0
0 Created: Apr 22,2026 | ARC Raiders
ARC Raiders Anvil Guide: Best 2-Tap Weapon Build, Tips, and How to Win More Fights

A lot of players still ignore the Anvil, and that's a mistake. After spending time running it in live raids, one thing becomes obvious: this gun can end fights faster than almost anything else if we play around its strengths.
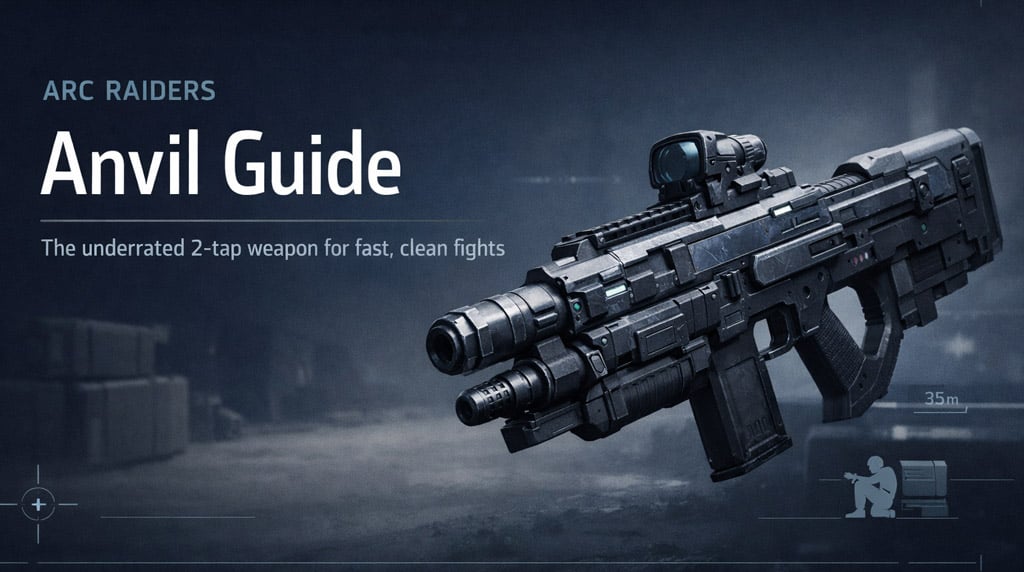
The headline reason is simple. Two headshots can drop a raider extremely fast, and even a headshot into a body shot is often enough to finish a distracted or lightly prepared target.
- What Makes the Anvil So Strong
- Fast kill pressure
- Strong from cover
- Crouching helps more than people expect
- How We Actually Get Value From It
- Best way to play the Anvil
- Where it performs best
- Common Mistakes That Get Us Killed
- Mistake 1: Wide swinging everything
- Mistake 2: Standing for every shot
- Mistake 3: Looting too early
- Loadout and Raid Advice
- What pairs well with it
- Practical raid rule
- FAQ
- Is the Anvil worth using in ARC Raiders?
- Can the Anvil really 2-tap players?
- Is the Anvil beginner-friendly?
- Should we crouch with the Anvil?
- What is the biggest key to winning with the Anvil?
- Final Thoughts
What matters is not just damage. It's how little time the other player gets to respond.
What Makes the Anvil So Strong
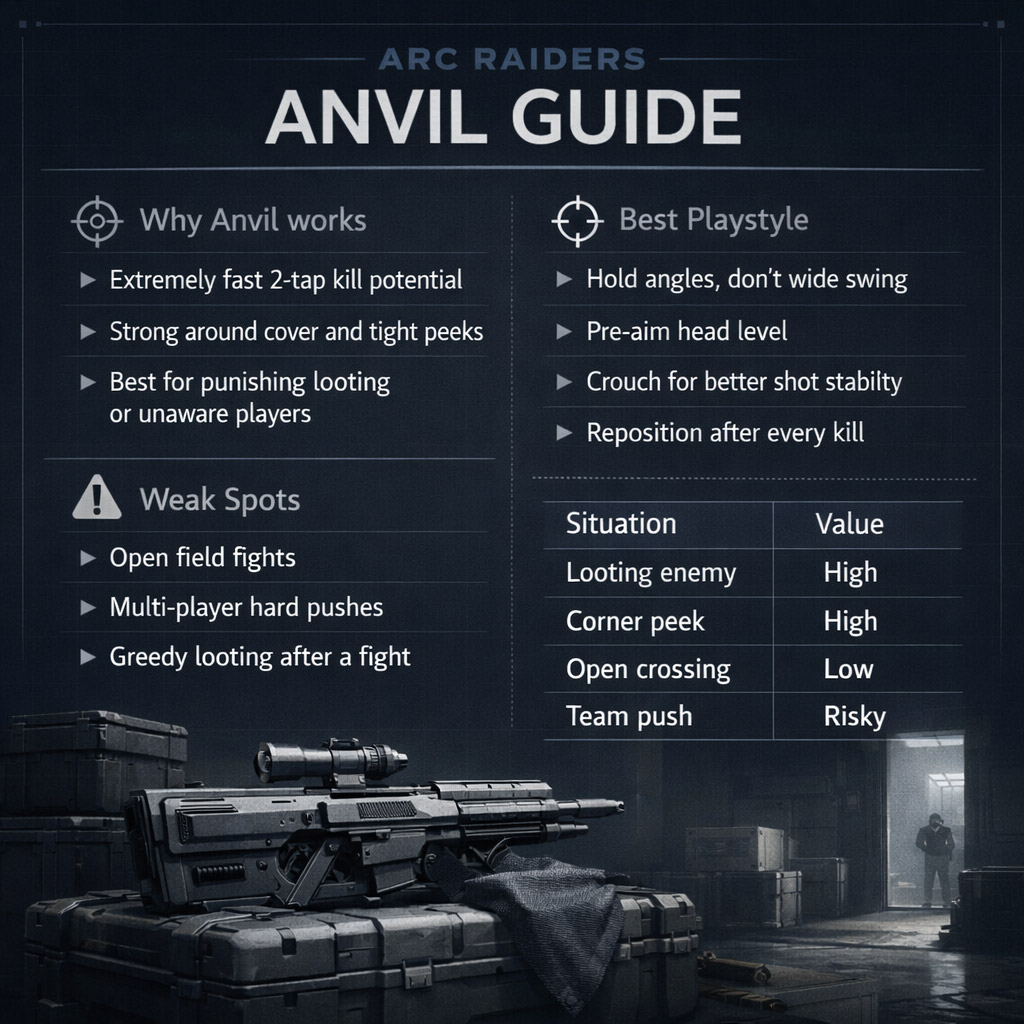
The Anvil is strongest when we stop treating it like a standard rifle.
Fast kill pressure
If you land clean opening shots, the fight can be over in a moment. In practical terms, that means:
- players looting are easy punish targets
- overconfident swingers get deleted
- medium and light defensive setups still feel unsafe against it
Strong from cover
One of the biggest reasons the gun feels oppressive is how well it works around cover. If we hug a wall or object tightly, we can sometimes keep pressure on target while exposing very little of ourselves.
That changes the fight immediately. The enemy sees less of us, but we still get to shoot first.
Crouching helps more than people expect
In our testing, crouching before a committed peek made the weapon feel much more reliable.
Why?
- better shot stability
- cleaner follow-up shots
- easier head-level correction
That matters because this gun rewards the first two shots more than anything else.
| Anvil Strength | Why It Matters |
|---|---|
| High burst lethality | Can end fights before enemies react |
| Great around cover | Lets us take safer peeks |
| Strong punish weapon | Excellent vs looters and stationary targets |
| High skill payoff | Better aim and positioning scale hard |
The short version: the Anvil is deadly because it turns good positioning into instant pressure.
How We Actually Get Value From It
This is where most players throw the gun away. They know it hits hard, but they use it like a spray weapon and lose fights they should win.
Best way to play the Anvil
We get the best results when we:
- hold angles instead of wide swinging
- pre-aim head level before peeking
- crouch when taking a stable fight
- shoot with intent, not panic
- reposition after a kill
If you find a player looting, healing, or tunnel-visioning another fight, then the Anvil becomes one of the best punish tools in the game.
Where it performs best
| Situation | Good for Anvil? | Reason |
|---|---|---|
| Enemy looting | Yes | Easy opening shot |
| Tight corner peek | Yes | Minimal exposure, high damage |
| Mid-range doorway fight | Yes | Strong first-shot pressure |
| Open field cross | No | Loses cover advantage |
| Multi-man hard push | Risky | Easy to get traded out |
This is the part many players miss: the Anvil is not weak in bad situations, it's just less forgiving.
Common Mistakes That Get Us Killed
Most failed Anvil runs come from decision-making, not from the weapon itself.
Mistake 1: Wide swinging everything
If we give full-body exposure, we throw away one of the gun's biggest advantages.
Better play: stay tight to cover and force short peeks.
Mistake 2: Standing for every shot
Standing is fine in emergencies, but if we have time, crouching gives better consistency.
Better play: crouch before committed shots whenever possible.
Mistake 3: Looting too early
This one gets people killed constantly. We win a fight, see a pile of gear, and immediately lose to the next player walking in.
Better play: reload, listen, scan, then loot.
| Mistake | Better Adjustment |
|---|---|
| Wide swinging | Use tight peeks from cover |
| Rushing follow-up shots | Let the crosshair settle |
| Instant looting | Secure the area first |
| Overchasing damaged players | Hold the angle and punish re-peek |
That last one matters a lot. With the Anvil, we usually don't need to chase. If the enemy has to peek us again, that's often where we win.
Loadout and Raid Advice
The Anvil does not need a fancy setup to work, but the rest of the loadout should support its style.
What pairs well with it
- light or medium protection
- enough healing to survive one messy trade
- utility for forcing movement
- disciplined bag space so we do not get trapped overweight
From real raid experience, lighter kits often feel better with this weapon because the Anvil already brings strong kill pressure. We do not always need to overspend to make the loadout work.
Practical raid rule
If you are already heavy with loot, play even slower.
That matters because the Anvil thrives on controlled fights. Once we are overweight, our ability to reposition drops, and third parties become much more dangerous.
FAQ
Is the Anvil worth using in ARC Raiders?
Yes. If we play around cover and hit our opening shots, it is one of the strongest punish weapons in the game.
Can the Anvil really 2-tap players?
It can kill extremely fast with accurate headshots, which is why it feels so dangerous in peek fights.
Is the Anvil beginner-friendly?
Not really. It is strong, but it asks for better aim, better peeking, and more discipline than forgiving weapons.
Should we crouch with the Anvil?
Yes, especially when holding an angle or taking a planned peek. It improves consistency more than many players expect.
What is the biggest key to winning with the Anvil?
Take cleaner fights. The weapon shines when we control the angle, not when we run into open trades.
Final Thoughts
The Anvil is underrated because it asks for a more disciplined playstyle than most players want to use. But once we lean into that, the weapon starts to make a lot more sense.
We hold tighter angles, crouch more often, punish looters and careless peekers, and stop taking open fights we do not need. That is where the gun feels strongest, and that is why it keeps winning fights even though so few players run it.

Most Popular Posts
- ARC Raiders Update 1.42: Phantom Targets Farming Guide (Glitched Wasps, Rewards, Regional Conditions)
- ARC Raiders Expedition Damage Guide: Fastest Way to Farm Damage
- ARC Raiders Hullcracker Blueprints: Fastest Way to Complete The Major's Footlocker
- ARC Raiders Best Pop Trigger Strategy: Fast Phantom Targets Damage Guide
- ARC Raiders Subway Skin Guide: Unlock the Subterranean Outfit
- ARC Raiders Spaceport Open Containers Guide: 19K+ Solo Trial Route
Popular Category Lists
- ARC Raiders / (339)
- Grow a Garden / (292)
- CoD: Black Ops 7 / (167)
- Star Citizen / (160)
- MLB 26 / (159)
- Monopoly Go / (152)
- ARK Survival Ascended / (125)
- Steal a Brainrot / (98)
- Blox Fruits / (74)
- Adopt Me / (73)
- Forza Horizon 6 / (72)
- Sailor Piece / (68)
- Grow a Garden 2 / (68)
- Diablo IV / (62)
- CoD: BLACK OPS 6 / (55)
- Path of Exile 2 / (48)
- Monster Hunter Wilds / (46)
- Windrose / (44)
- Aion 2 / (42)
- Donut SMP / (40)