0
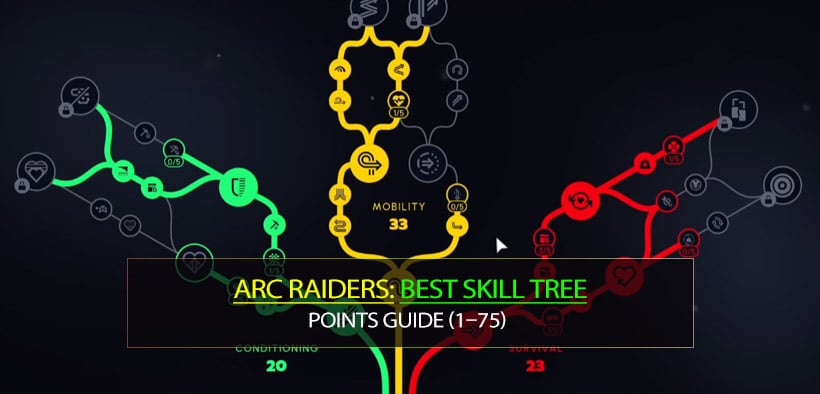
0Arc Raiders Best Skill Tree Points Guide (1–75) After the Update 1.7 Reset
- KITE
- Share
- ARC Raiders
- 12/18/25
- 11558
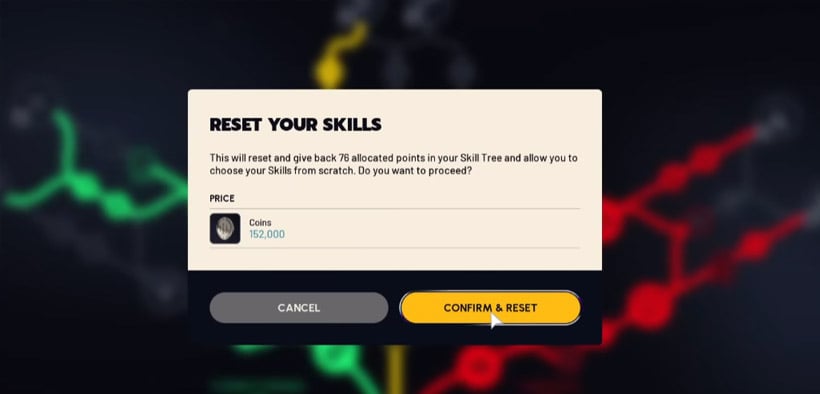
You've just hit reset on your skill tree with Arc Raiders Coins, you're staring at a wall of talents, and you know you won't get a second chance to blind-pick without wasting hours. I've been through that loop more times than I'd like to admit, so I built a route that assumes you're leveling from 1 to 75 and want something that feels strong in both PvE and PvP without overthinking every single point.
This article walks you through the exact order I'd spend my points, why certain nodes are bait early on, and how to use your last few expedition points to cleanly round out the build. Think of it as a practical, PvP‑leaning all‑rounder: strong mobility, efficient looting, and enough survivability that you don't spend half your sessions staring at the respawn screen.
- 1. Core Principles of This Build
- 1.1 What This Build Tries to Do
- 1.2 Who This Build Is For
- 2. Level 1–75 Route in One Glance
- 2.1 Milestone Overview
- 3. Mobility Tree: Moving Like You Mean It
- 3.1 Early Mobility Priorities
- 3.2 Core Mid–Late Mobility Talents
- 4. Conditioning Tree: Comfort, Sound Control, and Efficiency
- 4.1 Early–Mid Conditioning Picks
- 4.2 Late Conditioning & Optional Fill
- 5. Survival Tree: Quiet Looting and Staying Alive
- 5.1 Survival Basics: One Point in Everything Start
- 5.2 High‑Impact Survival Talents
- 6. Security Breach and the Nerfed Reality
- 6.1 When Security Breach Was Worth It
- 6.2 In the Current State
- 7. Post‑75 and Expedition Points: Filling the Gaps
- 7.1 Priority List for Extra Points
- 7.2 Fill in the Blanks Phase
- 8. Talent Priority
- FAQ
- Q1: Should I ever fully skip Youthful Lungs?
- Q2: Is Slip and Slide still worth it if I mostly play PvE?
- Q3: Why not invest more in crawling faster while downed?
- Q4: Is Security Breach ever mandatory?
- Q5: I rarely crouch. Should I still invest in crouch movement and Silent Scavenger?
- Summary
Let's break it down from core philosophy first, then go level-by-level.
↖ 1. Core Principles of This Build
Before we get into the specific levels, it helps to understand why this tree looks the way it does. Once you see the logic, minor adjustments become easy.
↖ 1.1 What This Build Tries to Do
Speed up everything that wastes your time
Breaching faster, looting faster, moving faster, and climbing smoother all add up. Over a full session, shaving 1–2 seconds from every action is a huge hidden DPS gain.
Front‑load high impact mobility and utility
We rush Mobility and key Conditioning nodes early because they change how the game feels to play. When your character is snappy, you survive more and you get more fights on your terms.
Delay nice to have sustain
Since adrenaline shots exist, we don't need to hard‑rush every stamina node early. That means we can push into talents that give immediate tactical value, especially for PvP.
Avoid talents built on I'm already losing scenarios
Things like crawl faster while downed are not useless, but building around being downed is a bad mindset if your goal is to win more fights, not just suffer more comfortably.
↖ 1.2 Who This Build Is For
This setup is ideal if:
- You play a mix of PvE and PvP, but you care about PvP performance.
- You value mobility, breaching speed, and looting efficiency over pure tankiness.
- You're okay using consumables (adrenaline shots) to cover early stamina gaps.
If you are a pure PvE turtle who barely fights other players, you can tweak some PvP‑heavy picks later, but the main skeleton still helps you move and loot efficiently.
↖ 2. Level 1–75 Route in One Glance
To keep things practical, here's a high-level roadmap of how the points are distributed as you level. Exact level‑by‑level can shift by 1–2 points depending on when you unlock nodes, but the order of priorities stays the same.
↖ 2.1 Milestone Overview
Note: The numbers in
Mob / Cond / Survare approximate distribution milestones, based on the path described:Mobility, Conditioning, Survival.
| Milestone | Approx Points (Mob/Cond/Surv) | What You Focus On | Key Talents Online |
|---|---|---|---|
| Early Game (1–20) | 7 / 6 / 0 | Rush Breaching, then core Mobility | Breaching, Marathon Runner, Slip & Slide |
| Mid Game (21–40) | 12 / 10 / 4 | Finish core Mobility, start Conditioning | Effortless Roll, Heroic Leap, BLAST-BORN |
| Late Mid (41–60) | 18 / 18 / 10 | Fill Conditioning, unlock Survival basics | Unburdened Roll, Loaded Arms, Looter's Instinct |
| Early End (61–75) | 18 / 22 / 18 | Round out Survival, broad shoulders, utilities | Silent Scavenger, Suffer in Silence, Good as New, Broad Shoulders |
| Post‑75 (Expedition) | ~18 / 22 / 23+ | Backfill QoL and utility nodes | Youthful Lungs max, Nimble Climber, Figuros Falter etc. |
You don't have to hit these numbers exactly at each level; what matters is which talents you prioritize first, which we'll now walk through tree by tree.
↖ 3. Mobility Tree: Moving Like You Mean It
I always start by locking in mobility, because in my experience, mobility wins fights. If you can dictate range, reposition quickly, and waste less stamina, you simply have more room to outplay people.
↖ 3.1 Early Mobility Priorities
You want to swing into Mobility as soon as Breaching is secured:
1. Marathon Runner – Max it out early
- Why: Sprint uptime directly controls how often you can push, rotate, or disengage.
- Synergy: With later stamina and roll talents, this becomes your engine for constant pressure.
2. Slip and Slide – Max (for PvP players)
- Why: Sliding is huge in PvP. It lets you break sightlines, throw off aim, and re‑peek unpredictably.
- When: As soon as you've got your basic movement speed sorted, Slip and Slide becomes a must if you fight other players regularly.
- If you rarely PvP: You can delay maxing this a bit, but I still recommend at least investing in it.
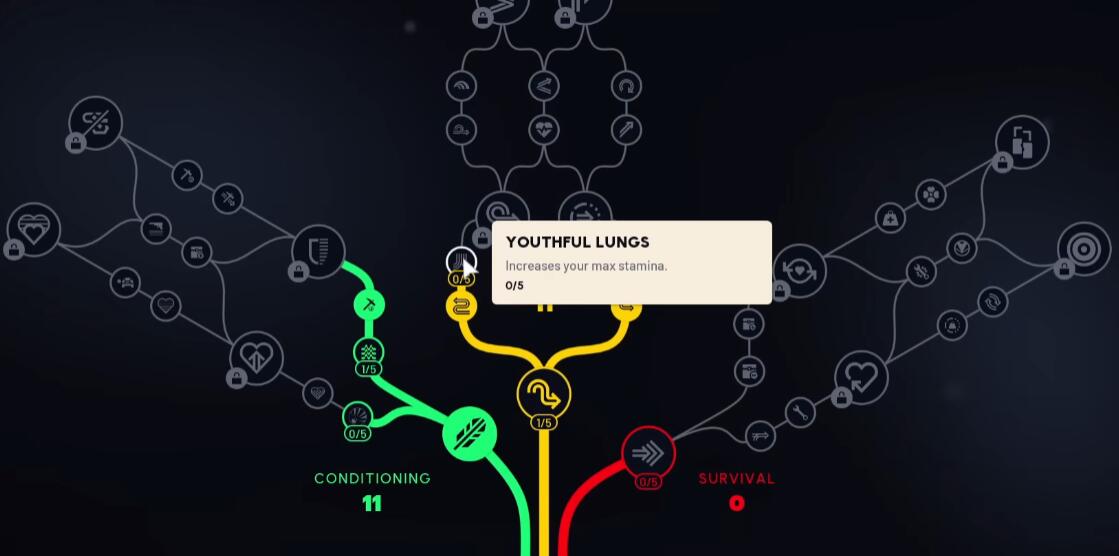
3. Youthful Lungs – 1 point early, not maxed yet
- Logic:
- You could max it, but you don't need to.
- Because adrenaline shots can temporarily solve stamina issues, Youthful Lungs doesn't have to be an early sink for multiple points.
- Recommended: Keep it at 4/5 by midgame, plan to finish it later with extra points.
4. Crawl faster when downed – Skip until forced
- Reasoning:
- When you are down, this helps, but you should not build around being downed.
- I treat this node as a tax to get to the talent above it, not a core defensive layer.
- Strategy: Take the minimum required later, only to climb the tree.
↖ 3.2 Core Mid–Late Mobility Talents
Once your basics are online, you finish the truly impactful movement tools:
Effortless Roll – Max (required for PvP)
- Why: A free dodge roll that doesn't cost stamina is insane.
- In practice: This feels like a free get‑out‑of‑jail card every fight. You can dodge, then still have stamina left to chase or run.
Heroic Leap – Max
- Why:
- Better vertical movement, faster gap closing, and more creative routes in urban areas (like Plaza Rosa).
- In longer runs, you'll feel how much less you hesitate at small ledges and gaps.
- For PvP: Being able to take unexpected angles or hop into cover is massive.
After Effortless Roll and Heroic Leap are done, Mobility is basically locked in for this build. At that point, I usually stop and swing back into Conditioning.
↖ 4. Conditioning Tree: Comfort, Sound Control, and Efficiency
Conditioning is where you turn raw mobility into smooth gameplay: less noise, smarter stamina use, and better handling of weight and rolls.
↖ 4.1 Early–Mid Conditioning Picks
When you first come back to Conditioning after establishing Mobility, you want to secure the biggest comfort boosts:
1. BLAST-BORN– Up to 4/5 at first
- Why: Sound reduction is far more impactful than most people think.
- In my experience, even a small reduction on explosions and other loud cues helps you stay unnoticed in chaotic areas.
- Why 4/5:
- 4 points give good returns;
- you can come back and finish the last point later when you have luxury points.
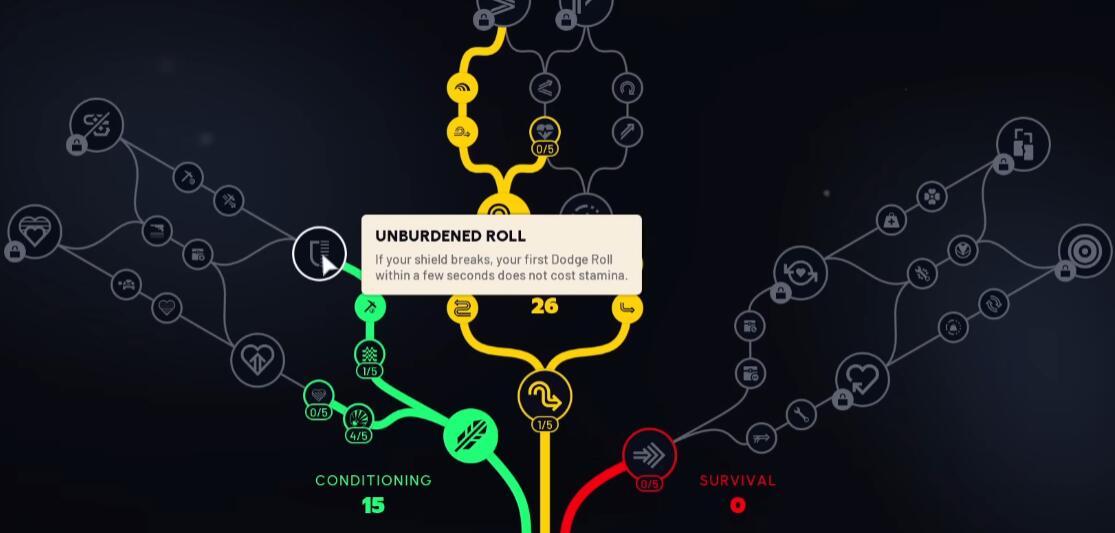
2. Unburdened Roll – Mandatory
- Why: A free roll that doesn't cost stamina is huge for both offense and defense.
- Interaction: Combines nicely with Effortless Roll from Mobility, creating a toolkit where rolling rarely feels punishing.
3. One point tax talents
- Some nodes are simply not that good, but you need one point to progress.
- Approach:
- Put exactly 1 point where required, don't sink more unless it unlocks something special.
- This keeps your build tight instead of bloated.
4. Loaded Arms – Very strong
- Why: Improving your weapon handling / readiness is a straightforward combat buff.
- As longer matches go on, you'll notice how often tiny timing advantages win gunfights.
At this stage (roughly around that 18 / 26 / 22 distribution mentioned in the prompt), you'll likely have most of your combat and movement core finished.
↖ 4.2 Late Conditioning & Optional Fill
Once BLAST-BORN is eventually maxed and your rolls are set, you mainly:
Top off Fight or Flight – 1 point only
- Why:
- A one‑off buff in clutch situations can turn a losing fight into a win.
- But stacking more points into it gives diminishing returns for this specific build.
Consider Looter's Luck – 1 point for benefit
- Logic:
- One point is enough to get the core value.
- Unless you are a hardcore loot goblin, fully maxing it is less impactful than mobility or survivability nodes.
↖ 5. Survival Tree: Quiet Looting and Staying Alive
I usually touch Survival after Mobility and key Conditioning, because once your movement and handling feel good, the next thing that matters is how you interact with the environment: looting, crouching, noise, and how punishing mistakes are.
↖ 5.1 Survival Basics: One Point in Everything Start
At around the 26 / 18 split mentioned (Mobility / Conditioning), I swing into Survival and:
Put 1 point into almost everything important
- Why: Many Survival nodes have great first point value.
- This lets you test what feels best for your playstyle while still following a strong baseline.
From there, you start specializing:
1. Looter's Instinct – High priority
- Logic:
- Even if the looting speed increase is just a little faster, it adds up across an entire session.
- If you're someone who hates standing still at a crate, this is emotionally worth it too.
2. Crouch Movement Talent – Max it if you crouch a lot
- If you find yourself crouch‑walking frequently (which I do), that extra speed makes your sneaky rotations less miserable.
- This also synergizes with silent looting and reduced sound later.
3. Silent Scavenger vs Stamina Regen While Crouched
- Question: Are you really crouching to regenerate stamina?
- Probably not. You crouch to be stealthy or hold an angle.
- That's why I go Silent Scavenger:
- Even a 2% reduction in sound is valuable, especially in PvP.
- Little noises absolutely give you away in this game.
↖ 5.2 High‑Impact Survival Talents
Then we get into the heavy hitters:
Suffer in Silence – Take it
- Why: More silence in your oh no moments keeps you from snowballing mistakes into entire squads collapsing on you.
Good as New – Take it
- Why: Helps you recover more effectively and reduces downtime after bad engagements.
Broad Shoulders – Insane, max it
- This one is big.
- More carrying capacity / better handling of weight simply opens up your options:
- You can bring more utility.
- You're not punished as hard for good loot runs.
- For me, this talent is non‑negotiable in late game.
At the point where your distribution is roughly 18 / 26 / 22 (Mob / Cond / Surv), you'll feel like your character finally plays like a build, not just a random assortment of perks.
↖ 6. Security Breach and the Nerfed Reality
Originally, Security Breach was so strong that building around it made perfect sense. Now that it's been nerfed and spread around the map, its value dropped significantly.
↖ 6.1 When Security Breach Was Worth It
In its old form, it justified a focused investment, because:
- It drastically accelerated breaching across the board.
- The opportunity cost of reaching it was outweighed by sheer utility.
↖ 6.2 In the Current State
In the current nerfed version:
- I treat Security Breach as optional, not core.
- If you are sitting at 18 / 26 / 22 with ~10 points remaining (15 including expedition), you could reach it, but:
- The cost in skipped QoL nodes is high.
- The impact is no longer strong enough to be the centerpiece.
My recommendation:
- Only consider it if you really enjoy a breaching‑centric playstyle and are willing to sacrifice some late‑game comfort nodes.
- For most players, I would rather finish Youthful Lungs, BLAST-BORN, and survival utilities first.
↖ 7. Post‑75 and Expedition Points: Filling the Gaps
Once you hit 75 and start getting those extra 5 points from expeditions, you enter the luxury tuning phase. Your core build is already solid; now you polish.
↖ 7.1 Priority List for Extra Points
With those last 10–15 points (the I technically have 15 phase), I usually:
1. Max out Youthful Lungs
- Upgrading from 4/5 to 5/5 is noticeable over long sessions.
- You're no longer leaning as heavily on adrenaline shots for stamina comfort.
2. Finish BLAST-BORN to 5/5
- At this stage, squeezing extra value out of sound reduction feels great.
- Your overall noise footprint in the world becomes much more manageable.
3. Pick 1 point in Fight or Flight (if not already)
- One is enough to give you that clutch buff when things get wild.
4. Put 1 point into Looter's Luck
- Again, we're going for first‑point efficiency, not full investment.
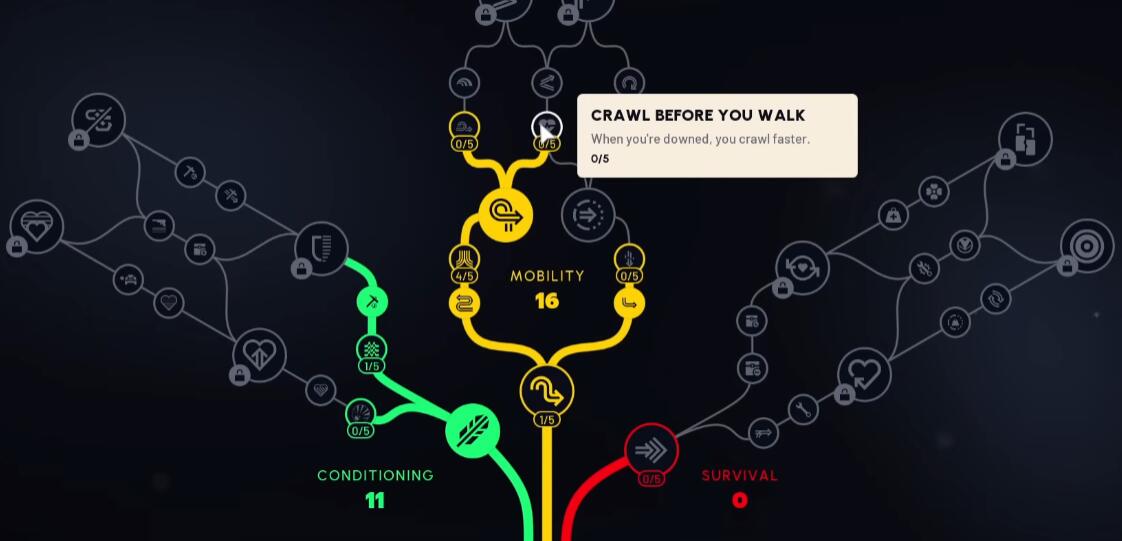
5. Crawl Before You Walk – 1 point, mostly as a bridge
- I still don't like the idea of planning to be downed, but sometimes this is a necessary stepping stone.
6. Figuros Falter – Very useful in long runs
- Think about those runs to Plaza Rosa where you're just sprinting across the map and climbing over obstacles:
- You don't always want to burn an adrenaline shot.
- A smoother, quicker vault/ climb makes travel much less frustrating.
7. Nimble Climber – Put remaining points here
- Anything that improves how quickly and cleanly you handle verticality is a quiet but real power boost.
- Over time, you'll get used to taking more aggressive high-ground paths because it just feels easier.
↖ 7.2 Fill in the Blanks Phase
After core and luxury picks are done, you can:
Consider Common Stroll or Faults on Fault
- These are nice-to-haves, not build‑defining nodes.
- If you have a strong personal preference, this is where you let style take over math.
↖ 8. Talent Priority
To make this easier to reference while you're in-game, here's a simple priority table.
| Talent | Category | Recommended Action | Reasoning Summary |
|---|---|---|---|
| Breaching (and branch) | Utility | Rush early | Huge time saver on containers and doors |
| Marathon Runner | Mobility | Max early | Core stamina/sprint uptime, defines tempo |
| Slip and Slide | Mobility | Max (PvP), 2–3 pts (PvE) | Strong reposition and peek tool |
| Youthful Lungs | Mobility | 1 early, 4/5 mid, max late | Covered early by adrenaline, better later |
| Crawl Faster When Downed | Mobility | Minimal, only to progress tree | You shouldn't plan to be downed |
| Effortless Roll | Mobility | Max, mandatory for PvP | Free dodge roll = massive survivability |
| Heroic Leap | Mobility | Max | Vertical mobility and creative routes |
| BLAST-BORN | Conditioning | 4/5 mid, 5/5 late | Sound reduction is crucial in high-pop areas |
| Unburdened Roll | Conditioning | Take ASAP | Free roll without stamina cost |
| Loaded Arms | Conditioning | Invest well | Combat readiness boost, helps in most engagements |
| Fight or Flight | Conditioning | 1 point | Clutch buff, but not worth maxing |
| Looter's Instinct | Survival | Invest strongly | Faster looting across entire session |
| Crouch Move Speed | Survival | Max (if you crouch often) | Better sneaking and angle holding |
| Silent Scavenger | Survival | Take over crouch stamina regen | Sound reduction > niche stamina regen while crouched |
| Suffer in Silence | Survival | Take | Low-profile recovery in dangerous situations |
| Good as New | Survival | Take | Better post-fight sustain |
| Broad Shoulders | Survival | Max, very high priority | Carry comfort and flexibility |
| Looter's Luck | Conditioning | 1 point | Good first-point value, not mandatory to max |
| Crawl Before You Walk | Mobility | 1 point (bridge) | Mostly a tax node |
| Figuros Falter | Mobility | Invest late | Smoother climbing / vaults in long map runs |
| Nimble Climber | Mobility | Sink remaining points | Strong QoL for vertical movement |
| Security Breach | Utility | Optional in current nerfed state | No longer strong enough to be core after nerf |
↖ FAQ
↖ Q1: Should I ever fully skip Youthful Lungs?
If you're heavily reliant on adrenaline shots and you rarely feel stamina‑starved, you could delay Youthful Lungs even longer, but I wouldn't permanently skip it. As fights get longer and you start chaining engagements, the extra stamina comfort becomes very noticeable. My approach is: early 1 point, mid 4/5, max with late points.
↖ Q2: Is Slip and Slide still worth it if I mostly play PvE?
If you barely PvP and mostly clear AI, you can drop Slip and Slide a tier in priority and invest more into looting or survival first. However, sliding isn't only for PvP: it still speeds up movement between cover and across open areas. I recommend at least a couple of points even for PvE‑leaning players.
↖ Q3: Why not invest more in crawling faster while downed?
Because talents that only work after you've already lost the fight are inherently weaker than those that help you win it. Crawling faster does help your team save you in bad situations, but it doesn't change the outcome of most engagements. I treat it as a necessary bridge, not a core skill.
↖ Q4: Is Security Breach ever mandatory?
Not in its current, nerfed state. When it was stronger, it justified the pathing. Now, it's playstyle‑dependent: if you love faster breaching above all else, you can choose it. For a generalist build that values combat and movement, I don't consider it mandatory anymore.
↖ Q5: I rarely crouch. Should I still invest in crouch movement and Silent Scavenger?
If you almost never crouch, you can trim points here and redirect them into more Conditioning or finishing other Mobility nodes earlier. However, if you start playing more cautiously—especially in high‑risk zones—you may find crouch speed and noise reduction surprisingly valuable, so keep them in mind for respecs.
↖ Summary
This build revolves around a simple idea: win on movement, information, and efficiency, then let survivability and comfort fill in behind that. You rush Breaching and Mobility to make your character feel sharp from levels 1–40, pivot into Conditioning for rolls and sound control, and finally invest in Survival to loot faster, move quieter, and carry more without feeling sluggish.
If you follow the priority lists and milestone table, you'll end up with a skill tree that feels strong from the moment you start leveling, not just at 75—and you won't have to waste another reset learning it the hard way.

Most Popular Posts
- ARC Raiders Assessors Guide: Easy Solo Loot Strategy With or Without Smoke Grenades
- ARC Raiders Riven Tides Key Room Guide: Best Hotel Keys, Loot Routes, Secure & Crane Storage
- ARC Raiders Damage Fireflies Trial Guide: Best Farm Method on Buried City Night Raid
- ARC Raiders Riven Tides Update: New Map & Items, ARC Turbine, Rewards, and Best Early Strategy
- ARC Raiders Bettina Guide: Best Build, Buffs, and How to Use It Against ARC
- ARC Raiders Solo Search Supply Drops Guide: Best Buried City Route, Beacon Locations
Popular Category Lists
- Grow a Garden / (283)
- ARC Raiders / (256)
- CoD: Black Ops 7 / (166)
- Monopoly Go / (146)
- MLB 26 / (139)
- Star Citizen / (106)
- Steal a Brainrot / (88)
- Sailor Piece / (67)
- Forza Horizon 6 / (58)
- Blox Fruits / (56)
- CoD: BLACK OPS 6 / (55)
- ARK Survival Ascended / (54)
- Diablo IV / (53)
- Path of Exile 2 / (48)
- Adopt Me / (48)
- Monster Hunter Wilds / (46)
- Windrose / (43)
- Path of Exile / (40)
- Battlefield 6 / (34)
- Bee Swarm Simulator / (34)