0
0 Created: Oct 18,2026 | ARC Raiders
ARC Raiders Frigate Inductor Farm: Solo Loot Route and Safe Pocket Tips

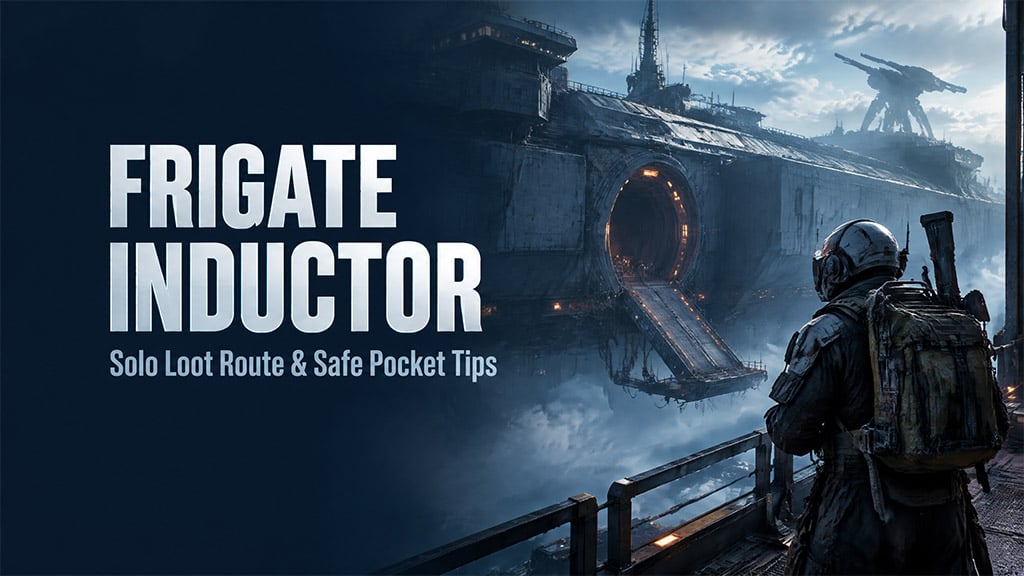
Find Frigate Inductors in the Frigate's round breach-and-search containers; we recommend boarding early and climbing toward the upper walkways and sheltered rooms. Once you find one, move it into a Safe Pocket before continuing the run.
Route: Boarding platform → less-contested wing → upper tunnel → sheltered containers → accessible fire-room loot → return platform → extraction.
- Choose a Loadout You Can Afford to Lose
- Board and Climb to the Upper Containers
- 1. Find and activate a boarding platform
- 2. Take the less-contested wing
- 3. Recover before crossing Hydra sightlines
- 4. Search sheltered containers first
- 5. Approach fire-room loot one cycle at a time
- Protect the Right Item and Leave
- Stop when the return route becomes your next risk
- FAQ (Frequently Asked Questions)
- Where does the Frigate Inductor drop?
- Do we need to complete the Frigate sabotage or bring an Emperor Key?
- Can we farm Frigate Inductors solo?
- Does the Photoelectric Cloak make the route safe?
- How many raids should an Inductor take?
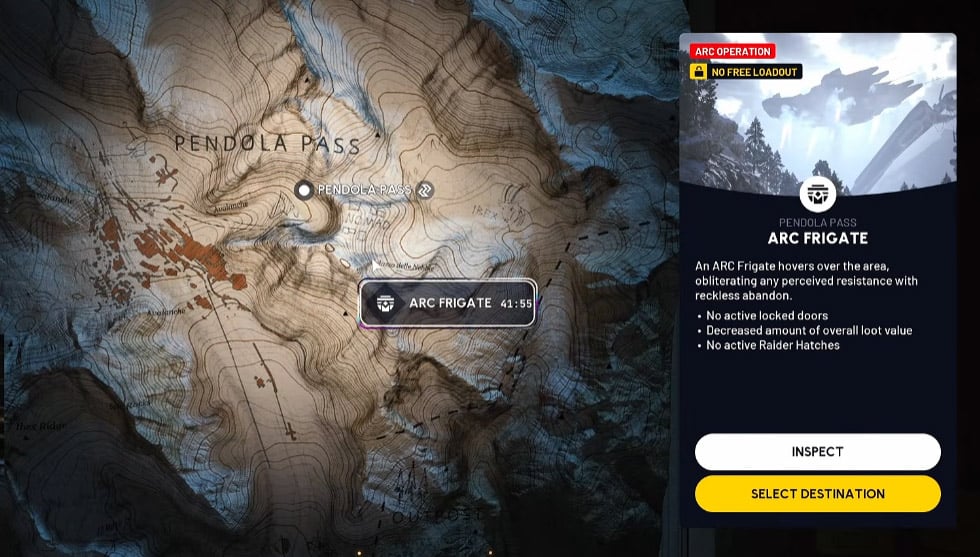
You do not need to complete the Frigate sabotage to follow this loot route. The upper path is a way to avoid congestion near boarding points—not a proven higher-drop-rate zone.
Patch-dependent advice was checked against official Update 2.1.0 notes. Route observations come from the supplied gameplay material; this guide does not claim independent in-game testing.
Choose a Loadout You Can Afford to Lose
We build around protected loot space and enough supplies to survive the climb. Check that your chosen augment has available Safe Pockets before deploying.
Use this table to avoid paying for tools that do not solve your usual failure.
| Item | Use it for | When to skip or limit it |
|---|---|---|
| Safe-pocket augment | Protecting an Inductor or valuable research item | Avoid filling protected space with optional equipment |
| Cheap weapon and light shield | Basic defense without risking a premium kit | Do not upgrade the kit merely to contest one extra container |
| Healing and Shield Rechargers | Recovering between crossings and after fire damage | Carry within a replacement budget you can sustain |
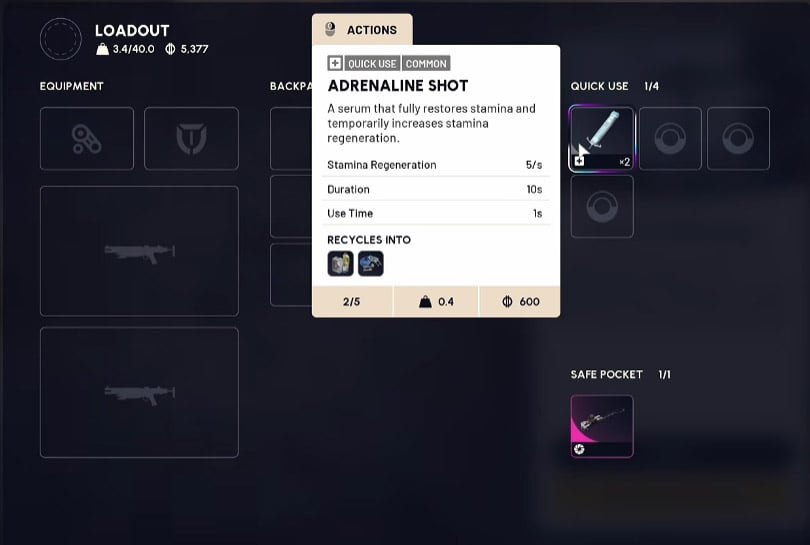
| Adrenaline Shots | Restoring stamina during the approach or climb | Do not depend on them during Sprinting on Fumes cooldown |
| Photoelectric Cloak | Optional assistance against ARC targeting | Skip it if buying replacements makes failed runs expensive |
| Grappling Hook | Shortening a route you already understand | Learn the normal climb before paying for mobility |
Protecting an expensive tool is not useful if it leaves no protected space for your target drop.
Official Update 2.1.0 notes confirm that stamina-restoring consumables cannot be used while Sprinting on Fumes is on cooldown. Recover before an exposed crossing rather than expecting a shot to bypass that restriction.
Board and Climb to the Upper Containers
We prioritize reaching unopened containers without stopping in crowded entry areas. If boarding traffic is heavy, change sides instead of committing to the first route you see.
1. Find and activate a boarding platform
Watch beneath the Frigate for an accessible platform. Climb aboard and complete the breach/disrupt interaction to begin the ascent.
Avoid ground marked by descending blue targeting beams, which the supplied gameplay identifies as an incoming ship attack warning. During ascent, stay near the platform's center rather than balancing on an edge.
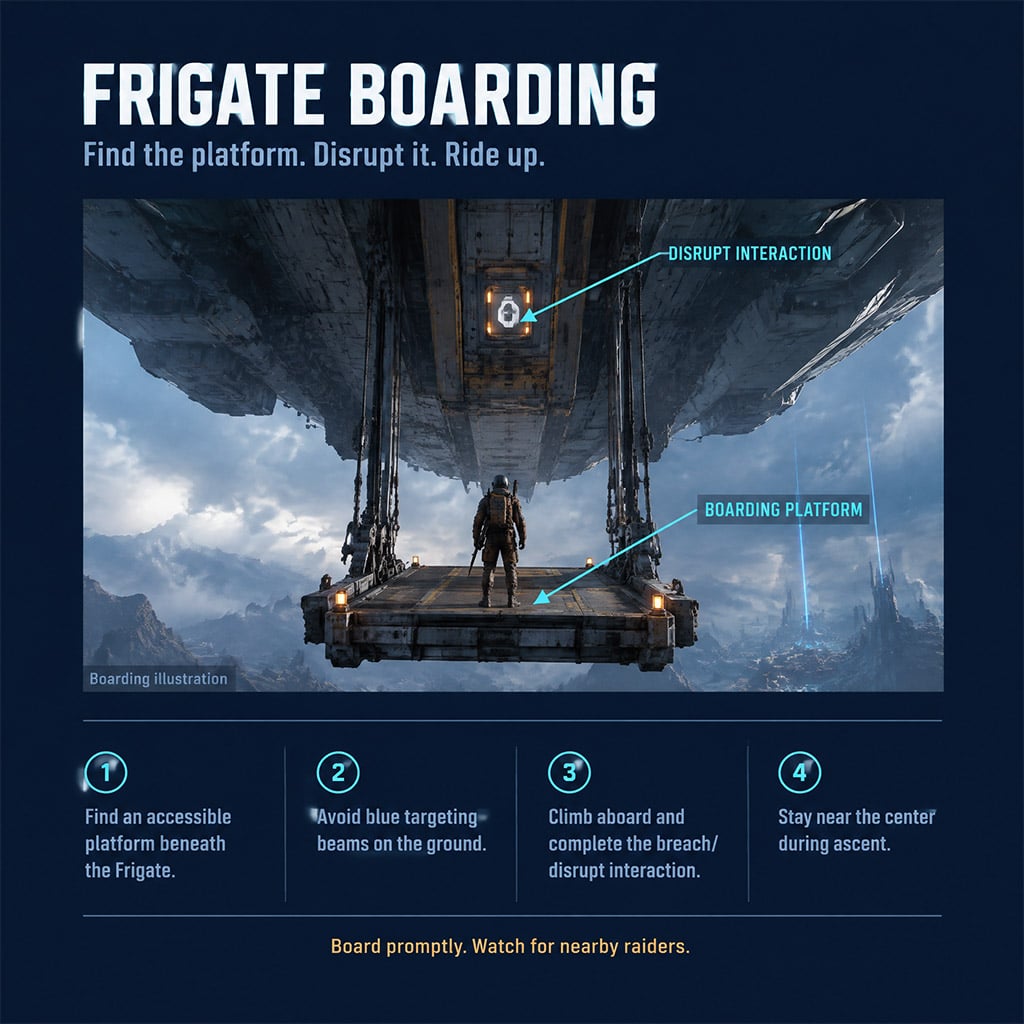
2. Take the less-contested wing
If the raider ahead turns left, take the right side when it is clear. The supplied routes describe mirrored traversal, so nearby traffic matters more than a fixed left-or-right rule.
Climb the wing structures toward the upper tunnel. Skip lower breaches when another player can reach you during the interaction; those containers can still contain useful loot, but stopping there may cost your boarding advantage.
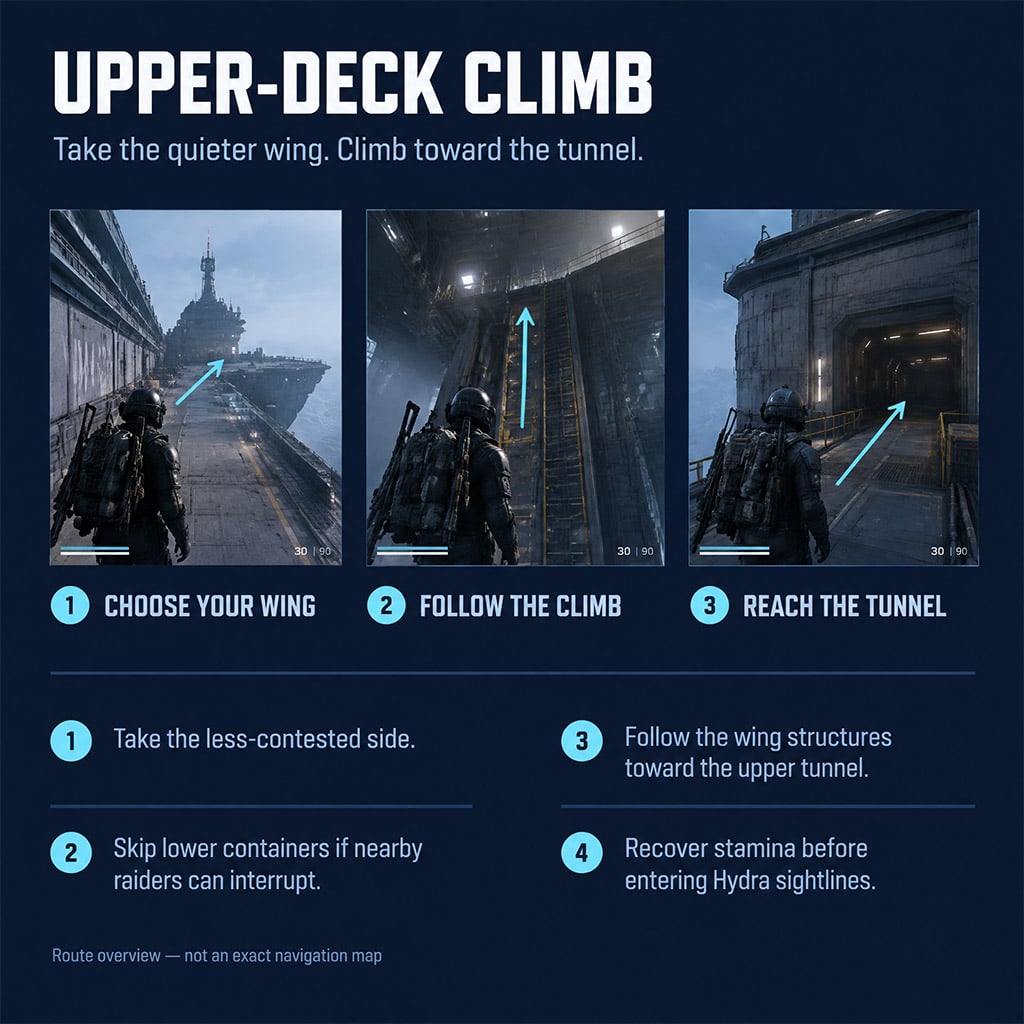
3. Recover before crossing Hydra sightlines
Pause inside the tunnel and restore stamina. Identify the next shelter before leaving cover, then move directly toward it.
The supplied material reports delayed Hydra retargeting after brief Photoelectric Cloak activation, but that behavior has not been independently confirmed here for the current patch. We do not treat the cloak as a guaranteed safe crossing, and it does not protect you from players.
If your health or stamina cannot support the crossing, wait or retreat.
4. Search sheltered containers first
Work through upper walkway breaches and adjoining rooms before attempting exposed Hydra-side containers. This order reduces time spent stationary in an open firing lane.
If you find the Inductor, pocket it immediately. Only continue when the remaining containers are reachable without consuming the supplies needed for your return.
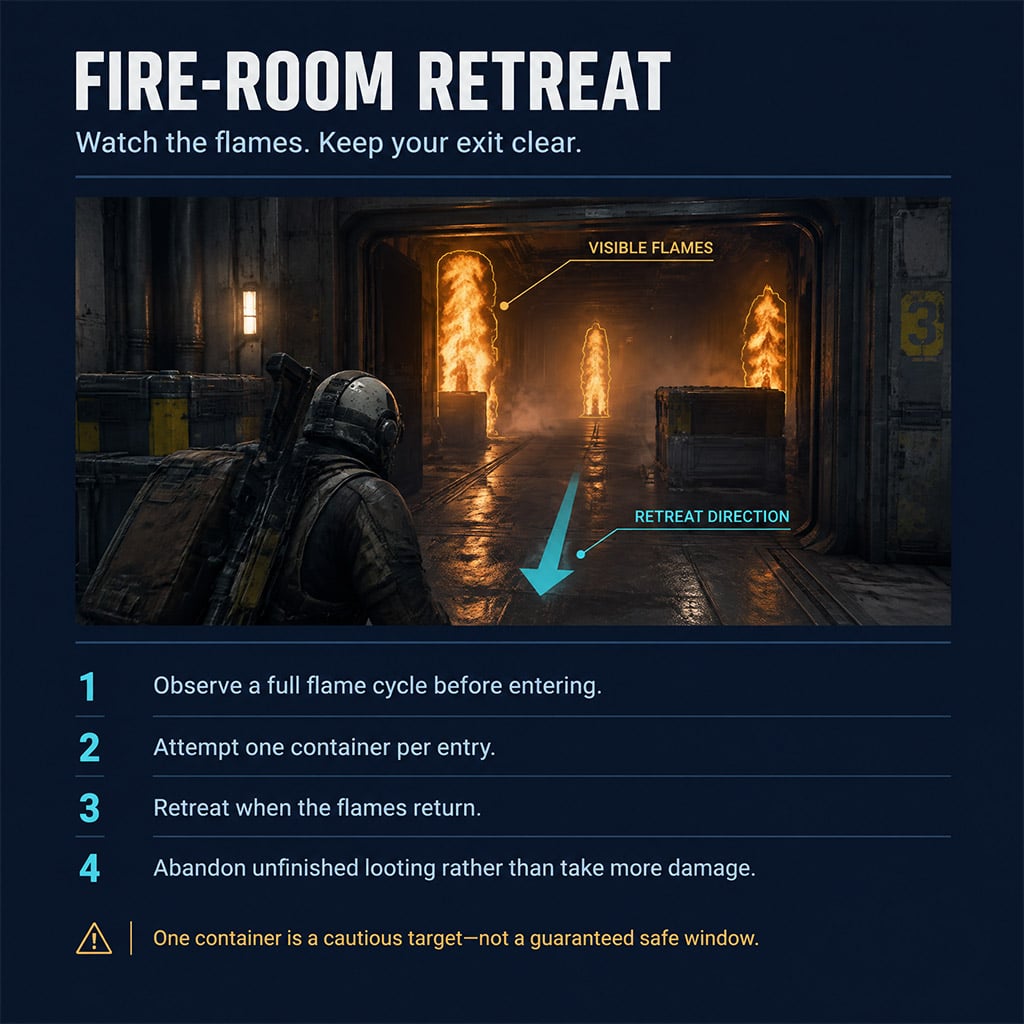
5. Approach fire-room loot one cycle at a time
Wait outside the flame path and observe a complete cycle before entering. Start with one container per entry, then retreat rather than assuming there is time for a second.
Update 2.1.0 explicitly adds burning damage over time when Frigate hatches open. Older footage therefore cannot establish a safe damage budget or a reliable breach-and-loot window.
If the flames return before you finish, abandon the interaction and move to safety. Do not continue merely because the container is nearly open.
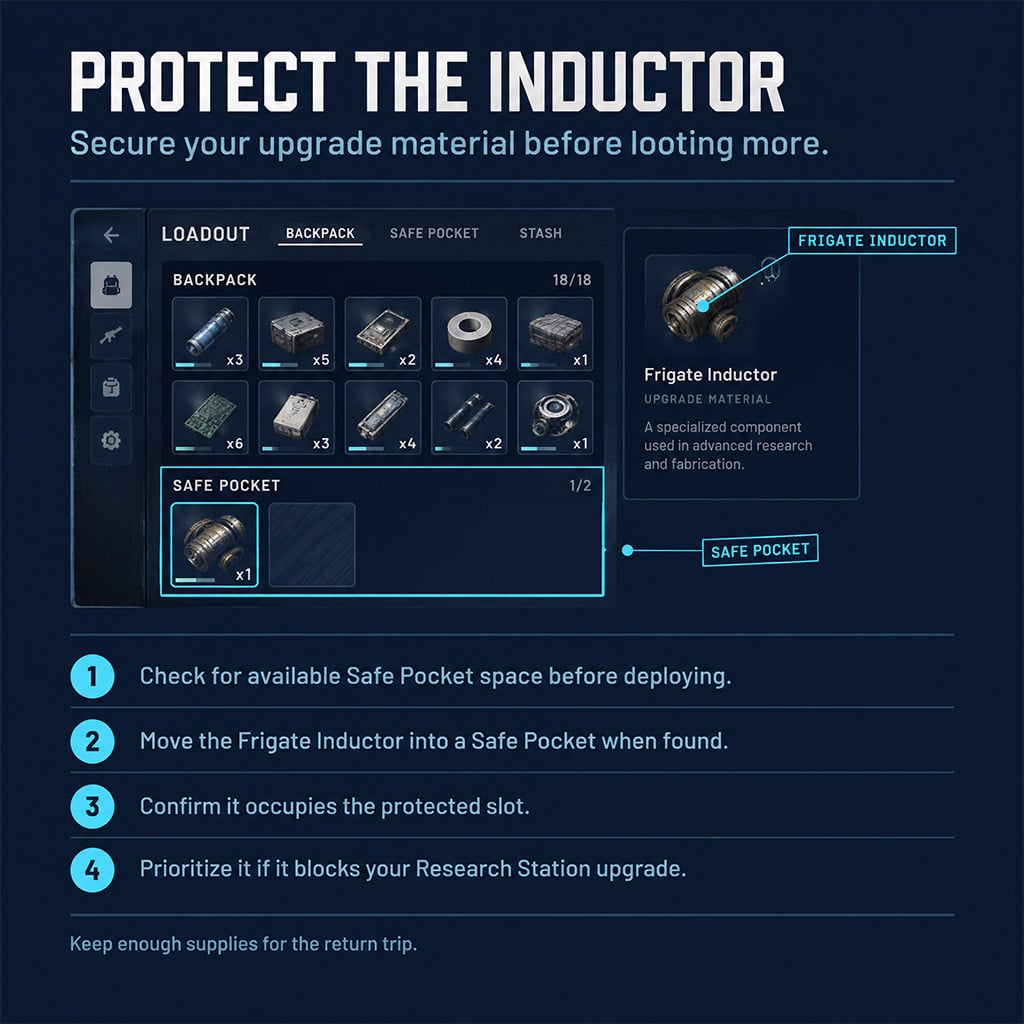
Protect the Right Item and Leave
We set pocket priority according to the upgrade we are pursuing. An Inductor and a Diagnostic Node are not interchangeable progression items.
Use this order before taking lower-priority components.
| Item | Main use | Pocket decision |
|---|---|---|
| Frigate Inductor | Research Station Level 4 upgrade material | Protect first if it blocks your upgrade |
| Frigate Diagnostic Node | Research Points | Prioritize during a research-focused run |
| ARC Data Module | Research Points and upgrade requirements | Keep after your immediate progression target |
| Amplification Modules | Amplified-weapon progression | Prioritize according to your current requirements |
| Other ARC components | Crafting, recycling, or selling | Keep in remaining backpack space |
Do not displace an upgrade-blocking Inductor simply to carry more research loot.
The supplied research walkthrough and a community item reference report 200 Research Points per ARC Data Module and 1,000 per Diagnostic Node. These are community-reported values, not an official yield table; check the Research Station's displayed return before consuming an item.
Stop when the return route becomes your next risk
Leave when sheltered containers are cleared, healing is running low, or another player controls the next breach. A protected target does not make your remaining equipment expendable.
Reverse the climb carefully, reach a return platform, and disrupt it to descend. Choose an available extraction while descending, then preserve stamina and cover for the ground approach.
Do not rely on surrendering or disconnecting as a substitute for extraction; that behavior has not been verified here.
FAQ (Frequently Asked Questions)
Where does the Frigate Inductor drop?
It drops from round breach-and-search containers aboard the Frigate. We recommend upper walkways and sheltered rooms for routing efficiency, but no verified evidence here establishes better Inductor odds upstairs.
Do we need to complete the Frigate sabotage or bring an Emperor Key?
No. The supplied gameplay examples collect Frigate containers without completing sabotage, and an Emperor Key is not required for this route.
Can we farm Frigate Inductors solo?
Yes, the supplied gameplay includes solo loot runs. Solo access does not guarantee survival, so keep the kit affordable and learn the return path before adding expensive equipment.
Does the Photoelectric Cloak make the route safe?
No. Its reported Hydra retargeting interaction lacks current-version confirmation here, and it does not protect against players; we still need cover and enough stamina to reach it.
How many raids should an Inductor take?
There is no verified average or established drop rate in the reviewed material. We would judge the route by unopened containers reached and equipment lost—not promise a drop within a fixed number of raids.

I’m Priya Raman, an Indian Content Strategist at GGWTB covering fantasy MMORPGs, classic online games, and guild-focused play. I plan coverage around class roles, group coordination, and long-term character growth. A strong solo build is only part of the picture—I focus on what you bring to a party and which investments stay useful as your guild takes on tougher content.

Most Popular Posts
- ARC Raiders Update 1.42: Phantom Targets Farming Guide (Glitched Wasps, Rewards, Regional Conditions)
- ARC Raiders Hullcracker Blueprints: Fastest Way to Complete The Major's Footlocker
- ARC Raiders Best Pop Trigger Strategy: Fast Phantom Targets Damage Guide
- ARC Raiders Subway Skin Guide: Unlock the Subterranean Outfit
- ARC Raiders Looting Mk. 3 Survivor Blueprint Guide: Best Blue Gate Route and Drop Locations
- ARC Raiders Medium & Heavy Gun Parts Blueprint Guide: Best Farm Route, Locations, and Refiner Crafting
Popular Category Lists
- ARC Raiders / (353)
- Grow a Garden / (294)
- CoD: Black Ops 7 / (167)
- Star Citizen / (162)
- MLB 26 / (159)
- Monopoly Go / (152)
- ARK Survival Ascended / (128)
- Steal a Brainrot / (99)
- Blox Fruits / (74)
- Adopt Me / (74)
- Forza Horizon 6 / (72)
- Sailor Piece / (68)
- Grow a Garden 2 / (68)
- Diablo IV / (62)
- CoD: BLACK OPS 6 / (55)
- Aion 2 / (51)
- Path of Exile 2 / (48)
- Monster Hunter Wilds / (46)
- Windrose / (44)
- Maplestory Classic / (42)