0
0 Created: Oct 18,2026 | Maplestory Classic
MapleStory Classic World Level 40–50 Guides: Maps, XP, and Potion Costs

For levels 40–50, we would compare a Jr. Wraith subway map with a suitable Drake-area alternative rather than assume either is universally fastest. Use the shortlist below, then measure XP across your complete play session—including channel searches and supply trips.

The available references describe map data, not controlled class-by-class testing. This guide does not claim measured XP rates.
- Start With a Map Your Character Can Clear
- Judge Mixed Maps by Their Slowest Target
- Compare Complete Sessions
- Run a Controlled Comparison
- Match the Result to Your Goal
- Fix the Bottleneck Before Switching
- Retest After a Meaningful Upgrade
- FAQ (Frequently Asked Questions)
- What is the best MapleStory Classic map for levels 40–50?
- Is Line 2 <Area 1> worth checking?
- Should we move to Drakes as soon as we reach level 40?
- Are published Max EXP/hr figures realistic targets?
- Should potion costs outweigh faster XP?
Start With a Map Your Character Can Clear
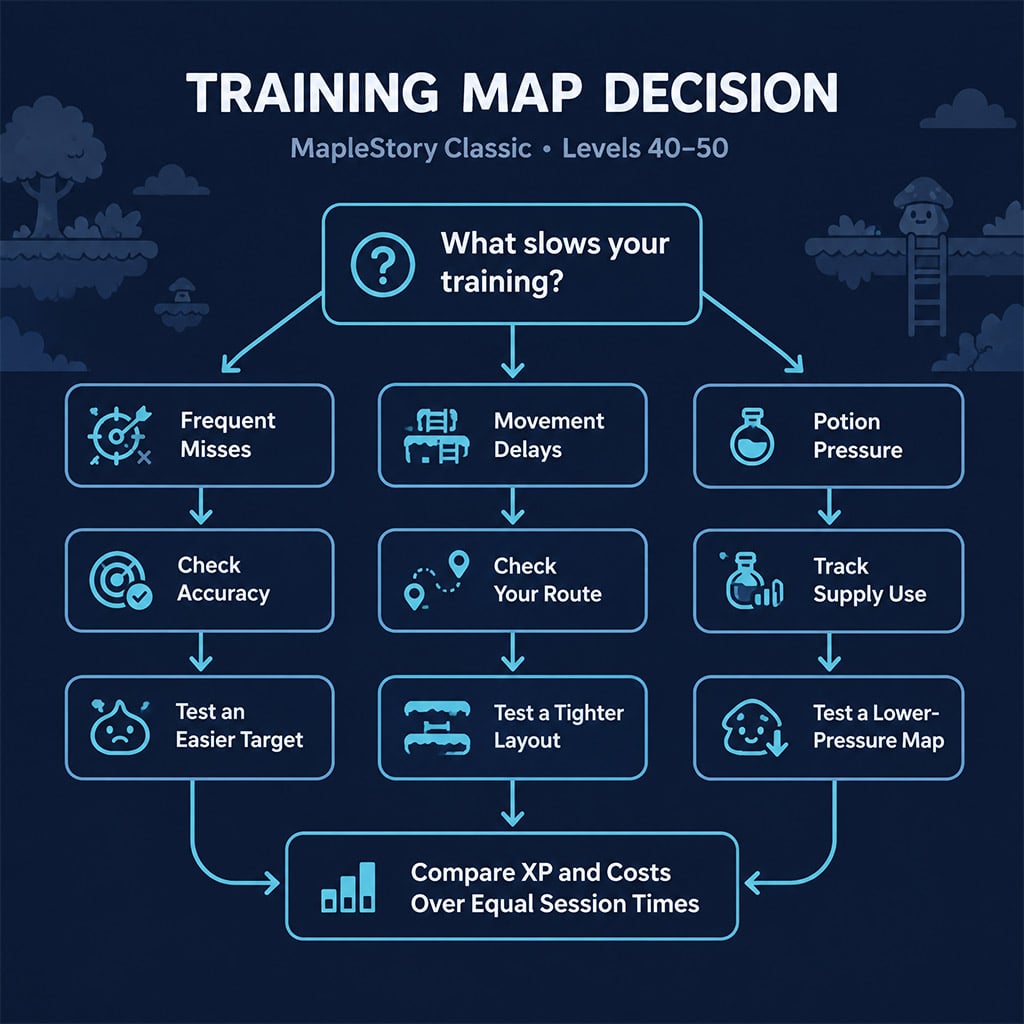
If a map slows you down, identify whether the problem is misses, movement, incoming damage, or competition before buying equipment.
The Henesys.gg training guide identifies the following monsters and map details; its recommended level ranges are editorial advice, not guaranteed performance.
| Training option | Supported map detail | What we would test | When to reject it |
|---|---|---|---|
| Line 2 <Area 1> | Contains Jr. Wraiths and Jr. Neckis | Skill coverage, reliable kills, and available spawns | Competition or awkward targeting leaves long gaps between kills |
| Drake/Cold Eye mixed map | The guide lists a map containing level-40 Cold Eyes and level-50 Drakes | Performance against both monsters, not just the easier target | Drakes cause frequent misses, slow kills, or heavy supply use |
| Your current lower-pressure map | Use your own session as the baseline | Whether fewer interruptions offset lower XP per kill | You repeatedly clear your reachable spawns and wait |
Start with the option you can sustain; a higher-level monster is not automatically a better training target.
Judge Mixed Maps by Their Slowest Target
A mixed map can look efficient while you fight its easier monsters. If the tougher targets accumulate, your usable route shrinks.
Test both monster types. If one consistently interrupts your rotation, try a map with a more manageable monster mix rather than judging the whole map from your best kills.
Compare Complete Sessions
Published XP figures need context. MeowDB's grind-map guide explicitly describes its Max EXP/hr figures as theoretical spawn-based ceilings, not rates players achieve.
We use those figures to shortlist maps—not to promise your leveling speed.
Run a Controlled Comparison
Use 30 minutes per map as a practical test window, not a performance claim.
1. Keep equipment, buffs, and party setup consistent.
2. Record starting XP and potion quantities.
3. Include channel searches, recovery, and recurring supply trips.
4. Record ending XP and the cost of replacing consumed supplies.
5. Keep unsold drops separate from realized income.
If you level up, change skills, or replace equipment between sessions, the comparison no longer isolates the map.
Match the Result to Your Goal
Choose according to the session you can actually maintain.
| Your goal | Decision rule | Common failure |
|---|---|---|
| Faster leveling | Prefer greater total XP over equal elapsed time | Counting combat time but excluding channel searches |
| Saving mesos | Compare collected mesos and completed sales against recurring costs | Treating unsold equipment as cash |
| Short sessions | Favor quick access and little setup | Spending most of the session finding a party or channel |
| Party training | Test with the intended party arrangement | Applying a solo result to different coverage and downtime |
Keep solo and party results separate; they answer different questions.
Fix the Bottleneck Before Switching
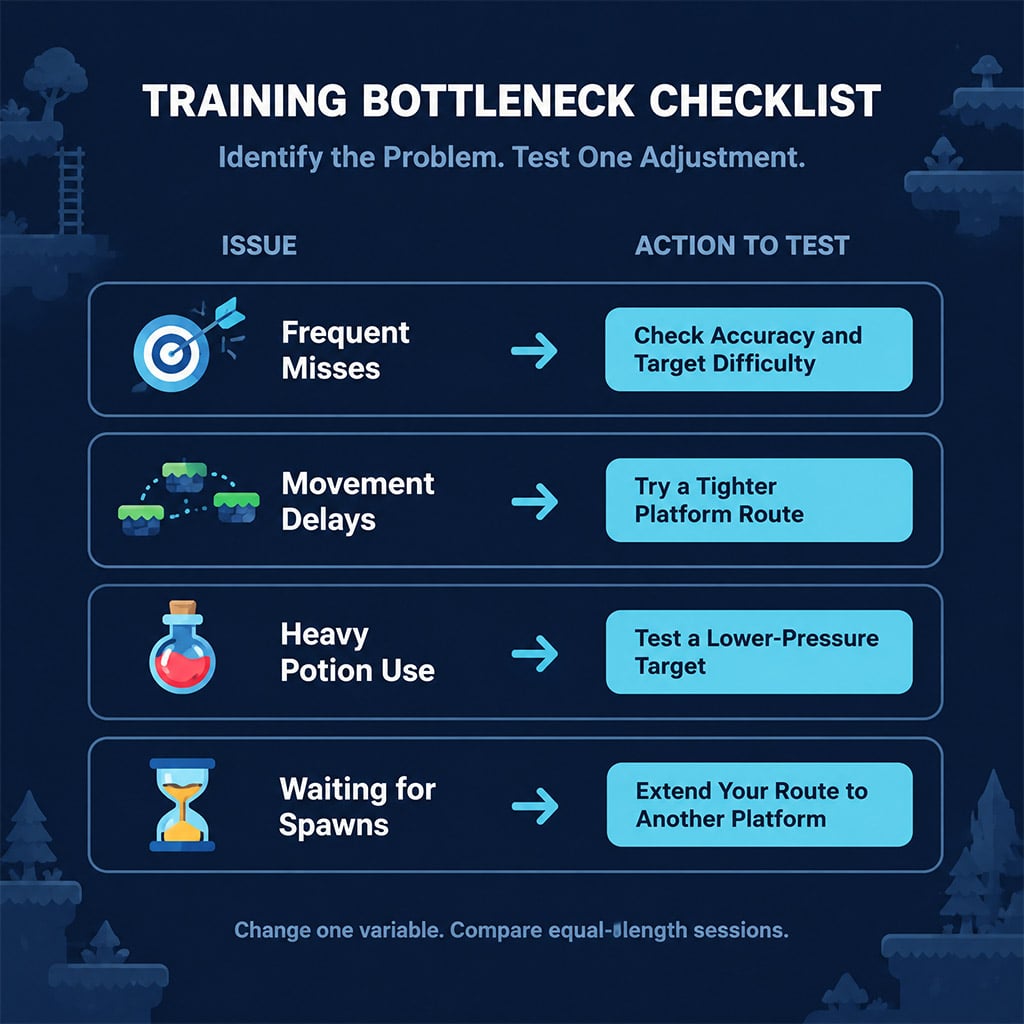
A map change will not solve every problem. We first check which part of the session prevents consistent kills.
- Frequent misses: Reassess accuracy and target difficulty before purchasing more damage.
- Long movement gaps: Try a tighter route or different platform layout.
- Heavy potion use: Compare a lower-pressure target before committing to a long grind.
- Spawn waiting: Try broader coverage if moving to another platform adds productive kills.
- Crowding: Compare a quieter alternative using the same elapsed-time window.
Retest After a Meaningful Upgrade
Retest when attacks per kill change, not merely when the displayed damage number rises. An upgrade that leaves kill speed unchanged may not alter the map decision.
Use the same comparison method after the upgrade; otherwise, improved gear and improved map choice become impossible to separate.
FAQ (Frequently Asked Questions)
What is the best MapleStory Classic map for levels 40–50?
The checked references do not establish a tested winner for every class. We would shortlist suitable subway and Drake-area options, then compare complete sessions using your actual character.
Is Line 2 <Area 1> worth checking?
The training reference lists Jr. Wraiths and Jr. Neckis there. Test whether your skills can clear available targets consistently; monster presence alone does not prove the map is efficient for your build.
Should we move to Drakes as soon as we reach level 40?
Not automatically: the referenced mixed map includes level-50 Drakes alongside level-40 Cold Eyes. If the Drakes cause repeated misses or excessive recovery, stay with more manageable targets.
Are published Max EXP/hr figures realistic targets?
Not when the source labels them theoretical ceilings. MeowDB's figures assume immediate kills under its spawn model, so use them for comparison rather than as expected personal results.
Should potion costs outweigh faster XP?
Prioritize faster XP when your supplies can sustain the session. If replenishment repeatedly stops training, choose the option that produces reliable progress across your available playtime.


I’m Kwame Asante, a Ghanaian Staff Writer at GGWTB covering anime combat, fighting games, and adventure progression. My guides connect combos and ability choices with the grind behind them: which upgrades open up your build, and which can wait. A rare unlock is exciting—but it needs to earn its place in your lineup.

Most Popular Posts
- MapleStory Classic World CBT2: The No-BS Guide to 3rd Job, Orbis, and Class Reworks
- MapleStory Classic World Early Best Maps, PQ, and Party Spot): The No-BS 1-30 Leveling Guide
- Maplestory Classic Closed Beta #2: 3rd Job Skills, Class Reworks & What to Test First
- MapleStory Classic Early Leveling Guide: Best Maps, Fastest Route, Real Player Tips
- MapleStory Classic World Release Date Guide: Launch Date, Founder Access
- MapleStory Classic World Priest Guide: Skills, Nerfs and Holy Arrow build
Popular Category Lists
- ARC Raiders / (353)
- Grow a Garden / (294)
- CoD: Black Ops 7 / (167)
- Star Citizen / (162)
- MLB 26 / (159)
- Monopoly Go / (152)
- ARK Survival Ascended / (128)
- Steal a Brainrot / (99)
- Blox Fruits / (74)
- Adopt Me / (74)
- Forza Horizon 6 / (72)
- Sailor Piece / (68)
- Grow a Garden 2 / (68)
- Diablo IV / (62)
- CoD: BLACK OPS 6 / (55)
- Aion 2 / (51)
- Path of Exile 2 / (48)
- Monster Hunter Wilds / (46)
- Windrose / (44)
- Maplestory Classic / (42)