


 0
0ARC Raiders PvP Ultimate Guide: Everything You Need To Know
- KIVRI
- Share
- ARC Raiders
- 03/10/26
- 366
ARC Raiders PvP is not just about landing shots. The players who improve fastest usually master three things first: spawn awareness, fight timing, and post-fight discipline. Aim matters, of course, but aim alone will not save you when another squad hears your fight, cuts off your exit, and arrives while you are still looting.

- Intro
- Core PvP Principles
- Use Free Kits Aggressively To Build Real Pvp Reps
- Build Quick-use Muscle Memory Early
- PvP Is Often Decided Before The First Bullet
- Free Kits & Quick Use & Spawns
- Learn Hotspots, But Respect The Lanes Around Them
- After A Kill, Secure The Area Before The Backpack
- Use Walls And Smoke To Reduce Your Looting Risk
- Best PvP Loadouts & Budget Kits
- What An Ideal Pvp Loadout Needs?
- Recommended High-tier Pvp Setup
- Best Budget Loadout For Warm-ups And Low-risk Improvement
- Loadout Details: Consumables, Utility, and Durability
- Carry A Repeatable Healing Structure
- Barricades Are More Valuable Than Many Players Think
- Low-durability Gear Has Niche Value
- Stash Management
- Keep Purpose-driven Inventory, Not Emotional Inventory
- Best Attachments
- General Attachment Principle
- Practical Attachment Priorities By Weapon Role
- Audio & Visual Ques
- Audio Tells You More Than Footsteps
- Gun Smoke Can Reveal Recent Fights And Exact Last-known Positions
- Best PvP Settings & Keybind Priorities
- Keybinds That Matter Most
- Graphics & Aiming Settings For PvP Clarity
- Best PvP Skills
- Skill Priorities That Usually Provide The Most PvP Value
- Improvement Routine
- 7-Step PvP Improvement Loop
- FAQS
- Q1: What Is The Fastest Way To Improve At Arc Raiders Pvp?
- Q2: Should We Always Rush The Main Hotspot?
- Q3: How Do We Stop Getting Third-Partied After Winning A Fight?
- Q4: What Is The Best Budget Weapon For Pvp Practice?
- Q5: Are Barricades Really Worth Carrying?
- Q6: Which Keybinds Matter Most?
- Q7: Should We Hoard Ammo And Random Crafting Materials?
- Outro
↖ Intro
If your goal is to get better at ARC Raiders PvP, we should be honest about what moves the needle fastest. It is not farming perfect gear and hoping confidence appears later. It is taking repeatable fights, learning where danger comes from, and building a setup that lets us react quickly under pressure.
This guide breaks PvP down the way experienced players usually learn it in practice: how to take more fights with less risk, how to avoid getting collapsed on, what to carry, and which habits create consistent wins instead of occasional highlight clips. Let's unpack it step by step.
That is why strong PvP improvement usually follows a simple pattern:
- Fight more often with low-risk kits
- Learn where players can appear before you hear them
- End fights quickly and reset even faster
- Carry tools that protect you while looting or healing
- Use settings and keybinds that reduce hesitation
In practice, this means your biggest gains often come from decision-making, not raw mechanics. The players who survive longer are rarely the ones with the fanciest stash. They are the ones who know when to push, when to pause, and when to leave the body on the ground for five extra seconds.
↖ Core PvP Principles
Here is the foundation. Before loadouts or settings, we need habits that create more clean engagements and fewer messy deaths.
↖ Use Free Kits Aggressively To Build Real Pvp Reps
For beginners and intermediate players, free kits are one of the best learning tools in the game.
| Why Free Kits Work | What It Means in Practice | Expected Benefit |
|---|---|---|
| No meaningful gear risk | We can enter hot zones repeatedly without fear | Faster mechanical growth |
| More fight exposure | We see more player behavior patterns | Better timing and reads |
| Lower hesitation | We push more confidently | Better initiative |
| Loot upside still exists | Even budget runs can snowball | Efficient progression |
This matters because PvP improvement is repetition-driven. If you only take important fights when wearing expensive gear, you usually become more passive, not more skilled.
If you find yourself protecting loot more than chasing growth, switch the mindset. Run free kits into active zones, look for isolated players, and treat each raid as deliberate practice. A single low-cost session with 6 to 10 real engagements often teaches more than several cautious loot runs.
↖ Build Quick-use Muscle Memory Early
A good quick-use layout does something subtle but powerful: it removes thinking time. If healing, smoke, revives, and grenades live in random slots, every fight includes a tiny panic tax. That tax gets you killed.
A reliable structure looks like this:
| Slot Type | Recommended Use | Why It Helps |
|---|---|---|
| 1 | Adrenaline / emergency stim | Fastest access under pressure |
| 2 | Smoke | Immediate disengage or cover |
| 3 | Grenade / defib | Flexible utility |
| 4+ | Main heals | Stable rhythm during resets |
The exact order can vary. The rule does not. Keep the same categories in the same slots every raid. If you discover that you often pull the wrong item in close fights, that is your sign to simplify the layout rather than try to remember better.
↖ PvP Is Often Decided Before The First Bullet
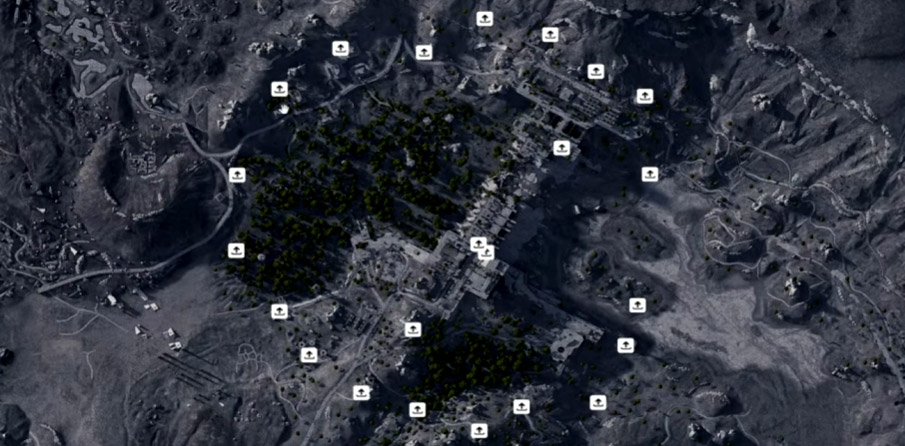
We should treat every spawn as information.
Spawn knowledge gives us three advantages:
- We know likely early push paths.
- We can predict who may third-party nearby fights.
- We can choose whether to contest the hotspot immediately or clear our flank first.
That last point is huge. Many players sprint straight to the main PvP area because that is where the action is. The problem is that everyone else knows that too.
If you spawn near multiple adjacent lanes, the smarter play is often:
- Scan left,
- Scan right,
- Identify the nearest likely team,
- Remove or avoid that pressure,
- Then rotate inward.
Not every spawn turns into a fight. But every spawn creates a threat map. The better we understand that map, the fewer random deaths we suffer.
↖ Free Kits & Quick Use & Spawns
This is where a lot of fights are won or thrown. Early success in ARC Raiders often creates immediate danger because nearby players hear shots, see movement, or anticipate traffic.
↖ Learn Hotspots, But Respect The Lanes Around Them
Every map tends to funnel players toward a few high-action zones. That does not mean the center is the only danger. Often the real risk is the ring of teams rotating into the same area from different spawn lines.
A practical mental model looks like this:
| Situation | Common Mistake | Better Response |
|---|---|---|
| Spawn near hotspot | Full sprint to center | Check nearest side spawns first |
| Win early fight | Immediate greedy looting | Clear perimeter before looting |
| Hear distant shots | Push in straight line | Approach from cover and expect a fourth party |
| Fight drags on | Commit harder | Reposition or disengage before lobby converges |
This means we should stop thinking of fights as isolated duels. In live lobbies, they are often noise beacons.
↖ After A Kill, Secure The Area Before The Backpack
Loot is bait. Sometimes very expensive bait.
A safer post-fight routine is simple:
- Stop moving for a second and listen
- Check the most likely entry routes
- Assign one or more players to overwatch if in squads
- Only then begin looting
- Loot fast, then rotate
In trios, one of the cleanest systems is:
- 2 players loot,
- 1 player holds a power angle or elevated view,
- Then swap if needed.
In solos, we do not have that luxury, so utility matters more. Walls and smoke are not optional comfort items. They are anti-chaos tools.
↖ Use Walls And Smoke To Reduce Your Looting Risk
If you are looting in the open, you are giving anyone with patience a free attempt.
Here is the practical hierarchy:
| Tool | Best Use | Why It's Strong |
|---|---|---|
| Barricade / wall | Create instant cover on bodies | Breaks sightlines and funnels pushes |
| Small smoke | Cheap disengage | Lets us reset or reposition quickly |
| Large smoke | Stronger area denial | Better for team resets or exposed loot spots |
If you notice you keep dying while looting, the issue is usually not bad luck. It usually means one of three things:
- You did not clear the perimeter,
- You looted too long,
- You looted without cover.
Loot faster. Listen more. Cover first.
↖ Best PvP Loadouts & Budget Kits
Now we get into gear. Good loadouts are not just about raw weapon strength. They are about coverage, tempo, and cost efficiency.
↖ What An Ideal Pvp Loadout Needs?
A strong PvP kit usually covers four jobs:
- Medium or long-range pressure
- Reliable close-range finish power
- Fast healing and reset tools
- At least one utility option that protects space
That is why two-weapon setups tend to perform so well: one gun opens the fight, the other closes it.
↖ Recommended High-tier Pvp Setup
Below is a clean structure for a top-end PvP loadout based on current practical value.
| Slot | Recommended Choice | Reason |
|---|---|---|
| Armor / augment | Looting MK3 + medium shield | Strong overall value and survivability |
| Primary | Renegade | Excellent medium-to-long range control |
| Secondary | Shotgun or El Toro | Dominant close-range kill pressure |
| Utility | Small smokes, barricades, grenades | Fight control and disengage |
| Heals | Adrenaline, herbals, rechargers | Fast reset pattern |
Why This Works:
- Renegade gives us reach and consistency.
- Shotgun or El Toro handles interior fights and fast collapses.
- Barricades let us deny angles, stop pushes, or loot with protection.
- Smokes buy time, and time wins more fights than people admit.
↖ Best Budget Loadout For Warm-ups And Low-risk Improvement
A budget kit should do one thing extremely well: get us into real fights without draining the stash.
| Slot | Budget Option | Why It's Efficient |
|---|---|---|
| Armor / augment | Looting MK1 | Cheap, useful, enough for practice |
| Main weapon | El Toro | Excellent close-range value |
| Alternate option | Anvil | Good if you want more range |
| Utility | Cheap smokes | Low-cost survival tool |
| Heals | Basic but consistent stack | Enough for repeated engagements |
If you are warming up, this is ideal. It lets you:
- Fight without overcommitting expensive gear,
- Sharpen movement and crosshair placement,
- Rebuild confidence after bad runs.
A useful benchmark: if a kit is so expensive that you hesitate to challenge winnable fights, it is too expensive for practice.
↖ Loadout Details: Consumables, Utility, and Durability
Small inventory decisions often create big PvP outcomes.
↖ Carry A Repeatable Healing Structure
A stable healing plan beats random stacking.
| Item Type | Role | Practical Rule |
|---|---|---|
| Emergency stim | Immediate survival | Keep in the same quick slot every raid |
| Core heal | Between-peek sustain | Carry enough for extended fights |
| Recharge-type heal | Shield or follow-up sustain | Use to preserve stronger healing items |
| Smoke | Defensive reset | Carry at least one every run |
If you are constantly running out of healing mid-raid, your issue may not be bad fights. It may be bad load planning.
↖ Barricades Are More Valuable Than Many Players Think
A cheap utility item that:
- cuts off a door,
- blocks an angle,
- protects a loot spot,
- slows a third party,
- buys healing time
…is absurdly valuable in PvP.
That is why barricades often outperform more glamorous gear. Space control is a quiet win condition.
↖ Low-durability Gear Has Niche Value
Some experienced players bring weapons or augments that are already close to breaking. The logic is simple: if we die, the enemy gets less value. This does not improve our combat power. It is stash economy and denial strategy. Treat it as optional, not essential.
Use it only when:
- The remaining durability is still enough for a full raid,
- The weapon remains reliable,
- You are intentionally optimizing value loss.
↖ Stash Management
A cluttered stash usually reflects a cluttered plan. If your main goal is PvP, every item in storage should answer one question: what exact future use does this serve?
↖ Keep Purpose-driven Inventory, Not Emotional Inventory
Here is a practical framework.
| Item Category | Keep Aggressively? | Reason |
|---|---|---|
| Core heals | Yes | Limited access and constant demand |
| Ammo | No, unless needed soon | Usually replaceable |
| Loose weapon mods | No | Attach them to guns to save space |
| Repair materials you actively use | Yes | Supports your real loadouts |
| Random low-value crafting clutter | No | Space tax with little return |
This is one of the easiest ways to clean a stash:
- Repair weapons that need repairing,
- Attach spare mods to stored guns,
- Stop hoarding infinite-buy items,
- Sell or use materials with no active purpose.
If you find that your stash is always full, then one of two things is usually happening:
- You are storing future possibilities instead of current priorities,
- Or you are keeping items because they feel valuable, not because they are useful.
There is a difference. The stash notices.
↖ Best Attachments
Attachments should support the weapon's job, not just inflate rarity.
↖ General Attachment Principle
We usually want to improve one of four traits:
- Recoil control
- ADS speed
- Magazine consistency
- Range specialization
A simple rule helps here:
- If the gun is already fast, improve stability;
- If the gun is already stable, improve responsiveness.
↖ Practical Attachment Priorities By Weapon Role
| Weapon Role | Best Attachment Focus | Why |
|---|---|---|
| Mid-range rifle | Recoil + mag size | Better sustained tracking |
| Aggressive SMG / AR | Balance ADS and control | Faster entry without losing beam potential |
| Shotgun | ADS / handling + choke | Faster swaps and tighter effective use |
| Precision medium-range weapon | Stability first | Helps repeated peek fights |
The important part is not perfection. Green-tier attachments on the right weapon can still perform extremely well if the weapon fits the fight you are taking.
If you discover your gun feels great in one lane but awful indoors, do not just blame the weapon. Look at the attachment direction. You may have built a range tool and then forced it into a close-range problem.
↖ Audio & Visual Ques
This section is quietly one of the most important.
↖ Audio Tells You More Than Footsteps
Different surfaces create different risk levels.
| Surface Type | PvP Impact | Action |
|---|---|---|
| Metal | Loud positional giveaway | Avoid crossing unless speed matters |
| Tile / hard interior ground | Distinct and trackable | Slow down near contested buildings |
| Sand / softer terrain | Lower audio signature | Use for stealthier movement |
If you hear someone on metal, you often know more than an enemy is nearby. You know:
- A likely lane,
- A likely elevation,
- And often the direction of the push.
This means surface awareness works both ways. If you are the one crossing loud terrain, you are broadcasting your route.
↖ Gun Smoke Can Reveal Recent Fights And Exact Last-known Positions
Visual cues matter more than many players expect. Certain smoke signatures can indicate:
- A recent gunfight,
- Active firing nearby,
- Or the difference between combat residue and environmental effects.
The practical takeaway is simple:
- If you see fresh combat smoke, assume a player is or was there very recently;
- Do not confuse different smoke types;
- Use visual residue to decide whether to slow push, wrap, or third-party.
This is especially useful when audio is cluttered or partially blocked by terrain. A careful player can often enter a zone already knowing where the last engagement happened.
↖ Best PvP Settings & Keybind Priorities
Settings do not make you good. They do make good habits easier.
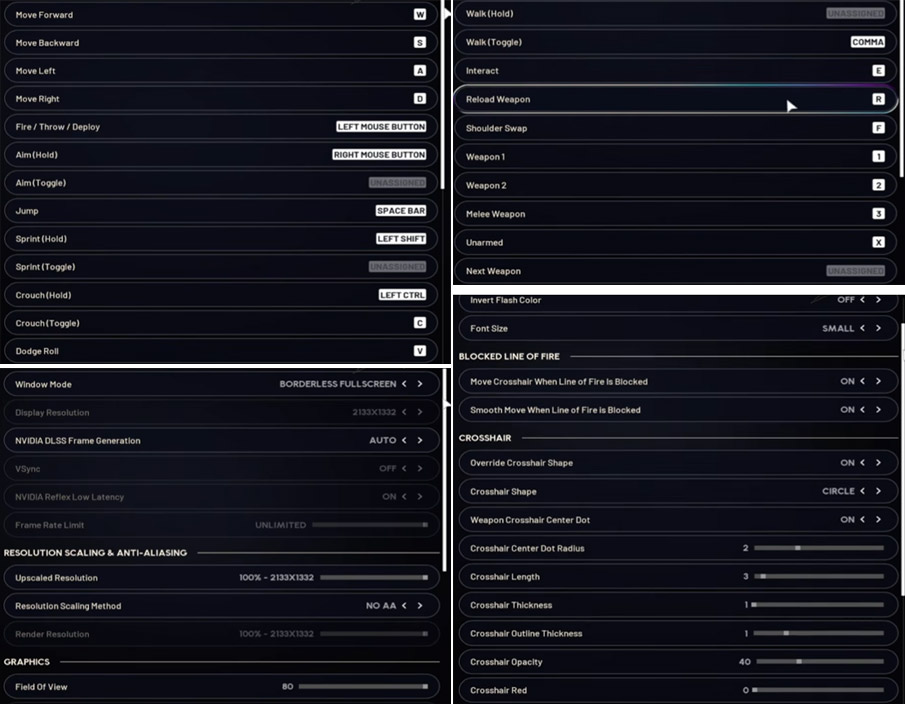
↖ Keybinds That Matter Most
We do not need a circus keyboard. We need a few reliable combat binds.
| Bind | Priority | Why |
|---|---|---|
| Dodge roll | Very high | Survival, repositioning, timing breaks |
| Crouch | Very high | Movement mix-ups and cover control |
| Shoulder swap | Essential | Better corner peeks and off-angle use |
Shoulder swap deserves extra attention. It is one of the simplest ways to win cleaner peeks around cover. If you are new, mastering this one habit can noticeably improve your corner fights.
↖ Graphics & Aiming Settings For PvP Clarity
A lot of competitive players favor visibility and responsiveness over visual beauty.
Common priorities:
- Lower graphics for clearer enemy readability,
- Reduced visual clutter,
- No mouse smoothing,
- Consistent ADS and hipfire feel.
| Setting Area | Recommended Direction | Reason |
|---|---|---|
| Mouse smoothing | Off | Cleaner input feel |
| Graphics quality | Low or competitive-focused | Better visibility and FPS |
| Sens scaling | Consistent with your preference | Reduces aim confusion |
| Crosshair style | Clear pellet/range awareness | Helps shotgun and close fights |
If you feel inconsistent while ADS, check whether your zoom sensitivity creates a different feel than hipfire. Consistency often beats theory-crafted sensitivity formulas.
↖ Best PvP Skills
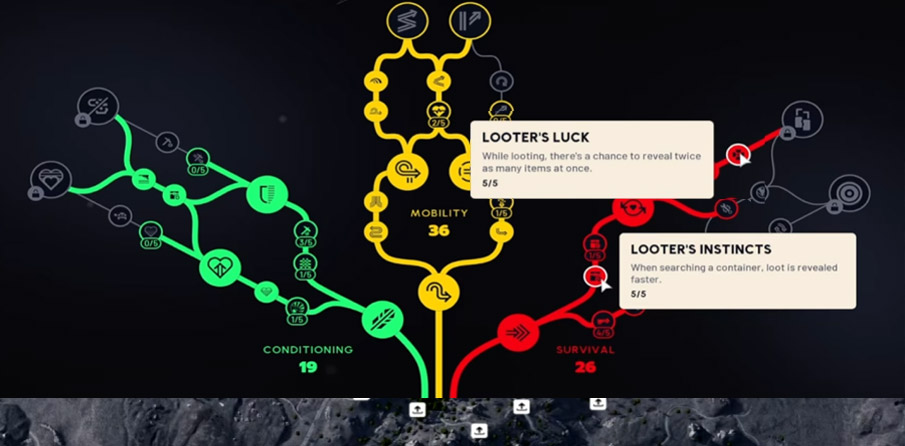
Skills should strengthen how you already fight. The best PvP choices usually improve one of these:
- Mobility
- Carry efficiency
- Downed-state survivability
- Loot speed and value
- Encumbrance management
↖ Skill Priorities That Usually Provide The Most PvP Value
| Skill Type | Why It Matters in PvP | Priority |
|---|---|---|
| Weight / encumbrance reduction | Keeps movement usable in real kits | High |
| Stamina / mobility skills | Better chase and reposition power | High |
| Looting support | Faster post-fight value extraction | Medium-High |
| Downed survivability | Strong in team modes | High in squads |
| Roll efficiency | Better reset and evade timing | High |
One especially important principle: a PvP build should not feel great only before the fight. If a skill helps looting but leaves you sluggish during resets, its value drops.
If you mostly play squads, downed-state and recovery-related skills often overperform. If you mostly play solos, mobility and quick reset tools usually matter more.
↖ Improvement Routine
Knowing what is strong is useful. Turning that into progress is better.
↖ 7-Step PvP Improvement Loop
| Step | What We Do | Why It Works |
|---|---|---|
| 1 | Queue budget or free kits | More reps, less fear |
| 2 | Contest active lanes | Real PvP exposure |
| 3 | Track spawn routes mentally | Faster reads |
| 4 | Focus on ending fights quickly | Lowers third-party risk |
| 5 | Use cover utility before looting | Fewer post-fight deaths |
| 6 | Review one death cause each session | Faster adaptation |
| 7 | Keep the same quick-use layout | Better muscle memory |
Here is the part many players skip: after each session, identify one recurring mistake.
Examples:
- Over-looting after kills,
- Sprinting to hotspots without checking side lanes,
- Forgetting shoulder swap in close peeks,
- Healing in predictable positions,
- Carrying too little smoke.
Fixing one leak at a time works better than trying to become better at everything overnight.
↖ FAQS
↖ Q1: What Is The Fastest Way To Improve At Arc Raiders Pvp?
A: The fastest route is high-volume, low-risk fighting. Free kits and budget kits give you more repetitions, and repetitions create pattern recognition. If you only PvP with expensive gear, you usually improve slower because you take fewer confident engagements.
↖ Q2: Should We Always Rush The Main Hotspot?
A: No. Hotspots attract action, but the path into them is often where players die. If you spawn near several lanes, check nearby threats first. A clean entry is usually stronger than a fast one.
↖ Q3: How Do We Stop Getting Third-Partied After Winning A Fight?
A: Use a strict reset routine:
- Clear nearby angles,
- Listen before looting,
- Use walls or smoke on exposed bodies,
- Loot quickly,
- Rotate before the lobby collapses on your gunfire.
↖ Q4: What Is The Best Budget Weapon For Pvp Practice?
A: El Toro is a strong value option for close-range pressure. If you want a bit more range, an Anvil-style option can also work well. The best budget weapon is the one that lets you fight confidently without making you stash-shy.
↖ Q5: Are Barricades Really Worth Carrying?
A: Yes. They are one of the most practical utility items in PvP because they create instant structure where none existed. That affects looting, healing, chokepoints, and anti-third-party defense.
↖ Q6: Which Keybinds Matter Most?
A: Dodge roll, crouch, and shoulder swap. Those three influence survival, peek quality, and movement variety more than most other combat binds.
↖ Q7: Should We Hoard Ammo And Random Crafting Materials?
A: Usually no. Keep items with a clear use case. Hoard core heals and repair or crafting resources tied to the kits you genuinely run. Infinite-buy or easily replaceable clutter should not own your stash.
↖ Outro
The biggest jump in ARC Raiders PvP comes when we stop treating fights like isolated aim tests and start treating them like information problems. Spawn routes tell us where pressure begins. Utility tells us how to survive the messy part after the kill. Loadout structure tells us whether we can adapt when range changes. And disciplined looting tells us whether a win stays a win.
If you want a practical path forward, focus on these five habits first:
| Priority Habit | What Changes |
|---|---|
| Use free or budget kits for practice | More reps, faster growth |
| Learn spawn patterns | Better early-game reads |
| Loot only after securing the area | Fewer third-party deaths |
| Carry smoke and barricades consistently | Better resets and safer looting |
| Standardize quick-use slots and binds | Faster reactions under stress |
That is where real consistency starts. Not with perfect gear. With repeatable decisions, cleaner resets, and the discipline to fight on purpose rather than merely react.

Most Popular Posts
- ARC Raiders Riven Tides Key Room Guide: Best Hotel Keys, Loot Routes, Secure & Crane Storage
- ARC Raiders Damage Fireflies Trial Guide: Best Farm Method on Buried City Night Raid
- ARC Raiders Riven Tides Update: New Map & Items, ARC Turbine, Rewards, and Best Early Strategy
- ARC Raiders Bettina Guide: Best Build, Buffs, and How to Use It Against ARC
- Arc Raiders Season 4 Riven Tides Update, Rewards, Safe Skins, and Release Timeline
- ARC Raiders Solo Search Supply Drops Guide: Best Buried City Route, Beacon Locations
Popular Category Lists
- Grow a Garden / (286)
- ARC Raiders / (262)
- CoD: Black Ops 7 / (166)
- Monopoly Go / (146)
- MLB 26 / (145)
- Star Citizen / (112)
- Steal a Brainrot / (89)
- Sailor Piece / (68)
- ARK Survival Ascended / (67)
- Diablo IV / (61)
- Forza Horizon 6 / (60)
- Blox Fruits / (60)
- CoD: BLACK OPS 6 / (55)
- Adopt Me / (53)
- Path of Exile 2 / (48)
- Monster Hunter Wilds / (46)
- Windrose / (44)
- Path of Exile / (40)
- Grow a Garden 2 / (40)
- Bee Swarm Simulator / (36)


