0
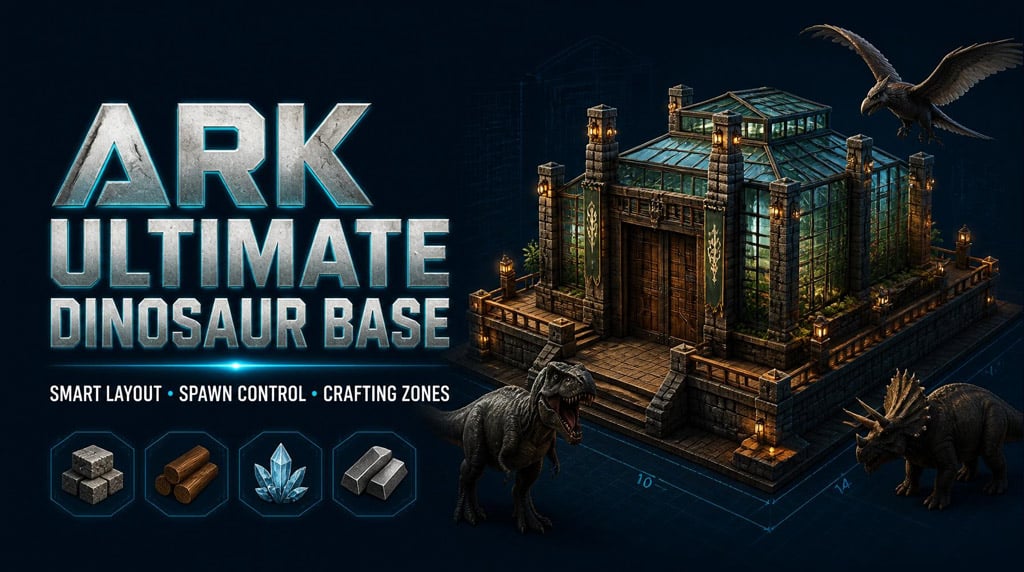
0ASA Ultimate Dinosaur Base: Best Layout, Build Order, Materials, and Practical Design Tips
- LUKE
- Share
- ARK Survival Ascended
- 07/02/26
- 216
A good ARK base is not just a pretty stone box. It needs safe access, clean dino movement, fast crafting, strong storage flow, and enough detail to avoid looking like a warehouse with trauma.
- ARK Dinosaur Base Location: Pick Space Over Scenery
- Spawn Control: Secure the Build Site First
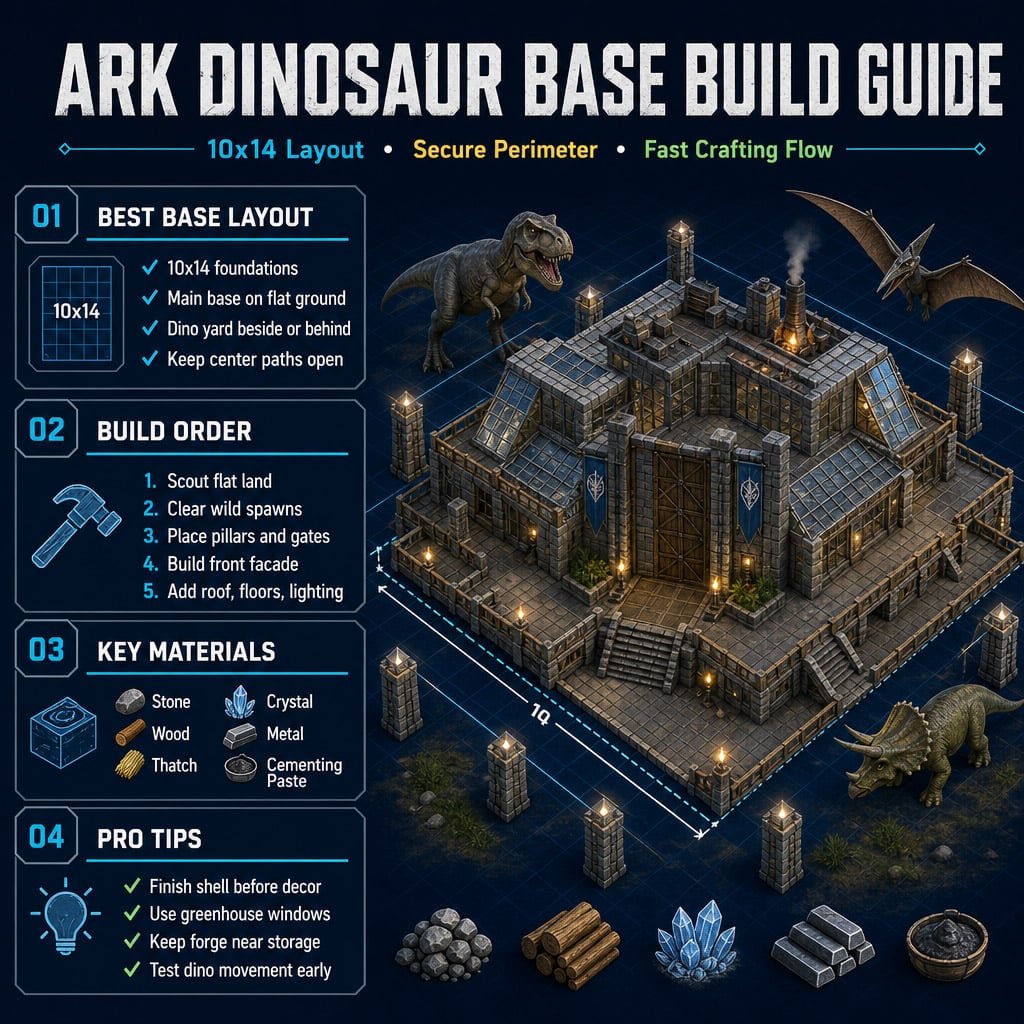
- Best Foundation Size: Use a 10x14 ARK Base Layout
- ARK Base Materials: Expect Heavy Resource Costs
- Exterior Build: Avoid the Flat Box Problem
- Windows and Glass: Use Greenhouse Pieces or Custom Shutters
- Interior Layout: Build for Speed, Not Just Looks
- Stairs, Floors, and Snapping Problems
- Lighting and Decoration: Finish the Base Properly
- Best ARK Base Build Order
- Common ARK Base Mistakes
- FAQ
- What is the best size for a large ARK dinosaur base?
- How do you stop dinosaurs spawning inside your ARK base?
- Should the dino pen be inside the main base?
- Are greenhouse pieces worth using in ARK base builds?
- What should go on the ground floor of a large ARK base?
- Summary
This build uses a large 10x14 foundation footprint, layered stone walls, greenhouse-style windows, exterior decking, multi-floor interiors, and a separate dino-friendly yard. It is big, expensive, and worth it if you want a proper long-term base.
↖ ARK Dinosaur Base Location: Pick Space Over Scenery
The biggest mistake is building in a beautiful spot that cannot handle the base size.
A waterfall view looks great. Then you hear it for ten hours while crafting walls. No thanks.
Choose land that gives you:
| Factor | Why It Matters | Best Choice |
|---|---|---|
| Flat ground | Easier foundation snapping | Large open plateau or beach edge |
| Dino access | Big tames need turning space | Wide lanes around the base |
| Resource access | Less farming downtime | Near trees, stone, metal routes |
| Low spawn pressure | Fewer build interruptions | Clearable open land |
| Expansion room | You will need more space later | Leave room for pens and farms |
Best layout logic:
- Put the main base on the flattest section.
- Put the dino pen beside or behind it.
- Keep a temporary crafting platform close to the build.
- Leave space for a separate greenhouse, breeding area, or industrial zone.
If you are unsure between two spots, pick the one with better movement. Views are nice. Getting a rex stuck on your front stairs is not.
↖ Spawn Control: Secure the Build Site First
Wild dinos spawning inside your base area will waste time and damage tames.
Before building the main structure:
1. Clear the area with a strong tame.
2. Place pillars, foundations, or fence supports around the perimeter.
3. Add temporary dinosaur gates.
4. Park utility tames inside the secured zone.
5. Keep storage and crafting stations nearby.
| Problem | Cause | Fix |
|---|---|---|
| Wild dinos spawn inside | Not enough structures | Add more pillars/foundations |
| Hostiles wander in | Open perimeter | Add gates and close gaps |
| Tames get hit | Weak staging area | Move them behind gates |
| Constant interruptions | Area not cleared | Sweep before each build phase |
Spawn suppression improves as you place more structures. Early on, expect a few annoying visitors. Deal with them before they become part of the floor plan.
↖ Best Foundation Size: Use a 10x14 ARK Base Layout
For a serious late-game dinosaur base, 10x14 foundations is the sweet spot.
That gives you around 140 foundations before porches, decks, stairs, or supports.
| Layout | Foundation Count | Best For |
|---|---|---|
| 6x8 | 48 | Starter base |
| 8x12 | 96 | Mid-game base |
| 10x14 | 140 | Large main base |
| 12x16 | 192 | Tribe hall / mega base |
Use this placement order:
1. Place a straight line of 10 foundations.
2. Extend one side to 14 foundations.
3. Fill the rectangle row by row.
4. Check alignment from a distance.
5. Keep extra foundations ready.
Do not craft the exact number only. You will miscount. Everyone does. Bring extras.
↖ ARK Base Materials: Expect Heavy Resource Costs
A large decorative base burns resources fast. The hidden cost is not the walls. It is the pillars, quarter walls, railings, ceilings, stairs, and greenhouse pieces.
| Structure Type | Estimated Amount | Main Materials |
|---|---|---|
| Foundations | 140+ | Stone, wood, thatch |
| Walls / quarter walls | 250–500+ | Stone, wood, thatch |
| Ceilings | 150–300+ | Stone, wood, thatch |
| Pillars | 80–200+ | Stone, wood, thatch |
| Railings | 80–150+ | Wood, stone, fiber |
| Greenhouse pieces | 40–120+ | Crystal, metal, cementing paste |
Practical farming setup:
- Use a Doedicurus for stone.
- Use a Castoroides, Therizino, or Mammoth for wood.
- Use an Argentavis or high-weight tame for hauling.
- Keep a smithy platform beside the build.
- Sort materials into labeled boxes.
If your tame is overloaded, you are probably building correctly.
↖ Exterior Build: Avoid the Flat Box Problem
The fastest way to make an ARK base look better is to add depth.
Flat wall bad. Layered wall good.
Use:
- Pillars on corners and window frames.
- Railings around decks.
- Stairs at entrances.
- Greenhouse walls for tall windows.
- Stone frames around glass.
- Wood details to break up heavy stone.
| Design Tool | Use It For | Result |
|---|---|---|
| Layered walls | Facades and alcoves | More depth |
| Pillars | Corners, arches, supports | Stronger silhouette |
| Greenhouse glass | Large windows | Better light |
| Decking | Exterior walkways | More usable space |
| Railings | Edges and stairs | Finished look |
Build the front facade first. Make it the visual anchor.
Core front features:
- One large central gate.
- A framed stone archway.
- Tall greenhouse or skinned windows.
- Side alcoves for shape.
- Pillars to frame the structure.
Then mirror the back. Check every few pieces. One wrong snap point can ruin the symmetry.
↖ Windows and Glass: Use Greenhouse Pieces or Custom Shutters
Greenhouse pieces make the base look less like a bunker.
Best uses:
- Tall front windows.
- Upper-floor glass sections.
- Greenhouse-style roof areas.
- Decorative stained-glass-style panels with skins.
| Window Option | Best Use | Downside |
|---|---|---|
| Greenhouse walls | Big bright windows | Needs crystal and metal |
| Skinned glass | Decorative facade | Needs skins/mods |
| Stone windows | Durable simple walls | Less visual impact |
| Trapdoor windows | Functional shutters | Takes placement testing |
A strong trick: use small hatch/trapdoor-style pieces as openable windows.
Why it works:
- They look like shutters.
- They can open outward.
- They create balcony access.
- They add function, not just style.
If greenhouse panels look too clean for your build, mix them with stone frames or custom shutters.
↖ Interior Layout: Build for Speed, Not Just Looks
A giant hall looks impressive for five minutes. Then you realize your fabricator is miles from your storage.
Use floors with clear jobs.
| Floor | Best Use |
|---|---|
| Ground floor | Forge, smithy, fabricator, vaults |
| Second floor | Beds, trophies, personal storage |
| Third floor | Greenhouse, lookout, display room |
| Exterior deck | Access, overflow crafting, decoration |
Best ground-floor layout:
| Area | Place Here |
|---|---|
| Front | Lamps, planters, entry decor |
| Left wall | Smithy, fabricator, repair gear |
| Right wall | Mortar, chemistry bench, resource boxes |
| Back wall | Industrial forge centerpiece |
| Center | Open movement lane |
Keep the center open. Big bases need traffic flow.
If you keep bumping into benches, boxes, or stairs, the room is badly planned.
↖ Stairs, Floors, and Snapping Problems
ARK stairs are cursed. Build around that fact.
Common fixes:
| Issue | Fix |
|---|---|
| Stairs will not snap | Add temporary ceilings or pillars |
| Railings work on one side only | Replace nearby stairs/floors |
| Split stairs look uneven | Use a wider landing |
| Player gets stuck on ledges | Cover bumps with ramps or ceilings |
| Upper floor feels cramped | Raise ceiling height early |
Do not force a fancy staircase if it breaks movement. Clean access beats clever geometry.
↖ Lighting and Decoration: Finish the Base Properly
Lighting does two jobs: it makes the base usable and makes the build look finished.
Use three layers:
1. Work lighting near crafting stations.
2. Path lighting near stairs and doors.
3. Accent lighting around windows, arches, and decks.
Good exterior details:
| Detail | Best Placement |
|---|---|
| Hanging lamps | Gates, decks, upper walls |
| Planters | Entry stairs, corners |
| Chimneys | Roofline |
| Railings | Decks and balconies |
| Chains | Tall facades |
| Shrubs | Stone-heavy areas |
Do not decorate before the shell is done. Finish the structure first. Then add detail.
↖ Best ARK Base Build Order
Use this order to avoid rework:
| Step | Task |
|---|---|
| 1 | Scout flat land |
| 2 | Clear the area |
| 3 | Add perimeter pillars/gates |
| 4 | Build temporary crafting platform |
| 5 | Place 10x14 foundations |
| 6 | Build front facade |
| 7 | Mirror the back facade |
| 8 | Connect side walls |
| 9 | Add roof and floors |
| 10 | Add windows and skins |
| 11 | Build decks and stairs |
| 12 | Place crafting stations |
| 13 | Add lighting |
| 14 | Decorate interior |
| 15 | Test player and dino movement |
This order saves hours. Decoration comes late because snapping problems always show up first.
↖ Common ARK Base Mistakes
| Mistake | Result | Fix |
|---|---|---|
| Building too close to cliffs | No room for decks or dinos | Leave extra space |
| Weak spawn control | Dinos appear inside | Add more structures |
| No movement lanes | Tames and players get stuck | Keep center open |
| Too much stone | Base looks flat | Add wood, glass, plants |
| Crooked main gate | Whole facade feels off | Replace it early |
| Decorating too soon | Rebuild destroys detail | Finish shell first |
| Poor lighting | Base feels dead at night | Add layered lighting |
The painful ones are easy to avoid: measure early, check alignment often, and do not overdecorate unfinished walls.
↖ FAQ
↖ What is the best size for a large ARK dinosaur base?
A 10x14 foundation layout is ideal for a large main base. It gives enough room for crafting, storage, multiple floors, and wide movement lanes without becoming unmanageable.
↖ How do you stop dinosaurs spawning inside your ARK base?
Use foundations, pillars, fence supports, and gates around the area. If dinos still spawn, place more structures inside the perimeter. Spawn suppression improves as the build fills in.
↖ Should the dino pen be inside the main base?
Usually, no. Keep large dinos outside in a dedicated yard. Use the main base for crafting, storage, beds, and utilities. Big creatures need room, and indoor dino traffic gets messy fast.
↖ Are greenhouse pieces worth using in ARK base builds?
Yes. Greenhouse walls are excellent for tall windows, upper floors, and decorative glass sections. They cost more resources but make large stone builds feel brighter and less bulky.
↖ What should go on the ground floor of a large ARK base?
Put heavy-use stations on the ground floor: industrial forge, smithy, fabricator, chemistry bench, vaults, and resource storage. Keep these close together to reduce running time.
↖ Summary
The best ARK dinosaur base is built in phases.
Start with a flat location. Secure the perimeter. Lay a 10x14 foundation. Build the facade before the details. Use pillars, greenhouse windows, decks, and railings to add depth. Keep the interior practical with clear crafting zones and open movement lanes.
A huge base does not need to be complicated. It needs to be planned. Build the shell first, fix snapping issues early, then decorate once the structure works. That is how you get a base that looks good, runs well, and survives daily ARK chaos.

Most Popular Posts
- ARK Survival Ascended Genesis 1 Best Loot and Hexagon Farm Guide
- ARK Survival Ascended Ship Guide: Best Ships, Sailing Controls, Cannons, Skills, Farming & PvP Uses
- ARK Survival Ascended Umbra Guide: Spawn Location, Taming Steps, Abilities, Skill Tree & Worth
- ARK Survival Ascended 2026 Update Guide: Lost Colony Fixes, Trait Upgrades, Creature Changes
- ARK: Survival Ascended Top Coordinates Guide: Best Genesis Base Locations
- ASA Best Boss Fighting Creatures: Ranked for Boss Arenas, Titans, and Mini Bosses
Popular Category Lists
- Grow a Garden / (286)
- ARC Raiders / (267)
- CoD: Black Ops 7 / (166)
- Monopoly Go / (147)
- MLB 26 / (146)
- Star Citizen / (124)
- Steal a Brainrot / (89)
- ARK Survival Ascended / (79)
- Sailor Piece / (68)
- Forza Horizon 6 / (65)
- Diablo IV / (61)
- Blox Fruits / (61)
- Adopt Me / (56)
- CoD: BLACK OPS 6 / (55)
- Grow a Garden 2 / (50)
- Path of Exile 2 / (48)
- Monster Hunter Wilds / (46)
- Windrose / (44)
- Path of Exile / (40)
- Bee Swarm Simulator / (36)