0
0Ashes of Creation Gold Farming With Crates, Commissions & Crafting
- Rive
- Share
- Ashes of Creation
- 12/16/25
- 4832
If you've been hanging around any Ashes of Creation community lately, you've probably heard the same advice on repeat: Just run crates, that's how everyone makes Gold. That's not wrong—but it's also not the full story, and for a lot of players it's barely even understandable. What are crates? Why do you need glint? Where do mules come in? And what are you supposed to do if PvP gank squads camp your route?
- 1. Core Money Systems: What You're Really Playing With
- 1.1 The Three Pillars of Gold Making
- 2. Crates: The Strongest Gold Engine (If You Respect the Risk)
- 2.1 Where Crates Start: Market Commodity Stations & Reputation
- 2.2 Money Crates vs Construction Crates (Don't Mix These Up)
- 2.3 Certificates, Rarity & Why Your Uncommon Junk Matters
- 2.4 Glint: The Hidden Fuel of the Crate Economy
- 2.5 Price Preview vs Reality: Dynamic Crate Values
- 2.6 Mules: Why a Day Strider Crate Mule Is Almost Mandatory
- 2.7 The Risk Side: Why You're a Walking Gold Pinata
- 3. Commissions & Glint: The Stable Backbone of Your Economy
- 3.1 Why Commissions Are So Good
- 3.2 Don't Open the Chests—Sell Them
- 3.3 Glint Commissions: Small Tasks, Big Value
- 4. Merch & Crafting: Turning Knowledge Into Profit
- 4.1 Experience Scrolls: Simple, High-Demand Consumables
- 4.2 Tailoring: Shirts With Real Stats, Real Demand
- 4.3 Cindertouch Jewelry: Regional Arbitrage 101
- 4.4 Weapon/Armor Materials, Rare Timber & Basalt Molds
- 5. Step-by-Step Gold Path: From Fresh Character to Regional Merchant
- 5.1 Early Game: First Gold, No Risk Required
- 5.2 Early–Mid Game: First Crates & Safe Routes
- 5.3 Mid Game: Crate Mule, Long-Haul Routes & Merchant Tricks
- FAQ
- Q1: Are crates mandatory if I want to be rich?
- Q2: How much glint should I keep for crates?
- Q3: What if my server's crate prices are low?
- Q4: Is it worth opening any caches or coffers myself?
- Q5: What's the safest gold method for a PvP-averse solo player?
- Final Takeaways: Build a System, Not Just a Farm Spot
↖ 1. Core Money Systems: What You're Really Playing With
Before we dive into do X to make Y gold, it helps to see the bigger picture. Ashes doesn't want you to just grind mobs and vendor trash; it wants friction, logistics and player-driven markets.
↖ 1.1 The Three Pillars of Gold Making
At a high level, almost everything you'll do for money falls into one (or several) of these pillars:
| Pillar | What It Is | Main Reward | Risk Level | Player Type |
|---|---|---|---|---|
| Crates & Logistics | Turning materials into crates, moving them far | High gold/HR + XP | Medium–High | Risk-tolerant, likes routes & planning |
| Commissions & Glint | Task scrolls (kill, gather, craft) + chest loot | Glint + XP + sellable loot | Low–Medium | Solo players, casual grinders |
| Merch & Crafting | Market arbitrage, shirts, molds, jewelry, scrolls | Variable, often large | Medium | Market-checkers, crafters, min-maxers |
Each pillar interacts with the others. For example:
- Commissions give you glint, which you can save to craft better crates.
- Crates give you gold, which lets you buy cheap materials and flip them via crafting.
- Crafting gives you gear and utility items that make crate runs and commissions faster and safer.
If you keep this triangle in mind, your choices start to feel a lot more deliberate.
↖ 2. Crates: The Strongest Gold Engine (If You Respect the Risk)
Crates are the backbone of early and mid-game wealth. The catch? The game pays you so well because you're literally walking around as a loot piñata.
↖ 2.1 Where Crates Start: Market Commodity Stations & Reputation
To even talk crates, you need to know what station is what.
- Look for the Market Commodity Station:
- Icon: little basket on the map and minimap.
- NPC next to it: Market Commodity Vendor.
This is where you:
1. Buy commodity certificates;
2. Craft gold-paying crates;
3. Preview destination prices.
Some certificates will be greyed out. That's not a bug: it means you lack settlement reputation.
- Check your settlement reputation:
- Open the Settlements tab (default key: N-type by default, but check your keybinds).
- There you can see reputation sources:
- Buy Orders
- Construction Projects
- Mayoral Commissions
If your town doesn't have a mayor yet, you'll mainly build reputation via Construction Projects. That leads to another type of crate.
↖ 2.2 Money Crates vs Construction Crates (Don't Mix These Up)
This is where a lot of players get confused. There are two conceptually different crate types:
| Type | Where Crafted | Main Reward | Used For |
|---|---|---|---|
| Market Commodity Crates | Market Commodity Station | Gold | Your actual income |
| Construction Crates | Construction-type stations | Reputation | Building out the settlement |
Construction crates are fantastic for accelerating a node's development and boosting your reputation, but they don't directly pay you gold.
To make sure you're about to build the right thing:
- Shift + Left-click the recipe at the station.
- Check whether the reward is gold or reputation.
If the reward line does not mention money, you're looking at the wrong crate for income.
↖ 2.3 Certificates, Rarity & Why Your Uncommon Junk Matters
Crates don't build themselves. You need:
1. Commodity Certificates
- Purchased from the Market Commodity Vendor.
- Come in different rarities (common, uncommon, rare, etc.).
- Higher rarity certificates → higher-value crates.
2. Materials
- Rocks, lumber, and other resources—especially uncommon and rare.
- That I don't know what to do with this rare ore problem? Crates love that.
What this means in practice:
- If your storage is full of uncommon ore / rare logs and your instinct is just vendor it cheap or waste it in random processing, pause.
- Those same materials can be turned into high rarity crates, which pay out far more once delivered.
- Crates themselves can be stored, so you can:
- Craft when you have time and materials;
- Stack crates in storage;
- Run them later when you feel like doing logistics or you have a protective group.
Crates are a storage tool and a money printer in one.
↖ 2.4 Glint: The Hidden Fuel of the Crate Economy
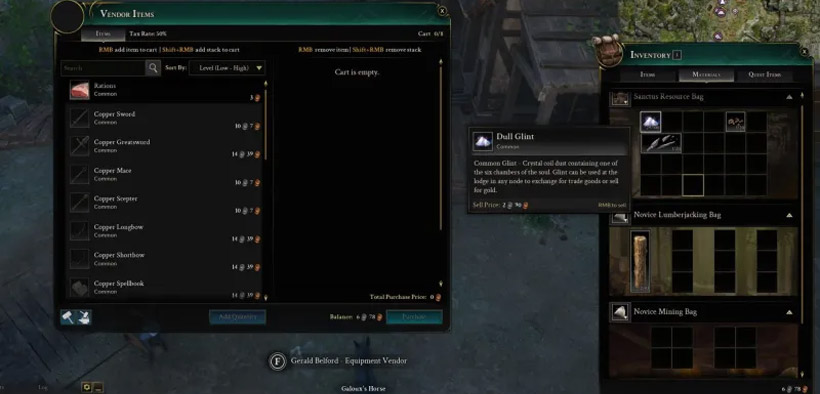
One of the easiest mistakes is thinking glint is just bonus vendor silver.
When you attempt to craft a crate and the game refuses to complete the craft even though materials are in place, that's your hint:
You don't pay silver to craft crates. You pay glint.
So if you:
- Vendor all your glint on sight,
- And then later decide you want to do serious crate runs,
…you'll be glint-starved and have to grind it again.
Rule of thumb:
- If you have any intention of running crates, do not auto-convert all glint to cash.
- Keep a working pool of glint just like you keep a pool of gold.
This is precisely why commissions (which give glint) synergize so well with crate gameplay—more on that later.
↖ 2.5 Price Preview vs Reality: Dynamic Crate Values
At the station, you can preview:
- If I deliver this crate from Jova → the Anvils, I'll get ~1–2 gold per crate.
This number is not guaranteed. Crate pricing is dynamic:
- If lots of players run the same route, prices drop.
- If supply dries up, prices climb.
Important nuance:
- Rarity bonus is independent of market fluctuation.
- Even if base prices shift, higher rarity crates always pay proportionally more.
So even when prices soften, rare crates still stay worth the trip.
↖ 2.6 Mules: Why a Day Strider Crate Mule Is Almost Mandatory
You can run crates on foot, but it feels like carrying a refrigerator uphill.
Crates add a movement speed penalty. Mules are the answer, especially the Day Strider Crate Mule:
- Benefits of a Crate Mule:
- Movement speed not affected by crate penalty.
- Can carry an extra crate (effectively doubling throughput).
- So you move at 100% speed while carrying 2 crates at once.
This directly multiplies your gold/hour, especially on long-distance routes.
Where to Get the Trainable Day Strider Crate Mule (and Avoid Scams)
You don't buy these from random players first—you buy the trainable version from:
- Herbalism Vendor
- Scroll to the bottom of the vendor list.
- Look for the trainable mule icon (specific icon, not just any mount portrait).
- Cost: roughly 50 silver base, but taxes can push it higher.
Common scam patterns you should avoid:
- Someone lists a Mule-like item for 1 gold saying cheap crate mule!
- Or they list it for 75s / 30s pretending that's a bargain.
If you can craft the mule via Animal Husbandry (Novice tier) and the base trainable mule costs you around 50 copper in Aven's End (plus tax), paying 1 gold is just volunteering for a scam.
Quick profit angle:
- In towns without an Herbalism station, local players can't easily buy trainable mules.
- You can:
- Buy them cheap in Aven's End or other starter areas;
- Transport them to a target town;
- List them for 2–4 silver each.
- You're selling convenience: many players will pay a few extra silver to avoid traveling all the way back.
When node taxes drop (e.g., 10% under a good mayor), this becomes very healthy margin with minimal effort.
↖ 2.7 The Risk Side: Why You're a Walking Gold Pinata
Crate profits are not free.
- When you're out in the middle of nowhere on a crate mule, every hostile player knows exactly what you are: a walking pile of raw gold.
- The farther the route and the better the crate, the juicier you are.
That's deliberate design:
The devs want friction, PvP, and conflict. Crates are a carrot to push players into risk.
This means you have a genuine choice:
- Long-haul high-risk route
- High gold per trip (especially with rares / heroic crates).
- Serious danger if PvP groups or mercenary guilds patrol your path.
- Short safer hops
- Lower payout per crate.
- Much smaller chance of being jumped and losing everything.
Being in a guild changes everything here:
- You can run escorted caravans or group crate runs.
- Guilds may coordinate safe windows or routes.
- Even just having friends nearby makes gankers think twice.
If you just want my first few gold quickly, you can:
- Craft some basic crates;
- Run short routes between relatively safe or low-population areas;
- Build up a buffer before you attempt the big money runs.
↖ 3. Commissions & Glint: The Stable Backbone of Your Economy
Crates may be glamorous, but commissions are often what keeps your glint and XP flowing.
↖ 3.1 Why Commissions Are So Good
Commissions are tasks like:
- Kill X mobs;
- Gather Y resources;
- Perform certain artisan actions.
They reward you with:
- Glint;
- Player XP (often a lot);
- Commissioner's Caches / Coffers (the gacha chests).
I like commissions because:
- They're fun to stack and min-max;
- They combine naturally with leveling and gathering;
- They feed directly into your crate and crafting economy via glint.
↖ 3.2 Don't Open the Chests—Sell Them
After opening a large sample size of these chests (think testing over 100 of them), the pattern is pretty consistent:
The expected value of opening them yourself is usually worse than selling them to other players.
That's especially true when:
- Rich players want glint fast (for crates or tax vouchers);
- They don't want to farm commissions;
- They are willing to gamble on RNG for glint and recipes.
Typical price patterns (these will vary per server, but the relationships matter):
| Item Type | Typical Price Range | Notes |
|---|---|---|
| Commissioner's Caches | ~3 silver each (sometimes more) | Easy to stack from casual play |
| Coffers | 8–15 silver each (5+ not uncommon) | Higher loot table, includes recipes etc. |
Example:
- If you casually stack 100 Commissioner's Caches while gathering and doing artisan stuff, and you sell them at 3 silver each, that's 3 gold in pure bonus money.
- That's often enough to:
- Pay your processing costs;
- Buy early tools or mule;
- Seed your first serious crate project.
↖ 3.3 Glint Commissions: Small Tasks, Big Value
The actual commission rewards are strong, even without the caches:
- Example: Kill 10 undead
- Reward: ~2 dim glint (you can vendor for ~2 silver).
- Plus a coffer that may contain more glint, say another 2 glint.
- Plus 4,500 XP, which can exceed 5,000 XP with an XP scroll.
So for 10 quick kills, you get:
- Several silver worth of glint;
- A chest you can sell or gamble;
- A big chunk of experience.
Now imagine stacking commissions:
- In a wolf-hunting route, you can:
- Pick up six different wolf commissions;
- Kill ~20 wolves;
- Complete all six commissions at once.
This is how you turn just grinding into optimized money + XP + glint per hour.
↖ 4. Merch & Crafting: Turning Knowledge Into Profit
If crates are your engine and commissions your fuel, merch/crafting is your leverage. This is where understanding the market starts to dramatically multiply your returns.
↖ 4.1 Experience Scrolls: Simple, High-Demand Consumables
XP scrolls are one of the easiest value-add crafts:
Basic chain:
1. Rubies →
2. Ruby Dust →
3. Red Ink →
4. Experience Scrolls
Two key takeaways:
- Use higher-tier rubies when possible; they turn into more valuable scrolls.
- Focus on Adventuring & Gathering scrolls.
Why not crafting/processing scrolls?
- Commission scrolls are simply better for processing:
- The scroll triggers on each process button click, not on time spent.
- A 5-minute window is more than enough to start all your processing jobs at once.
- A crafted processing XP scroll can't compete with that efficiency.
By contrast:
- Adventuring & Gathering activities are more continuous;
- You're out in the world for much longer;
- Players are willing to pay good money to stack XP gain over long sessions.
↖ 4.2 Tailoring: Shirts With Real Stats, Real Demand
Some of the most underrated money-makers are artisan shirts. Tailoring shines here.
You need to:
1. Visit a Tailor Vendor.
2. Buy shirt recipes (e.g., lumberjack, miner, etc.).
3. Craft shirts using Linen Thread:
- 1 Flax → 1 Thread.
- Higher rarity flax → higher rarity shirts.
What makes them valuable:
- Shirts provide real, noticeable stats, e.g.:
- Lumberjack shirt → Physical Power
- Players like to wear them for combat, not just gathering.
- High-rarity versions outperform vendor-bought shirts.
So, if you:
- Are already gathering flax,
- Have some rare flax sitting in storage,
…turning that into rare or heroic shirts can be very profitable.
Example play:
- Craft a rare miner shirt;
- List it for ~50 silver to test the market;
- Even common/uncommon shirts can sell for 30+ silver on some servers, given how cheap the linen thread is.
You're selling two things at once:
- Stats (people feel stronger)
- And an unlock (some shirts are required for optimal crafting & processing setups).
↖ 4.3 Cindertouch Jewelry: Regional Arbitrage 101
Now the fun part: cross-region merching.
In the Anvils, you can craft Cindertouch Jewelry:
- Basic recipes:
- 1 Tendonite
- 2 Rough Rime
- Result: rings/earrings with strong power stats.
This jewelry often sells for high prices in the Riverlands, because:
- Their stats are excellent for early/mid game;
- The resource cost is low (especially if you buy smart);
- Many Riverlands players don't want to grind the Anvils themselves.
A simple but powerful loop:
1. Make a crate in the Riverlands.
2. Run it up to the Anvils (profit #1).
3. In the Anvils, craft a crate there to go back down.
4. While returning to the Riverlands, fill your inventory with Cindertouch jewelry.
5. Sell the jewelry at premium prices.
Additional optimization:
- You can often buy Tendonite cheaply in the Riverlands, because:
- It drops as a secondary from sand processing;
- Many players there see it as trash and dump it.
- Bring that Tendonite up with you;
- Get Rough Rime locally or from the market;
- Convert everything into jewelry;
- Bring jewelry back down and sell.
On some servers, players get ~20 silver per jewelry piece for a cost that's almost negligible in raw resources. Your margin is primarily knowledge + logistics.
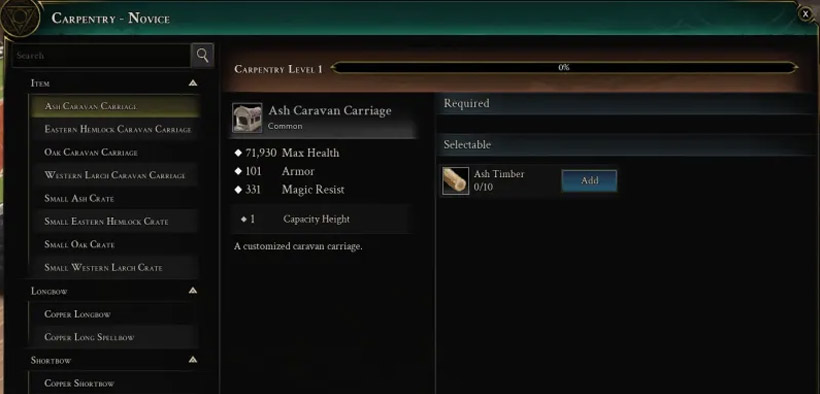
↖ 4.4 Weapon/Armor Materials, Rare Timber & Basalt Molds
Weapon and armor smiths are hungry for specific processed materials. If you understand their needs, you can:
- Convert cheap raw resources into high-demand intermediate goods;
- Sell molds and timbers at a premium.
For example:
- Weaponsmithing heavily uses ash timber and other rare woods.
- If you gather rare ash wood, processing it into timber often beats selling raw logs.
- Armorsmithing uses Basalt Armor Molds, which:
- Take any wood (but you might prioritize woods like oak);
- Combine that wood with Basalt.
A profitable pattern:
1. Buy a heroic Basalt for ~3 silver.
2. Buy a heroic wood (oak, hemlock, etc.) for ~3–4 silver.
3. Process into a Heroic Basalt Armor Mold.
4. List the mold for something like 15+ silver if there's no competition.
You're:
- Profiting several silver per craft;
- Earning processing XP and player XP;
- Providing something armorsmiths cannot skip if they want full heroic sets.
When there are no comparable items listed on the market:
You set the reference price.
Don't be afraid to experiment high and adjust later.
↖ 5. Step-by-Step Gold Path: From Fresh Character to Regional Merchant
To tie everything together, let's build a practical path.
↖ 5.1 Early Game: First Gold, No Risk Required
Goal: Hit your first few gold without stepping into dangerous crate routes.
1. Do Commissions While Leveling
- Always check for kill & gather commissions around where you plan to farm.
- Stack them (e.g., multiple wolf commissions) to finish several at once.
- Save all glint; don't auto-vendor it.
2. Sell Your Commissioner's Caches & Coffers
- Don't open them; list them on the market.
- Rough target: 3 silver per cache, higher for coffers depending on server.
3. Gather Flax & Basic Resources
- Start stockpiling flax, ore, and wood in your storage.
- Don't panic-sell uncommon/rare materials for vendor prices.
At this stage, you should be able to afford:
- A basic mule or be close to a crate mule;
- Decent beginner gear;
- A buffer to start experimenting with crates.
↖ 5.2 Early–Mid Game: First Crates & Safe Routes
Goal: Learn crates without feeding every gank squad on the map.
1. Find the Market Commodity Station in Your Region
- Learn where the basket icon is; memorize the route from your main town.
2. Craft Low–Mid Tier Crates
- Use your accumulated uncommon/rare materials.
- Pay crafting costs using saved glint.
3. Run Short Routes
- Pick destinations that:
- Are close;
- Have enough demand to pay at least decent silver per crate;
- Are not infamous PvP hotspots.
4. Store Excess Crates
- If you're feeling unsafe, you can stockpile crates and wait for a calmer window or guild protection.
You're now learning the logistics loop without risking everything you own.
↖ 5.3 Mid Game: Crate Mule, Long-Haul Routes & Merchant Tricks
Goal: Turn your character into a mobile profit engine.
1. Buy (or craft) a Trainable Day Strider Crate Mule
- Get it from an Herbalism vendor in a starter area (e.g., Aven's End).
- Train it via Animal Husbandry at novice.
- Remember: you want the trainable icon—not an overpriced player resell.
2. Start Running Longer Routes
- Riverlands ↔ Anvils is a classic loop; adapt based on your server.
- Use the crate mule to carry 2 crates at 100% speed.
3. Add a Merch Layer to Each Trip
- On the way up: bring materials that are cheap where you are, expensive where you're going (e.g., Tendonite).
- On the way down: bring finished goods like Cindertouch jewelry, rare shirts, or armor molds.
4. Experiment With Niche Crafts
- Try lumberjack/miner shirts, XP scrolls, and basalt armor molds.
- If the market has no listings—perfect. You define the price.
At this point, your sessions look less like grind for 3 hours and more like:
- Run a profitable route;
- Flip region-based crafts;
- Do commissions in downtime;
- Constantly grow glint, gold and XP together.
↖ FAQ
↖ Q1: Are crates mandatory if I want to be rich?
Not strictly, but they're the most scalable and repeatable source of big gold in Early Access. You can make good money with commissions and merching alone, but crates are what turn you from comfortable into capital-rich.
↖ Q2: How much glint should I keep for crates?
Treat glint like fuel. If you plan to run crates regularly, aim to always have enough glint to craft several full batches of crates for your next route. Don't vendor down to zero unless you're taking a break from crate gameplay.
↖ Q3: What if my server's crate prices are low?
That just means a lot of people are running the exact same routes. Try to:
- Switch to different destinations;
- Prioritize high rarity crates (which still scale well);
- Lean more on commissions and merching until prices rebound.
↖ Q4: Is it worth opening any caches or coffers myself?
In most tested scenarios, selling is better than opening, especially early when gold is tight. The only time it might be worth opening is if you're very rich, you specifically want glint or recipes, and you're okay gambling on RNG.
↖ Q5: What's the safest gold method for a PvP-averse solo player?
Focus on:
- Commissions (especially stacked kill/gather ones);
- Selling caches/coffers;
- Crafting XP scrolls and utility shirts;
- Occasional short-distance crates in relatively quiet areas.
You'll earn less per hour than an optimized crate-runner in dangerous zones, but your death count and stress will also be lower.
↖ Final Takeaways: Build a System, Not Just a Farm Spot
Ashes of Creation doesn't reward you for doing one thing forever. It rewards you for understanding the system and chaining mechanics together:
- Commissions feed you glint and XP.
- Glint fuels your crates.
- Crates turn stored materials (and risk) into big gold.
- Merching & crafting convert regional price differences and rare resources into high-value gear and consumables.
If you treat every play session as a chance to connect those dots—stack commissions before you hunt, craft shirts and scrolls when your inventory fills, plan crate routes with a mule and a shopping list—you'll feel your income curve bending upward very quickly.
And if you stumble onto a secret niche that prints silly amounts of gold? Maybe keep that one quiet for a bit so you don't crash your own market.
Most Popular Posts
- Ashes of Creation Leveling Guide (1–25): Fast Core Route + Best Alternate Spots
- Ashes of Creation Gold Farming With Crates, Commissions & Crafting
- Ashes of Creation Phase 2 Mage Gearing Best in Slot, Stat Priorities, and Farming Strategegies
- Ashes of Creation Level 10–19 Gearing Guide: Cheap Adept Set Damage and Healing Fast
- Ashes of Creation Gold Farming Guides: Freshwater Sport Fishing and Selling Routes
- Ashes of Creation Gold Farming Guides: Pivot + Commodity Crates
Popular Category Lists
- Grow a Garden / (286)
- ARC Raiders / (266)
- CoD: Black Ops 7 / (166)
- Monopoly Go / (146)
- MLB 26 / (145)
- Star Citizen / (116)
- Steal a Brainrot / (89)
- ARK Survival Ascended / (74)
- Sailor Piece / (68)
- Forza Horizon 6 / (63)
- Diablo IV / (61)
- Blox Fruits / (60)
- CoD: BLACK OPS 6 / (55)
- Adopt Me / (53)
- Path of Exile 2 / (48)
- Monster Hunter Wilds / (46)
- Windrose / (44)
- Grow a Garden 2 / (42)
- Path of Exile / (40)
- Bee Swarm Simulator / (36)