0
0Ashes of Creation Leveling Guide (1–25): Fast Core Route + Best Alternate Spots
- Rive
- Share
- Ashes of Creation
- 12/31/25
- 6292
Leveling fast in Ashes of Creation isn't about finding one magical camp—it's about keeping kill uptime high while minimizing travel, death runs, and tag wars. The best spot on paper becomes mediocre the moment it's overcrowded, and that's why I always run with a main route and a set of alternates.
Below is a complete 1–25 path you can follow blindly, plus backup locations for the most contested ranges (especially 7–18). I'll also tell you why each step works and the exact trigger that tells me it's time to move.
- How I Choose Spots (So You Can Self-Correct)
- Master Route (1–25) + Alternates
- Step-by-Step Execution (What I Actually Do)
- Levels 1–5/6: LionHold Start (Samia's Hope) — Quest Only
- Levels 5–9: Church of the Seven Stars — Vertical Progression
- Levels 9–12: Bears — Low Downtime, Smooth Tempo
- Levels 11–13 (Optional): Daragal Estates — High Risk, High Payoff (Group)
- Levels 12–14: Highwayman Hills — XP + Gear That Matters
- Levels 14–16: Oakbane — Quick Bridge Levels
- Levels 16–18: PvP Island — Elite XP + Ashen Set Progress
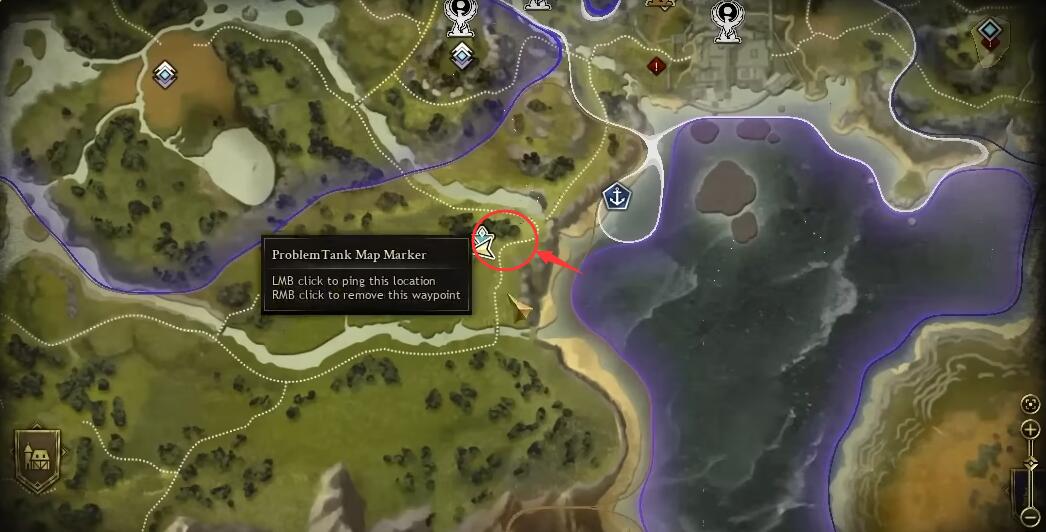
- Levels 13–18 (Alternate Lane): Seahook West Beach Crabs — Stable Group Grinding
- Levels 18–21: Goblin Area — Level 20 Gear Starts Dropping
- Levels 18–22+ (Alternate): Desert Shardlings (Sunhaven and Nearby)
- Levels 18–25 (Alternate): Nash Farming — Dreadmine + Donut River Backup Lane
- Levels 21–25: Wildport ↔ Haka Beach Nash — The Finish Line
- Levels 20–25 (Power Option): Cororin Island High-Level Crabs
- FAQ
- 1) What's the fastest clean 1–25 route if everything is uncontested?
- 2) What do I do when Church is packed?
- 3) I hate PvP. Do I lose a lot by skipping the PvP island?
- 4) Should I farm goblin bosses for level 20 gear?
- 5) How do I know when to rotate to an alternate spot?
- Summary
↖ How I Choose Spots (So You Can Self-Correct)
I rate every camp using four practical metrics:
- XP/hour (effective): not theoretical. If you're waiting on spawns, XP/hour is lying to you.
- Uptime: time spent actively pulling/killing vs. drinking, running, banking, repairing.
- Death cost: wipes erase high XP spots fast.
- Contest cost: if you're losing tags, you're donating time to strangers.
If two of these break at once (most often: uptime + contest cost), I rotate immediately. That one habit is a huge speed gain.
↖ Master Route (1–25) + Alternates
This table is your full navigation layer. After it, I'll break down the tricky parts (PvP island, crab loops, Nash farming, and when to bail).
| Level | Primary Route (Fastest) | Best Alternates (If Contested / Difficult) | Best With | Why This Works | Leave When… |
|---|---|---|---|---|---|
| 1–5/6 | Lion Hold (lower map) → Seama's Hope quests | N/A | Solo | Quests beat early grinding; mount unlock accelerates everything | You hit 5–6 and mount is unlocked |
| 5–9 | Church of the Seven Stars (ghosts; progress upward) | Kora Lock, Gemspring | Duo–Group (solo ok) | Dense pulls + short reset; grouping multiplies uptime | You can't keep pulls rolling due to crowding |
| 9–12 | Bears near Lion Hold | Back to Church until 10–11; or Kora Lock/Gemspring | Group preferred | Close to town = low downtime for repairs/banking | Solo feels unsafe or slow |
| 11–13 (bridge option) | (Optional) Daragal Estates | Stay bears/church longer if underpowered | Group | Higher risk but faster pace if coordinated | Adds/patrols cause repeated deaths |
| 12–14 | Highwayman Hills (XP + gear) | Daragal Estates (group) | Group or careful solo | Gear upgrades increase future kill speed (compounding efficiency) | You've got your weapon upgrade or hit 14 |
| 14–16 | Oakbane | Highwayman Hills a bit longer (if solo/gear chase) | Group | Quick levels, easy LFG momentum | Diminishing returns or you reach 16 |
| 16–18 | PvP Island (green ghost elites + Ashen set progress) | Safer grind: Seahook West Beach crabs (if PvP is chaos) | Group strongly | Great XP, reduced death penalty, strong gear path | You're repeatedly hunted or wipes spike |
| 13–18 (alt lane) | N/A | Seahook West Beach crabs | Group | Stable AOE grind, clean terrain, easy loops | Two+ groups contest same strip |
| 18–21 | Goblin area (level 20 gear drops) | Desert shardlings (Sunhaven area) | Group helps | Gear you'll keep + strong XP; normal mobs drop loot too | Camp is overcrowded and tags are unreliable |
| 18–22+ (alt lane) | N/A | Desert shardlings (Sunhaven + nearby pockets) | Coordinated group | Spread-out lanes reduce contest; scalable pulls | Accidental elite pulls become frequent |
| 18–25 | N/A | Apothecarium Dreadmine (Nash) + Southwest donut river Nash lane | 1–2 groups | Sustained density; supports multiple parties | Another group parks your rotation |
| 21–25 | Wildport ↔ Haka beach (level 30 Nash) | Dreadmine / donut river Nash; Cororin Island crabs (if strong) | Group | High-level mobs + group pulls = fast finish | You can't sustain 2–3 mob pulls safely |
| 20–25 (power option) | N/A | Cororin Island (north of Seahook) high-level crabs | Strong tank + heals | Huge XP per kill if your team is disciplined | Wipes or healer OOM becomes common |
↖ Step-by-Step Execution (What I Actually Do)
↖ Levels 1–5/6: LionHold Start (Samia's Hope) — Quest Only
I don't grind at all here.
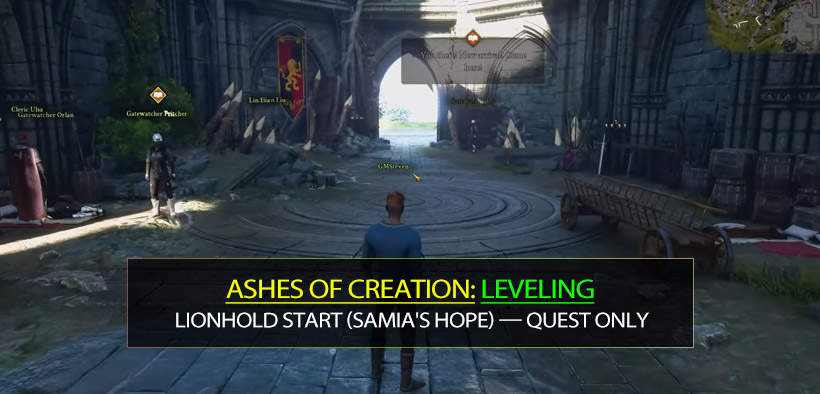
Because early kits are incomplete and mobs die slower, grinding feels productive while quietly wasting time. Quests also push you toward key unlocks (including your first mount), and that means less travel friction for the next 20 levels.
If you catch yourself farming just one level, then stop and follow the quest chain. It's the faster play.
↖ Levels 5–9: Church of the Seven Stars — Vertical Progression
This is the first real grind checkpoint.
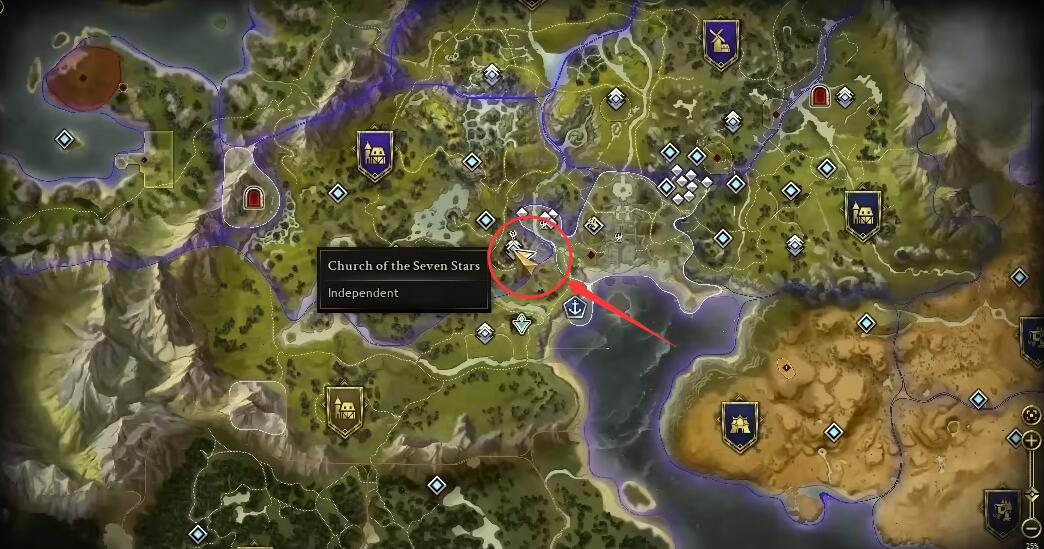
How I run it
1. Start with safer ghosts (solo: one at a time).
2. At level 7, move upstairs.
3. Continue up to the roof; grind until 9.
Grouping is usually faster here because kill time drops and your downtime shrinks.
If it's overcrowded (common)
If you're losing tags or waiting on respawns, the camp's effective XP/hour collapses.
If you can't maintain a continuous pull cycle for ~2–3 minutes, then switch to Kora Lock or Gemspring.
Not because they're better, but because low contest = more uptime.
↖ Levels 9–12: Bears — Low Downtime, Smooth Tempo
Bears are strong for one underrated reason: proximity to Lion Hold. Repairs, banking, and resets are quick, which keeps your session hot.
If bears are too hard solo, then stay Church until 10–11 and return.
That tiny power bump often turns dangerous into steady.
↖ Levels 11–13 (Optional): Daragal Estates — High Risk, High Payoff (Group)
Daragal Estates is my accelerator when I have a coordinated group.
Because the mobs are more dangerous, sloppy pulling gets punished. That sounds bad, but it actually forces discipline—and disciplined pulls increase throughput.
If patrols/adds keep collapsing your pulls, then your route is too wide. Tighten the loop and hug one side.
If deaths remain frequent, abandon it; repeated wipes erase the advantage.
↖ Levels 12–14: Highwayman Hills — XP + Gear That Matters
This segment is where your route starts compounding.
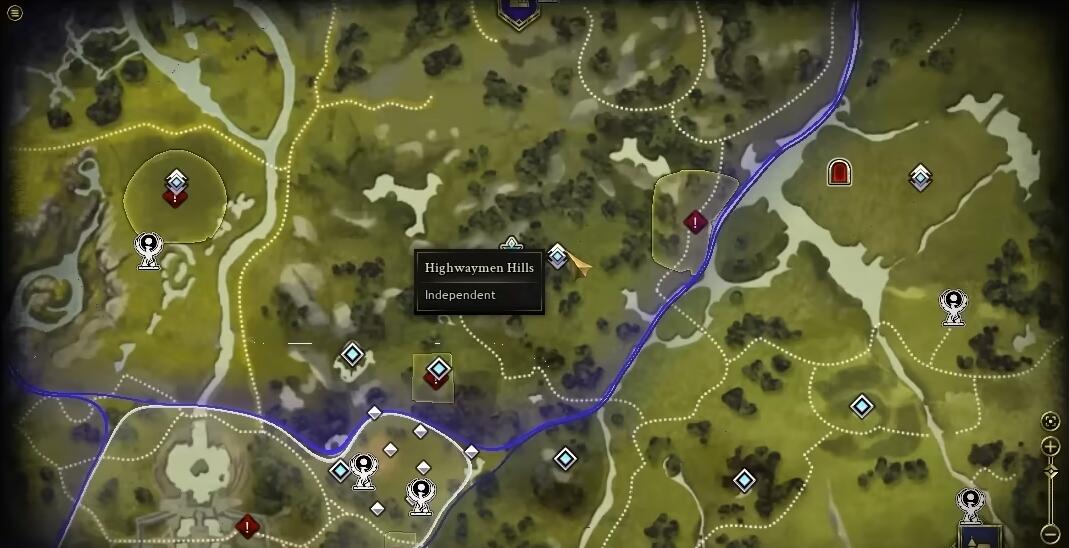
You're not just gaining XP; you're upgrading weapons/gear, which increases kill speed and reduces downtime later. That means the true payoff shows up around 16–21.
Loot etiquette isn't just social—it's efficiency:
If groups implode because of greedy rolls, your XP/hour dies. Need only what you'll equip.
↖ Levels 14–16: Oakbane — Quick Bridge Levels
Oakbane is usually active, so it's an easy LFG win.
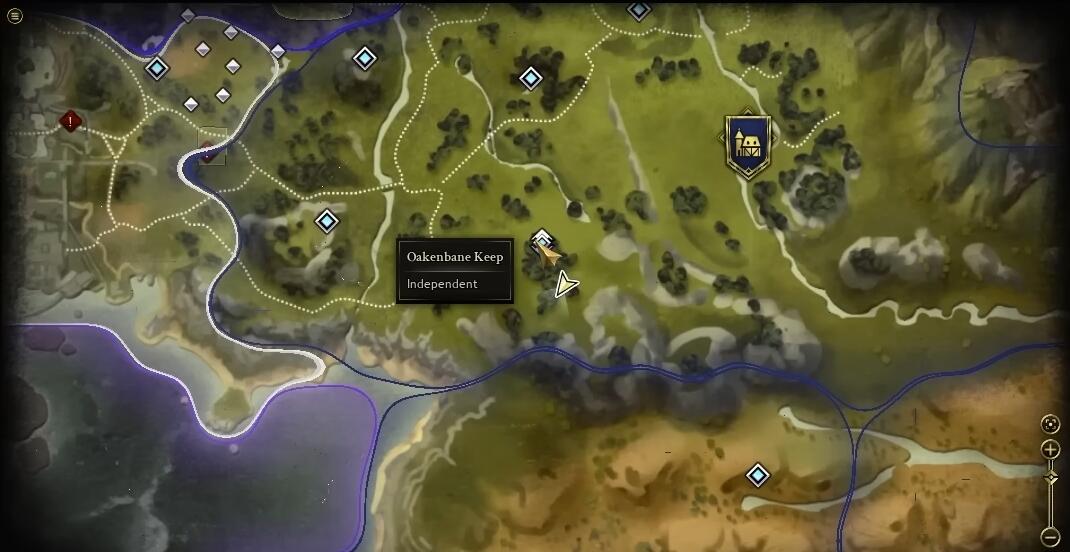
This is not a camp forever zone. I treat it like a bridge to the next power spike.
If you hit 16 and you're not actively chasing a specific drop, then move. Momentum beats gambling.
↖ Levels 16–18: PvP Island — Elite XP + Ashen Set Progress
This is a top-tier segment if you respect the rules.
Why it works
- You're auto-flagged as a combatant (PvP risk).
- Death penalty is reduced (forgiving compared to normal zones).
- Green ghost elites give strong XP and help you work toward the blue Ashen set.
How I farm it without feeding the island
- Pull elites one at a time. Big pulls aren't required for fast XP.
- Unlock Shorefoot for closer respawns.
- Watch your status carefully:
Do not enter Shorefoot while you are still a combatant—guards will one-shot you.
If your combatant status is active, wait it out before walking in.
When I bail
- If you're repeatedly hunted and can't maintain rhythm, leave.
- Your best safe pivot is Seahook West Beach crabs.
↖ Levels 13–18 (Alternate Lane): Seahook West Beach Crabs — Stable Group Grinding
This is the it just works camp.
It's dense, the terrain is clean, and AOE value is high. With a good group, you can keep pulls rolling with minimal drama.
Simple pull pattern
1. Tank/puller tags a pack and walks a wide arc along the shoreline.
2. DPS waits for stacking, then unloads.
3. Healer saves cooldowns for overlapping packs.
If two groups are already running the same strip and you can't chain pulls, rotate out. Contest pressure kills crab efficiency quickly.
↖ Levels 18–21: Goblin Area — Level 20 Gear Starts Dropping
From 18 onward, the route is about building a kit that lasts.
Normal mobs can drop the gear; bosses are often a time trap.
If you're spending more time claiming boss spawns than killing normal mobs, then you're leveling slower.
Group up if it's crowded—tags matter.
↖ Levels 18–22+ (Alternate): Desert Shardlings (Sunhaven and Nearby)
Shardlings are strong because you can spread out.
A single famous hotspot becomes a bottleneck. A wider shardling area gives you multiple lanes, which means more uptime and fewer conflicts.
If you keep accidentally pulling non-target mobs/elites, then your pathing is too aggressive. Tighten pulls and keep the rhythm.
↖ Levels 18–25 (Alternate): Nash Farming — Dreadmine + Donut River Backup Lane
These two Nash options solve a real problem: contest pressure.
- Apothecarium Dreadmine: strong density, often contested.
- Southwest donut river pool: supports up to two groups, less collision.
If another group parks your loop, don't half-pull their rotation. Move to the donut lane and keep your XP stable.
↖ Levels 21–25: Wildport ↔ Haka Beach Nash — The Finish Line
This is my default final stretch.
These Nash mobs are high level, which can translate into excellent XP—if your group can safely do 2–3 mob pulls.
Key efficiency move
Unlock the nearby harbor so a death doesn't turn into a five-minute walk of shame.
Solo is possible by kiting hunters, but grouping is usually faster because it reduces recovery time and increases pull size safely.
↖ Levels 20–25 (Power Option): Cororin Island High-Level Crabs
This is the numbers go up fast choice, but it's not forgiving.
It shines when you have:
- a tank who can kite in a circle while holding threat,
- strong, consistent healing,
- DPS that doesn't panic-split targets.
If wipes happen more than about once per 15 minutes, it's no longer efficient.
Drop back to shardlings/Nash until your group stabilizes.
↖ FAQ
↖ 1) What's the fastest clean 1–25 route if everything is uncontested?
Lion Hold quests → Church → Bears → Highwayman Hills → Oakbane → PvP Island → Goblins → Wildport–Haka Nash beach.
↖ 2) What do I do when Church is packed?
Go Kora Lock or Gemspring. If you're already near 9, pivot to bears early.
↖ 3) I hate PvP. Do I lose a lot by skipping the PvP island?
You lose a strong XP+gear spike, but you can replace it with Seahook West Beach crabs or a safer mid-teen grind. The key is maintaining uptime; stress kills speed.
↖ 4) Should I farm goblin bosses for level 20 gear?
Usually no. Normal mobs drop gear too, and boss competition often destroys efficiency.
↖ 5) How do I know when to rotate to an alternate spot?
If you can't keep continuous pulls and you're spending 25–30% of your time waiting, losing tags, or recovering, rotate. That's the moment the math flips.
↖ Summary
This guide is built like a two-lane highway: the fastest primary route gets you to 25 quickly when camps are reasonable, and the alternate spots keep your XP/hour stable when the server is busy. Church and mid-teens are where most runs slow down, so having Kora Lock/Gemspring, Daragal Estates, and Seahook crabs ready is what keeps you moving.
When you treat leveling as an uptime problem—manage crowding, lock in respawn anchors, avoid wipe loops—you stop hoping a spot works and start making the route work.
Most Popular Posts
- Ashes of Creation Leveling Guide (1–25): Fast Core Route + Best Alternate Spots
- Ashes of Creation Gold Farming With Crates, Commissions & Crafting
- Ashes of Creation Phase 2 Mage Gearing Best in Slot, Stat Priorities, and Farming Strategegies
- Ashes of Creation Level 10–19 Gearing Guide: Cheap Adept Set Damage and Healing Fast
- Ashes of Creation Gold Farming Guides: Freshwater Sport Fishing and Selling Routes
- Ashes of Creation Gold Farming Guides: Pivot + Commodity Crates
Popular Category Lists
- Grow a Garden / (285)
- ARC Raiders / (260)
- CoD: Black Ops 7 / (166)
- Monopoly Go / (146)
- MLB 26 / (142)
- Star Citizen / (109)
- Steal a Brainrot / (89)
- Sailor Piece / (68)
- ARK Survival Ascended / (64)
- Forza Horizon 6 / (59)
- Diablo IV / (59)
- Blox Fruits / (59)
- CoD: BLACK OPS 6 / (55)
- Adopt Me / (51)
- Path of Exile 2 / (48)
- Monster Hunter Wilds / (46)
- Windrose / (44)
- Path of Exile / (40)
- Grow a Garden 2 / (37)
- Bee Swarm Simulator / (36)