0
0Battlefield 6 SGX Best Weapons Builds: Meta Loadouts, Early Unlock Alternatives
- Zane
- Share
- Battlefield 6
- 10/16/25
- 2014
Want your SMG to feel like a laser from the first match? The SGX is a top-tier close-range bully that also scales into mid-range with the right parts. You get it right away in the SMG category, it's snappy, mobile, and comes with tameable recoil out of the box. This guide gives you two optimized builds—one meta and one alternative—plus early-game placeholders while you're still Weapons leveling. Why does that matter? Because your earliest hours set the tone: dial in a stable kit now, and you'll snowball attachments and confidence faster.
- SGX Meta Build
- Early-Game Leveling Alternatives (no full unlocks yet)
- Why it works while leveling
- Strong Alternative Build
- Attachment logic, simplified
- Practical drills to level up faster
- Map/mode adaptation cues
- FAQ
- Conclusion
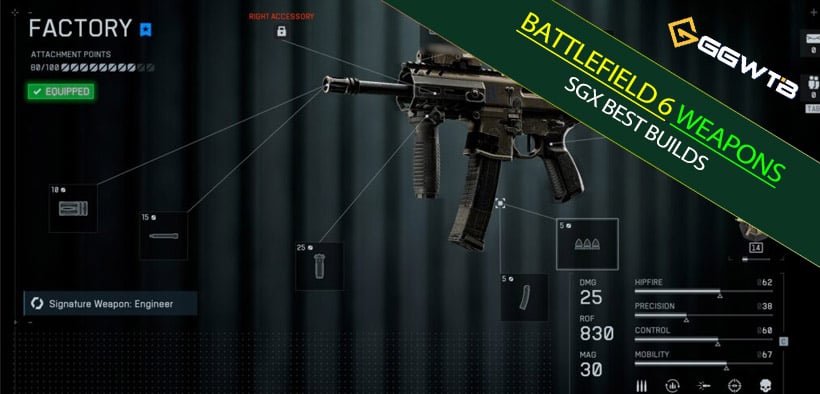
↖ SGX Meta Build
| Part | Selection | Purpose / Effect | When to Change |
|---|---|---|---|
| Optic | OSA-7 1.00x | Clear 1x sight for fast target acquisition; minimal visual recoil | If you need more precision at 25–35 m, try a 1.5x; stay low zoom for CQB |
| Muzzle | Compensated Muzzle Brake | Balances vertical and horizontal recoil; slows bloom growth in bursts | Switch to Double-Port for tighter horizontal control in tight-strafe fights |
| Barrel | 8" Extended | Higher bullet velocity and stability; better mid-range hit consistency | Use 4.5" Compact for faster handling on pure close-quarters maps |
| Underbarrel | Short, Knurled | Improves ADS stability and strafe tracking; smoother 6–10 round bursts | Swap to Vertical grip if you struggle with vertical climb control |
| Magazine | 36-Round Mag | Enough bullets to down 2 targets with controlled bursts; fewer reloads | Go 30-round for faster handling if you prioritize speed over sustain |
| Ammo | VMG | Best raw TTK profile; reliable damage through early bursts | Use Frangible early-game for extra flinch/finishing until VMG unlocked |
Why it slaps
- Purpose: dominates in close-quarter TTK while remaining trackable to mid-range.
- Mechanics: the Compensated Brake plus knurled foregrip sharply reduces horizontal sway and bloom growth, keeping your sight glued on target during 12–15 round bursts. The 8" Extended bumps bullet velocity, tightening effective lead and making 25–35 m fights feel hitscan-ish compared to stock.
you can commit to longer bursts without your spread exploding, and your first 10 bullets land where they should—crucial when trading with carbines at 20–30 m.
How to run it
- Distance bands: 0–20 m, full auto with slight pull-down; 20–35 m, 6–10 round bursts; 35–45 m, feathered bursts or pre-aim corner holds.
- Aim routine: pre-aim chest, let recoil walk into headshots. If you over-climb, lower ADS sens 5–10%.
- Movement: abuse AD-strafe on the first 6 bullets, then settle. If you notice bloom taking over, micro-pause for 120–150 ms and resume.
When to tweak
- If you're dying mid-reload, consider a fast-reload mag variant if available on your progression path.
- If you're mostly playing tight interior maps, you can swap to a shorter barrel to lean harder into sprint-to-fire times, but you'll sacrifice mid-range forgiveness.
↖ Early-Game Leveling Alternatives (no full unlocks yet)
| Part | Selection | Purpose / Effect | When to Change |
|---|---|---|---|
| Optic | OSA-7 1.00x | Clean 1x for quick target acquisition; low visual clutter | Move to 1.5x only if you consistently fight at 25–35 m |
| Muzzle | Single-Port Brake | Simplifies vertical recoil control; beginner-friendly pattern | Upgrade to Compensated/Double-Port once you want stronger overall control |
| Barrel | 6" Standard | Neutral handling; stable baseline while leveling | Switch to 8" Extended for better velocity once unlocked |
| Top Accessory | 5MW Red | Boosts hip-fire confidence and initial shot steadiness | Swap to higher-power laser if you focus on pure CQC |
| Underbarrel | Vertical, Alloy | Reduces vertical climb; steadier 6–10 round bursts | Try Short/Knurled later for better ADS strafe control |
| Magazine | 36-Round Mag | Comfortable sustain for two targets; fewer reloads mid-fight | Downgrade to 30-round only if you need faster handling |
| Ammo | Frangible | Adds flinch and chip damage; helpful before meta ammo unlocks | Switch to VMG for best TTK once available |
↖ Why it works while leveling
- Single-Port Brake offers a clean vertical correction pattern—easier for new players to learn.
- 5MW Red plus Vertical Alloy combo stabilizes initial muzzle climb and boosts hip-fire for emergency peeks.
- Frangible rounds increase flinch and chip damage, helping you finish trades when your raw TTK is slightly behind meta.
Play tips for this setup
- Hip-fire at sub-10 m with laser on; ADS beyond that. If you feel your ADS transition is late, pre-ADS before clearing the final 1–2 meters of a corner.
- Keep bursts short (8–10 rounds) until you unlock the extended barrel and compensated brake.
↖ Strong Alternative Build
| Part | Selection | Purpose / Effect | When to Change |
|---|---|---|---|
| Muzzle | Double-Port Brake | Strong horizontal recoil control; steadier tracking during fast strafes | Use Compensated if you want a more balanced vertical + horizontal feel |
| Barrel | 4.5" Compact | Faster ADS and sprint-to-fire; best for pure close-quarters | Swap to 8" Extended for better velocity and mid-range consistency |
| Top Accessory | 50 MW Green | High hip-fire accuracy and quicker target confirmation in entries | Downgrade to lower-power laser if you want less visual clutter |
| Optic | Mini Flex – 1.00x (player preference) | Clear 1x picture; minimal visual recoil for CQB tracking | Try 1.5x only if your fights often stretch past 25–30 m |
| Underbarrel | Vertical, Classic | Reliable vertical climb reduction; stable 6–10 round bursts | Switch to Short/Knurled if you favor ADS strafe gunfights |
| Magazine | 30-Round Mag | Snappier handling; faster reloads at the cost of sustain | Use 36-round if you need multi-target capacity and fewer reloads |
| Ammo | VMG | Best-in-slot TTK for this build; reliable damage profile | Consider Frangible only early-game for added flinch pressure |
Why it's good
- It feels like a laser at all practical SMG distances by doubling down on muzzle control and visual stability.
- The 50 MW Green laser materially improves hip-fire confidence for hallway brawls and fast entries.
- In range demos, it cleared the second-to-last plate and held the last steadily under fire—indicating sustained control rather than “first 10 bullets only.”
Trade-offs and when to choose it
- 30-round mag means stricter target selection: don't ego peek two players deep without cover.
- Pick this if you're playing hard entry, love fast ADS/hip transitions, and your fights cluster inside 25 m. If your lobby forces more 30–40 m duels, move back to the meta's 8" Extended and 36-round mag.
↖ Attachment logic, simplified
- Muzzle (Single vs. Compensated vs. Double-Port):
- Single-Port: easiest vertical pattern; best for learners.
- Compensated: balanced vertical + horizontal control; best overall once you're comfy.
- Double-Port: strongest horizontal taming; pair with short barrels to offset their twitch.
- Barrels (4.5" vs. 6" vs. 8"):
- 4.5" Compact: fastest handling, best for pure CQC.
- 6" Standard: neutral baseline.
- 8" Extended: velocity and stabilization for mid-range stickiness.
- Underbarrel (Short/Knurled vs. Vertical variants):
- Knurled short grips shine for rapid ADS strafe gunfights.
- Classic vertical grips reduce climb and help hold head-height lanes.
- Ammo (VMG vs. Frangible):
- VMG: best raw TTK profile for meta play.
- Frangible: early-game crutch for pressure, flinch, and finishing power.
↖ Practical drills to level up faster
- 10-minute routine:
- 3 minutes recoil tracing: paint a vertical line on a wall at 15 m; hold fire and learn the counter-pull needed to keep shots within a 10 cm corridor.
- 3 minutes burst control: 8–10 round bursts on 20–30 m plates; insert a 120 ms pause and resume—feel bloom reset.
- 2 minutes hip-to-ADS hand-offs: start hip-fire at 7 m, transition to ADS by 15 m on a moving target.
- 2 minutes head-height pre-aim: walk map lines and keep your reticle locked to common chest/head heights.
- If you notice your first bullet misses: lower initial ADS sens or add a tiny ADS slowdown in settings.
- If you lose to strafe duels: widen your curve—slightly increase movement response or practice AD rhythm synced to bursts.
↖ Map/mode adaptation cues
- Tight, interior-heavy maps: favor the Alternative Build (4.5" + laser), lean into hip-fire and sprint-to-fire timings.
- Mixed corridors and lanes: run the Meta Build (8" + compensated + 36 mag) for a balanced profile.
- Large open lanes: consider swapping to a carbine or at least extend SGX bursts only when you have cover and numbers; SGX can contest 30–35 m but shouldn't anchor open lanes solo.
- If you're on objective entry duty: laser + faster handling > velocity; if you're playing anchor/support: velocity + mag size > raw sprint speed.
↖ FAQ
Q1: I keep running out of ammo mid-fight—36 or 30 rounds?
- A: Go 36 unless your map is ultra-tight and you prize handling above all. If you still get caught reloading, stagger fights and reload-cancel behind cover; consider fast-reload variants when available.
Q2: My shots bloom out after 10 rounds. Fix?
- A: Shorten to 6–10 round bursts and insert a brief pause (~120 ms). Use the compensated brake + knurled grip; avoid max-zoom optics (keep it at 1.0x–1.5x).
Q3: Hip-fire or ADS with SGX?
- A: Hip-fire under 10 m with a strong laser; ADS beyond that. If you miss hips often, shift to ADS earlier and practice the 7 m hip-to-ADS hand-off.
Q4: VMG vs. Frangible—when to swap?
- A: Use VMG for best TTK once unlocked. If you're early and losing close trades by a sliver, Frangible can tilt flinch and chip your favor.
Q5: Double-Port vs. Compensated—what should I pick?
- A: If your fight pattern is tight rooms with sudden strafes, Double-Port tames sideways wobble better. If you're taking mixed distances and value general stability, Compensated is the safe, consistent pick.
↖ Conclusion
If you want the simplest winning formula: equip the Meta Build (OSA-7, Compensated Brake, 8" Extended, Short/Knurled, 36-Round, VMG) for balanced CQB-to-mid dominance. If your lobbies funnel you into hallways and staircases, switch to the Alternative Build with the 4.5" barrel and high-power laser for instant handling and ruthless hip-fire.
Most Popular Posts
- Battlefield 6 Season 1 Ultimate Weapon Tier List: Best Guns, TTK Data, Loadouts, and Pro Tips
- Top 10 Low-Recoil BF6 Guns: Most Accurate Battlefield 6 Weapons
- How To Unlock the PSR (M98B) in Battlefield 6 Fast?
- Battlefield 6 AFK XP After Patch: Easy Passive Leveling Using 4-Minute Portal Lobbies
- Battlefield 6 Top 10 Meta Weapons: Builds, TTK Insights, and Practical Tips
- Battlefield 6 Fast Weapon Leveling Guide: Unlock Attachments
Popular Category Lists
- Grow a Garden / (286)
- ARC Raiders / (268)
- CoD: Black Ops 7 / (166)
- Monopoly Go / (147)
- MLB 26 / (147)
- Star Citizen / (124)
- Steal a Brainrot / (89)
- ARK Survival Ascended / (79)
- Sailor Piece / (68)
- Forza Horizon 6 / (65)
- Diablo IV / (61)
- Blox Fruits / (61)
- Adopt Me / (56)
- CoD: BLACK OPS 6 / (55)
- Grow a Garden 2 / (50)
- Path of Exile 2 / (48)
- Monster Hunter Wilds / (46)
- Windrose / (44)
- Path of Exile / (40)
- Bee Swarm Simulator / (36)