0
0Battlefield 6 Top 5 Best Beginner Weapons Loadouts You Can Unlock Fast
- Ben
- Share
- Battlefield 6
- 10/14/25
- 2316
You're grinding early ranks, unlocking assignments, and trying to make every life count. The good news: you don't need late‑game blueprints to win fights. After dozens of matches across Breakthrough, Conquest, and CQB playlists, these five early‑unlock weapons—and their specific builds—consistently delivered better hit registration, faster TTK through headshot multipliers, and steadier control. I'll show you what to run, why it works, and how to adapt if your lobby or map shifts.
- M433 — The Day‑1 Workhorse AR
- B‑36A4 — The Trust‑the‑Process Laser
- M4A1 — The Aggressive All‑Rounder
- PW5 A3 (MP5) — Close‑Range Bully
- M87A1 — Shotgun That Didn't Really Calm Down
- Assignment Speedups and Leveling Notes
↖ M433 — The Day‑1 Workhorse AR
- Role and Where It Shines:
- Mid‑range anchor around objectives; excels on mixed sightline maps (e.g., Manhattan Bridge lanes, open courtyards).
- Starts wobbly, but scales hard with the right attachments.
The base bloom feels inconsistent; mitigating spread and stabilizing vertical recoil transforms it from entry‑level to reliable mid‑range beam.
- Core Build (early‑mid levels ~25):
| Slot | Choice | Key Reason | Notes/Alternatives | Quant/Impact |
|---|---|---|---|---|
| Muzzle | Long Suppressor | Stealth plus recoil smoothing without heavy handling penalty | Converter for bloom consistency; Double Port/Compensated Brake for recoil buildup | Stealth; smoother recoil feel |
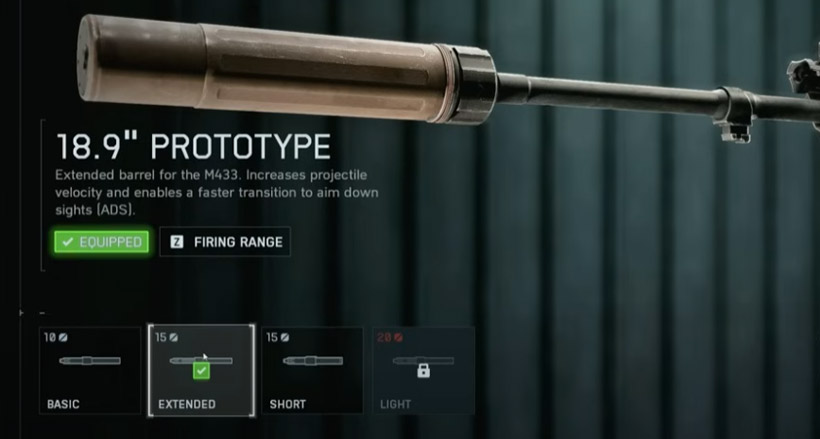
| Barrel | Extended Barrel | Higher velocity improves hit registration and leads at range | Use on mixed/longer sightlines (40–60 m) | ~837 m/s velocity target |
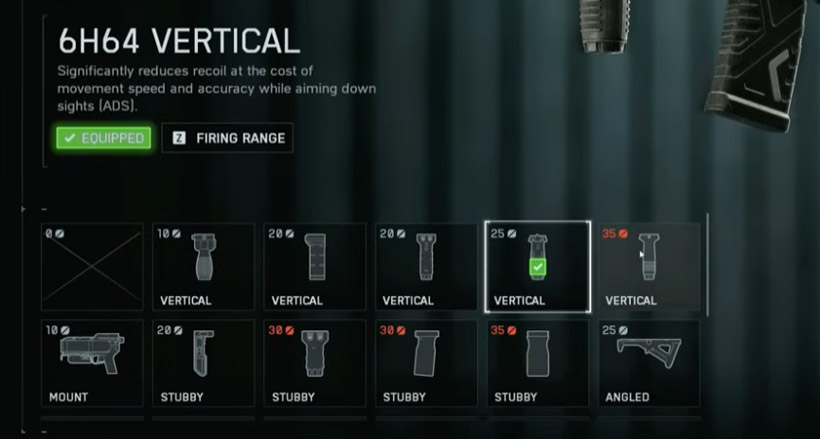
| Underbarrel | 6H64 Vertical | Cheaper point cost with minimal control loss | Classic Vertical if you need maximum control | ~10 pts cheaper; ~3 control loss vs Classic |
| Magazine | 30-round Standard | Low cost and fast reload improve uptime on objectives | 40-round only if you often fight multiple targets without cover | Faster cycle vs high-cost larger mags |
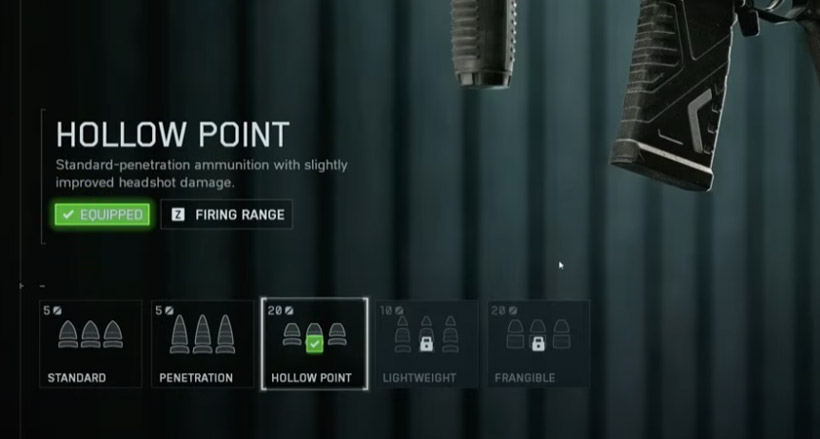
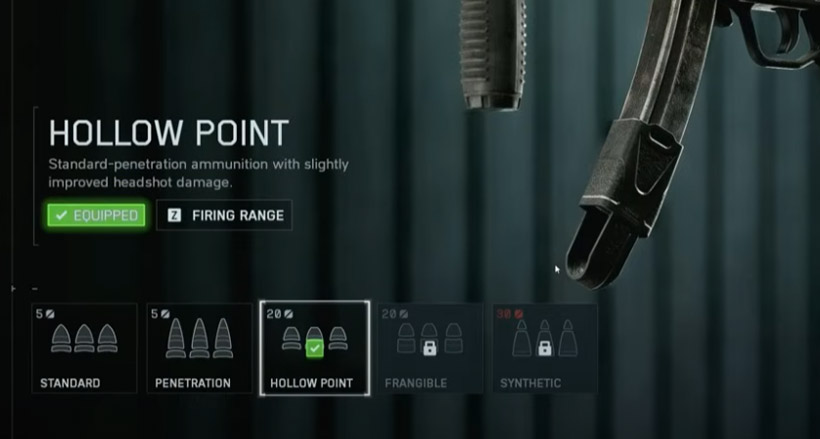
| Ammo | Hollow Point | Boosted headshot multiplier accelerates TTK | Consider Synthetic Tip later if available and budget allows | HS multi: 1.34x → 1.5x |
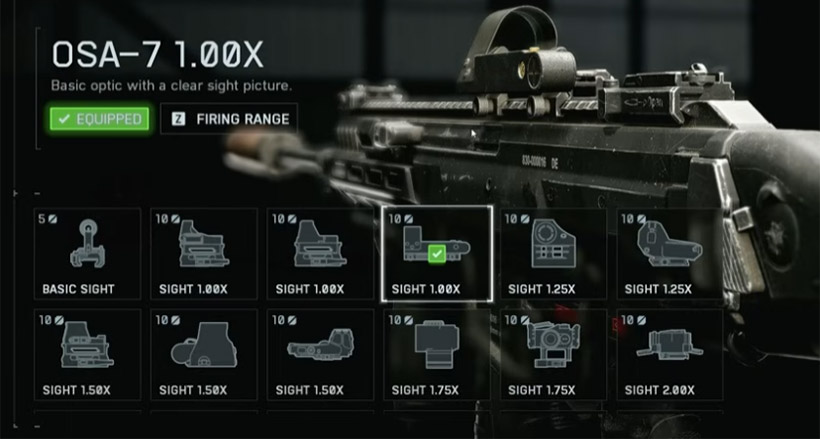
| Optic | OSA 1x–1.75x | Clear sight picture suited for close to mid ranges | Choose reticle you aim best with | 1x–1.75x magnification |
- How To Play It:
- Burst at 30–50 m; strafe‑ADAD with short bursts to keep bloom down.
- If you notice random misses despite centered aim, you're overspraying—downshift to 4–6‑round taps.
- Common Mistakes to Avoid:
- Overspending on big mags early; you'll pay too much in points for marginal fights.
- Heavy barrels that feel sticky—ADS slowdown hurts when contesting doors and stairwells.
- One‑liner: Trust the process; attachments flip the M433 from shaky to staple.
↖ B36A4 — The Trust‑the‑Process Laser
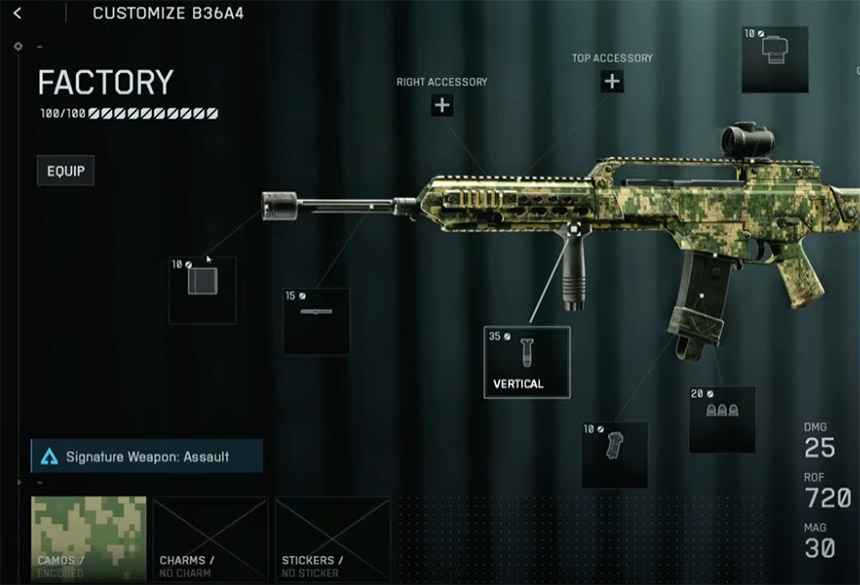
- Role and Where It Shines:
- Best early AR for long lanes; control upgrades turn it into a beam on defense and mid‑long picks.
Starts awkward (noticeable shake) but becomes the most “locked‑in” ranged rifle with correct stacking.
- Core Build (around level 22; upgrade path noted):
| Slot | Choice | Key Reason | Notes/Alternatives | Quant/Impact |
|---|---|---|---|---|
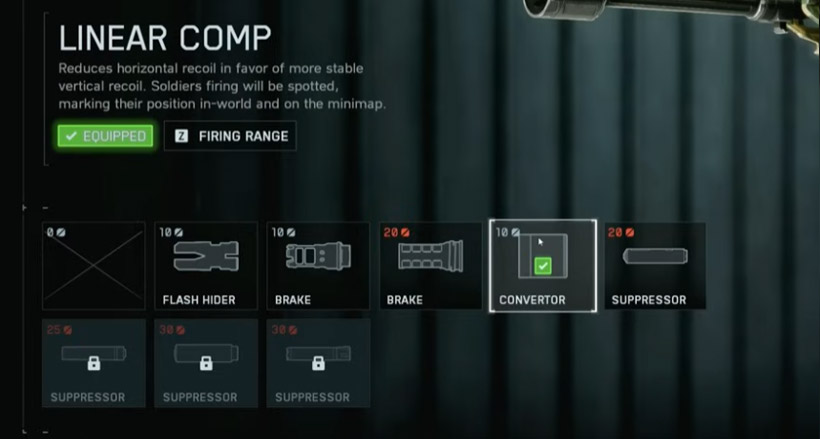
| Muzzle | Converter | Reduces horizontal sway; improves bloom feel for tap/burst | Comp/Brakes if prioritizing recoil buildup (higher cost) | Straighter tracking in bursts |
| Barrel | Extended Barrel | Heavy-level velocity without ADS penalty | Avoid Heavy Extended to keep corner-clearing snappy | Same velocity as Heavy; faster ADS |
| Underbarrel | Classic Vertical → 6H64 later | Classic calms early shake; 6H64 frees points with minor control loss | Swap once you need budget for premium ammo | Stability early; point savings later |
| Magazine | 30 Fast → 30 Standard | Faster reloads while leveling | Drop to Standard to fund higher-cost ammo | Reload speed vs. budget flexibility |
| Ammo | Hollow Point → Synthetic Tip (lvl 31) | Hollow = 1.5x HS; Synthetic = 1.75x HS for big TTK gains | Switch when headshot consistency and points allow | HS multi: 1.5x → 1.75x |
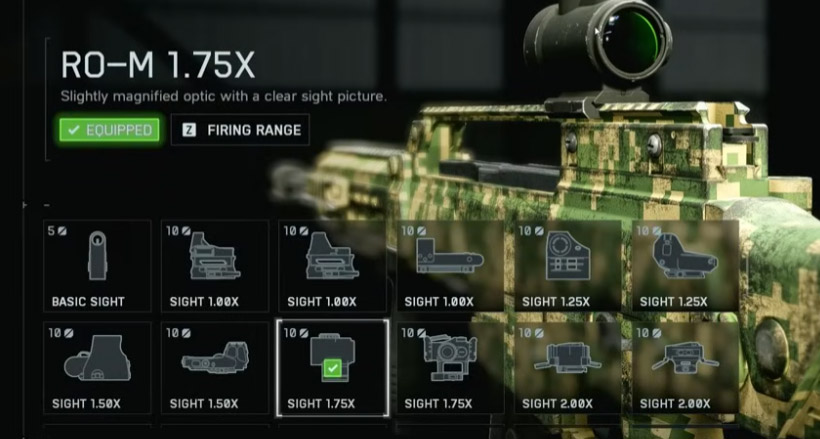
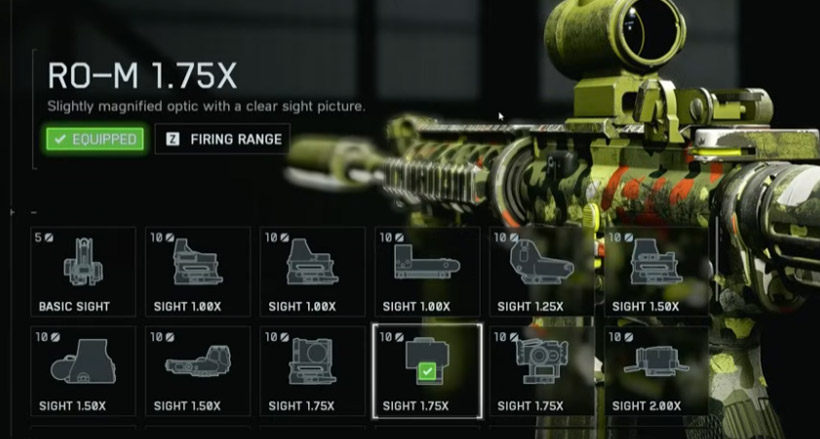
| Optic | ROM 1.75x | Clean glass; low visual recoil for mid-range bursts | Stick to what you track best with | 1.75x magnification |
- How To Play It:
- Two‑to‑three‑shot bursts at range; micro‑compensate down and slightly left/right depending on your roll pattern.
- If you find your crosshair walking off target, your burst length is too long—cut it by 25%.
- Common Mistakes:
- Heavy barrel addiction; the ADS drag punishes you in interior fights.
- Delaying Synthetic Tip forever; restructure points (lose Fast Mag, swap to 6H64) when you hit 31.
- One‑liner: Suffers naked, dominates dressed—this is your lane sentinel.
↖ M4A1 — The Aggressive All‑Rounder
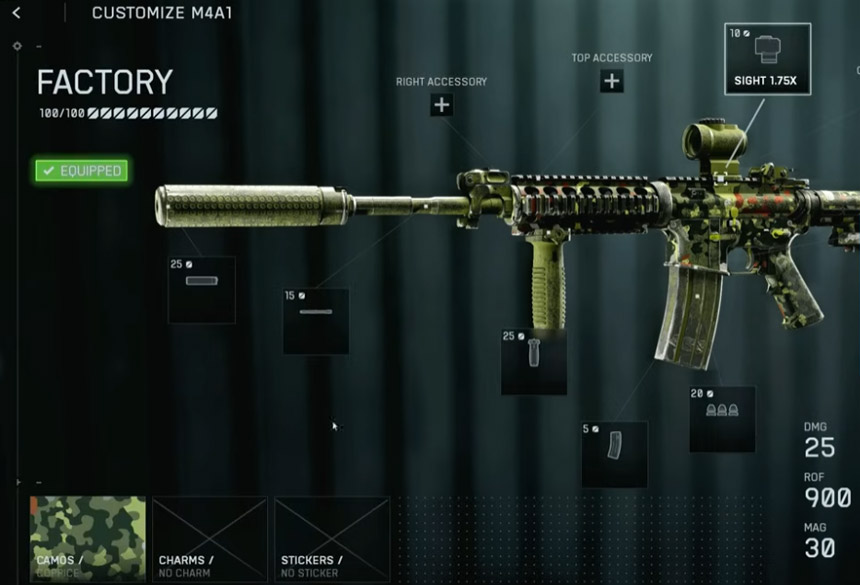
- Role and Where It Shines:
- Close‑to‑mid on smaller maps and tight objective stacks; 900 RPM rewards initiative.
Popular for a reason—great handling, easy recoil, and it scales with headshot ammo.
- Core Build:
| Slot | Choice | Key Reason | Notes/Alternatives | Quant/Impact |
|---|---|---|---|---|
| Muzzle | Long Suppressor or Converter | Stealth (off-minimap) or improved bloom control | Compensated Brake if you mag-dump and dislike recoil buildup | Stealth vs. consistency trade-off |
| Barrel | Extended Barrel | Higher velocity stabilizes 30–40 m duels | Pairs well with mid-range playstyle | Base ~787 m/s → higher with Extended |
| Underbarrel | 6H64 or Classic Vertical | Control tuning based on point budget and feel | 6H64 for value; Classic for max steadiness | Minor control vs. cost trade |
| Magazine | 30 Standard | Fast reloads suit 900 RPM burn rate | Skip 36/40 early due to point cost | Higher uptime in fights |
| Ammo | Hollow Point → Synthetic Tip (later) | Headshot multiplier boosts practical TTK | Swap to Synthetic when unlocked and affordable | HS multi increases (e.g., 1.5x → 1.75x) |
| Optic | 1–1.75x | Avoid over-zoom for CQB viability | Pick the clearest reticle you track best with | 1x to 1.75x magnification |
- Micro Tactics:
- Pre‑aim head‑level at door frames; M4 punishes shoulders‑only peeks when you stack HS multi.
- Hip‑to‑ADS snap at 10–15 m; first three bullets decide the duel—keep your opening burst tight.
- Mistakes:
- Over‑engaging past 50 m; you'll lose to tuned B‑36 A4s.
- One‑liner: If you like to set the pace, this is your pedal.
↖ PW5A3 (MP5) — Close‑Range Bully
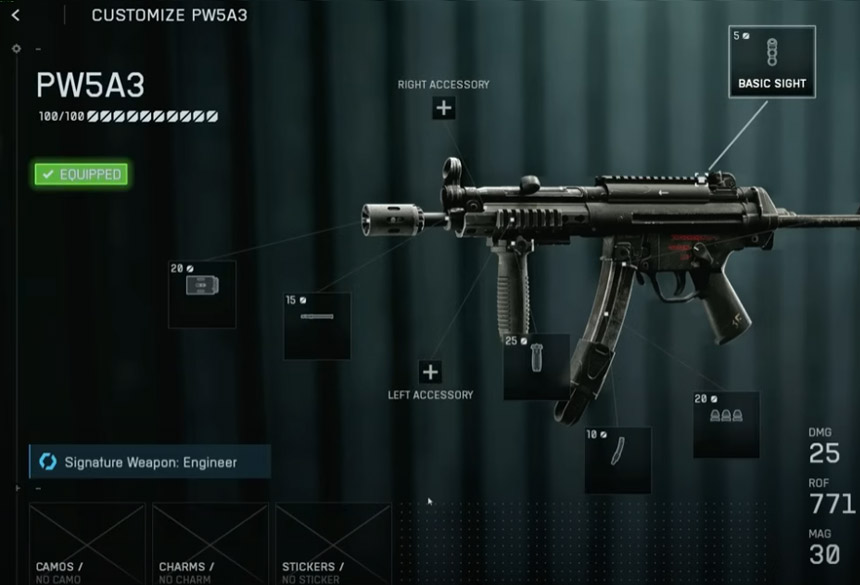
- Role and Where It Shines:
- King of CQB; shreds in Rush chokes, Domination lanes, and interior stair fights.
Laser‑like controllability; surprisingly competent tap‑fire at mid if you must.
- Core Build:
| Slot | Choice | Key Reason | Notes/Alternatives | Quant/Impact |
|---|---|---|---|---|
| Muzzle | Compensated Brake (primary) or Converter | Minimizes recoil buildup for sustained sprays | Skip suppressors at 5–15 m; Converter for straighter tracking | Best for room-clearing sprays |
| Barrel | Extended Barrel | Boosts weak base velocity for better hitreg on exits | Helps at 20–30 m transitions | Base ~540 m/s → higher with Extended |
| Underbarrel | 6H64 Vertical | Keeps sprays tidy | ADS accuracy penalty negligible in intended ranges | Value pick vs cost |
| Magazine | 30 Fast | Rapid reload for immediate re-entry | Drop to 30 Standard if budget is tight | Faster reload cycle |
| Ammo | Hollow Point → Synthetic (lvl 40) | Higher HS multiplier collapses practical TTK | Switch once unlocked and affordable | HS multi: 1.5x → 1.75x |
| Optic | Irons or 1x | Clean, cheap, and CQB-friendly | Add minimal glass only if needed | 1x magnification max |
| Accessory | Mag Catch | Snappier reloads | Pairs well with 30 Fast for uptime | Lower reload time |
- Playbook:
- Entry: Slide‑cancel or shoulder‑peek to get first bullet; commit to a 10–12 bullet controlled spray.
- Mid‑range: Quick 2–3‑shot taps; don't hose at 25+ m unless you must.
- Mistakes:
- Chasing 40‑round mags too early; you'll kneecap your points for marginal benefit.
- One‑liner: Fast in, faster reset; the definition of tempo.
↖ M87A1 — Shotgun That Didn't Really Calm Down
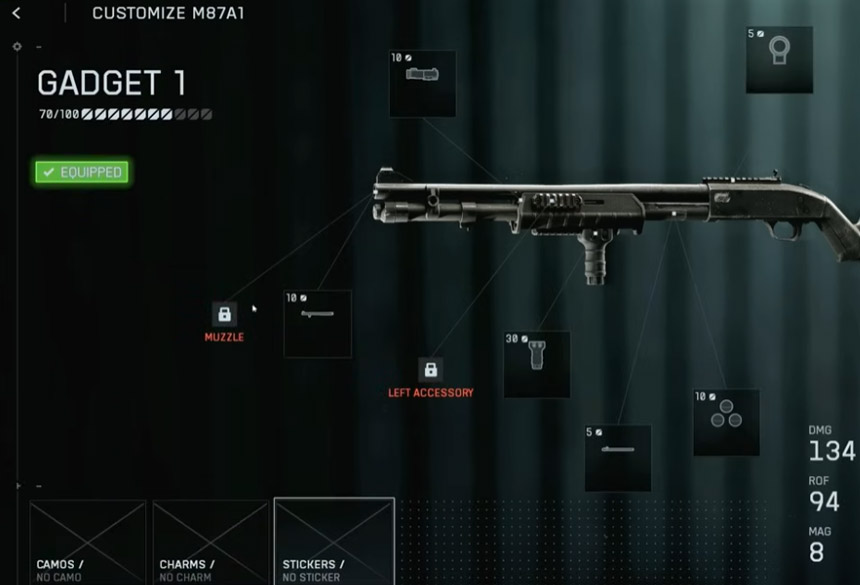
- Role and Where It Shines:
- Domination, King of the Hill, interior Breakthrough phases; objective brawler.
Post‑beta nerf rarely changes outcomes in true CQB; still deletes within room length.
- Core Build (you barely need levels):
| Slot | Choice | Why/Notes |
|---|---|---|
| Muzzle | None | Only suppressors exist; one hurts hipfire—skip |
| Laser | Red Laser (early) | Tightens hipfire if you hip-shoot often |
| Barrel | Basic | Only option |
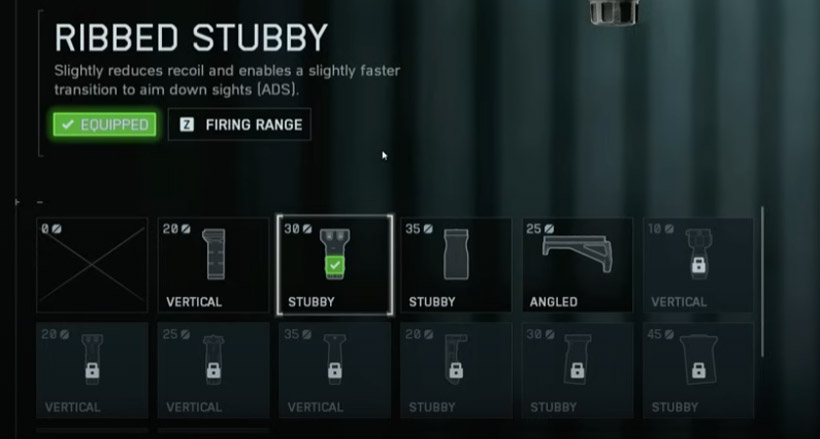
| Underbarrel | Stubby | Slight recoil reduction + faster ADS for precision pops |
| Tube | 7-Round | Clear multi-man rooms; helps no-reload kill challenges. 5/6-round feels snappier for sprint routes |
| Ammo | Buckshot or Slugs | Buckshot = forgiving; Slugs if you reliably hit head flicks while strafing |
| Optic | Basic bead | Add 1x glass only if you ADS a lot |
- Technique:
- Hip at within‑hug distance; ADS only if target is past 8–10 m or peeking narrow.
- Stagger footsteps and entry timing; let a teammate jiggle first, you trade with guaranteed close damage.
- Mistakes:
- Running suppressor with hipfire penalty; you're sabotaging the shotgun's core strength.
- One‑liner: Minimal leveling, maximal room control.
↖ Assignment Speedups and Leveling Notes
- If you're stuck on headshot or multi‑kill assignments:
- Prioritize Hollow Point/Synthetic Tip on ARs/SMGs; these ammo types convert partial head taps into drastically faster kills.
- If recoil feels random:
- Swap to Converter + shorter bursts. If it still feels off, your optic magnification might be too high for your tracking speed—drop to 1–1.5x.
- If you can't win 30–40 m duels with M4/PW5:
- Rotate to M433/B‑36 A4 with Extended Barrel; you'll gain velocity and burst control that fits that lane length.
- If reloads get you killed:
- Trade up to Fast Mags or add Mag Catch on SMGs; on ARs, practice kill‑swap‑kill into reload behind cover rather than reloading on point.
FAQ
Q1: Hollow Point vs. Synthetic Tip—when should I switch?
- If you can reliably land headshots (2+ per duel), go Synthetic as soon as you unlock it and can afford the point budget. If your headshot rate is inconsistent, Hollow Point is the safer, cheaper spike.
Q2: My shots feel like they don't register at 40+ meters. What should I change first?
- Add or keep Extended Barrel for velocity. Then shorten burst length and consider Converter to stabilize bloom. Don't over‑zoom; 1.75x is a sweet spot for most AR bursts.
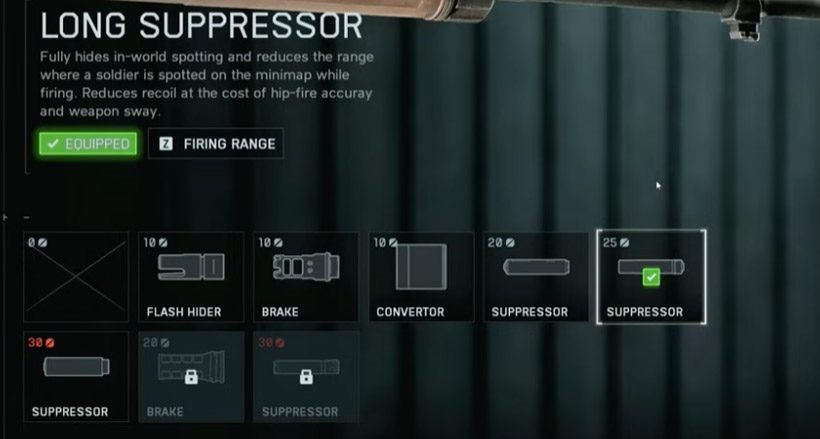
Q3: Is Long Suppressor worth the handling tax on aggressive rifles?
- On M433/M4A1, yes if you flank and value off‑radar openings. If you're front‑lining trades, Converter/Comp Brake can feel better because fights are decided before stealth matters.
Q4: 30‑round vs. 40‑round mags early?
- Early on, 30‑round + fast reload timing is higher value per point. 40‑rounders make sense for solo anchor play where you fight multiple pushes without safe reload windows.
Q5: Should I use Heavy Extended barrels for maximum velocity?
- They don't add velocity over standard Extended in these cases but cost you ADS. Unless you're hard‑posting sightlines, stick to regular Extended.
If you're early in BF6, you're not under‑gunned—you're under‑tuned. Start with M433 and B‑36 A4 when lanes lengthen; swap to M4A1 or PW5 A3 to press the pace; keep M87A1 ready for objective interiors. Build around velocity for hitreg, Converter/Brakes for controllability, and Hollow/Synthetic for headshot TTK. If you notice a fight type repeating—long holds vs. tight stacks—swap to the loadout above that was designed for it, and you'll feel the difference within a match.
Most Popular Posts
- Battlefield 6 Season 1 Ultimate Weapon Tier List: Best Guns, TTK Data, Loadouts, and Pro Tips
- Top 10 Low-Recoil BF6 Guns: Most Accurate Battlefield 6 Weapons
- Battlefield 6 AFK XP After Patch: Easy Passive Leveling Using 4-Minute Portal Lobbies
- How To Unlock the PSR (M98B) in Battlefield 6 Fast?
- Battlefield 6 Top 10 Meta Weapons: Builds, TTK Insights, and Practical Tips
- Battlefield 6 Fast Weapon Leveling Guide: Unlock Attachments
Popular Category Lists
- Grow a Garden / (286)
- ARC Raiders / (277)
- CoD: Black Ops 7 / (166)
- MLB 26 / (149)
- Monopoly Go / (148)
- Star Citizen / (127)
- Steal a Brainrot / (90)
- ARK Survival Ascended / (84)
- Sailor Piece / (68)
- Forza Horizon 6 / (66)
- Diablo IV / (62)
- Blox Fruits / (61)
- Adopt Me / (56)
- CoD: BLACK OPS 6 / (55)
- Grow a Garden 2 / (53)
- Path of Exile 2 / (48)
- Monster Hunter Wilds / (46)
- Windrose / (44)
- Path of Exile / (40)
- Bee Swarm Simulator / (37)