


 0
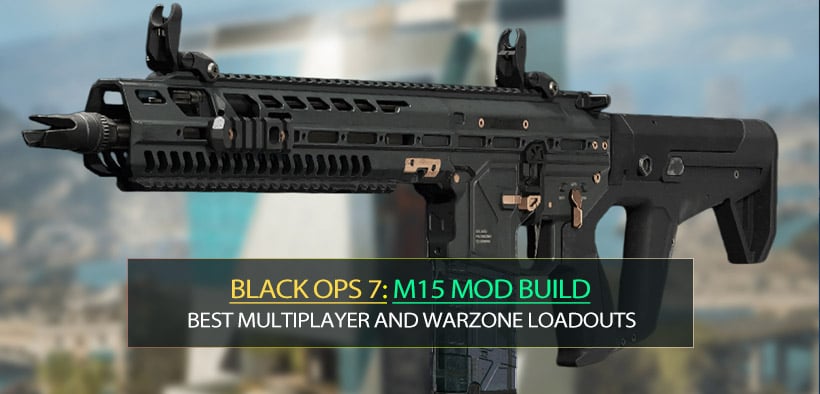
0BLACK OPS 7 M15 MOD Build: Best Multiplayer and Warzone Loadouts
- ELSA
- Share
- CoD: Black Ops 7
- 12/24/25
- 943
The BLACK OPS 7 M15 MOD feels like one of those guns that turns I'm trying to cap B into why is everyone suddenly frozen and disappearing?—when it's built correctly and used with clean timing. In this guide I'm sharing the exact way I run it in Multiplayer and Warzone, why it works, and what to do when the lobby gets chaotic (because it will).
- 1) What the M15 MOD is actually good at (and what it isn't)
- 2) Multiplayer Loadout (Objective-first, streak-friendly)
- 3) Multiplayer Playbook: 3-2-1 Timing without the cringe
- 4) Warzone / Rebirth Loadout (survive the chaos)
- 5) Mastery Camos & Blueprint Effects: what to pay attention to
- 6) Capturing B without throwing your life away
- 7) Dealing with snipers / hard lane-holders
- 8) Streak discipline (the difference between almost and dropped it)
- FAQ
- 1) Is the M15 MOD better on controller or mouse & keyboard?
- 2) What's the #1 attachment mistake people make?
- 3) Why do I keep dying right after I call in UAV / streaks?
- 4) In Warzone, should I treat it as a sniper support or a main?
- 5) Are paid unlock services worth it?
- What to do next
↖ 1) What the M15 MOD is actually good at (and what it isn't)
The M15 MOD shines when you treat it like a tempo weapon—you take space, you lock a lane, you punish pushes.
Best at
- Holding mid-map choke points and objective entrances.
- Winning fights where you can pre-aim and force enemies to walk into your crosshair.
- Converting a single pick into a streak chain (UAV → info → more picks).
Not ideal for
- Wide-open long-range duels where you're basically asking it to be a marksman rifle.
- Constant ego-challing around corners with no info.
Why does it feel buffed?
Often it's not a raw damage change—it's that a small handling tweak (recoil smoothing, ADS speed, sprint-out) makes the gun feel like it's deleting people. That means your build should lean into consistency, not gimmicks.
↖ 2) Multiplayer Loadout (Objective-first, streak-friendly)
I built this around cap B without donating my streak. The idea is simple: stabilize recoil, keep ADS snappy, and reduce downtime (reload + flinch).
Recommended MP Build (copy/paste mindset)
| Slot | Pick (Type) | Why it's here | If you notice… then… |
|---|---|---|---|
| Muzzle | Recoil control or sound suppression | Keeps shots tight when holding lanes | If you lose long-ish fights, switch to stronger recoil control |
| Barrel | Range/velocity or recoil-focused | Improves mid-range reliability | If fights feel inconsistent, prioritize velocity |
| Underbarrel | Vertical recoil / stability | Makes sustained fire easier | If you over-correct aim, choose a smoother stability option |
| Magazine | Extended mag (balanced) | Lets you clear 2–3 enemies per life | If reloads get you killed, go bigger—accept slower handling |
| Rear Grip / Stock | ADS + strafe | Helps win corner fights | If you're losing to jump/peek spam, add strafe speed |
Perks & equipment (objective logic)
| Category | My pick | Practical reason |
|---|---|---|
| Tactical | Info/disable tool (snapshot/stun-style) | Lets you push B with a plan, not vibes |
| Lethal | Area denial (frag/semtex/molotov-style) | Clears headglitches and forces movement |
| Field upgrade | Trophy / deployable cover (map dependent) | Stops nade spam on the hill/flag |
| Streaks | UAV → higher info streak → lane control streak | Information creates easier gunfights; easier gunfights create more streaks |
This means you're not trying to be a highlight reel every life. You're trying to make the enemy team feel like every doorway is a bad decision.
↖ 3) Multiplayer Playbook: 3-2-1 Timing without the cringe
I use a simple internal clock when I'm controlling spawns or rotating to B:
1. First 3 seconds: Re-center, reload, check minimap.
2. Next 2 seconds: Pre-aim the most likely re-peek lane.
3. Last 1 second: Either swing with info—or don't swing at all.
If you're thinking, that sounds too simple, good. Simple is repeatable.
Spawn & objective rules I follow
- If two enemies die on one side, I assume a flip is possible, not guaranteed.
- If my team is stacking one lane, I rotate early to the next power position.
- If I'm one off a big streak, I stop hero plays and start playing like a coward with a purpose.
Common failure mode: you win four fights, then sprint into the open to keep it going.
That's not confidence. That's charity.
↖ 4) Warzone / Rebirth Loadout (survive the chaos)
Warzone punishes downtime. Losing your loadout, getting third-partied, re-challing with no plates—classic.
So I build the M15 MOD here to be a reliable primary that can still win in messy short-mid fights.
Recommended WZ Build (stability + readiness)
| Slot | Pick (Type) | Why it matters in WZ |
|---|---|---|
| Optic | Clean 1x–2x | Faster target reacquisition in clutter |
| Muzzle | Suppressor (or recoil-suppressor hybrid) | Keeps you off pings and steadies bursts |
| Barrel | Velocity/range | Helps convert damage before enemies duck away |
| Magazine | Extended (largest you can tolerate) | Lets you finish downs + punish the teammate |
| Underbarrel | Recoil/stability | Makes tracking at 20–40m feel stupid easy |
The I lost my guns protocol (yes, it happens)
If you drop in and someone yoinks your weapons:
- First: stop hunting emotionally.
- Then: grab any serviceable floor gun + plates.
- Finally: farm a safe regain (contracts/edge loot) and approach loadout like it's hot.
If you find yourself saying I need to kill that guy, that's tilt talking. Tilt is expensive.
↖ 5) Mastery Camos & Blueprint Effects: what to pay attention to
Cosmetics don't change damage, but they can change your performance because visibility and distraction are real.
Here's what I look for when a blueprint has flashy effects (freeze/energy/particles):
| Check | Why it matters | Quick fix |
|---|---|---|
| Muzzle flash / particles | Can hide targets in sustained fire | Lower effects intensity if possible; use a cleaner muzzle |
| Sight picture clutter | Makes tracking harder on dark maps | Switch to a simpler optic |
| Screen glare / lighting | Real-world glare = missed shots | Reposition monitor/light; reduce brightness slightly |
Why does this matter?
Because your aim isn't just skill. It's also ergonomics, visibility, and how much visual noise you tolerate before you start guessing.
↖ 6) Capturing B without throwing your life away
- Do this: smoke/stun/info first, then enter with pre-aim.
- Not that: sprint into the point and hope your teammates discover bravery mid-gunfight.
If you notice you're solo-capping every time, then rotate your route: clear the nearest power headglitch first, because it's the #1 reason caps fail.
↖ 7) Dealing with snipers / hard lane-holders
- Don't wide-swing the same angle twice.
- Shoulder peek once, re-peek from a new height/offset.
- If you have no cover tool, rotate. Pride is not a counter-snipe attachment.
↖ 8) Streak discipline (the difference between almost and dropped it)
If you're within 1–3 kills of a big streak:
- Then you stop capping like a martyr and start playing like a chess player.
- You hold the lane that gives you the highest probability fight: predictable traffic, good cover, quick retreat.
This means your gameplay gets boring… and your streaks get consistent. Pick one.
↖ FAQ
↖ 1) Is the M15 MOD better on controller or mouse & keyboard?
From my experience, it often feels stronger on controller because aim assist + stable recoil builds make mid-range tracking very forgiving. On MnK, it's still excellent—just prioritize stability and a clean sight picture to reduce over-correction.
↖ 2) What's the #1 attachment mistake people make?
Going all-in on one extreme:
- Full recoil control but the gun feels like a truck (slow ADS, slow strafe), or
- Full speed but it bounces and loses mid-range fights.
A balanced build wins more matches than a perfect in theory build.
↖ 3) Why do I keep dying right after I call in UAV / streaks?
Because you're standing still in predictable spots.
Call streaks behind cover, after a reload, and preferably when your team is not flipping spawns.
↖ 4) In Warzone, should I treat it as a sniper support or a main?
If your lobby is close-range heavy (Rebirth style), run it as a main with a big mag.
If you're playing bigger maps and taking 60m fights, it becomes a support unless your build is heavily velocity/range focused.
↖ 5) Are paid unlock services worth it?
I don't recommend account-sharing or boosting services because they can risk account security and violate game terms. If you want mastery camos, the safest route is still: consistent sessions, a checklist, and builds that reduce frustration.
↖ What to do next
Run the MP build for 10 matches and track three things:
1) how often you die while reloading, 2) how many fights you lose at 20–35m, 3) how often you get picked while calling streaks.
Then adjust only one variable at a time (usually mag size or recoil/stability). That's how you turn the M15 MOD from this feels good into this is my default pick when I want to win.

Most Popular Posts
- Black Ops 7 Endgame Exotic Affinity Weapons Guide: Best Bonuses, Full Weapon List, and Farming Tips
- Black Ops 7 Zombies Totenreich Easter Egg Guide: Fast Solo & Co-Op Main Quest Walkthrough
- Black Ops 7 Cherry Fizz Guide: Fastest Illicit Cargo Event Route for Season 4
- Black Ops 7 Season 04 Endgame META: Best 5 Weapons After the XR3 Ion Nerf
- Black Ops 7 Season 4 Release Date, Maps, Weapons, Zombies, Warzone, and MW4 Reveal Prep
- Black Ops 7 Zombies Fast KOWAKUJO Easter Egg Guide: Cat Wonder Weapon, Evidence Puzzles
Popular Category Lists
- Grow a Garden / (286)
- ARC Raiders / (262)
- CoD: Black Ops 7 / (166)
- Monopoly Go / (146)
- MLB 26 / (145)
- Star Citizen / (112)
- Steal a Brainrot / (89)
- Sailor Piece / (68)
- ARK Survival Ascended / (67)
- Diablo IV / (61)
- Forza Horizon 6 / (60)
- Blox Fruits / (60)
- CoD: BLACK OPS 6 / (55)
- Adopt Me / (53)
- Path of Exile 2 / (48)
- Monster Hunter Wilds / (46)
- Windrose / (44)
- Path of Exile / (40)
- Grow a Garden 2 / (40)
- Bee Swarm Simulator / (36)


