0
0Call of Duty: Black Ops 6 Rook Safes Open Guides
- BO6
- Share
- CoD: BLACK OPS 6
- 12/04/24
- 1933
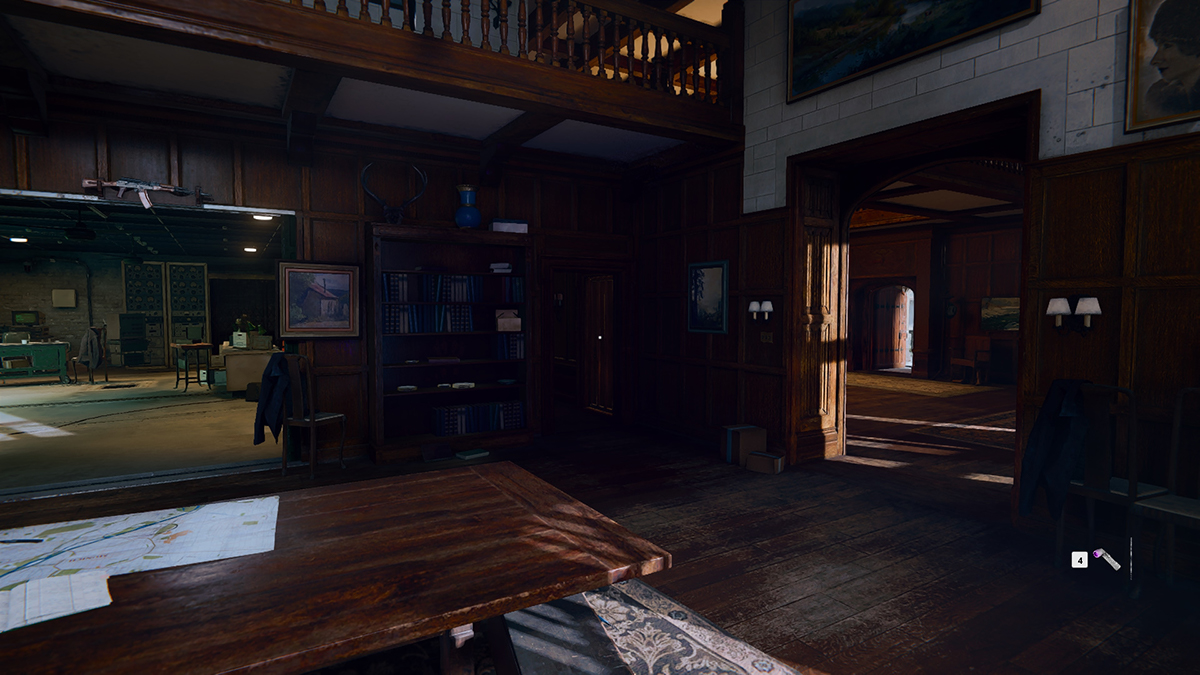
Rook is a safe house where you will find yourself at the very beginning of the game, after the prologue. In such shelters, you will spend time between story missions. Here you can find several interesting items that expand the lore, talk with partners, spend honestly stolen bucks on expanding the training ground, workshop and unlocking new perks, but most importantly, secrets are hidden in almost every such place.
- How to start the boiler and press on the piano?
- Piano - puzzle
- Cauldron
- What is the code for the door in the basement?
- Computer Word Puzzle
- How to open the safe in the shelter?
- All possible combinations
- Safe #2 - Mission 2. Blood Feud
- Safe #3 - Mission 3. Objective Number One
- Safe #4 - Mission 4. Hunting Season
- Safe #5 - Mission 5. Cradle
- Safe #6 - Mission 6. Emergency
- Safe #7 - Mission 7. High Rollers
- Safe #8 - Mission 8. Ground Control
- Safe #9 - Mission 9. Below the radars
The code for each new playthrough will be different, so there is no point in using the combinations that we indicate below. The only thing that will be the same for each playthrough is the sequence of notes in the piano puzzle.
↖ How to start the boiler and press on the piano?
You can solve both parts of the puzzle first. It doesn't matter, because the piano opens access to another basement, and the boiler in the other basement unlocks the door inside the secret one. Let's pretend you found the piano first.
↖ Piano - puzzle
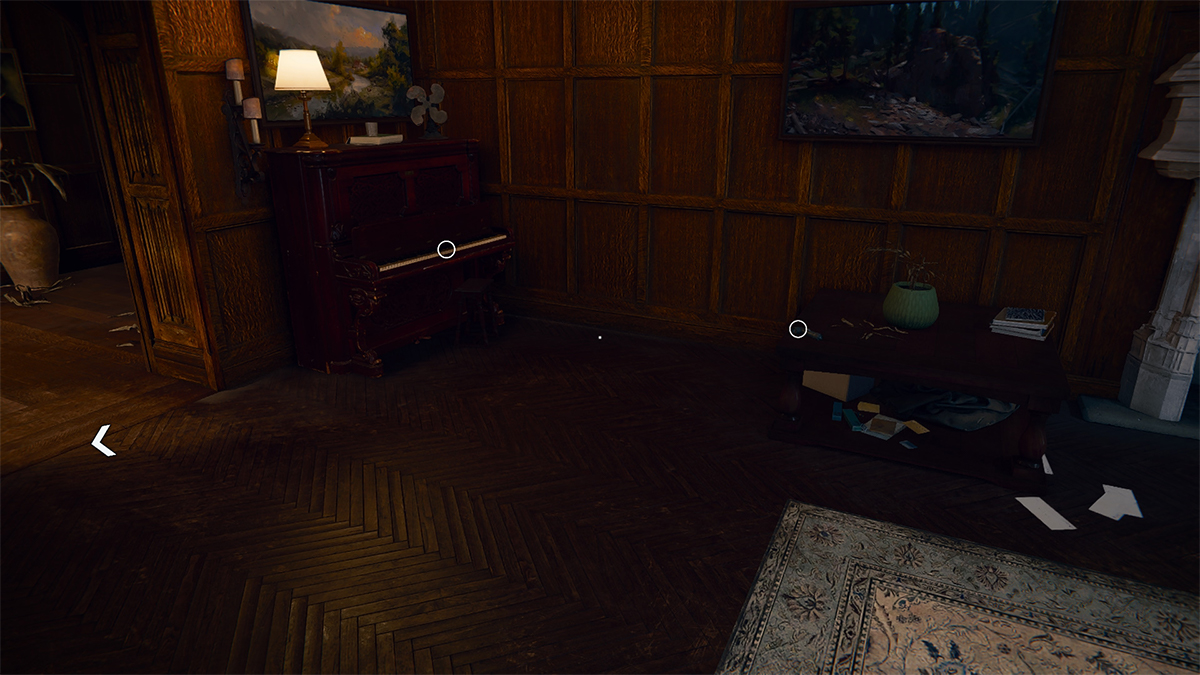
There is a table with an ultraviolet flashlight next to the musical instrument on the first floor of the house (to the left of the exit to the training ground). Take it: you can turn on the flashlight using the "4" key or RMB if you are close to any object (for example, studying the piano).
Shine a light on the piano to see the names of the notes above some keys. Shine a light above the piano and you will find the first note with the number "1". There is also an arrow pointing to the direction of the next note. All of them are displayed on the walls of the same room. When you find 5 notes, all that remains is to play the piano. A secret passage will open. More details about this puzzle are in our separate guide!
↖ Cauldron
Stand next to the table where Marshall was (or is right now, packing his things into his bag). Look towards the briefing board and Woods. To the right there is a small corridor, at the beginning of which there will be a door leading to the basement. Go down there, go to the second room and find a huge boiler. After examining two notes, you will get a hint to solve this part of the puzzle:
- Turn the fuel valve twice so that the arrow is on "0".
- Do the same with the "Boiler" valve.
- Turn the "Fuel" valve 1 time so that the arrow is in the middle.
- Press the ignition (the first light on the side of the boiler should light up; but it should not be red).
- Turn the "Boiler" valve twice more. The second, bright green light will light up. You have solved the puzzle!
- Thanks to these actions, the door in the second basement, next to the piano, will open.
↖ What is the code for the door in the basement?

After going down, read the note on the table, and then interact with the nearest door. You need to determine the correct code for the door, and you will have to act by guessing. Follow these tips:
- Enter any 5 numbers and press the button with the "lock".
- If there are green numbers, then you have not only guessed part of the code, but also found the correct position for the number.
- If there is a yellow number, then you have only guessed its value, but its position should be different.
- Immediately cross out all the red numbers from the code combination and do not use them anymore.
- Next, enter other numbers, excluding the red ones and adding those that have not yet been used. Leave the green numbers in their positions, and put the yellow ones in others where they have not yet been.
- Continue, you have about 5-6 attempts. If you do not have time to guess, you will have to start over.
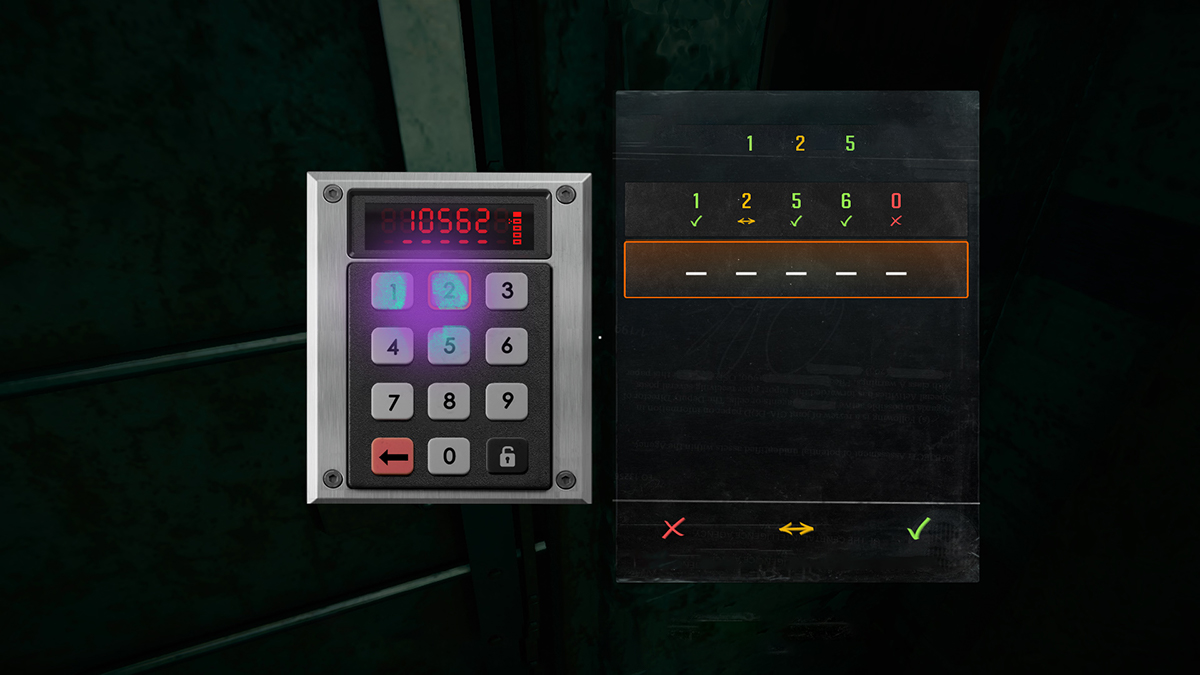
The difficulty of this puzzle is partly a matter of luck: if you guess a few numbers and their positions the first time, the task will be much easier. Each player will have a random combination.
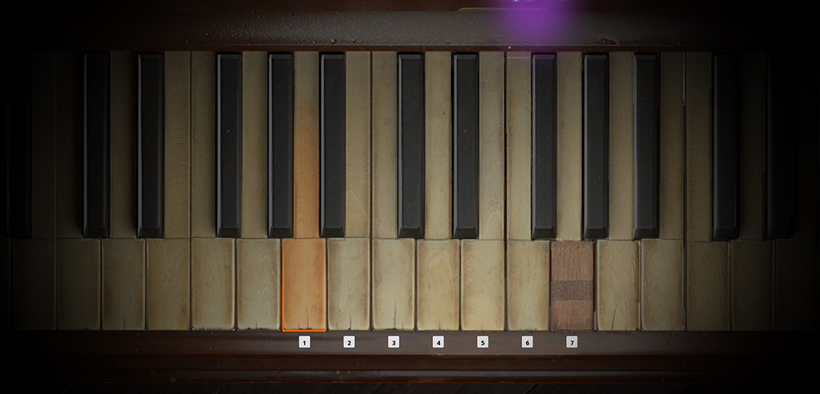
↖ Computer Word Puzzle
Go through the door, go around the equipment, read the note and look for another encryption machine at the end of the room. You need to choose 4 correct words.
These words will always be the same:
- BUNKER
- ROOM
- DOOR
- INTERROGATION
.jpg)
The order in which you enter the words will be different. Below you can see the connection between the numbers and letters, and at the top left is the hidden word made of numbers. Match these numbers and letters, or just look at the suggested letters and check which of the four words above can be assembled from them. There is nothing difficult in this puzzle!
When you solve the puzzle, one of the two doors in the corridor of this basement will open. Go down the corridor to the right, enter the room and find a torture chamber behind the glass. There is a note on the table. To get into the room and take the key, you need to pick the lock with a master key. Just rotate the master key by moving the game mouse until you see the spring light up. Hold it in this position for a few seconds. Repeat the steps for three springs.
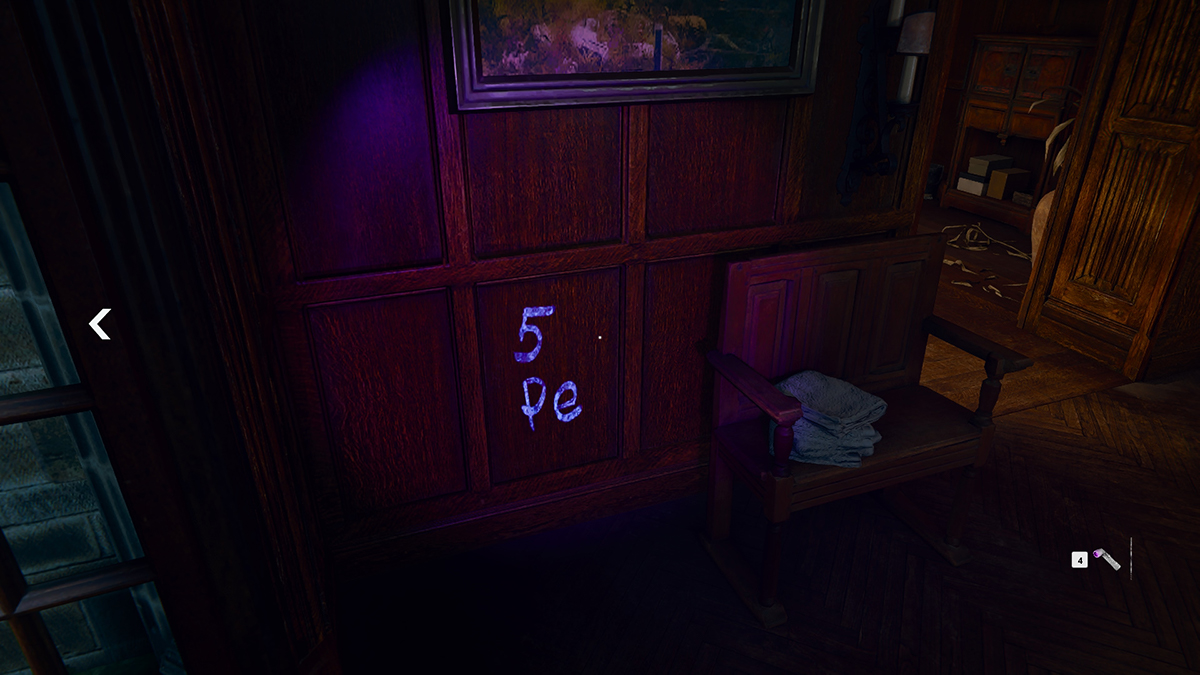
↖ How to open the safe in the shelter?
The climax is near! Having received the key from the previous room, go to the other wing of the basement and open the door. Turn on the radio located on the shelf. You will hear a random story in prose. This story, consisting of two lines, contains four words that you should pay attention to.
These words are objects that are placed around the room. You need to find the objects and shine an ultraviolet flashlight on them. Thanks to this, you will get a combination of four numbers. Unfortunately, there are objects that are more difficult to find than others. Well, I couldn't find some "flakes", and it's hard to spot the guitar - it's to the left of the sofa.
↖ All possible combinations
Mom came home with the flakes and crossed them off the list on the board, and when she reached for the broom, she realized that her bag had been left at the market. Code 7218.
- About Ivan — 1836
- "While Uncle Played the Guitar..." — 7409
- Iron on the Windowsill — 4037
- The Record Played the Sound of a Rocket Launch — 5024 (or 2024)
- This Is Not Just an Ashtray — 8935
- Love Letter — 2087
- He Collapsed on the Sofa — 3169 (or 3196)
- She Stood in the Dim Light of the Lamp, Sobbing Over the Family Crest — 1958
- She Stood Under the Crest — 1958
Look for the following words in your code phrase that match the numbers listed:
Ashtray — 8
Flag — 6
Broom — 8
Grill — 4
Calendar — 9
Guitar — 7
Cereal — 7
Iron — 4
Chair — 5
Lamp — 1
Board — 2
Bag — 1
Sofa — 3
Vinyl record — 5
Coat of arms — 9
Rocket — 0
Curtain — 0
Carpet — 8
Movie — 2
TV — 3
Once you have the combination, go up to the second floor of the house and find a bedroom with a safe. Enter the code. If you do it right, the code will be accepted automatically. That is, you do not need to click or confirm anything. If you enter the code and nothing happens, then a mistake was made.
Inside the safe is $1000, a skin for a knife. You will also get an achievement.
↖ Safe #2 - Mission 2. Blood Feud
The safe is in the same building as the main objective of the mission. Look on the first floor. To the left of the building, there is a truck that you can use to climb up to the ventilation. On the right side of the ventilation shaft, there is a grate that you can use to get into an office with two enemies. There is also a radio in the same room.
↖ Safe #3 - Mission 3. Objective Number One
Shortly after the start of the mission, when you enter the large hall, turn right to see a bar. McKenna's wife will be standing near it. Go around the bar on the left, go behind the screen and find a safe with a radio.
↖ Safe #4 - Mission 4. Hunting Season
After getting the tactical map, go to the enemy camp in the southwest. It's called "The Village". Destroy all the mobs in the central building and go inside.
↖ Safe #5 - Mission 5. Cradle
At the beginning of the mission, enter through the left door of the first building and go up to the second floor.
↖ Safe #6 - Mission 6. Emergency
Located in the red zone of the research complex. You go there to get the red director's pass. After entering the cognitive research area, immediately turn into the locker room on the right and look for a radio with a safe.
↖ Safe #7 - Mission 7. High Rollers
Controlling Sev, go down to the lower floor, using the pass, and clear the area of enemies. Go left, to the golden elevator that Marshall and Case need to send. To the left of the elevator is a radio, to the right is a safe.
↖ Safe #8 - Mission 8. Ground Control
At the start of the mission, clear the area in front of the terminal and go inside. Kill the enemies in the waiting room and go to the end, to the large boards. Look for a radio behind the reception desk, and in the office to the right of the desk is a safe built into the wall.
↖ Safe #9 - Mission 9. Below the radars
On the top floor of the building with the antenna. You need to disable this radar. You can get inside through the door below or by jumping from the roof.
Most Popular Posts
- CoD Black Ops 6 Bot Lobbies Guide: Everything You Need To Know
- COD BO6 Ranked Play: SR Works, Hidden MMR, Matchmaking, and More
- Black Ops 6 Dark Matter Camo Guide: Tips and Best Way To Unlock
- CoD Black Ops 6 Movement Guide: Settings, Techniques, and Strategies
- Call of Duty Black Ops 6 Beginner Guide: Tips, Tricks and Settings
- Top 10 Best PVP and PVE Shooter Games Release in Year 2025
Popular Category Lists
- Grow a Garden / (286)
- ARC Raiders / (268)
- CoD: Black Ops 7 / (166)
- Monopoly Go / (147)
- MLB 26 / (147)
- Star Citizen / (124)
- Steal a Brainrot / (89)
- ARK Survival Ascended / (79)
- Sailor Piece / (68)
- Forza Horizon 6 / (65)
- Diablo IV / (61)
- Blox Fruits / (61)
- Adopt Me / (56)
- CoD: BLACK OPS 6 / (55)
- Grow a Garden 2 / (50)
- Path of Exile 2 / (48)
- Monster Hunter Wilds / (46)
- Windrose / (44)
- Path of Exile / (40)
- Bee Swarm Simulator / (36)