


 0
0COD Black Ops 7 Controller Settings: Unlock Sticky Aim & Boost KD
- ELSA
- Share
- CoD: Black Ops 7
- 11/28/25
- 2801
You ever ADS at an enemy, but for some reason, none of your shots stick? It feels like there's a force field pushing your crosshair away, and you just can't hit them to save your life.
I'm going to walk you through the settings that will give you the stickiest aim possible. Whether you are a seasoned player trying to push past a 2.0 KD (like I am right now with my 1.9), or you are struggling to win gunfights, these changes are designed to make the game do the heavy lifting for you. This isn't just about copying numbers; it's about understanding how to make the game engine work in your favor.
- Step 1: Interface & Visibility (The Hidden Aim Buff)
- Step 2: Graphics & FOV (The Size Matters Debate)
- Step 3: Controller Mechanics (The Feel)
- Step 4: Aiming & Curves
- FAQ
- Summary
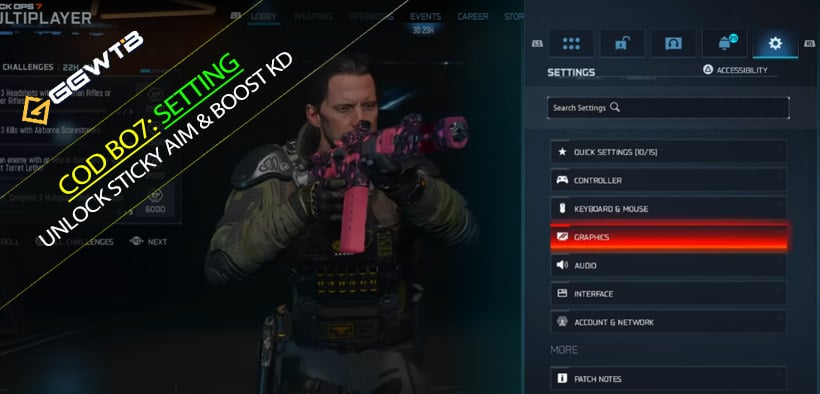
↖ Step 1: Interface & Visibility (The Hidden Aim Buff)
Most people skip straight to sensitivity, but you can't shoot what you can't see.
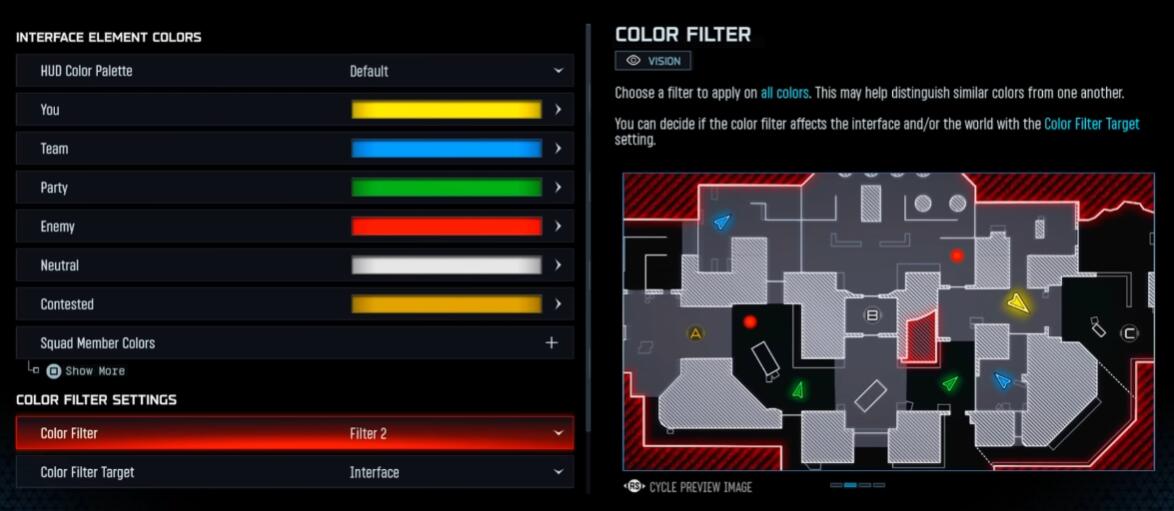
Color Customization: Make Enemies Pop
Go to Interface ->Readability ->Color Customization.
The Setting: Set Color Filter to Filter 2.
Why?
This cranks up the RGBs (Reds, Greens, Blues). In the muddy colors of certain maps, this makes enemy outlines pop significantly more. The faster your eyes snap to a target, the faster your thumbs react.
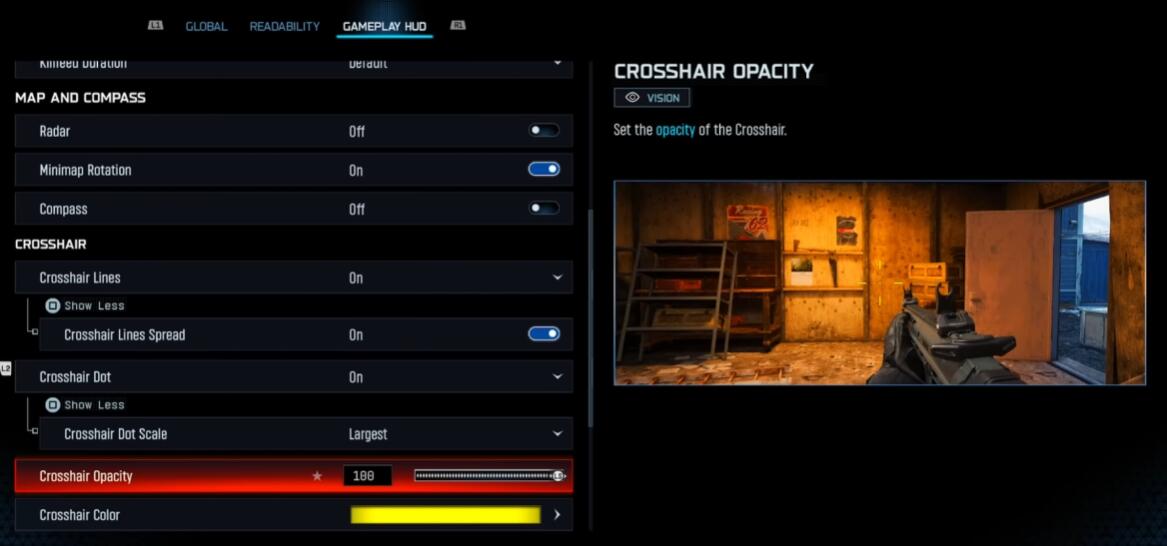
Crosshair Dot: The Tape Trick
Under Gameplay HUD, find the Crosshair settings.
Crosshair Dot: On.
Scale: Set to Largest.
Color: Yellow or Purple.
The Strategy: Back in the day, before this was a setting, people literally put clear tape with a dot on the center of their TV screens. Why? So they knew exactly where the center was for centering and quick-scoping. Making this dot huge and bright (yellow/purple stands out best) allows you to center your aim before you even aim down sights.
↖ Step 2: Graphics & FOV (The Size Matters Debate)
There is a misconception that Max FOV = Pro Player. That is actually hurting your aim.

Field of View (FOV)
Recommendation: 100 to 107.
The Logic:
- If it's too low (Default 90): You have tunnel vision. You have to move your stick too much to track someone running past you.
- If it's too high (120): Enemies at a distance look like ants. The aim assist bubble also feels smaller visually.
- 107 is the sweet spot: You get the peripheral vision to see threats, but targets remain large enough to hit consistently.
ADS Field of View (The Secret Sauce)
For Pro Aimers: Affected.
For Sticky Aim Seekers: Independent.
What does this mean?
If you struggle to stay on target, switch this to Independent. When you aim down sights (ADS), the game zooms the camera back in closer to the default value.
- The Result: The enemy's head becomes massive on your screen instantly.
- The Trade-off: You lose some side vision while aiming, but the target becomes huge. It makes tracking significantly easier because you have more screen real estate to work with.
↖ Step 3: Controller Mechanics (The Feel)
Now, let's talk about the actual sticks. This is where we eliminate fighting your own controller.
Vibration
Action: Turn it OFF.
Why? It might feel immersive, but vibration shakes your thumb. In a game where millimeters matter, you don't want your controller fighting your muscle memory. It will feel weird for two days, and then you will never go back.
Deadzones (Crucial for Aim Assist)
This is the most important part of the guide.
Right Stick Min: Set to 5.
- The Danger of 0: If you set this too low (like 0 or 1), the slightest accidental twitch of your thumb—or a tiny bit of stick drift—registers as input.
- The Aim Assist Conflict: If the game thinks you are inputting a Left command because of drift, while Aim Assist is trying to pull Right, you will break the rotational aim assist.
- The Fix: Setting it to 5 creates a small safety buffer. It ensures that when Aim Assist kicks in, your controller isn't accidentally fighting against it.
Right Stick Max: 100 (Or 99). This gives you full range of motion.
Left Stick Min: As low as possible (0-3) to make movement snappy.
Sensitivity
Horizontal/Vertical: 6-6 or 7-7 (Around 1.65 if using specific multipliers).
The Goal: You want to be fast enough to turn on someone shooting you in the back, but slow enough to stay centered. Do not go over 1.75 (or roughly 8-8) unless you are a movement god. It ruins consistency.
↖ Step 4: Aiming & Curves
Target Aim Assist: On (obviously).
Aim Response Curve:
- The Pick: Standard.
- The Controversy: A lot of people preach Linear, but in Black Ops 7, especially with recent nerfs to aim assist, Standard feels much stickier. It gives you that classic COD feel where the aim slows down appropriately over the target.
ADS Sensitivity Multiplier: 0.90 or 0.95.
- Why lower it? This allows you to look around quickly (high base sens) but slows your aim down slightly the moment you zoom in. That 0.05 difference is often the glue that keeps your crosshair on the enemy's chest during a strafe fight.
↖ FAQ
Q: Do I really need Control Freeks (Thumbstick extenders)?
A: They aren't mandatory, but they help. Increasing the height of your right stick increases your range of motion. It allows you to play at a higher sensitivity while still being able to make micro-adjustments. If you have $15, it's a solid investment.
Q: I changed to Independent FOV and now the recoil feels higher. Why?
A: Because the camera is zoomed in more, visual recoil looks more intense. It's not actually higher, it just looks that way. Give it a few games; the benefit of bigger targets usually outweighs the visual recoil.
Q: My aim still feels slippery at close range.
A: Check your Left Stick input. Rotational Aim Assist activates best when you are moving. If you are standing still like a turret, aim assist is weak. Always be strafing (moving left or right) while shooting to engage the sticky aim.
↖ Summary
Settings won't aim for you, but they can remove the barriers between you and a higher KD.
If you take one thing away from this guide: Try the Independent ADS FOV and lock your Deadzone to 5. These two changes alone can drastically change how heavy and sticky the aim assist feels.
Go into the Firing Range, test these out, and tweak them slightly to fit your playstyle. Now get out there and fix that KD.

Most Popular Posts
- Black Ops 7 Endgame Exotic Affinity Weapons Guide: Best Bonuses, Full Weapon List, and Farming Tips
- Black Ops 7 Zombies Totenreich Easter Egg Guide: Fast Solo & Co-Op Main Quest Walkthrough
- Black Ops 7 Cherry Fizz Guide: Fastest Illicit Cargo Event Route for Season 4
- Black Ops 7 Season 04 Endgame META: Best 5 Weapons After the XR3 Ion Nerf
- Black Ops 7 Season 4 Release Date, Maps, Weapons, Zombies, Warzone, and MW4 Reveal Prep
- Black Ops 7 Zombies Fast KOWAKUJO Easter Egg Guide: Cat Wonder Weapon, Evidence Puzzles
Popular Category Lists
- Grow a Garden / (286)
- ARC Raiders / (262)
- CoD: Black Ops 7 / (166)
- Monopoly Go / (146)
- MLB 26 / (145)
- Star Citizen / (112)
- Steal a Brainrot / (89)
- Sailor Piece / (68)
- ARK Survival Ascended / (67)
- Diablo IV / (61)
- Forza Horizon 6 / (60)
- Blox Fruits / (60)
- CoD: BLACK OPS 6 / (55)
- Adopt Me / (53)
- Path of Exile 2 / (48)
- Monster Hunter Wilds / (46)
- Windrose / (44)
- Path of Exile / (40)
- Grow a Garden 2 / (40)
- Bee Swarm Simulator / (36)


