0
0Drake Golem in Star Citizen 4.7: Is It Worth It for Mining?
- RCHM
- Share
- Star Citizen
- 04/06/26
- 4236
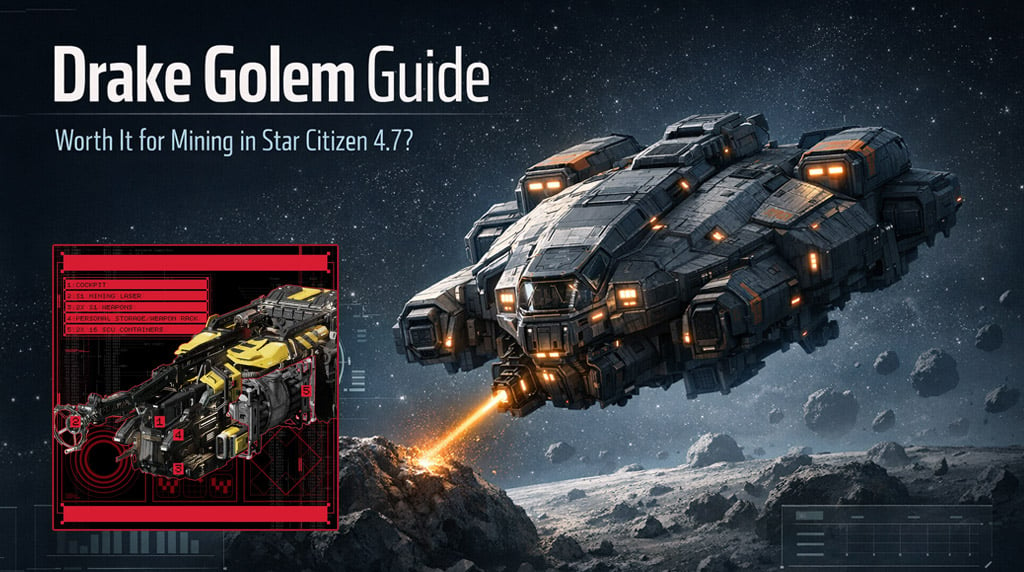
The Drake Golem is one of those ships that looks more appealing the longer you stare at the stat sheet—until you take it into real mining runs and feel where the compromises are. After spending time with it, my view is pretty simple: the Golem is good in a narrow role, but it is not the mining ship I'd recommend to most players first. It works best when we play to its strengths, avoid forcing bad rocks, and treat it as a specialist rather than a flexible all-rounder.
- What the Drake Golem does well
- Strong points
- The real issue: the Pittman mining head
- Best Drake Golem loadout
- Recommended setup
- What you should mine with the Golem
- Good targets
- Bad targets
- One area where the Golem stands out: stealth
- Should you buy the Drake Golem?
- Buy it if:
- Skip it if:
- FAQ
- Is the Drake Golem better than the Prospector?
- What is the best Golem loadout in Star Citizen 4.7?
- Is the Golem good for Quantanium or Stellarum?
- What is the Golem best at?
- Final thoughts
↖ What the Drake Golem does well
The Golem has a few real advantages, and they are not minor ones.
↖ Strong points
- Very good SCM speed
- Excellent stealth potential
- Comfortable on low-resistance rocks
- Usable mining window with the right module setup
Compared with the Prospector, the Golem feels a bit more agile when moving around in SCM. That matters if we are covering ground, staying low-profile, or mining in areas where being seen is a bad idea.
Here's the short version:
| Category | Drake Golem | Prospector |
|---|---|---|
| SCM Speed | 203 m/s | 156 m/s |
| NAV Speed | 1010 m/s | 994 m/s |
| Stealth Potential | Excellent | Good |
| Mining Flexibility | Limited | Better |
The key takeaway is this: the Golem is faster and stealthier, but the Prospector is easier to recommend overall.
↖ The real issue: the Pittman mining head
This is the part that decides whether you'll enjoy the ship or get tired of it.
The Golem uses the Pittman mining laser, and it is bespoke, which means we cannot swap it out. That matters because the laser comes with built-in trade-offs.
| Pittman Modifier | Effect | Practical Result |
|---|---|---|
| Resistance | +25% | Hard rocks get worse |
| Instability | +35% | More charge control difficulty |
| Optimal Charge Window | +40% | Easier to stay in the green |
| Optimal Charge Rate | -40% | Slower charge response |
On paper, the bigger charge window sounds nice. In practice, the extra resistance is the problem.
From my own testing, this is where the Golem starts losing ground. If we stick to easy, low-resistance rocks, the ship feels fine. If we try to mine tougher materials, the laser starts working against us. That is why the ship can feel efficient one run and frustrating the next.
↖ Best Drake Golem loadout
For most players, I would keep the loadout simple.
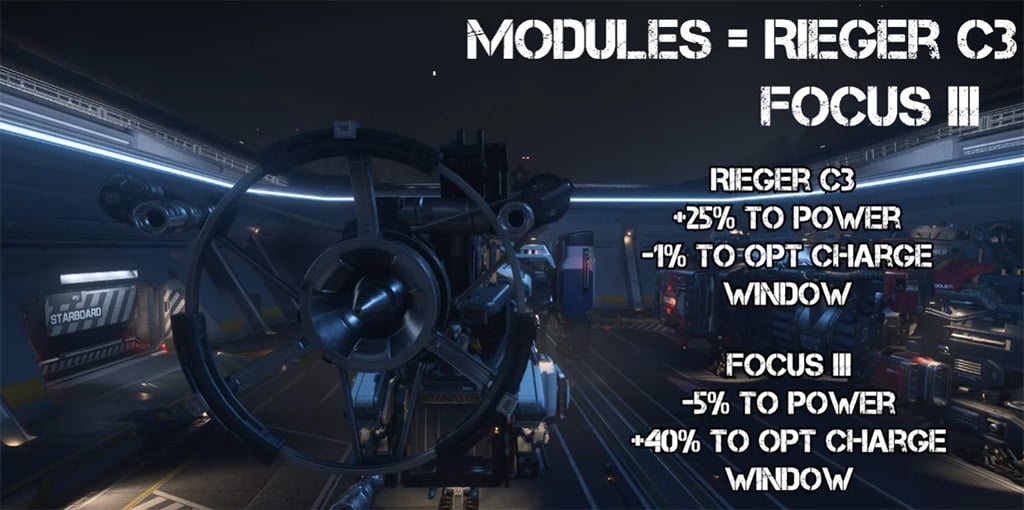
↖ Recommended setup
- Rigor C3
- Focus 3
This setup gives a strong balance between:
- More laser power
- A wider optimal charge window
- Better overall control on easier rocks
If you find the laser charge-up too slow, switch to: Rigor C3 + Torrent 3
That setup feels better if you want a faster response, but it gives up some comfort.
| Loadout | Best Use | Why It Works |
|---|---|---|
| Rigor C3 + Focus 3 | Everyday mining | Best balance of power and control |
| Rigor C3 + Torrent 3 | Faster charge response | Helps offset slow charge behavior |
| Double Rigor C3 | Aggressive power build | Only for pilots comfortable with instability |
If you are new to mining, I would not overcomplicate this. Start balanced, then adjust based on what feels slow or awkward.
↖ What you should mine with the Golem
This is where practical value really shows up.
↖ Good targets
The Golem is much better on low-resistance materials, such as:
- Iron
- Titanium
- Aluminum
Why? Because the laser's extra resistance penalty matters far less when the base rock is already easy to crack.
↖ Bad targets
I would avoid using the Golem as a dedicated ship for high-resistance materials like:
- Quantanium
- Stellarum
- Ricsite
- Other harder premium rocks
That does not mean the ship is useless. It means we need to be selective. And honestly, that is the most important thing to understand before buying it.
| Rock Type | Golem Performance | Recommendation |
|---|---|---|
| Low resistance | Good | Prioritize these |
| Medium resistance | Situational | Depends on setup and skill |
| High resistance | Weak | Usually skip |
If you find yourself constantly fighting the charge bar, adding power, and still feeling behind, that usually means you picked the wrong target for the ship.
↖ One area where the Golem stands out: stealth
This is probably the Golem's most underrated advantage.
With stealth-focused components, the ship can become a very low-signature mining platform. That gives it a niche the Prospector does not match quite as well.
A practical stealth-oriented setup includes:
- Mirage
- Snowblind
- Slipstream
- Specter
- Abetti Civilian A radar
Here's a simplified radar comparison:
| Radar | EM Max | Use Case |
|---|---|---|
| Abetti Civilian A | 1408 | Best stealth option |
| Surveyor Light | 1980 | Standard industrial choice |
| Observer Light | 2178 | Higher EM signature |
If we are mining in riskier areas, this matters. A lower signature gives us more room to work quietly and leave before attracting attention.
↖ Should you buy the Drake Golem?
For most players, my answer is only if its niche matches how you already mine.
↖ Buy it if:
- You focus on lower-resistance rocks
- You value stealth
- You want a faster SCM mining ship
- You are fine with a more specialized tool
↖ Skip it if:
- You want to mine everything
- You prefer high-value, high-resistance targets
- You want a ship with more flexibility
- You do not want to work around a fixed mining head
This is really what it comes down to: the Golem is not bad, but it is picky. If we use it the way it wants to be used, it performs well enough. If we ask it to do Prospector jobs, it starts feeling like the wrong purchase.
↖ FAQ
↖ Is the Drake Golem better than the Prospector?
Not overall. The Golem is faster and stealthier, but the Prospector is still the better general-purpose mining ship.
↖ What is the best Golem loadout in Star Citizen 4.7?
For most players, Rigor C3 + Focus 3 is the safest and most useful setup.
↖ Is the Golem good for Quantanium or Stellarum?
Not really. It can attempt harder rocks, but the built-in resistance penalty makes those targets less comfortable and less efficient.
↖ What is the Golem best at?
It is best at low-resistance mining with a stealth-focused playstyle.
↖ Final thoughts
The Drake Golem is worth it for the right pilot, not for every pilot. That is the cleanest way to put it. If we want a stealthy, fast mining ship for easier rocks, it does the job well. If we want flexibility and fewer limitations, the Prospector remains the safer recommendation.

Most Popular Posts
- Star Citizen Covalex Cargo Hauling 4.8: Fast Reputation Route, Best Ships, and Master Unlocks
- Star Citizen 4.8 Solo Ship Guide: Best Purchasable PvP & PvE Ships, Loadouts, Components
- Star Citizen 4.8 Salvage Guide: Best RMC Farming, Adagio Rep, and Ships to Use
- Star Citizen 4.8.3 XenoThreat Event Guide: Fast Points, Best Missions, Rewards, and Ship Strategy
- Star Citizen 4.8 Best Component Blueprints: Fast Farming Roadmap for Crafting
- Star Citizen 4.8 aUEC Farming Guide: Best Money Methods, First Ships, and Fast Progression
Popular Category Lists
- Grow a Garden / (286)
- ARC Raiders / (266)
- CoD: Black Ops 7 / (166)
- Monopoly Go / (146)
- MLB 26 / (145)
- Star Citizen / (120)
- Steal a Brainrot / (89)
- ARK Survival Ascended / (75)
- Sailor Piece / (68)
- Forza Horizon 6 / (64)
- Diablo IV / (61)
- Blox Fruits / (60)
- CoD: BLACK OPS 6 / (55)
- Adopt Me / (54)
- Path of Exile 2 / (48)
- Grow a Garden 2 / (47)
- Monster Hunter Wilds / (46)
- Windrose / (44)
- Path of Exile / (40)
- Bee Swarm Simulator / (36)