0
0Star Citizen 4.8 aUEC Farming Guide: Best Money Methods, First Ships, and Fast Progression
- RCHM
- Share
- Star Citizen
- 05/27/26
- 10119
Patch 4.8 wiped the board clean. That means early choices matter again.
The fastest path right now is simple: farm Gilly's Flight School, rotate Protect Ship Foxwell contracts during cooldowns, then move into planetary hauling once you can rent or buy a proper cargo ship.

- Best Star Citizen 4.8 aUEC Farming Methods
- Farm Gilly's Flight School First
- Gilly's Combat Scenario Priority
- Core Combat Rule
- Best Starter Farm: Gilly's Scenario 3 and 4
- First Ship to Buy: F7C Hornet Mk II
- Why the Hornet Mk II Is Worth It
- Best Hornet Mk II Upgrades in 4.8
- Priority Upgrade List
- How to Clear Gilly's Scenario 5 and 6
- Scenario 5 Kill Order
- Scenario 6 Kill Order
- Rotate Protect Ship Foxwell Contracts
- Best Combat Rotation
- Hauling: Boring, But Strong Money
- Best Hauling Areas in Stanton
- RAFT vs Hull-B
- How to Stack Hauling Missions for 1.5M aUEC/hour
- Farm Covalex Reputation While Hauling
- Legal vs Illegal Hauling
- Best First Ships to Buy in Star Citizen 4.8
- Recommended Ship Progression
- Example 4.8 Starter Fleet
- Fastest 4.8 Progression Route
- Common Mistakes That Kill Profit
- FAQ
- What is the best way to make money in Star Citizen 4.8?
- What is the best first ship to buy after the wipe?
- Can starter ships farm Gilly's Flight School?
- Is hauling worth it in Star Citizen 4.8?
- Should I buy the RSI Perseus early?
- Summary
This route works with starter ships. It gets much better once you buy a Hornet Mk II.
↖ Best Star Citizen 4.8 aUEC Farming Methods
Do not lock yourself into one activity. The money comes from rotating contracts and cutting downtime.
| Method | Best Ship | Expected Income | Use Case |
|---|---|---|---|
| Gilly's Scenarios 3–4 | Starter ship / light fighter | Strong early income | First money farm |
| Gilly's Scenarios 5–6 | Medium fighter | High combat income | After fighter upgrade |
| Protect Ship Foxwell | Starter ship / fighter | 60k+ per mission | Fill Gilly's cooldowns |
| Planetary Hauling | RAFT / Hull-B | Up to 1.5M aUEC/hour | Steady money + rep |
| Illegal Interstellar Hauling | Cargo ship | Good but risky | Higher-risk hauling |
The best early combat loop can push around 1M aUEC/hour when mission spawns cooperate and you keep moving.
↖ Farm Gilly's Flight School First
Gilly's Flight School missions sit under the Mercenary tab as Combat Gauntlet - Scenario 1 to 8.
For money farming, focus on Scenario 3 to 6.
Avoid Scenario 7 and 8 if you are solo in a starter ship. They are not worth the repair bills or wasted time.
↖ Gilly's Combat Scenario Priority
| Scenario | Difficulty | Recommended Ship | Farm Value |
|---|---|---|---|
| 1–2 | Easy | Any starter ship | Warm-up only |
| 3 | Easy | Starter ship | Good early farm |
| 4 | Easy in 4.8 | Starter ship / fighter | Best early farm |
| 5 | Medium | Hornet Mk II or better | Good after upgrade |
| 6 | Medium | Hornet Mk II or better | Strong combat farm |
| 7–8 | Hard | Group / strong ship | Skip early |
↖ Core Combat Rule
Do not sit in front of enemy ships.
That one habit saves more money than any component upgrade.
If enemies keep deleting your shields, you are probably jousting. Break off. Roll away. Re-enter from the side or rear.
Your goal is not to trade damage. Your goal is to control angles.
↖ Best Starter Farm: Gilly's Scenario 3 and 4
Scenario 3 and 4 are the early wipe sweet spot.
They are easy enough for ships like:
- Aurora
- Mustang
- Cutter
- Nomad
- Avenger Titan
Scenario 4 can be annoying when working properly because the enemy ships are agile. In Star Citizen 4.8, it is currently easier than expected when mission behavior bugs out.
Use that while it lasts.
| Starter Ship | Performance in Scenario 3–4 | Tip |
|---|---|---|
| Aurora | Works, but fragile | Avoid head-on trades |
| Mustang | Solid handling | Abuse mobility |
| Cutter | Usable, not ideal | Play safe angles |
| Nomad | Tankier, slower turn rate | Do not chase tight turns |
| Avenger Titan | Best starter feel | Farm aggressively |
If Scenario 4 feels rough, your ship may be the issue. Farm Scenario 3, stack Foxwell contracts, then upgrade.
↖ First Ship to Buy: F7C Hornet Mk II
Your first serious combat buy should be the F7C Hornet Mk II.
It is not just stronger. It makes farming cleaner.
You kill faster. You take fewer repairs. You can handle Gilly's Scenario 5 and 6 without sweating every mistake.
↖ Why the Hornet Mk II Is Worth It
| Strength | Why It Matters |
|---|---|
| Good stock components | Less upfront upgrade cost |
| Strong hardpoints | Scales well with better guns |
| Durable frame | More forgiving than light fighters |
| Great mission farmer | Clears Gilly's and Foxwell fast |
| Useful long-term | Not a throwaway purchase |
The Ghost Mk II is also a valid option if you want to save slightly more before buying.
↖ Best Hornet Mk II Upgrades in 4.8
Buy the ship first. Then upgrade weapons and travel speed.
↖ Priority Upgrade List
| Upgrade | Location | Cost / Note |
|---|---|---|
| Atlas Quantum Drive | HUR-L5 | About 84k aUEC |
| F7C Mk II Nose Turret | New Babbage | Required for stronger setup |
| F7C Mk II Ball Turret | New Babbage | Adds major DPS |
| Deadbolt II / III / IV | New Babbage | Full weapon package about 473k aUEC |
This setup turns the Hornet into a reliable money printer for Gilly's Scenario 4–6.
If you are short on cash, buy the Atlas first, then upgrade weapons piece by piece.
↖ How to Clear Gilly's Scenario 5 and 6
Scenario 5 is where bad target priority gets punished.
You will face tougher ships, including Freelancer MIS targets. On the second wave, kill the Sabre Firebird first.
↖ Scenario 5 Kill Order
| Priority | Target | Reason |
|---|---|---|
| 1 | Sabre Firebird | Fast threat, high pressure |
| 2 | Escorts | Cuts incoming damage |
| 3 | Freelancer MIS | Easier once the field is clean |
Do not tunnel the big ship while small threats chew you up.
↖ Scenario 6 Kill Order
Scenario 6 gives you:
- 2x Gladius
- 1x Constellation Andromeda
Clear it like this:
1. Kill both Gladius first.
2. Stay away from the Constellation's nose.
3. Avoid the four front Size 5 weapons.
4. Take turret fire if needed. Never face-tank the main guns.
| Threat | Danger | Answer |
|---|---|---|
| Gladius fighters | Fast pressure | Kill first |
| Connie turrets | Annoying chip damage | Manageable |
| Connie front guns | Deadly burst | Avoid completely |
With an upgraded Hornet, Scenario 6 becomes consistent. In a starter ship, it is usually not efficient.
↖ Rotate Protect Ship Foxwell Contracts
Gilly's missions have downtime. Do not wait around.
Run Protect Ship Foxwell contracts.
They usually pay around 60k aUEC each at yellow level, and there are often two available.
Later, orange and red versions pay more.
↖ Best Combat Rotation
| Step | Action |
|---|---|
| 1 | Run available Gilly's 3–6 |
| 2 | Take Protect Ship Foxwell contracts |
| 3 | Complete 1–2 Foxwell missions |
| 4 | Return to Gilly's when scenarios respawn |
| 5 | Repair, restock, repeat |
This keeps the money moving.
With a Hornet Mk II and clean flying, expect around 1M aUEC/hour on average. Bad spawns, long travel, or heavy repairs will cut that down.
↖ Hauling: Boring, But Strong Money
Hauling is not glamorous. It pays anyway.
Once you can rent or buy a RAFT or use a Hull-B, start stacking planetary hauling contracts.
Skip long interstellar routes early unless the payout is clearly worth it. Planetary loops are faster and easier to stack.
↖ Best Hauling Areas in Stanton
Use the major planets:
- microTech
- ArcCorp
- Hurston
- Crusader
Run planet-to-station and station-to-planet contracts.
↖ RAFT vs Hull-B
| Ship | Best Use | Verdict |
|---|---|---|
| RAFT | Early hauling | Simple, reliable, good starter hauler |
| Hull-B | Bigger stacking | Better for rep and volume farming |
Both have tractor beam support, which matters. Loading speed is profit.
↖ How to Stack Hauling Missions for 1.5M aUEC/hour
The hauling trick is route stacking.
In a good loop, you can stack roughly:
- 7 planet-to-station contracts
- 3 station-to-planet contracts
- 10 completions per round trip
That is where hauling becomes real money.
| Rule | Why It Matters |
|---|---|
| Take only direct routes | Avoids wasted travel |
| Pick the highest-paying contracts | Better payout per minute |
| Keep one planet/station pair | Cleaner route flow |
| Use tractor beams fast | Loading time kills profit |
| Replace completed contracts immediately | Keeps the loop alive |
With clean loading and good contract luck, this can reach about 1.5M aUEC/hour.
If your cargo bay turns into a disaster pile, stack fewer jobs. Fast and clean beats overloaded and miserable.
↖ Farm Covalex Reputation While Hauling
Hauling is not only about Star Citizen aUEC.
In Star Citizen 4.8, Covalex reputation matters because it helps unlock useful crafting access, including strong military component options.
That gives hauling long-term value.
One important habit: insure valuable crafted components.
Losing crafted gear because you skipped insurance feels terrible. Do not learn that lesson twice.
↖ Legal vs Illegal Hauling
Illegal hauling pays, but it adds risk.
If you are broke after the wipe, stay legal. If you already have backup cash and ships, illegal interstellar hauling can be worth testing.
| Type | Risk | Best For |
|---|---|---|
| Legal planetary hauling | Low | Stable income |
| Legal interstellar hauling | Medium | Patient haulers |
| Illegal interstellar hauling | High | Risk-tolerant players |
Early wipe rule: protect your bankroll first.
↖ Best First Ships to Buy in Star Citizen 4.8
Buy ships that unlock income. Not ships that only look good in the hangar.
↖ Recommended Ship Progression
| Priority | Ship | Role | Why Buy It |
|---|---|---|---|
| 1 | F7C Hornet Mk II | Combat | Best early mission farmer |
| 2 | RAFT | Hauling | Opens cargo income |
| 3 | Hull-B | Hauling / Rep | Better stacking and Covalex grind |
| 4 | Prospector | Mining | Adds another money loop |
| 5 | Reclaimer | Salvage | Emergency money machine |
| 6 | RSI Perseus | Heavy combat | Long-term goal, around 39M aUEC at Area18 |
The smart order is simple:
Combat income first. Cargo income second. Big dream ships last.
↖ Example 4.8 Starter Fleet
A balanced fleet keeps the game from becoming one endless grind.
| Ship | Purpose |
|---|---|
| Cutlass Red | Medical utility and support |
| Hornet F7A/F7C Mk II | Combat farming |
| Hull-B | Hauling and rep |
| Prospector | Mining |
| Fortune | Industrial variety |
| Guardian MX | Combat variety |
| Reclaimer | Salvage income goal |
You do not need all of these fast.
You need one reliable earner first. For most players, that is the Hornet Mk II.
↖ Fastest 4.8 Progression Route
Use this order if you want clean progress after the wipe.
| Phase | Action | Result |
|---|---|---|
| 1 | Farm Gilly's 1–4 in starter ship | First cash stack |
| 2 | Repeat Scenario 3–4 | Save for fighter |
| 3 | Buy Hornet Mk II | Faster combat clears |
| 4 | Add Atlas + Deadbolt setup | Better DPS and travel |
| 5 | Farm Gilly's 4–6 + Foxwell | Around 1M/hour potential |
| 6 | Rent/buy RAFT or Hull-B | Open hauling income |
| 7 | Stack planetary hauling | Around 1.5M/hour potential |
| 8 | Buy Prospector, Reclaimer, or Perseus | Long-term fleet growth |
This path works because every step makes the next step faster.
↖ Common Mistakes That Kill Profit
Avoid these. They waste more time than bad payouts.
| Mistake | Fix |
|---|---|
| Jousting enemies head-on | Fight from side/rear angles |
| Running Scenario 7–8 too early | Stay on Scenario 3–6 |
| Waiting for Gilly's respawns | Run Foxwell contracts |
| Buying luxury ships first | Buy income ships first |
| Taking random hauling routes | Stack direct planet/station routes |
| Overstacking cargo | Keep loads clean and fast |
| Forgetting component insurance | Insure valuable crafted parts |
If your hourly income feels bad, check downtime first. Repairs, travel, bad route choices, and messy loading are usually the real killers.
↖ FAQ
↖ What is the best way to make money in Star Citizen 4.8?
The best early route is Gilly's Flight School Scenario 3–4, then Protect Ship Foxwell contracts during cooldowns. After buying a better fighter, farm Gilly's 4–6 for stronger income.
↖ What is the best first ship to buy after the wipe?
The F7C Hornet Mk II is the best first serious buy for combat-focused players. It clears Gilly's and Foxwell contracts faster, takes fewer repairs, and scales well with weapon upgrades.
↖ Can starter ships farm Gilly's Flight School?
Yes. Aurora, Mustang, Cutter, Nomad, and Avenger Titan can handle early scenarios. Stick to Scenario 3 and 4 until you can afford a better fighter.
↖ Is hauling worth it in Star Citizen 4.8?
Yes. With a RAFT or Hull-B, stacked planetary hauling can reach about 1.5M aUEC/hour. It also builds useful reputation, especially with Covalex.
↖ Should I buy the RSI Perseus early?
No. The RSI Perseus costs around 39M aUEC at Area18 and should be a long-term goal. Build stable income first through combat, hauling, mining, or salvage.
↖ Summary
The best Star Citizen 4.8 money route is practical, not fancy.
Start with Gilly's Scenario 3–4 in any starter ship. Buy a Hornet Mk II. Upgrade it with an Atlas Quantum Drive and Deadbolt weapon setup. Then rotate Gilly's 4–6 with Protect Ship Foxwell contracts for around 1M aUEC/hour potential.
Once combat income is stable, move into RAFT or Hull-B hauling. Stack direct planetary contracts for up to 1.5M aUEC/hour and grind Covalex reputation while you earn.
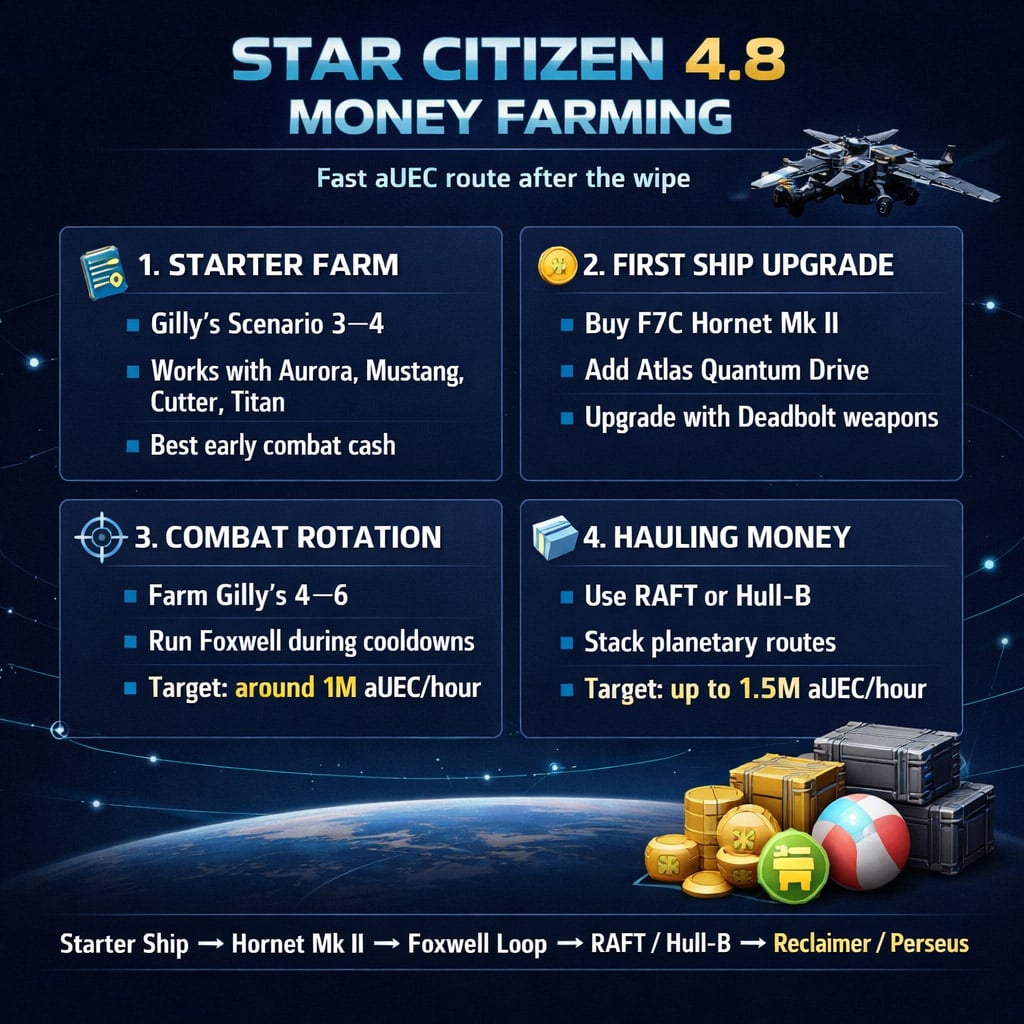
The clean progression is:
Starter ship ➔ Gilly's farm ➔ Hornet Mk II ➔ Foxwell rotation ➔ RAFT/Hull-B hauling ➔ Reclaimer or Perseus goals.

Most Popular Posts
- Star Citizen Covalex Cargo Hauling 4.8: Fast Reputation Route, Best Ships, and Master Unlocks
- Star Citizen 4.8 Solo Ship Guide: Best Purchasable PvP & PvE Ships, Loadouts, Components
- Star Citizen 4.8.3 XenoThreat Event Guide: Fast Points, Best Missions, Rewards, and Ship Strategy
- Star Citizen 4.8 Best Component Blueprints: Fast Farming Roadmap for Crafting
- Star Citizen 4.8 aUEC Farming Guide: Best Money Methods, First Ships, and Fast Progression
- Star Citizen 4.8 aUEC Guide: 3M+ Money per Hour with Salvage Cargo Runs
Popular Category Lists
- ARC Raiders / (291)
- Grow a Garden / (286)
- CoD: Black Ops 7 / (166)
- MLB 26 / (150)
- Monopoly Go / (148)
- Star Citizen / (128)
- ARK Survival Ascended / (90)
- Steal a Brainrot / (90)
- Sailor Piece / (68)
- Forza Horizon 6 / (67)
- Diablo IV / (62)
- Blox Fruits / (62)
- Adopt Me / (58)
- Grow a Garden 2 / (57)
- CoD: BLACK OPS 6 / (55)
- Path of Exile 2 / (48)
- Monster Hunter Wilds / (46)
- Windrose / (44)
- Path of Exile / (40)
- Bee Swarm Simulator / (37)