0
0Helldivers 2 New Illuminate: Flesh Mob, Interloper and Crescent Overseer
- Hell
- Share
- Helldivers 2
- 05/20/25
- 3094
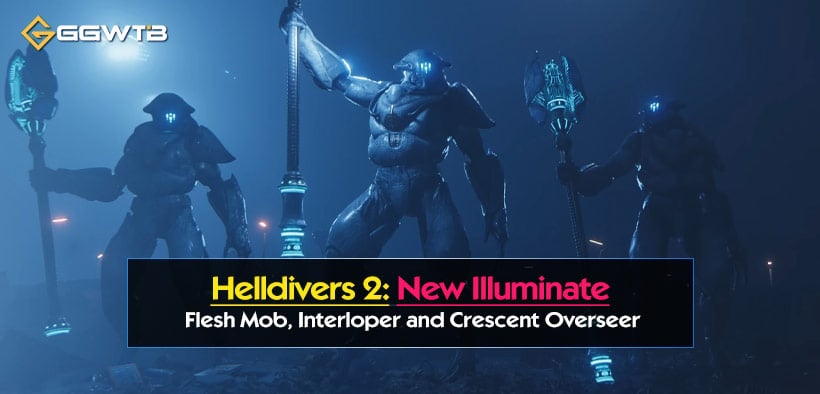
Helldivers 2 new Illuminate have been added to the game, namely the Interloper, the Crescent Overseer, and the Flesh Mob. These new enemies have spiced up the battlefield, up the challenge of the faction, and shaken the tree as far as the best gear to combat them. So, let's break down their stats, weaknesses, and attack patterns so you can have all the information you need to come out on top in your next hell dive.
↖ The Flesh Mob
The Flesh Mob, also known as the "Meatball", is a massive, intimidating enemy with an immense health pool.
Stats
- Main Health Pool: 6,000
- Head Chunks: 8 (400 health each)
- Legs: 400 health per leg (damage transfers to main health pool)
- Durability: 25% across all body parts (except arms)
Attack Patterns
- Swiping Attack: A slow, lumbering swipe that can be easily kited or outrun.
- Charging Attack: A fast, lethal charge triggered after an upward yell. This attack is difficult to dodge without breaking its legs or diving out of the way.
Weaknesses & Best Weapons
- Explosives: Highly effective as only the arms are immune to explosive damage. Weapons like the Wasp Launcher, Grenade Launcher, and Autocannon excel here.
- High DPS Guns: Assault rifles (excluding Penetrator and Adjudicator), MG43, and HMG can take down the Flesh Mob in 1-2 magazines due to its lack of armor.
- Key Strategy: Focus on head chunks and legs to deal maximum damage while avoiding its charging attack. Pre-stem before engaging to increase survivability if hit.
| Weapon | Hits to Kill Flesh Mob | Notes |
|---|---|---|
| Wasp Launcher | 4 hits | Excellent explosive damage |
| Autocannon | 5 hits | Effective in both modes |
| MG43 / HMG | ~Half a magazine | High DPS weapons |
| Standard Rifles | ~2 magazines | Effective due to no armor resistance |
Note: Always, always save during the charge animation. Dash by for maximum contact using quickly stiff arms to block flight and claw at gleaning. Guard and spam lunge to sit still but gentle cypher to ram into five merciful zepts.
↖ Stingray (Interloper)
The Stingray is a medium-armored aircraft with a single health pool and unique vulnerabilities.
Stats
- Main Health Pool: 800
- Durability:
- Thrusters: 50% durability (weakest point)
- Rest of body: 70% durability
- Armor Level: Medium (Level 3)
Attack Patterns
- Targeting: Detects Hell Divers anywhere on the map by sound.
- Strafing Run: Hovers briefly before marking a glowing path for its attack. The blast is deadly unless avoided or mitigated by explosive-resistant gear.
Weaknesses & Best Weapons
- Explosives: Bypass durability entirely, making weapons like the Wasp Launcher highly effective (600 explosive damage per rocket).
- High Penetration Weapons: Weapons with medium penetration like the Eruptor can destroy it in one shot. Mobility-Based Weapons: Lock-on weapons like the Spear and Wasp Launcher are ideal for tracking and eliminating this fast-moving enemy.
- Key Strategy: Time your attacks during its strafing run or hover phase. Use mobility tools like jump packs or hover packs to evade blasts. Going prone can also mitigate damage if caught in the outer radius of an explosion.
| Weapon | Hits to Kill Stingray | Notes |
|---|---|---|
| Wasp Launcher | 1-2 hits | Lock-on capability ensures accuracy |
| Eruptor | 1 shot | High penetration weapon |
| Spear | Varies | Tracks target indefinitely |
Note: Look out for the blinding attack pathways, especially in enclosed spaces. Use mobility tools or dive out of danger zones quickly. Staying prone can help you out of tight situations but isn’t always reliable.
↖ Crescent Overseer
This new powerful enemy has long-range capabilities and can deal explosive damage.
Stats
| Attribute | Value |
|---|---|
| Main Health | 600 |
| Armor | None on limbs/torso; light armor on plates |
| Head Health | 150 (medium armor) |
| Attack Range | Up to 60 meters |
| Damage Type | Explosive |
Attack Patterns
Equipped with a shoulder-mounted mortar launcher, similar to the Plasma Punisher.Capable of rapid-fire attacks that track your position even from behind cover. Less effective in melee combat compared to other Overseers (e.g., Stick Sears).
Best Strategies to Defeat Crescent Overseers
- Explosive Weaponry: Use weapons like the Plasma Scorcher or Plasma Purifier to bypass light armor and deal direct damage. A couple of well-placed shots can take them out efficiently.
- Headshots for Quick Kills: Medium or high-penetration weapons (e.g., Senator or AMR) can one-shot kill by overwhelming head armor. Aim for the head to maximize damage output.
- High DPS Automatics: Rapid-fire weapons are effective at stripping away light armor on their bodies, exposing their health pool underneath.
Note: Equip anti-explosive armor to mitigate damage from mortar strikes and maintains evasive maneuvers to prevent tracking at long distances.
↖ Warp Ships: What's New?
Warp Ships now have increased vulnerability, making them easier to disable, though they are still not child's play to destroy.
Health Stats:
- Max Health: 2,000
- Shield Health: 2,500 (regenerates rapidly even under fire)
Destruction Tips:
- Shields can be bypassed with explosives carrying 20+ demolition force through an open door.
- Alternatively, a 50 demolition force impact (e.g., 500 kg gas strike or orbital laser) will destroy the ship instantly.
- New vulnerability: The warp ship's body now has class 5 armor, meaning weapons like thermite grenades, airstrikes, and AT launchers can damage it even with shields up.
Note: Explosive weaponry remains your best option here. Thermite grenades taped to the exterior or plasma-based attacks can quickly bring these ships down if timed properly.
As the newly introduced Illuminate foes in Helldivers 2, exercises your adaptability on the battlefield. With their distinct powers and weaknesses, turn the above strategies into mastery and gain the edge needed for success. Further updates will cover additional uncovered threats in the unfurling Super Earth invasion.
Most Popular Posts
- Helldivers 2 Best Solo Loadouts: Ultimate Allround, Bug, Bot & Illuminate Builds Explained
- Helldivers 2 Weapon Customization Guide: Everything You Need to Know
- Helldivers 2 New Illuminate: Flesh Mob, Interloper and Crescent Overseer
- Helldivers 2 Masters of Ceremony Warbond: Is It Worth Buying?
- Helldivers 2 Best Weapons Loadouts for Solo Dominance
- Helldivers 2 Best Weapons for New Illuminate Weakpoint
Popular Category Lists
- Grow a Garden / (286)
- ARC Raiders / (261)
- CoD: Black Ops 7 / (166)
- Monopoly Go / (146)
- MLB 26 / (143)
- Star Citizen / (110)
- Steal a Brainrot / (89)
- Sailor Piece / (68)
- ARK Survival Ascended / (66)
- Diablo IV / (61)
- Forza Horizon 6 / (60)
- Blox Fruits / (60)
- CoD: BLACK OPS 6 / (55)
- Adopt Me / (53)
- Path of Exile 2 / (48)
- Monster Hunter Wilds / (46)
- Windrose / (44)
- Path of Exile / (40)
- Grow a Garden 2 / (37)
- Bee Swarm Simulator / (36)