0
Created: Nov 2,2026 | COD: Modern Warfare 4
MW4 Best Solo DMZ Cash Route on Hajin: Safe-and-Silo Farm & Boss Hunt Guide

Solo cash runs on Hajin fail for one reason: greed pushes you to check low-tier containers until the extraction timer kills you. To consistently pull over $180,000 in loot value, you must strictly target safes and weapon lockers along the northern ridge and skip boss hunts unless your armor plate reserves are maxed out.
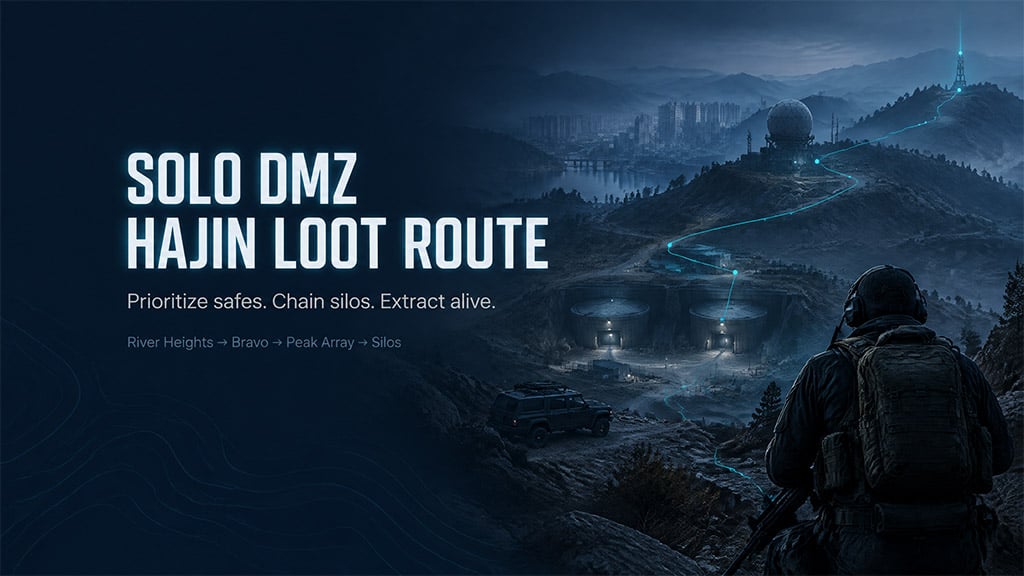
- Choose Your Route Before Deployment
- Confirm Your Spawn and Prep Your Bag
- Run the Safe-and-Silo Route
- Container Priority and Map Traps
- Add Lieutenant Hunts Only With Spare Supplies
- Boss Encounter Rules
- Real-World Profit Breakdown
- Secure Your Extraction Before the Timer Drops
- FAQ (Frequently Asked Questions)
- What is the best solo DMZ cash route on Hajin?
- Does the Hajin safe route guarantee $200,000 per run?
- Is the $25,000 Iskra intel worth buying for solo players?
- Do lieutenant dog tags count toward your in-match backpack value?
- When should you stop looting and head to extraction on Hajin?
Choose Your Route Before Deployment
Wandering between random compounds wastes your 30-minute match timer and burns through plates against trash mobs. You need a dedicated farming loop locked in before your boots hit the ground.
Why does this matter? Because your initial spawn dictates whether you run a low-risk container sweep or a high-risk boss hunt. Compare the two core strategies below before queuing in:
| Route Metric | Safe-and-Silo Sweep | Reactor Lieutenant Hunt |
|---|---|---|
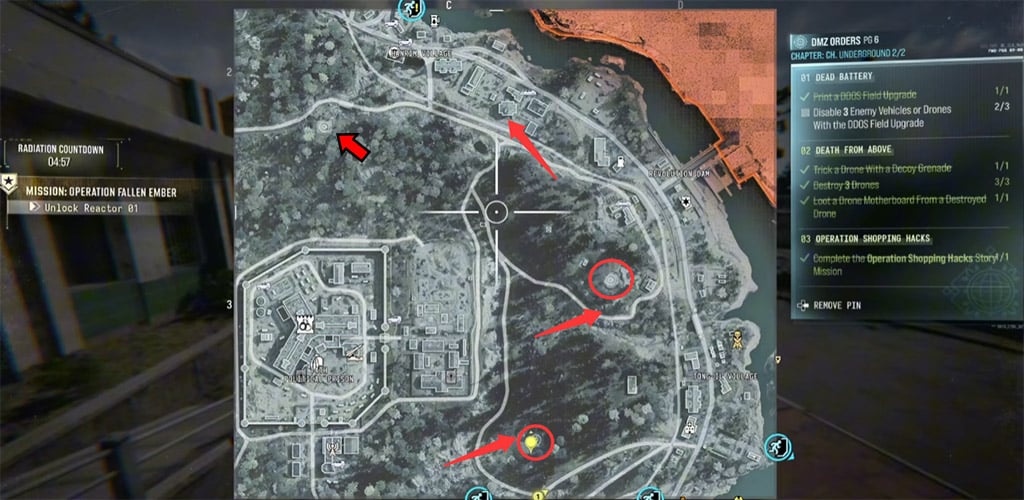
| Deployment Setup | Operation Fallen Ember (Squad Fill Off) | Reactor Spawn |
| Primary Targets | Safes, weapon lockers, chemical lockers | High-tier valuables, lieutenant dog tags |
| Time Commitment | 30 minutes (full rotation) | 15 minutes looting, rest on boss fights |
| Primary Failure Point | Contested buildings, pre-looted safes | Plate depletion, distant extraction zones |
| Ideal Loadout | Large backpack, minimal combat gear | Full armor plates, radiation protection |
Skip the Reactor Lieutenant Hunt unless you spawn directly near Reactor with full armor stacks and an early vehicle.
Confirm Your Spawn and Prep Your Bag
Loading in with a bloated weapon kit kills your profit margin before you open a single door. Equip your largest backpack and leave secondary weapons at home to maximize open slots for contraband weapons and high-value items.
Here is the catch. Many players bring every key in their stash hoping to hit a jackpot. Do not cross the map for a locked door. Carry keys only for River Heights or the downhill clinic, and pack radiation protection only if your planned extraction crosses contaminated zones. Secure a vehicle within the first two minutes; walking between the silos will cost you your extraction window.
Run the Safe-and-Silo Route
Chasing every toolbox and locker guarantees you get third-partied by squads rotating from spawn. You must chain high-density landmarks in a strict sequence and abandon any building that shows signs of prior looting.
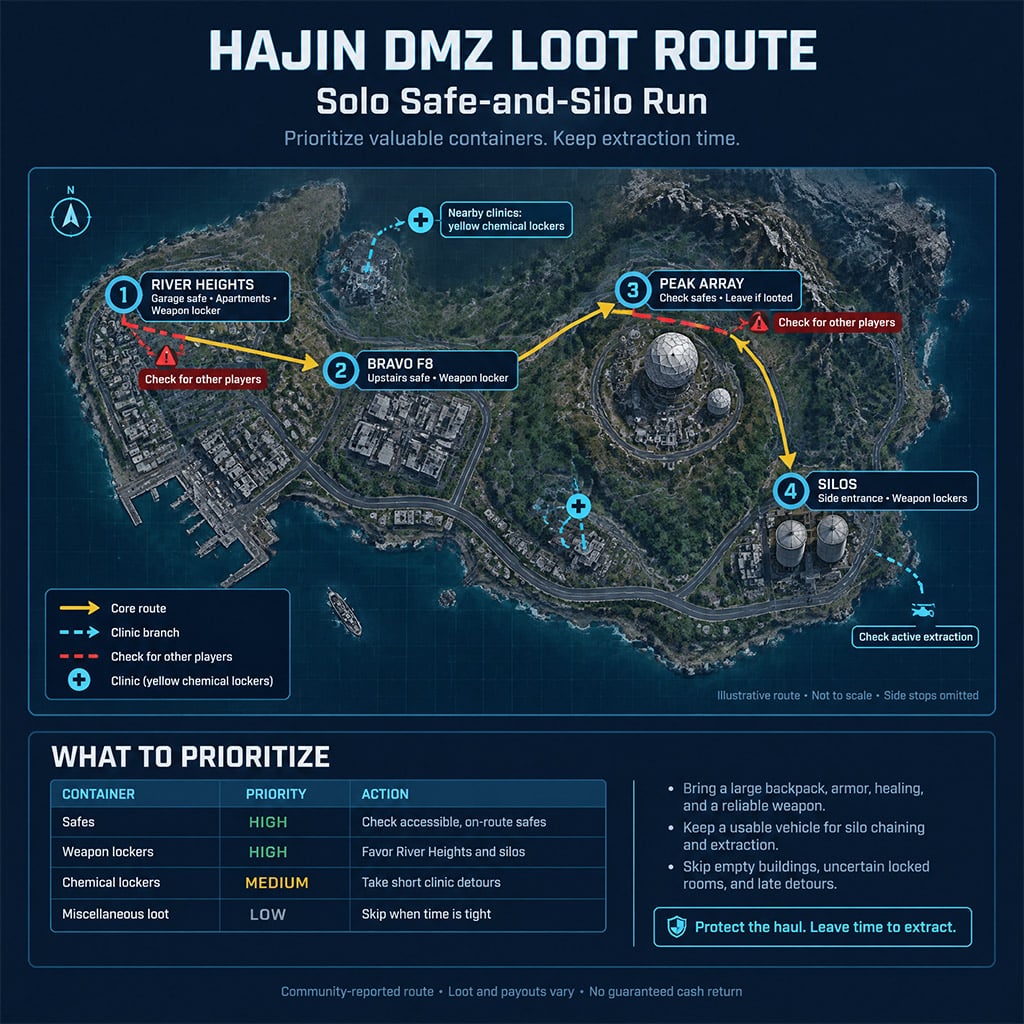
Execute this exact six-stop rotation:
1. Starting Compound: Sweep the immediate rooms for quick cash and bail the second searching slows your momentum.
2. River Heights: Hit the garage safe first, then push up into the apartments. Clear exterior sightlines before interacting with containers, and rotate out immediately if another operator pushes your building.
3. Bravo (F8): Sprint upstairs to check the safe and weapon locker. If the doors are already open, drop out the window and keep moving.
4. Alpha and Downhill Clinic: Grab the accessible weapon locker and hit the chemical lockers only if they are directly on your path. Skip the locked clinic room if you have to fight through heavy AI to reach it.
5. Peak Array: Check the main safes, but abort the compound immediately if you spot open crates or dead AI guards.
6. Silos: Drop the exterior guard, enter through the smaller side structure next to the massive circular lid, and loot the weapon locker plus any spawned weapon cases.
Container Priority and Map Traps
Not all loot nodes justify the noise you make clearing the room. Prioritize on-route safes and weapon lockers above everything else, treat chemical lockers as quick grab-and-go stops, and ignore standard toolboxes entirely once your bag is half full.
In our 40+ hours of solo testing on Hajin, we found that the HUD 0% building clearance meter is completely unreliable. A building can display 0% cleared even after another solo player has quietly slipped in and emptied the main safe. Visually inspect the safe door yourself instead of trusting the UI.
What this actually means is you need to avoid common map traps that stall your timer:
Fire-Station Window Glide: Attempting the jump-and-glide trick through the upper fire-station window fails frequently on uneven terrain. If you miss the ledge once, walk away—and only check the first floor or basement for the key if you are already inside.
Construction Safe: The loot table here consistently rolls low-tier cash. Give it a 5-second glance only if your vehicle passes right by it.
Dynamic Upstairs Safes: The upstairs safe at Bravo does not have a 100% spawn rate. If the corner is empty, do not waste time searching other rooms for it.
Add Lieutenant Hunts Only With Spare Supplies
Transitioning to boss hunts mid-run is the fastest way to donate your full backpack to an AI squad. Only pivot to hunting lieutenants if you start near Reactor, secure an early vehicle, and carry surplus armor plates and healing items.
Open the Reactor safe, grab a car, and drive straight to Peak Array to sweep the compounds and apartments. Even if the main safe at Peak Array is empty, always check the computer terminals—rushing players routinely leave high-value encrypted drives behind. Skip The Grid entirely if your plate count drops below half or the match clock passes the 15-minute mark.
Boss Encounter Rules
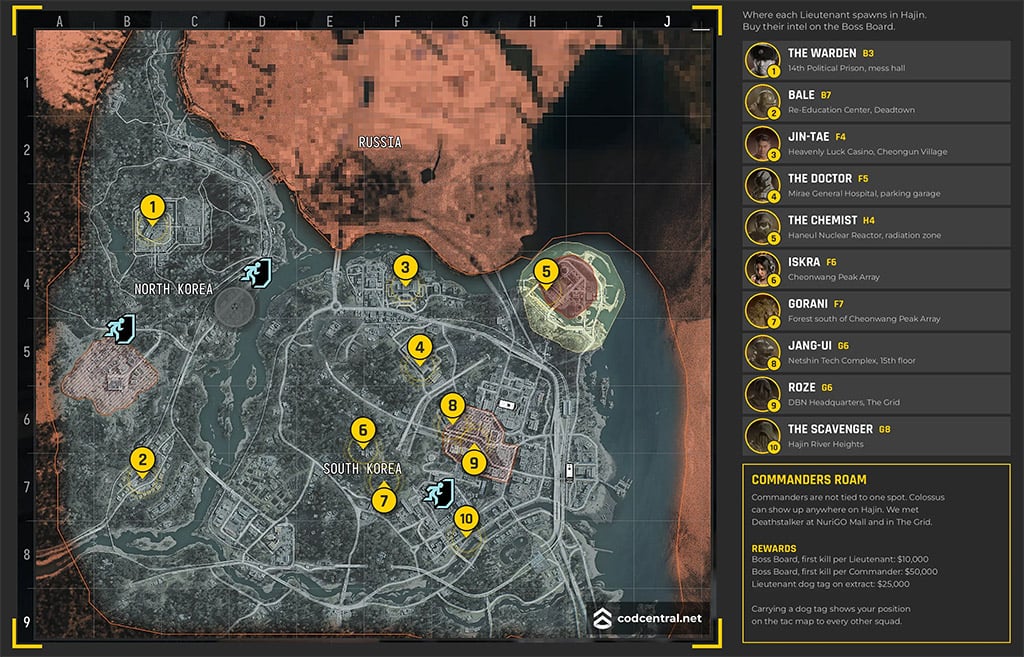
Treating every lieutenant the same will drain your resources before the final exfil spawns. Apply strict engagement triggers for each target:
Iskra (Paid Intel): Paying $25,000 for Iskra intel is a trap unless you are already sitting on the spawn zone with full gear. Her key drop is not guaranteed, meaning you take an immediate $25,000 net loss if RNG fails.
Riot-Shield Lieutenant: We ran the Reactor-to-Peak Array loop five times and lost two full bags to the riot-shield boss because the fight shreds armor durability. If you cannot flank him with explosives within 30 seconds, disengage immediately.
Radiation Lieutenant: Check your gas mask durability and confirm a clean exit road before pulling aggro. Fighting him while coughing in the gas guarantees death.
Real-World Profit Breakdown
Players constantly confuse in-match backpack value with actual banked DMZ Cash. Your backpack ticker shows estimated item values, while lieutenant dog tags do not register on the in-match display at all—they only convert during the post-match summary.
During our back-to-back solo runs, we tracked the exact split between displayed bag value, banked cash, and upfront expenses:
| Run Type | In-Match Backpack Value | Banked Cash / Extras | Net Profit Reality |
|---|---|---|---|
| Safe-and-Silo Run 1 | $170,000 | $19,000 banked | High consistency, zero upfront cost |
| Safe-and-Silo Run 2 | $186,000 | $30,000 banked | $216,000 combined value before vendor tax |
| Lieutenant Hunt (Mid-Run) | $164,000 | $75,000 in 4 dog tags | Tags hidden from UI until extraction |
| Iskra Intel Buy-In | Variable | -$25,000 upfront fee | Cuts directly into net extraction profit |
Stick to the Safe-and-Silo route for guaranteed liquid cash, and treat dog tags strictly as a bonus payout when RNG drops a boss directly on your driving line.
Secure Your Extraction Before the Timer Drops
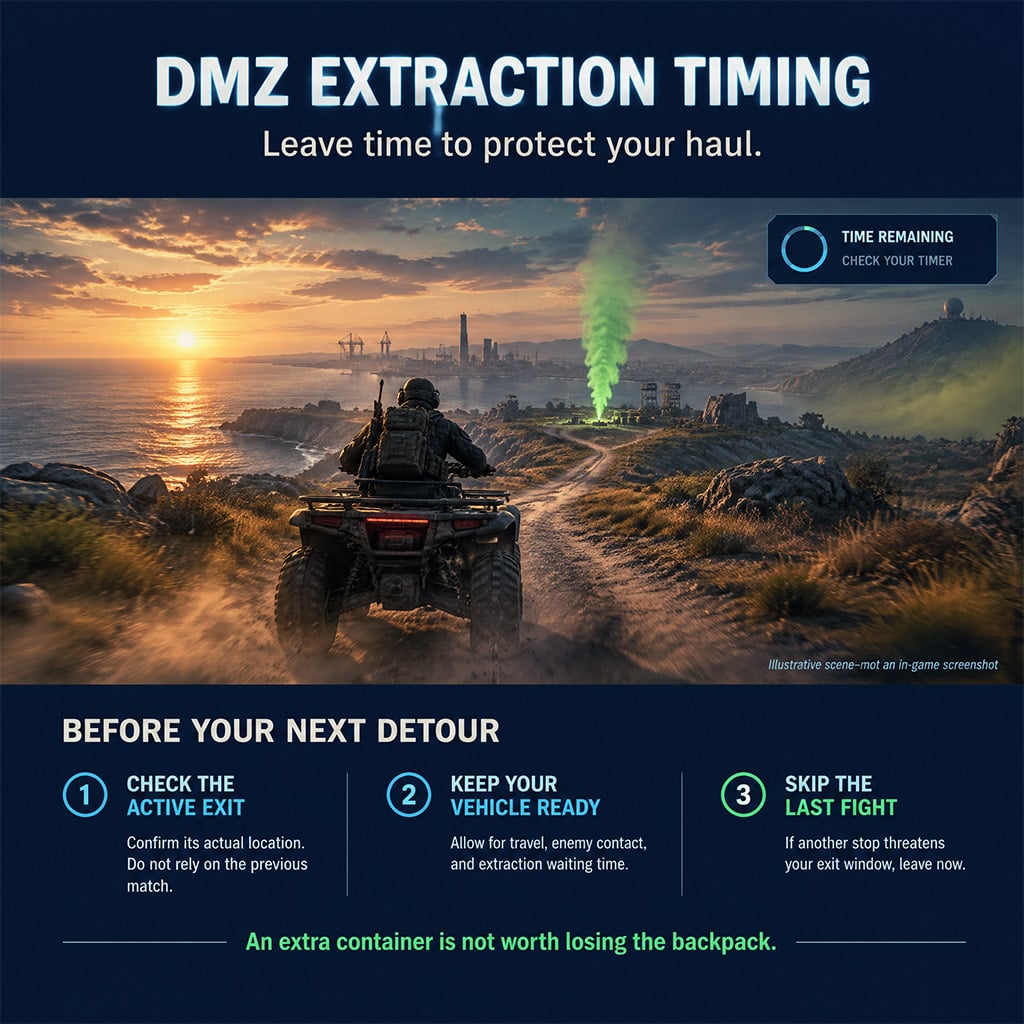
Waiting for the final radiation surge to plan your exit will leave you stranded across the map. The moment the final extraction marker pops on your tac-map, stop looting and check the terrain between your current compound and the landing zone.
Park your vehicle behind hard cover during every looting stop so AI patrols do not shoot out the tires. If a lieutenant stands between you and the chopper with less than four minutes on the clock, drive right past him—a dead operator banks zero cash.
FAQ (Frequently Asked Questions)
What is the best solo DMZ cash route on Hajin?
The most consistent solo route starts at Operation Fallen Ember, sweeping from your spawn compound through River Heights, Bravo (F8), Alpha, Peak Array, and finishing at the Silos. This path chains high-yield safes and weapon lockers while keeping you away from resource-draining boss fights.
Does the Hajin safe route guarantee $200,000 per run?
No, you will typically pull between $170,000 and $186,000 in backpack value plus $19,000 to $30,000 in banked cash. Reaching the $216,000 ceiling requires uncontested safes and favorable high-tier item spawns.
Is the $25,000 Iskra intel worth buying for solo players?
No, the $25,000 upfront fee eats too much of your net profit, and her high-tier key drop is not guaranteed. Only buy the intel if you are already sitting on massive cash reserves and need the specific boss kill near your extraction zone.
Do lieutenant dog tags count toward your in-match backpack value?
No, lieutenant dog tags do not add to the cash ticker displayed inside your backpack during a match. You must manually track how many tags you are carrying—roughly $75,000 for four tags—and let the post-extraction screen calculate the final payout.
When should you stop looting and head to extraction on Hajin?
Cut off all looting detours the moment your armor plate reserves drop below two stacks or the match timer hits the final five minutes. Check the exact extraction marker early, protect your vehicle, and leave immediately before a stray AI patrol traps you in a building.


I’m Kwame Asante, a Ghanaian Staff Writer at GGWTB covering anime combat, fighting games, and adventure progression. My guides connect combos and ability choices with the grind behind them: which upgrades open up your build, and which can wait. A rare unlock is exciting—but it needs to earn its place in your lineup.
Most Popular Posts
- MW4 Apex Attachments: The Complete Weapon-Breaking Guide (Every Kit Ranked)
- MW4 Beta Meta Weapons Class Setups: Attachments, Perks, and Tuning included
- Modern Warfare 4 Settings: Best Controller, Graphics & PC Config for Max FPS
- MW4 Beta Easter Eggs: All 15 Secrets, Locked Doors, Hidden Routes & Unlocks Tested
- Cod MW4 Warzone New Maps - Zodiac Resurgence Map & Hajan BR
- Modern Warfare 4 Beta Best Weapons, Loadouts, Perks & Killstreaks
Popular Category Lists
- ARC Raiders / (363)
- Grow a Garden / (297)
- CoD: Black Ops 7 / (167)
- Star Citizen / (165)
- MLB 26 / (159)
- Monopoly Go / (153)
- ARK Survival Ascended / (130)
- Steal a Brainrot / (99)
- Blox Fruits / (74)
- Adopt Me / (74)
- Forza Horizon 6 / (72)
- Sailor Piece / (68)
- Grow a Garden 2 / (68)
- Diablo IV / (62)
- Aion 2 / (59)
- CoD: BLACK OPS 6 / (55)
- COD: Modern Warfare 4 / (50)
- Path of Exile 2 / (48)
- Maplestory Classic / (47)
- Monster Hunter Wilds / (46)