0
Created: Oct 31,2026 | COD: Modern Warfare 4
MW4 Movement Guide: Better Slides, Safer Peeks, Cleaner Gunfights

Stop sprinting before likely contact, time slides around cover, and keep your aim on the next threat. We prioritize those habits over movement combinations that leave you exposed or unable to track.
Check control labels in your current game menu. The advice below focuses on repeatable positioning, not unverified input shortcuts or patch-specific timing claims.
- Fix Inputs That Break Your Aim
- Change One Setting at a Time
- Approach Corners With a Plan
- Adjust Your Slide Before Exposure
- End Sprint Before the Danger Zone
- Confirm the Route Before Chasing
- Use Movement That Solves the Fight
- Compare Jumping Against a Stable Baseline
- Run a Focused 15-Minute Routine
- FAQ (Frequently Asked Questions)
- Should We Enable Automatic Tactical Sprint?
- When Should We Start Sliding Around a Corner?
- Are Jump Shots Better Than Drop Shots?
- Do We Need Rear Paddles for Better Movement?
- How Should We Practice Movement Before Matches?
Fix Inputs That Break Your Aim
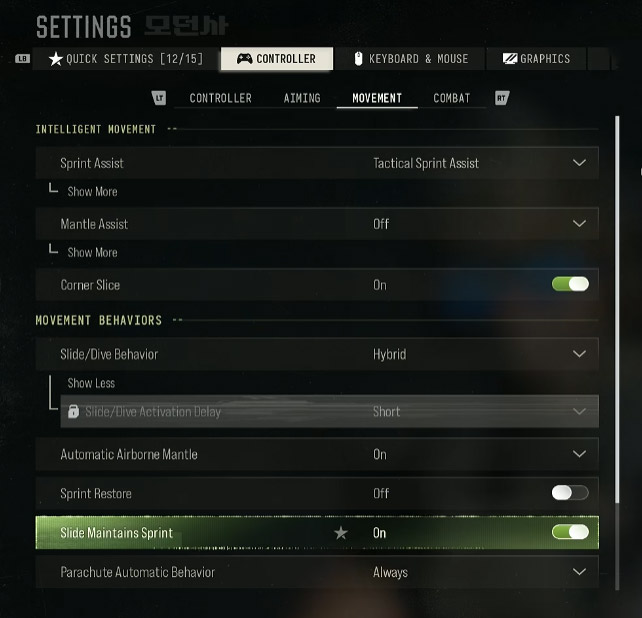
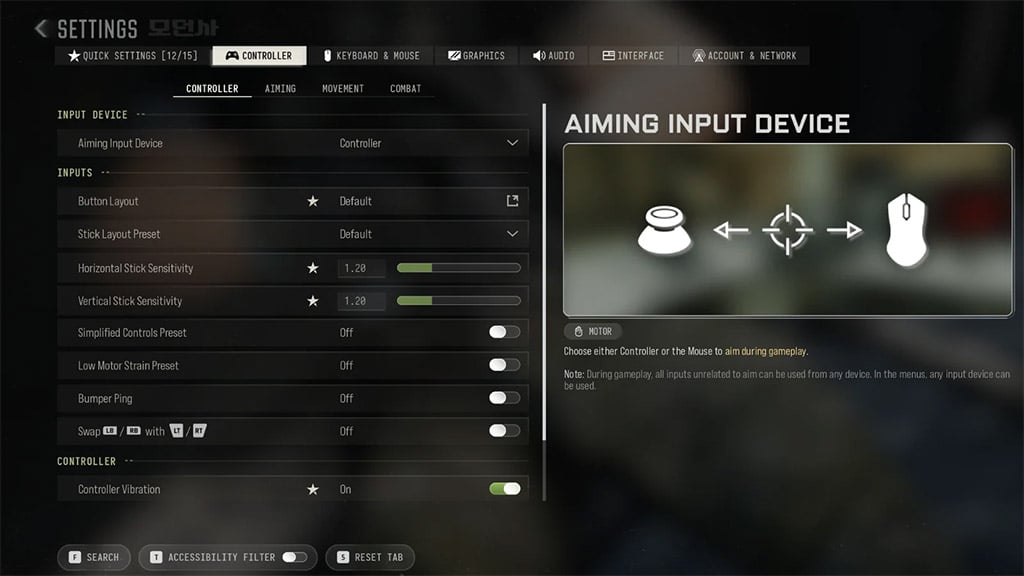
If jumping pulls your thumb off the aiming stick—or sliding produces an unwanted dive—fix the controls before practicing combat movement. We favor predictable actions over the busiest setup.
Use these starting points to identify what interrupts your tracking.
| Control | Starting Point | Practice Check | Change It When |
|---|---|---|---|
| Automatic tactical sprint | Compare enabled and disabled | Approach the same doorway slowly with each option | Sprint activates when you intend to peek |
| Slide/dive behavior | Slide-only, where available | Attempt 10 deliberate slides | Unwanted dives interrupt the sequence |
| Jump access | Reachable remap or rear paddle | Jump while keeping aim on one target | Button reach breaks tracking |
| Crouch access | Reachable remap or rear paddle | Change stance while tracking | You lose control of the aiming stick |
Choose the layout that produces fewer mistakes; additional movement options are useless when you trigger them accidentally.
Change One Setting at a Time
We use a simple control-check sequence: move, perform one action, then repeat while aiming. Changing several bindings together makes it harder to identify the cause of a mistake.
1. Adjust one control.
2. Repeat its action on open ground.
3. Add target tracking.
4. Test it near cover before using it in a match.
Paddles are optional. They improve button access, not positioning decisions.
Approach Corners With a Plan
If you lose fights immediately after rounding cover, your approach may be exposing you before you can aim. We separate travel speed from fight readiness.
Adjust Your Slide Before Exposure
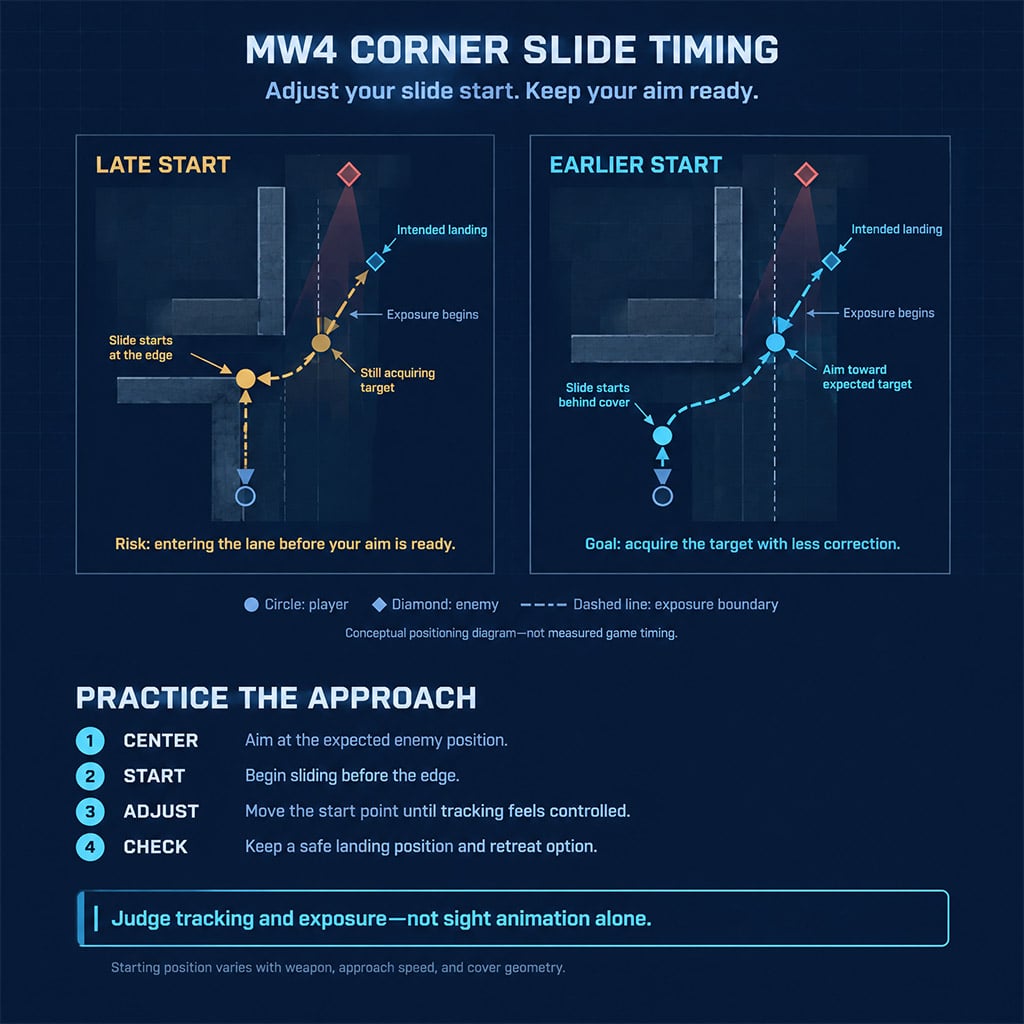
An earlier slide is worth testing when a late slide carries you through a corner before you acquire the target. The goal is not an early input by itself—it is a usable firing position.
1. Choose a corner with a predictable target beyond it.
2. Center your aim at the expected target height.
3. Start the slide before reaching the edge.
4. Adjust the starting position until you acquire the target without a frantic correction.
5. Keep the approach only if you can also stop or reach cover safely.
Judge the landing position.
A visibly tilted sight does not prove that bullets are inaccurate. We judge the technique by target tracking, shot placement, and exposure—not animation alone.
End Sprint Before the Danger Zone
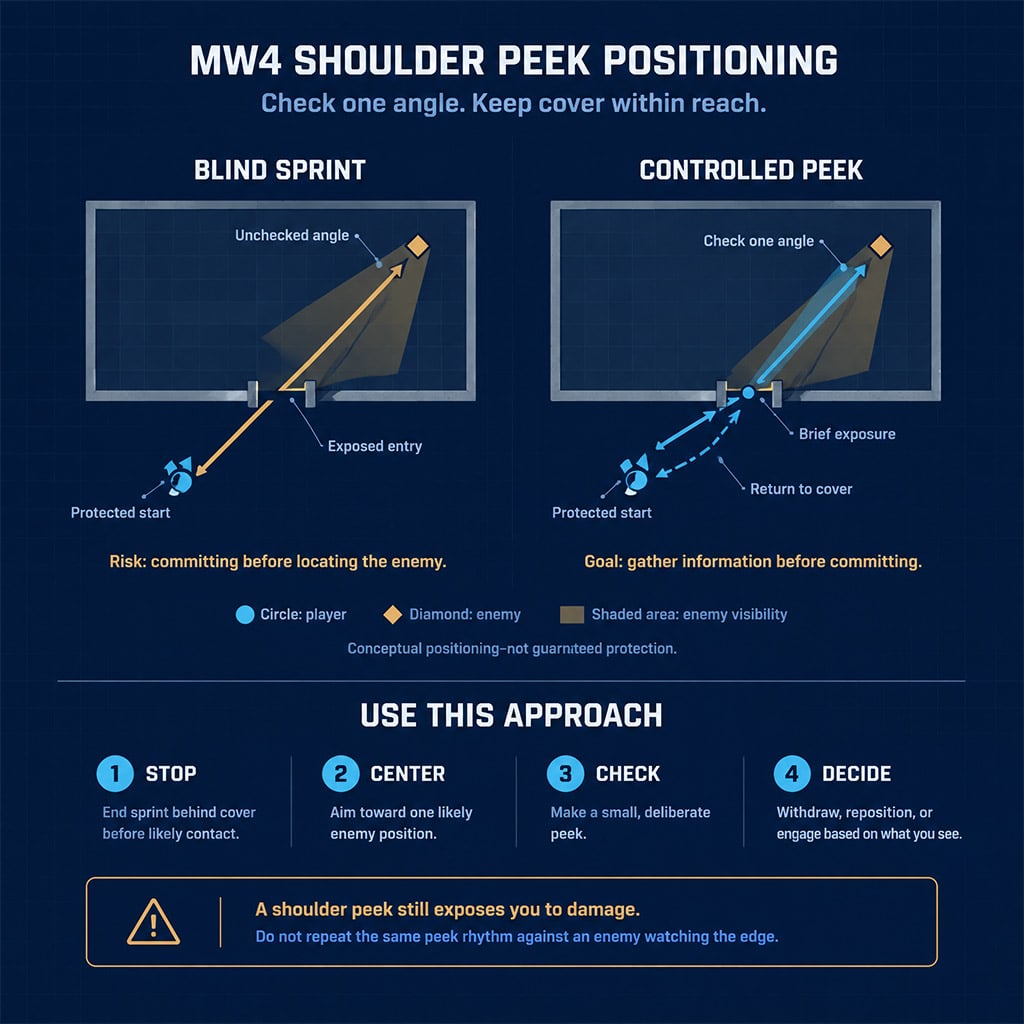
If the next doorway, pillar, or vehicle could conceal an enemy, end sprint behind the preceding cover. Automatic sprint is a travel convenience, not permission to enter every angle at full speed.
We use this approach sequence:
1. Stop sprinting while protected.
2. Aim at one likely enemy position.
3. Expose only enough to inspect that angle.
4. Withdraw if you need to check another position.
5. Commit after identifying the threat.
Here is the catch: shoulder peeking still exposes you to damage. Do not repeat the same peek rhythm against an opponent already watching the edge.
Confirm the Route Before Chasing
A damaged enemy is not necessarily an accessible enemy. If you lose sight of them, their last position becomes a clue—not a destination.
Before pushing, confirm:
- Target location: Can you still locate the enemy?
- Approach safety: Could another opponent cover your route?
- Weapon readiness: Can you shoot when you arrive?
- Exit: Where do you go if the target has moved?
If any answer is unclear, take a controlled angle instead. We want to finish the fight without handing the opponent a predictable chase.
Use Movement That Solves the Fight
If every engagement includes jumping, sliding, and stance changes, unnecessary inputs may be costing you accuracy. We choose movement by its purpose: gain an angle, reach cover, or preserve tracking.
Match the action to the problem before adding complexity.
| Action | Useful Purpose | Common Failure | Our Priority |
|---|---|---|---|
| Controlled peek | Locate an enemy from cover | Repeating an exposed angle | Learn first |
| Corner slide | Change position against a known threat | Overshooting into another sightline | Practice after basic peeks |
| Jump shot | Change height during a deliberate challenge | Disrupting your own tracking | Keep situational |
| Prone transition | Reduce height near suitable cover | Losing mobility or line of sight | Test before relying on it |
| Dive | Relocate toward protection | Ending exposed during recovery | Use only with a safe endpoint |
| Repeated weapon swapping | Personal rhythm habit | Meeting an enemy mid-swap | Skip near likely contact |
Prioritize controlled peeks and reliable positioning; advanced inputs must provide a clear benefit to justify their risk.
Compare Jumping Against a Stable Baseline
We recommend an A/B drill rather than assuming every jump helps. Use the same weapon, target, and starting position for both attempts.
1. Track and fire without jumping.
2. Repeat with a jump.
3. Compare missed shots and tracking corrections.
4. Repeat at a farther distance.
5. Remove the jump where it consistently makes shooting harder.
Your aim counts too.
If movement makes you harder to hit but costs your own shots, its value depends on the trade-off. Against a stationary target, you can assess your accuracy—not whether the movement disrupts a real opponent.
Run a Focused 15-Minute Routine
If movement works alone but fails during fights, add tracking before adding more techniques. We structure practice around one mistake at a time.
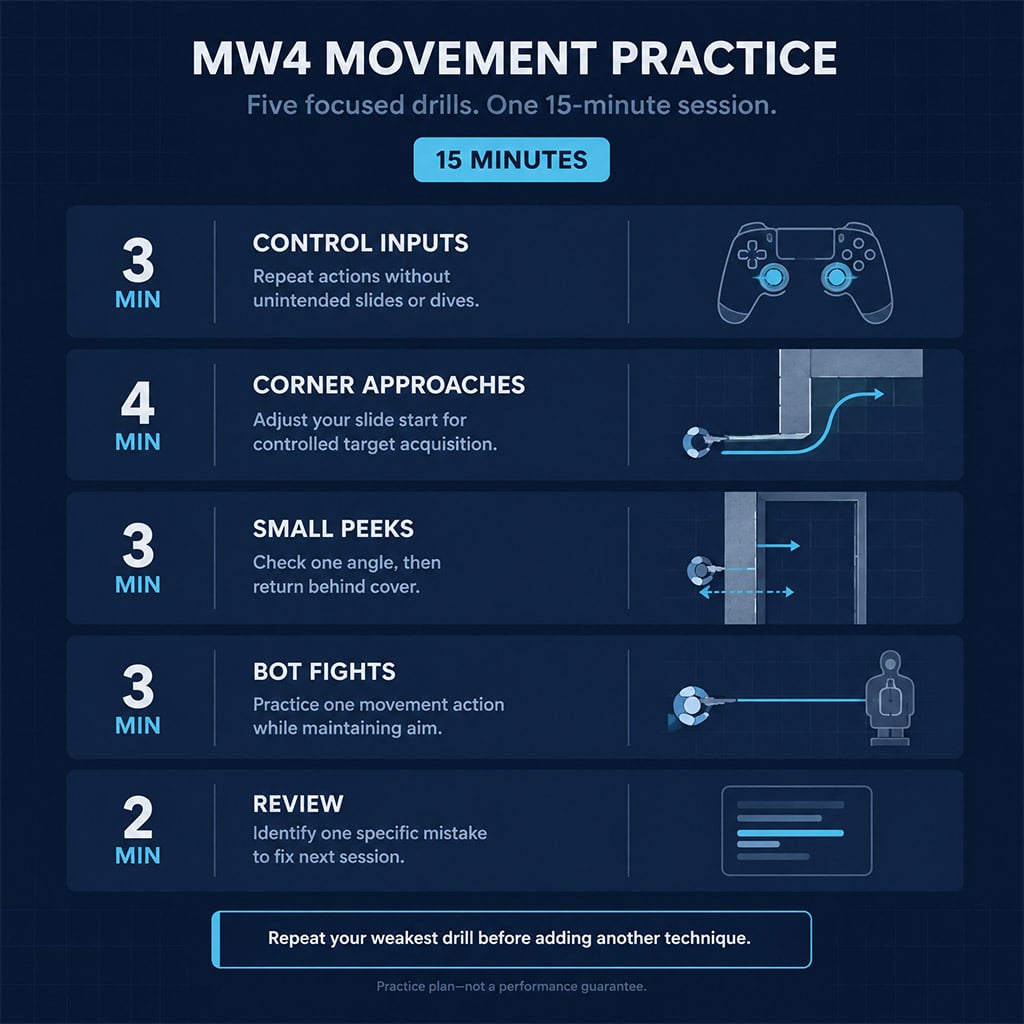
Use this routine to connect controls, positioning, and shooting.
| Time | Drill | Pass Condition |
|---|---|---|
| 3 minutes | Isolated movement inputs | Intended action without accidental alternatives |
| 4 minutes | One corner approach | Target acquired without a large correction |
| 3 minutes | Small peeks | One angle checked with a controlled withdrawal |
| 3 minutes | Bot fights using one chosen action | Tracking remains controlled |
| 2 minutes | Review failures | Identify one specific error to fix |
Repeat the weakest drill next session instead of adding another technique.
FAQ (Frequently Asked Questions)
Should We Enable Automatic Tactical Sprint?
Enable it only if you can still approach dangerous angles without unwanted sprinting. We recommend comparing both settings at the same doorway and keeping whichever gives you more deliberate control.
When Should We Start Sliding Around a Corner?
Start before the edge if a later slide exposes you before you can acquire the target. Adjust the starting position to your approach speed and cover geometry; there is no verified universal distance in this guide.
Are Jump Shots Better Than Drop Shots?
Neither is better in every engagement. We choose the action that preserves tracking and fits the cover, then reject it if its execution repeatedly costs shots or escape options.
Do We Need Rear Paddles for Better Movement?
No—rear paddles are optional. They help you access jump and crouch without releasing the aiming stick, but a comfortable remap can address the same input problem.
How Should We Practice Movement Before Matches?
Use the 15-minute routine and focus on one repeatable error. Start with clean inputs, add corner approaches and tracking, then test the chosen action against bots before taking it into live fights.

I’m Chloe Whitaker, a British Fact Checker at GGWTB focused on Currency farming, pet collecting, and management games, alongside Minecraft sandbox content. I check the details that shape your next move: growth timers, unlock requirements, and whether a reward is still obtainable. An old event tip shouldn’t cost you an evening chasing a pet you can no longer get.
Most Popular Posts
- MW4 Beta Meta Weapons Class Setups: Attachments, Perks, and Tuning included
- MW4 Beta Easter Eggs: All 15 Secrets, Locked Doors, Hidden Routes & Unlocks Tested
- Modern Warfare 4 Settings: Best Controller, Graphics & PC Config for Max FPS
- Modern Warfare 4 Beta Best Weapons, Loadouts, Perks & Killstreaks
- MW4 Beta Guide: Maps, Weapons, Perks, and the Fastest Way to Level 20
- MW4 DMZ Hajin Map: Confirmed Features, Release Date and What's Still Unknown
Popular Category Lists
- ARC Raiders / (376)
- Grow a Garden / (301)
- Star Citizen / (173)
- CoD: Black Ops 7 / (168)
- MLB 26 / (159)
- Monopoly Go / (153)
- ARK Survival Ascended / (132)
- Steal a Brainrot / (101)
- Adopt Me / (80)
- Blox Fruits / (74)
- Forza Horizon 6 / (72)
- Sailor Piece / (68)
- Grow a Garden 2 / (68)
- Aion 2 / (67)
- COD: Modern Warfare 4 / (63)
- Diablo IV / (62)
- CoD: BLACK OPS 6 / (55)
- Maplestory Classic / (51)
- Path of Exile 2 / (48)
- Monster Hunter Wilds / (46)