0
Created: Oct 31,2026 | COD: Modern Warfare 4
MW4 Hyeon Burst Best Loadout Guide: Test Hyper Burst and Fix Your Build

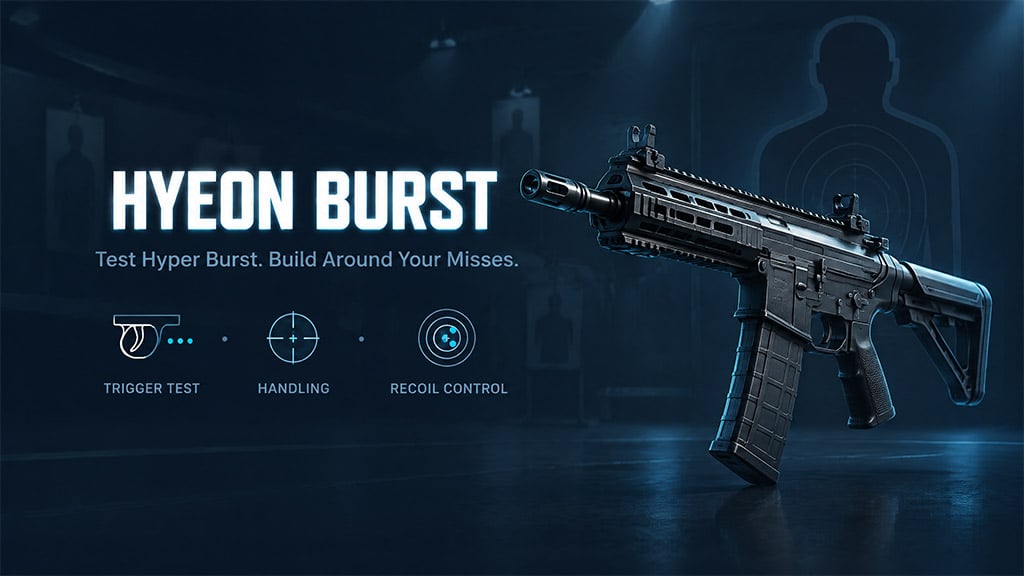
Test whether Hyper Burst repeats fire while you hold the trigger before building around it. Then prioritize handling if you lose sprint-entry fights or recoil recovery if your follow-up burst misses.
- Check Hyper Burst's Trigger Behavior
- Choose Attachments Around Your Misses
- If You Lose Immediately After Sprinting
- If Your Second Burst Misses
- If Reloads Keep Getting You Killed
- Test Damage and Equipment Without Misreading Results
- Give Equipment One Specific Job
- FAQ (Frequently Asked Questions)
- Is Hyper Burst fully automatic in MW4?
- What is the best Hyeon Burst loadout to start with?
- Was the Hyeon Burst buffed or nerfed?
- Should I use High Velocity Rounds or the 40-Round Magazine?
- Is Crossfire better than Air Lock Down?
Check Hyper Burst's Trigger Behavior
The wrong trigger habit can stop your follow-up attack entirely. Our firing-mode test starts with the base weapon, then repeats the same inputs with Hyper Burst equipped.
1. Use a fresh magazine and hold the trigger for three seconds.
2. Note whether fire stops after one burst or continues.
3. Equip Hyper Burst and repeat.
4. Test separate taps to check whether releasing the trigger changes follow-up behavior.
Repeated bursts are not necessarily continuous full-auto fire. Listen for pauses between shot groups; ammunition consumption alone does not establish the firing pattern.
If holding the trigger produces only one burst, release and press again for the next attack. If it repeats bursts, compare sustained fire against deliberate taps before choosing your technique.
Choose Attachments Around Your Misses
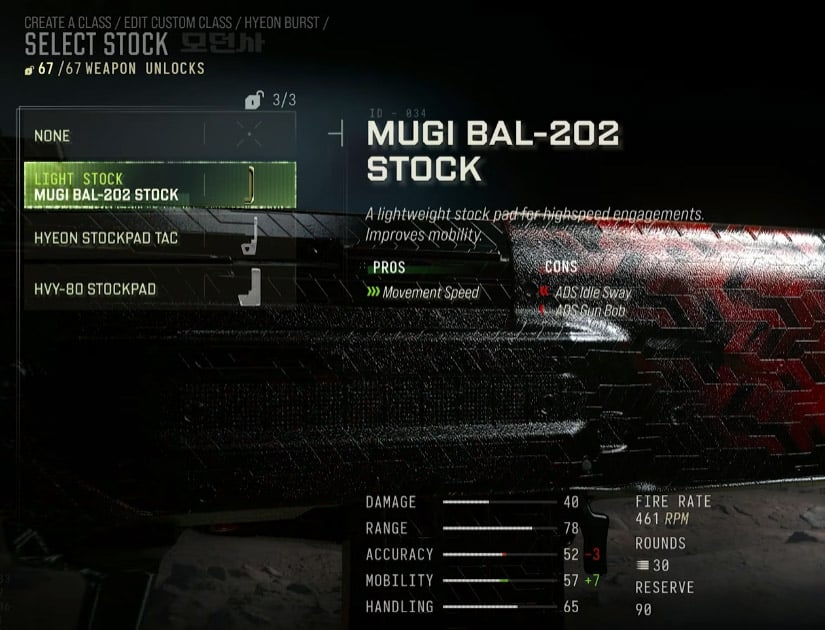
A longer attachment list does not guarantee a stronger weapon. We recommend starting with the base rifle and adding one compatible attachment at a time, rather than copying a complete setup whose slot limits remain unconfirmed.
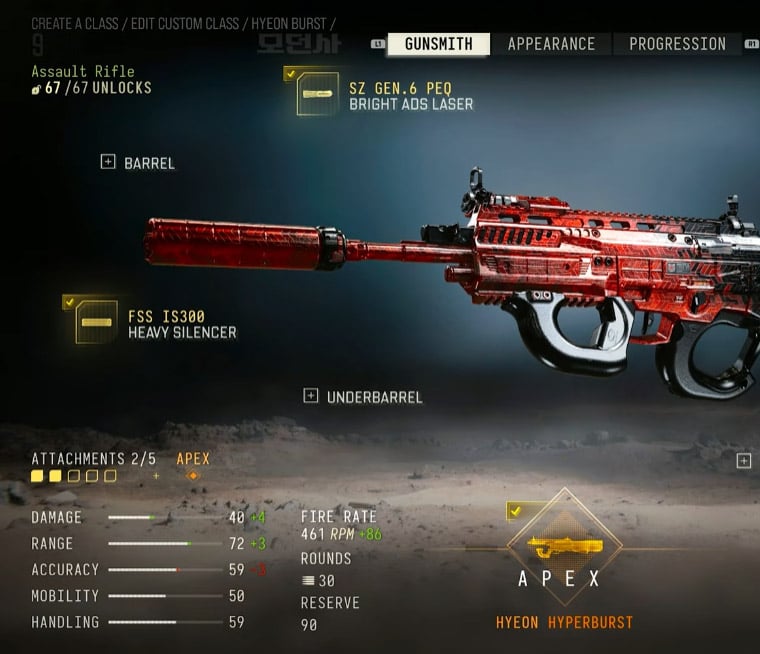
These are the two candidate setups to check against your Gunsmith menu.
| Slot | Handling Candidate | Mid-Range Candidate |
|---|---|---|
| Apex | Hyper Burst | Hyper Burst |
| Muzzle | Heavy Silencer | Heavy Silencer |
| Laser | Bright ADS laser | SA-500; exact name unconfirmed |
| Barrel | No selection specified | 609 mm Long Barrel |
| Magazine | No selection specified | 40-Round Magazine |
| Ammunition | High Velocity Rounds | No selection specified |
| Rear grip | Skeleton Grip | No selection specified |
| Stock | Light Stock | Light Stock |
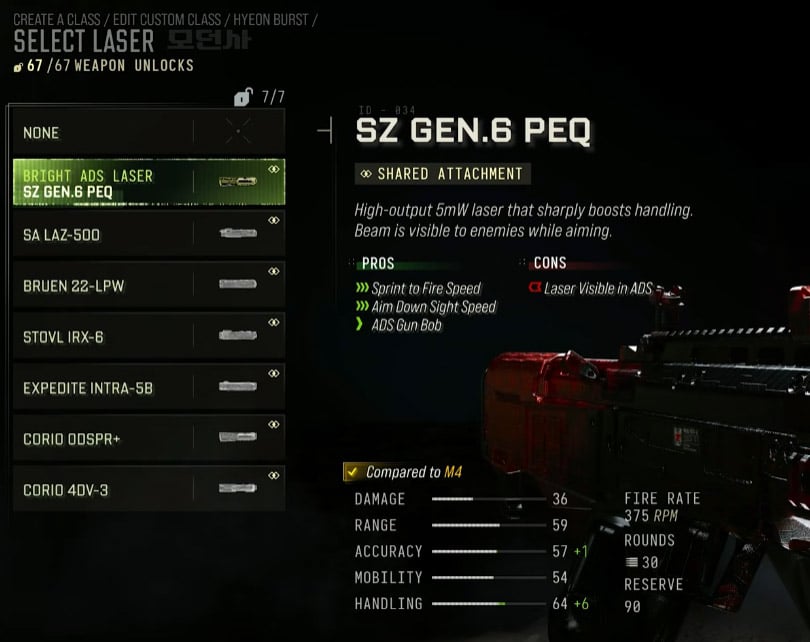
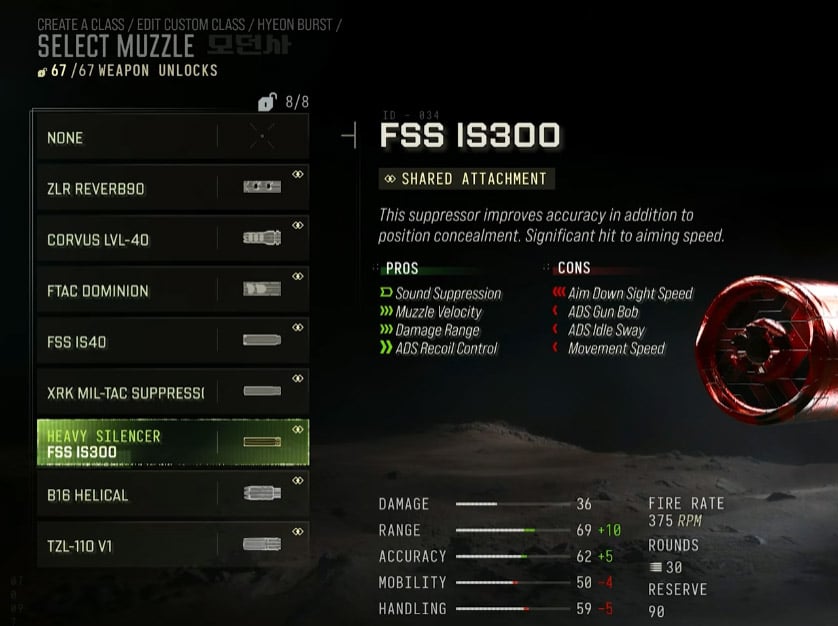
Reject any part that is absent, incompatible, or fails to improve your actual problem.
If You Lose Immediately After Sprinting
Your problem may be sprint-to-fire delay, not aiming speed. Check those stats separately in the attachment menu; faster ADS does not automatically mean you can shoot sooner after sprinting.
Our handling test uses the same sprint route, stopping point, and target for each attempt. Repeat it with one attachment changed, then compare time to first accurate hit, not merely how quickly the sights appear.
Keep the change only if it improves the opening shot.
If Your Second Burst Misses
Do not assume you need more handling speed. Fire two bursts at the same target and compare the second group's position and spread.
Our recoil test holds distance, aim point, and firing rhythm constant. If slower taps tighten the second group, test your cadence before sacrificing attachment slots for recoil control.
Fix the rhythm first.
If Reloads Keep Getting You Killed
Consider the 40-Round Magazine only after confirming its capacity and handling penalties in your menu. Reload exposure matters most when you face another opponent before reaching safe cover.
For moving targets, test High Velocity Rounds separately. Faster projectiles do not guarantee greater damage or fewer hits to kill; keep them only if your moving-target accuracy improves.
Test Damage and Equipment Without Misreading Results
Claims of reduced damage and increased range remain unverified here. A range increase can preserve damage farther away without improving close-range kills, so test each distance separately.
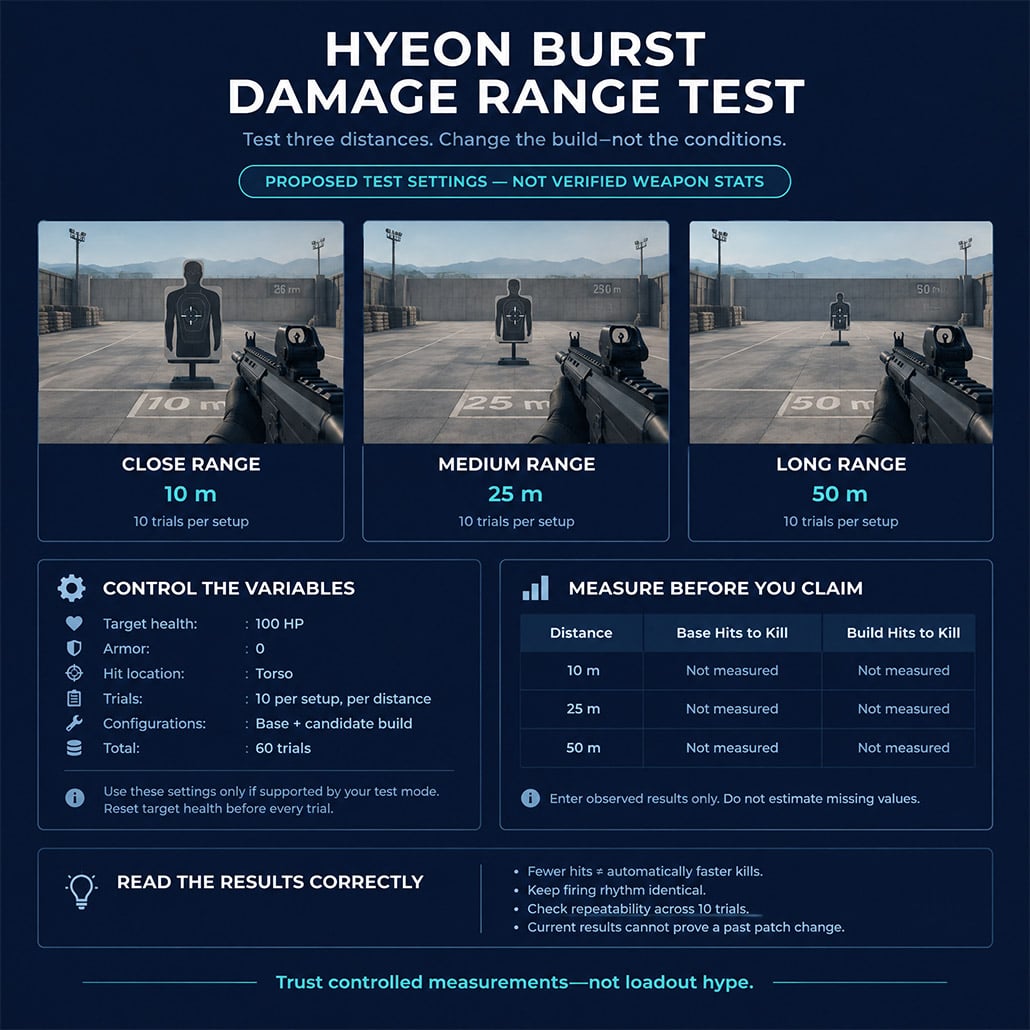
Our damage-test protocol keeps target health, armor, hit location, and distance identical between the base weapon and candidate build.
Use this worksheet instead of guessing from a match score.
| Test Distance | Base Hits to Kill | Build Hits to Kill | Required Control |
|---|---|---|---|
| Close: note exact distance | Enter measured result | Enter measured result | Same torso aim point |
| Medium: note exact distance | Enter measured result | Enter measured result | Same health and armor |
| Long: note exact distance | Enter measured result | Enter measured result | Stationary target |
Do not call a change a buff unless your measurements improve under matching conditions.
A current test establishes current behavior—not a historical patch change without an older baseline. Likewise, fewer hits to kill do not establish faster kills if firing cadence changes.
Give Equipment One Specific Job
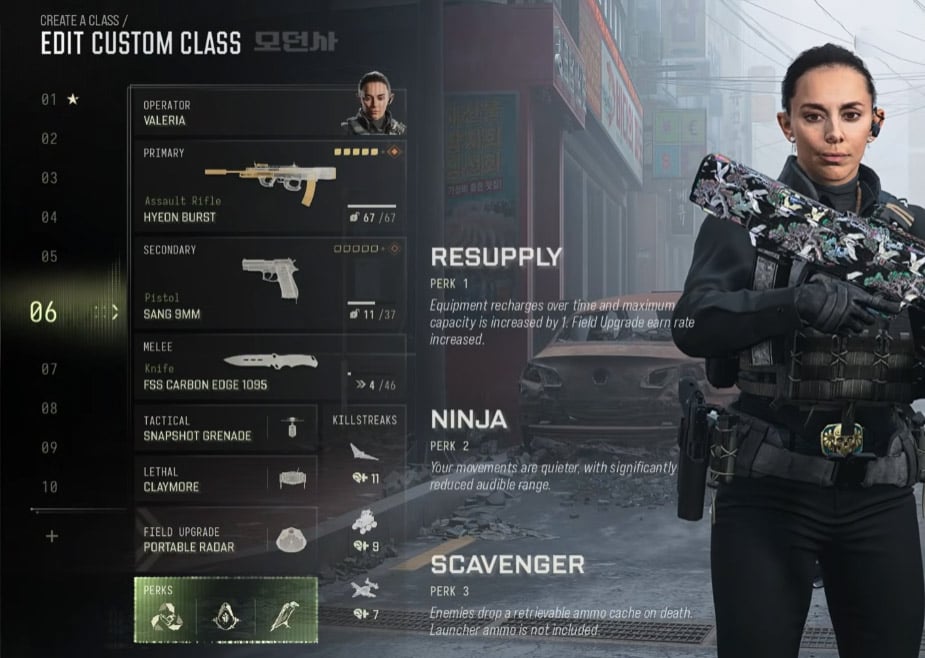
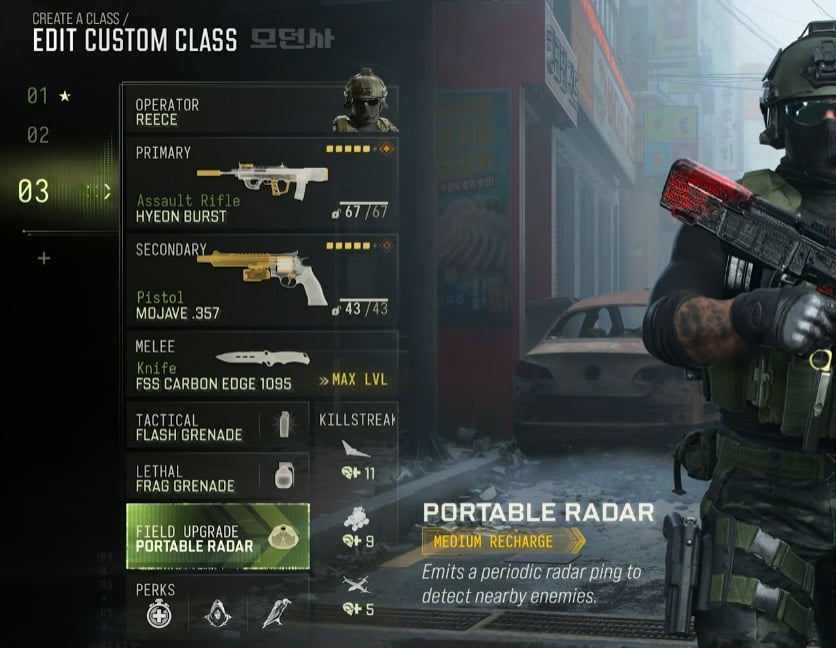
If these items appear in your current mode, choose Snapshot Grenade for enemy-location information, Claymore for an unattended approach, and Ninja according to its current perk description. None repairs missed follow-up bursts.
For Crossfire and Air Lock Down, compare cost, successful activations, and objective impact under similar conditions. Isolated totals of five versus thirteen kills do not establish which streak is more efficient.
Check the exact menu name before selecting any streak labeled Wilson.
FAQ (Frequently Asked Questions)
Is Hyper Burst fully automatic in MW4?
Hyper Burst's firing mode is not established by the evidence available here. Hold the trigger with it equipped and check whether it produces one burst, repeated bursts, or continuous fire.
What is the best Hyeon Burst loadout to start with?
Start with the base rifle and change one attachment to address your most frequent failure. Prioritize verified handling improvements for sprint-entry losses and recoil recovery for missed follow-up bursts.
Was the Hyeon Burst buffed or nerfed?
A Hyeon Burst damage or range change is not verified here. Establish a historical change through official patch notes or comparable measurements from before and after the update.
Should I use High Velocity Rounds or the 40-Round Magazine?
Choose High Velocity Rounds if testing shows better moving-target accuracy; choose the 40-Round Magazine if reload exposure repeatedly costs you fights. Confirm compatibility and handling penalties before equipping either.
Is Crossfire better than Air Lock Down?
The available kill totals do not establish that Crossfire is better than Air Lock Down. Compare their costs and objective impact across similar matches, rather than choosing from one high-kill result.

I’m Sofia Bergström, a Swedish Managing Editor covering FPS, competitive shooters, and extraction shooters for GGWTB. My guides focus on loadout trade-offs, positioning, and when to commit—or cut your losses. A weapon’s stats tell only part of the story; I focus on how it fits your role and the fight ahead.
Most Popular Posts
- MW4 Beta Meta Weapons Class Setups: Attachments, Perks, and Tuning included
- MW4 Beta Easter Eggs: All 15 Secrets, Locked Doors, Hidden Routes & Unlocks Tested
- Modern Warfare 4 Settings: Best Controller, Graphics & PC Config for Max FPS
- Modern Warfare 4 Beta Best Weapons, Loadouts, Perks & Killstreaks
- MW4 Beta Guide: Maps, Weapons, Perks, and the Fastest Way to Level 20
- MW4 DMZ Hajin Map: Confirmed Features, Release Date and What's Still Unknown
Popular Category Lists
- ARC Raiders / (376)
- Grow a Garden / (301)
- Star Citizen / (173)
- CoD: Black Ops 7 / (168)
- MLB 26 / (159)
- Monopoly Go / (153)
- ARK Survival Ascended / (132)
- Steal a Brainrot / (101)
- Adopt Me / (80)
- Blox Fruits / (74)
- Forza Horizon 6 / (72)
- Sailor Piece / (68)
- Grow a Garden 2 / (68)
- Aion 2 / (67)
- COD: Modern Warfare 4 / (63)
- Diablo IV / (62)
- CoD: BLACK OPS 6 / (55)
- Maplestory Classic / (51)
- Path of Exile 2 / (48)
- Monster Hunter Wilds / (46)