0
0PoE 2 Sanctum Farm Guide: Trial of the Sekhemas
- Davis
- Share
- Path of Exile 2
- 02/11/25
- 32658
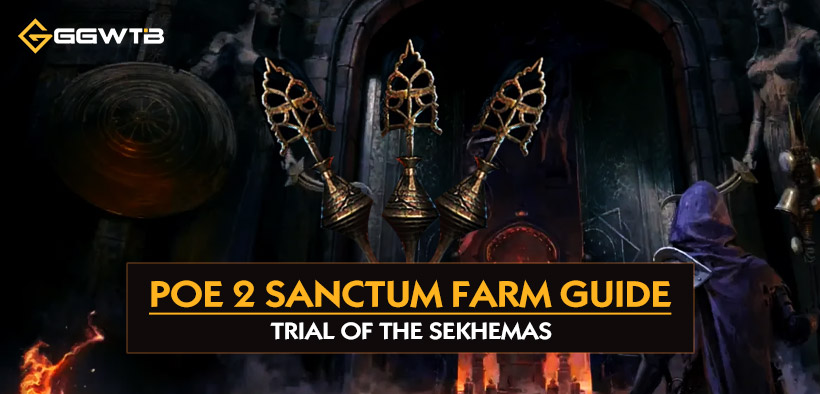
In PoE 2, Farming Sanctum provides some of the most effective methods of acquiring currency. Magic relics, unique jewels, and even rare chase items offer phenomenal rewards which can drastically increase a player's net worth. This guide breaks down everything you need to know about farm Sanctum Trial of the Sekhemas, including its benefits, challenges, and methods for maximizing your profists.
- Why Choose Sanctum Farming?
- Setup 1: Relic Hunting
- Setup 2: Alliance Run
- Boon Priorities
- Affliction Priorities
- Moneymakers
- Relic Selling Strategy
↖ Why Choose Sanctum Farming?
Farming Sanctum in Path of Exile 2 can be incredibly rewarding due to the vast number of high-value items up for grabs.
Key Rewards
- Item Type: Profit Potential
- Magic Relics: Depending on the modifiers and relic's rarity, these can sell for up to 30 Divines.
- Unique Jewels: Highly sought after Time-Loss Jewels and Sanctum Jewels, along with various others.
- Desperate Alliance Vase: Item used to unlock Against the Darkness Jewel for certain builds.
- The Last Flame Relic: No-hit Sanctum runs rewarding players with Temporalis, one of the strongest gear pieces, become possible.
Why It's Profitable?
- Chase Items: With just a single drop of high-value relics and jewels, players can turn tremendous profits.
- Diverse Loot Pool: There are plenty of items that Sanctum has to offer making it more than likely to turn a profit on multiple runs.
- Activities that Test Skill: The payout appeals to both casual players and late-game grinders who need scalable income sources.
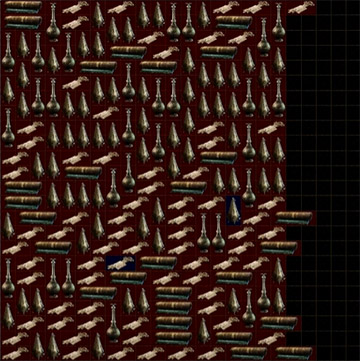
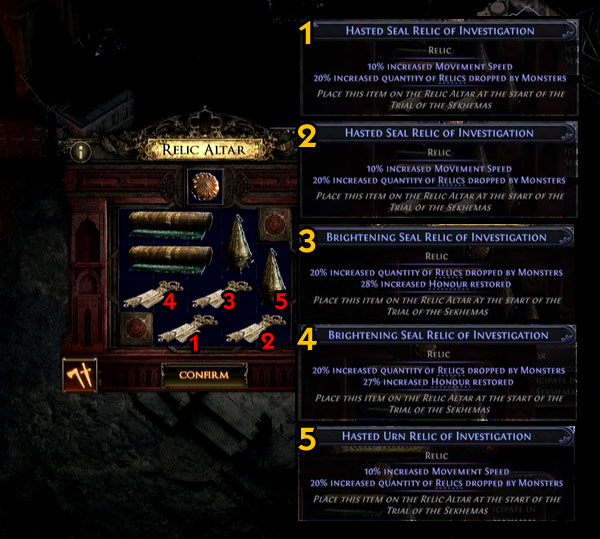
↖ Setup 1: Relic Hunting
This setup is designed to maximize relic drops, making it ideal for farming high-value items like 'Desperate Alliance' and 'The Last Flame'.
Key Objectives
- Achieve 100% quantity of relics dropped by monsters.
- Maintain high movement speed for efficient clearing.
- Ensure capped resistance and honor restoration for survivability.
Recommended Relic Configuration
| Relic Attribute | Priority Level | Notes |
|---|---|---|
| 20% Quantity of Relics Dropped (x5) | High | Mandatory for 100% relic drop quantity |
| 10% Movement Speed | Medium | Enhances clearing speed |
| Monsters Drop Double Sacred Water (15%) | Medium | Improves honor restoration |
| Merchant Choices (6 additional options) | Medium | Provides access to better boons |
Strategy
- Core Relics: Equip five relics at 20% each to achieve the full 100% drop rate guarantee.
- Optional Features: Add chance to increase movement speed, restore honor, and Sacred Water for smoother runnning.
- Relatively Inexpensive: If the budget is tight, equip relics with quantity boosts first and change the lesser attributes as needed.
Advantages
- Reliable drop of relics, usually receiving 3-4 per boss encounter.
- Great efficiency gained from movement honor restoration and speeds.
Considerations
This configuration can get pricey, but as most tend to the demand is there to resell for some of thier exspense back.
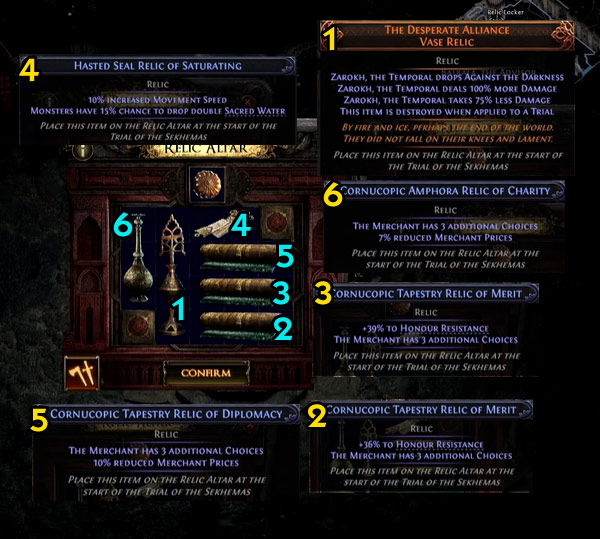
↖ Setup 2: Alliance Run
Using Merchant dealings and maximizing boons makes farming the Time-Lost "Against the Darkness" unique jewel effortless.
Key Objectives
- Gather Desperate Alliance relics to execute this strategy.
- Ensure that defeating the Sanctum boss will drop the Time-Lost Against the Darkness jewel.
- Merchant selection is the most critical step to make powerful boons easily accessible while greatly increasing prices.
Recommended Relic Configuration
| Relic Attribute | Priority Level | Notes |
|---|---|---|
| Additional Merchant Choices (x2) | High | Ensures access to more boons |
| Reduced Merchant Prices | High | Essential for efficient Sacred Water use |
| Movement Speed | Medium | Speeds up clearing and Merchant access |
| Monsters Drop Double Sacred Water (15%) | Medium | Supports faster honor restoration |
Strategy
- Merchant Optimization: Favor relics that open up more Merchant options and lower their prices so you can maximize boon selection preferences efficiently.
- Boon Prioritization: Try to get powerful boons earlier on to increase survivability and damage dealt.
- Boss Preparation: Be aware that the Sanctum boss will have quadruple health and this setup will let them deal double damage, so you should be ready before fighting them.
Advantages
- Time-Lost "Against the Darkness" jewel reward guaranteed post completion.
- Near invincible due to stacking several Merchant-bought boons.
Considerations
- Requires previously farming *Desperate Alliance* relics with Setup 1.
- Much more difficult boss fights due to additional health and damage.
↖ Boon Priorities
This is the following list which will prioritize the important Boon from most to the least. These choices are made to increase rewards,efficiency and speed. For Bouns left behind, feel free to choose whichever fits your preference or build.
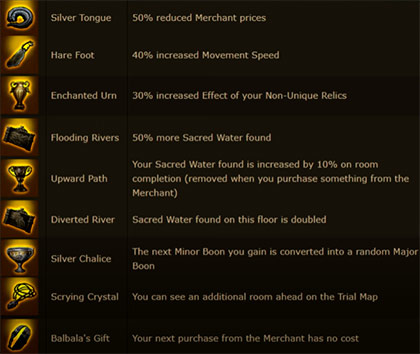
Priority 1: Silver Tongue
- Effect: Reduces Merchant prices by 50%.
- Why It's Important: Lets you buy more upgrades and Boons during your run. This is the first Boin buy that you will spend Sacred Water on.
- Tip: If you are presented with Silver Tongue multiple times, you should always pick it, so you can spend your Sacred Water on other items.
Priority 2: Haford (Movement Speed Boost)
- Effect: Increases movement speed significantly.
- Why It's Important: Helps you complete runs much more efficiently, especially with existing movement speed boosts.
- Example: With Haford and a 40% movement speed bonus, runs are possible in under 20 minutes.
Priority 3: Enchanted Urn
- Effect: Relics yield drop quantity from bosses increases.
- Why It's Important: It improves the prospect of acquiring 3 to 4 Relics from bosses, thus, improving overall loot.
Priority 4: Sacred Water Related Boons
These Boons improve the collection of Sacred Water required for purchasing upgrades and Boons from Merchants.
| Boon Name | Effect | Why It's Important |
|---|---|---|
| Sacred Water Found | Increases the amount of Sacred Water found on floors | More Sacred Water allows you to buy out Merchant shops |
| Upward Path | Doubles Sacred Water found on specific floors | Enables massive Sacred Water gains in certain situations |
Priority 5: Silver Chalice
- Effects: Transforms your following Minor Boon into a random major one.
- Focus on importance: Turns unhelpful minor Boons into useful major Boons.
Priority 6: Scrying Crystal
- Effects: Enhances the map by creating a new room.
- Importance: Improves more complicated turns greatly.
- Bonus: Specialized crystrals enhance maps even more with the unmatched bonus, All-Seeing Eye.
Additional Notes on Major Boons
Major Boons are rare Strategies are designed around the their capture. Capture Major Boons according to your construction and demands. For example, Major offensive Boons if your build is missing damage output or Major defensive if you're the one lacking survivability.
↖ Affliction Priorities
Afflictions in the Sanctum can help or hinder your progress through the game by either restricting your choices or complicating encounters. Below is a pre-prepared order of how afflictions should be avoided, from the most impactful to the least.
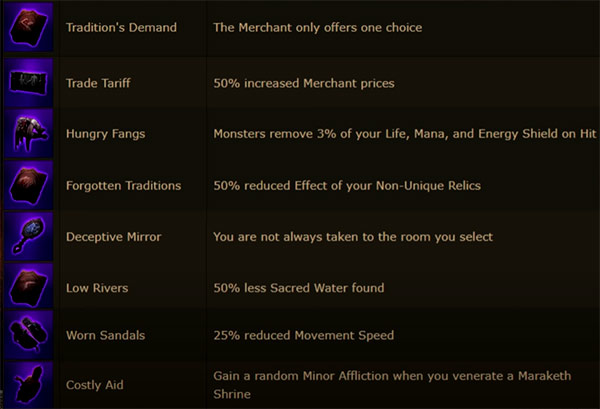
Afflictions to Absolutely Avoid
These afflictions can severely hinder your progress and should be avoided at all costs:
| Affliction | Effect | Reason to Avoid |
|---|---|---|
| Tradition's Demand | Merchant only offers one choice | Limits flexibility in choosing relics and items |
| 50% Increased Merchant Prices | Doubles the cost of merchant items | Drastically reduces resource efficiency |
| Hungry Fangs | Monsters remove a percentage of your life, mana, and energy shield on hit | Extremely dangerous and can lead to frequent deaths |
| Forgotten Traditions | Reduces the effect of your non-unique relics | Directly counters powerful relics like The Earn, which are crucial for success |
| Deceptive Mirror | You are not always taken to the room you select | Disrupts your strategy and can force unwanted afflictions or encounters |
Afflictions to Avoid When Possible
These are less severe but still detrimental to your run:
| Affliction | Effect | Reason to Avoid |
|---|---|---|
| Low Rivers | 50% less Sacred Water recovery | Reduces survivability and healing potential |
| Reduced Movement Speed | Slows down your character | Can make dodging mechanics and completing rooms more difficult |
| Costly Aid | Gain a random minor affliction when venerating a Marath Shrine or acquiring another affliction | Introduces unpredictability, potentially leading to worse outcomes later on |
How to Gauntlet Made Easy?
The Gauntlet floors in the Sanctum are greatly feared, but can surprisingly be easier with the widely accepted tools and strategy.
Recommended Skills
- Frost Wall: Block projectiles or create a space between yourself and enemies with Frost Wall. This skill can also be used to control how an enemy moves, granting you more control of the encounter.
- Blink: Blink lets you go over features created to obstruct you. Sorcerers take advantage of this skill the most, but it can be used by any class that can equip it.
Strategy
| 1. Preparation | As you enter the Gauntlet floor, equip both Frost Wall and Blink. Make sure you have sufficient mana/charges to apply these skills consistently throughout the floor. |
| 2. Execution | Skip Gauntlet doors with Blink and avoid unnecessary fights or harm. Use duplicate Frost Wall to block damage or guide them toward where you want them to go. |
| 3. Adaptation | When things do not go as expected, use Blink to change your position and touch off new enemy aggro patterns with Frost Wall. Aim to regulate the setting instead of hurrying through the floor. |
↖ Moneymakers
The key to earning significant currency in Trail of the Sekhemas lies in identifying high-value items and understanding their market worth.
| Item | Value (at time of recording) | Notes |
|---|---|---|
| Emerald Spectrum Jewel | 200x (uncorrupted, unidentified) | High demand; extremely profitable |
| Sapphire Spectrum Jewel | 10 Divine (uncorrupted) | Corruption can further increase its value |
| Desperate Alliance Vase Relic | 2 Divine | A quick and easy sell for consistent income |
| Against the Darkness Relic | 4 Divine (unidentified) | Identifying it can yield massive profits but comes with a gambling risk |
| Last Flame Relic | 330 Divine | Extremely rare and valuable; consider selling for instant wealth |
Notes:
- Accomplishing a no-hit run while using the Last Flame Relic can net you the sought after Temporalis Silk Road.
- Consider which option - selling or using a relic - best serves your purpose.
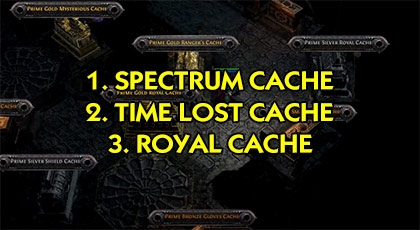
Chest Priority List
Choosing the most beneficial chests to open after completing a run is critical for maximizing rewards. Stick to this order of priority:
- Spectrum Chests – These tend to be the richest in terms of Spectrum Jewels.
- Time-Lost Chests – Great variety of relics and items that can make you profit.
- Royal Chests – Good alternative if these extra rewards are needed.
- Arcanist's Cache or Ring Chests – Only use these when no other options are present.
↖ Relic Selling Strategy
Efficiently managing and selling relics is essential for maximizing profits while minimizing wasted time. Follow this step-by-step approach:
Step 1: Organize Your Relics
- After each run, dump all relics into an unidentified stash tab (e.g., a quad stash tab).
- Once the tab is full, begin processing relics in batches.
Step 2: Identify & Sort Relics
- Take a portion of relics from the stash and identify them using a Transmutation Orb.
- Move identified relics into separate tabs based on size or type (e.g., "Sanctum Small Relics").
Step 3: Search for Desirable Affixes
- Focus on relics with sought-after modifiers such as:
- Movement Speed (e.g., 10% or higher)
- Quantity of Relics Dropped (e.g., 16% or higher)
- Use search filters to quickly locate relics with these valuable affixes.
Step 4: Price Check & Sell
Price-check identified relics using market tools or community benchmarks. Place valuable relics into a dedicated "Relic Sales" stash tab for easy listing and selling.
| Relic Type | Potential Value Range | Notes |
|---|---|---|
| High Movement Speed Relics | 10–30 Divine | Highly desirable for faster gameplay efficiency |
| Quantity-Based Relics | 5–20 Divine | Great for players focusing on farming efficiency |
| Magic Relics (General) | 1–30 Divine | Even basic magic relics can sell well depending on affixes |
Step 5: Reforge Worthless Relics
Use a Reforging Bench to reroll modifiers on worthless relics, potentially creating something valuable.
If you have an optimal strategy, then Trail of Sekhemas has some of the best spots in PoE 2. Focus on the important moneymakers and relics, prioritize your chest selections, and utilize a streamlined selling system for relics.
Most Popular Posts
- Path of Exile 2 Witch Class Overview: Blood Mage vs Infernalist
- PoE 2 Passive Tree Guide: Classes and Builds Application
- Path of Exile 2 Mercenary Overview: Witchhunter vs Gemling Legionnaire
- PoE 2 Leech Mechanics: Types, Statistics, Example and Keypoints
- PoE 2 Sanctum Farm Guide: Trial of the Sekhemas
- Path of Exile 2 Warrior Class Overview: Titan vs Warbringer
Popular Category Lists
- ARC Raiders / (291)
- Grow a Garden / (286)
- CoD: Black Ops 7 / (166)
- MLB 26 / (150)
- Monopoly Go / (148)
- Star Citizen / (128)
- ARK Survival Ascended / (90)
- Steal a Brainrot / (90)
- Sailor Piece / (68)
- Forza Horizon 6 / (67)
- Diablo IV / (62)
- Blox Fruits / (62)
- Adopt Me / (58)
- Grow a Garden 2 / (57)
- CoD: BLACK OPS 6 / (55)
- Path of Exile 2 / (48)
- Monster Hunter Wilds / (46)
- Windrose / (44)
- Path of Exile / (40)
- Bee Swarm Simulator / (37)