0
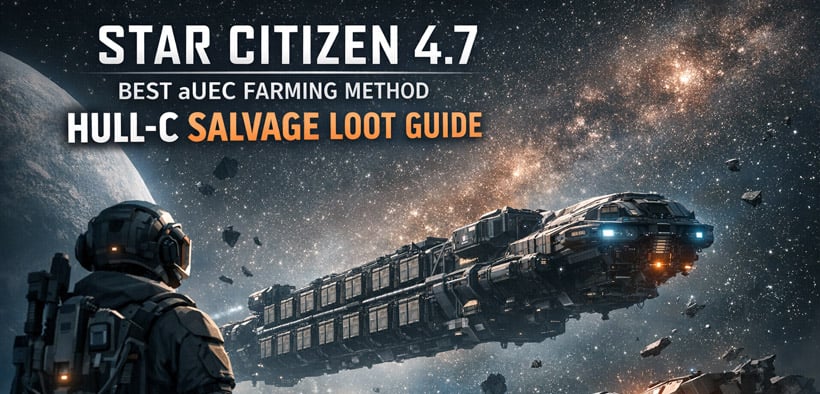
0Star Citizen 4.7 Best aUEC Farming Method: Hull-C Salvage Loot Guide
- RCHM
- Share
- Star Citizen
- 03/28/26
- 6349
If you're looking for the strongest Farming money (aUEC) method in Star Citizen 4.7, this is the one worth paying attention to right now. From our runs, the big profit isn't coming from normal salvage alone. It's coming from Hull-C cargo spawns inside unverified 20k salvage missions, especially around Hurston.
The reason this works is simple: one good spawn can carry millions in high-value cargo, and even after travel time, selling friction, and bad rerolls, the payout is still far above most regular loops. The trick is not to treat it like a full salvage clear. We need to run it like a fast cargo extraction route.
- Why This Method Works in 4.7
- What we found in practice
- What really drives the hourly rate
- Best Setup and Cargo Priority
- Recommended setup
- Loot priority
- How We Run the Route
- 1. Check unverified 20k salvage missions
- 2. Reroll until you find a Hull-C
- 3. Swap into a cargo ship
- 4. Scan and take the best cargo first
- 5. Watch the mission timer
- 6. Sell at HUR-L1
- Profit Expectation and Common Mistakes
- Profit snapshot
- Common mistakes to avoid
- FAQ
- Is this still worth doing solo?
- Why is Stims better than Medical Supplies?
- Do I need a Reclaimer?
- Where should I look for these missions?
- Does rerolling missions still make sense?
- Summary
↖ Why This Method Works in 4.7
In 4.7, the ship pool inside these 20k unverified salvage contracts seems to have shifted. The standout target now is the Hull-C, because it can spawn with a huge amount of profitable freight.
↖ What we found in practice
A strong Hull-C spawn can include:
- Medical Supplies
- Stims
- Distilled Spirits
On paper, one ship can hold cargo worth around 12 million aUEC. In practice, you won't move all of that solo in one trip, but you do not need to. Even one clean run can still be excellent money.
↖ What really drives the hourly rate
The hourly income comes from three things:
- Low mission cost
- Very high cargo value
- Short route around Hurston
That's why this method can push toward 10M+ aUEC/hour when the rerolls and selling go your way.
↖ Best Setup and Cargo Priority
Before running the route, we need the right mindset: cargo first, salvage second.
↖ Recommended setup
| What to Bring | Why It Helps |
|---|---|
| C2 Hercules | Best solo choice for moving high-value cargo fast |
| Reclaimer | Useful for group runs or salvaging after the cargo is stripped |
| Hurston / HUR-L1 / HUR-L2 positioning | Helps refresh and run contracts faster |
This is the main takeaway from the setup: if you're solo, bring a hauler, not just a salvage ship.
↖ Loot priority
| Cargo | Priority | Why |
|---|---|---|
| Stims | Highest | Strong value and usually easier to sell in bulk |
| Medical Supplies | High | Great value, but slower to sell |
| Distilled Spirits | Medium | Worth taking if premium cargo space is already filled |
This is where many players lose time. Medical Supplies look amazing on paper, but Stims are often better for real hourly profit because the selling process is smoother.
↖ How We Run the Route
The loop is straightforward once you stop overthinking it.
↖ 1. Check unverified 20k salvage missions
Stay around Hurston, HUR-L1, or HUR-L2 and look for the right contract.
↖ 2. Reroll until you find a Hull-C
If the mission does not give you a Hull-C, drop it and move on.
Yes, this costs money. No, it usually does not matter. One good hit pays it back.
↖ 3. Swap into a cargo ship
Once you know the target is worth it, bring out the C2 and head in.
↖ 4. Scan and take the best cargo first
If you find Stims, load those first.
If there's still space, take Medical Supplies next.
↖ 5. Watch the mission timer
This part matters. It is still an illegal mission.
If the timer is getting low:
- stop trying to clear everything
- secure the best cargo you already have
- leave clean
↖ 6. Sell at HUR-L1
That remains one of the better spots for this route.
One important 4.7 issue: Medical Supplies can be annoying to sell one by one because of the current cargo quality system. That slows the loop down more than most players expect.
↖ Profit Expectation and Common Mistakes
The headline number is exciting, but we should be realistic about how the money is made.
↖ Profit snapshot
| Run Type | Approximate Result |
|---|---|
| Strong single run | 3M+ aUEC in around 20 minutes |
| Optimized hour | Up to 10M+ aUEC |
| Full paper value of one rich Hull-C | Around 12M aUEC in cargo |
The reason the paper value is higher than the real payout is simple: ship capacity, timer pressure, and selling speed all reduce what you can actually convert per hour.
↖ Common mistakes to avoid
- Trying to loot everything instead of taking the best cargo and leaving
- Overloading on Medical Supplies when Stims would sell faster
- Running the wrong ship and losing time on extra transfers
- Refusing to reroll bad missions, which kills the average hourly rate
From experience, the best players running this method are not the greediest ones. They are the ones who know when a run is already good enough.
↖ FAQ
↖ Is this still worth doing solo?
Yes. Solo is absolutely viable, especially with a C2. You just won't extract the full value of the richest Hull-C spawns.
↖ Why is Stims better than Medical Supplies?
Mostly because of sell speed. Both are valuable, but Medical Supplies can become tedious to liquidate in 4.7.
↖ Do I need a Reclaimer?
No. A Reclaimer helps in a team setup, but the core money here comes from cargo extraction.
↖ Where should I look for these missions?
Your best bet is around Hurston, HUR-L1, and HUR-L2.
↖ Does rerolling missions still make sense?
Yes. Even if you burn some aUEC refreshing contracts, one good Hull-C run usually covers it easily.
↖ Summary
Right now, this is one of the best high-end money routes in Star Citizen 4.7 if you want strong returns without relying on a long setup chain. The formula is simple: hunt 20k unverified salvage missions near Hurston, reroll until you get a Hull-C, prioritize Stims, treat Medical Supplies as secondary, and leave before the timer turns the run into a mess.
That's the real version of this method. Not glamorous, but very effective.

Most Popular Posts
- Star Citizen Covalex Cargo Hauling 4.8: Fast Reputation Route, Best Ships, and Master Unlocks
- Star Citizen 4.8 Solo Ship Guide: Best Purchasable PvP & PvE Ships, Loadouts, Components
- Star Citizen 4.8 Salvage Guide: Best RMC Farming, Adagio Rep, and Ships to Use
- Star Citizen 4.8.3 XenoThreat Event Guide: Fast Points, Best Missions, Rewards, and Ship Strategy
- Star Citizen 4.8 Best Component Blueprints: Fast Farming Roadmap for Crafting
- Star Citizen 4.8 aUEC Farming Guide: Best Money Methods, First Ships, and Fast Progression
Popular Category Lists
- Grow a Garden / (286)
- ARC Raiders / (267)
- CoD: Black Ops 7 / (166)
- Monopoly Go / (147)
- MLB 26 / (146)
- Star Citizen / (122)
- Steal a Brainrot / (89)
- ARK Survival Ascended / (77)
- Sailor Piece / (68)
- Forza Horizon 6 / (65)
- Diablo IV / (61)
- Blox Fruits / (61)
- CoD: BLACK OPS 6 / (55)
- Adopt Me / (55)
- Path of Exile 2 / (48)
- Grow a Garden 2 / (48)
- Monster Hunter Wilds / (46)
- Windrose / (44)
- Path of Exile / (40)
- Bee Swarm Simulator / (36)