


 0
0Arc Raiders Expedition 2 Fast Skill Tree, Easy Level 75, and Bench Level 3 Setup Guides
- KIVRI
- Share
- ARC Raiders
- 03/03/26
- 678
If your goal is to feel Arc Raiders fully online after one day—strong backpack, stable income, level 3 stations, and a skill tree that snowballs—then we want a plan that removes randomness. We're going to control lobby pressure, upgrade carry capacity early, then farm XP and parts with a repeatable loop that pays for itself.
We've run this kind of setup in wipe-like resets: after ~7–8 hours, you can realistically sit around level ~20+, have bench progress well underway, and be ready to pivot into a clean level 75 grind without feeling broke or constantly overweight.
- Stabilize Your Matchmaking (Cut PvP While You Build)
- Run a Cheap Looting Loadout That Scales
- Rush Gear Bench Level 2 (Your First Real Power Spike)
- Inject Cash (Fast, Repeatable, Low-Risk)
- Max Scrappy Early (It's a Hidden Progress Multiplier)
- The Skill Tree That Snowballs (Order Matters)
- Fast XP: Combine Search XP + Arc Kills (The No-Waste Rule)
- Our Favorite Repeatable XP Route: Bastion Loop
- Push All Stations to Level 3 (While XP Farming)
- Blueprint Quests That Actually Matter
- FAQ
- 1) Why do we purposely die to fix matchmaking?
- 2) Why is Gear Bench 2 the first big milestone?
- 3) Pharaoh vs Anvil—when do we switch?
- 4) What's the fastest way to level if our gear is still weak?
- 5) We keep getting overweight—what should we change first?
- 6) Are grenades worth it early?
- Closing Takeaways
↖ Stabilize Your Matchmaking (Cut PvP While You Build)
Early progression is fragile: one death can erase your crafting parts, time, and momentum. Because of that, we treat PvP as a tax we don't need to pay on day one.
What we do
1. Load a free kit.
2. Run to the nearest player.
3. Let them kill you (don't fight back).
4. Repeat ~4–5 times.
Why this works
- The game's aggression matchmaking behavior isn't a hard toggle; it's more like a trendline.
- After a few non-aggressive signals, we typically see lobbies shift from frequent raider fights to mostly PvE pressure.
If/then trigger
- If you notice players stop instantly shooting on sight, then you're close to the PvE-leaning pool and can start your real farm loop.
- If you still see repeated PvP fights after several runs, keep the free-kit deaths going a bit longer before investing gear.
↖ Run a Cheap Looting Loadout That Scales
We want a kit that:
- kills basic Arc reliably,
- doesn't drain ammo Coins,
- and keeps value safe even if you misplay.
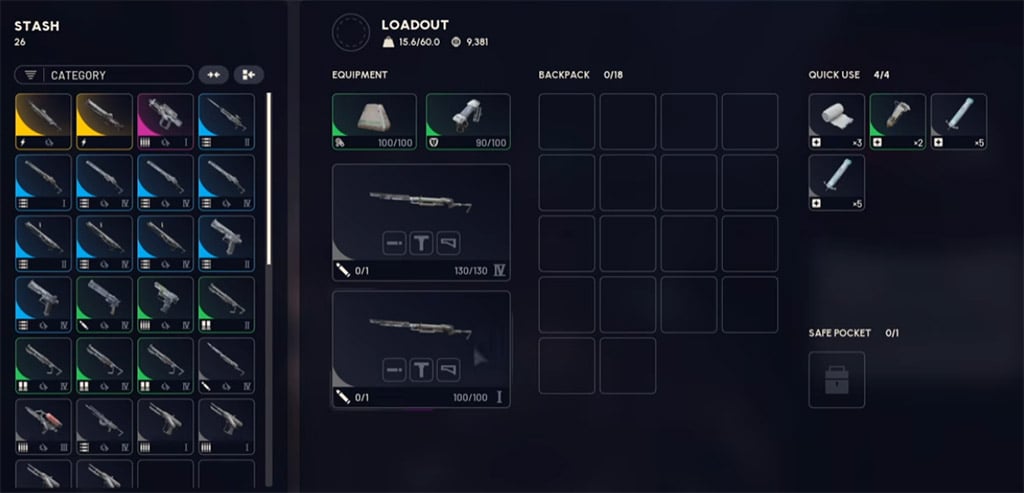
Baseline loadout
- Looting Mark 1 (early slots + safe pocket)
- Light shields
- Pharaoh (minimum Level 2; Level 3 recommended)
- Adrenaline shots: 5 minimum, 10 ideal
Why Pharaoh (early)
Because each shot hits hard and cuts armor, your ammo efficiency is strong. Also, upgrading it is cheap compared to replacing expensive guns after a bad run.
Practical note from our runs
- A Level 1 Pharaoh feels like fighting the recoil more than the Arc.
- Level 2 is usable, Level 3 is where reload time stops killing your tempo.
If/then trigger
If you're still missing mobility perks, then adrenaline isn't optional—it's your time-saver and your get out button.
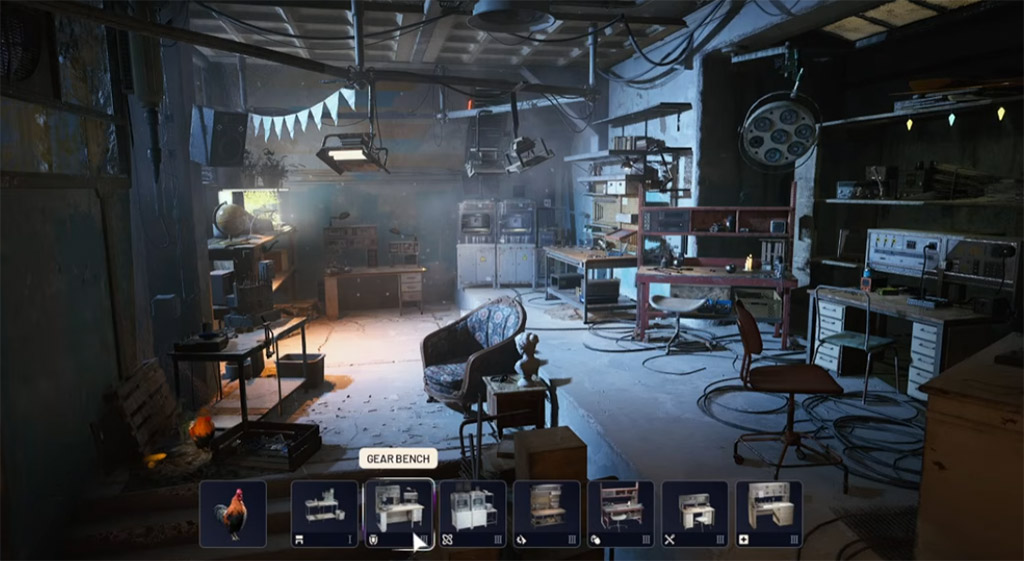
↖ Rush Gear Bench Level 2 (Your First Real Power Spike)
Gear Bench 2 unlocks Looting Mark 2, which is the early-game engine.
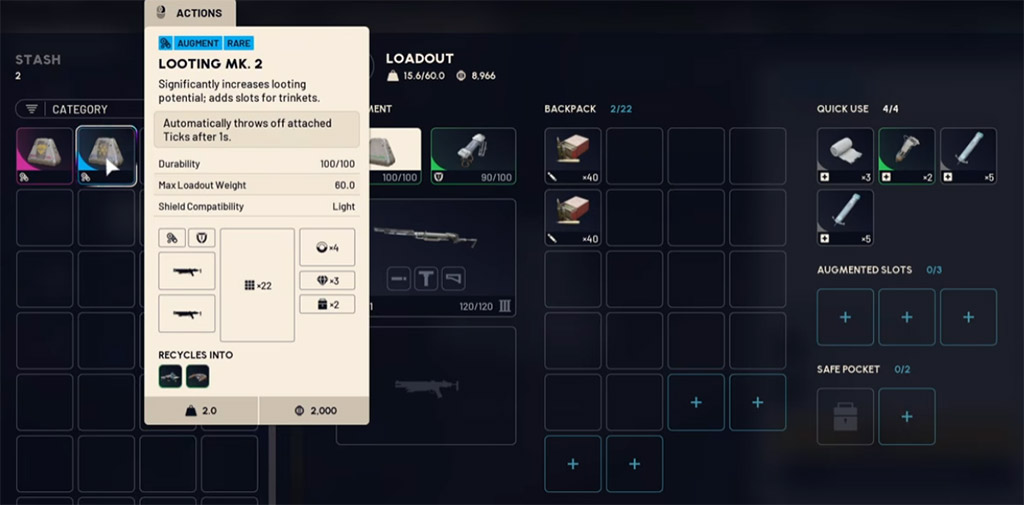
What Looting Mark 2 gives
- +4 inventory slots
- 3 augment slots
- +1 safe pocket
- higher max carry weight
This means you extract more value per run and stop leaving high-weight items behind.
Materials: where to get them fast
We're not hoping for parts; we're targeting them.
| Item | Fast Sources | Breakdown/Craft Notes |
|---|---|---|
| Magnets | Industrial areas; certain items break down into magnets | Can buy limited magnets daily from vendors |
| Electrical Components | Tech containers | Can be crafted once Refiner is online |
| Power Cables | Tech/industrial loot | Keep them early; they gate upgrades |
| Hornet Drivers | From Hornets | Farm while moving; don't detour too hard |
Why we do this before coins grinding
Because every upgrade to capacity and speed increases your value per minute. That's the theme of this guide.
↖ Inject Cash (Fast, Repeatable, Low-Risk)
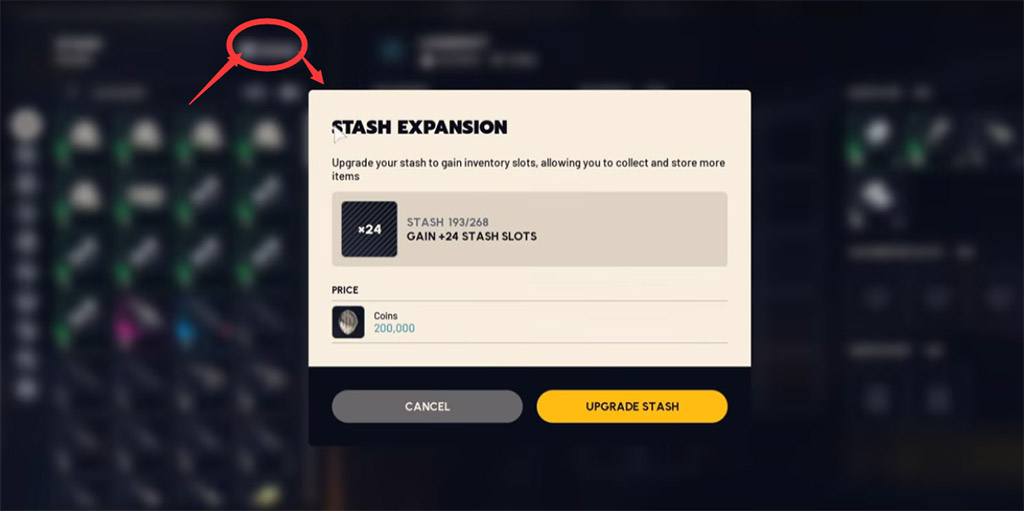
We want enough coins to:
- buy stash upgrades (space = speed),
- afford weapon upgrades (Pharaoh → Anvil),
- and fund XP utilities (grenades/mines/ammo).
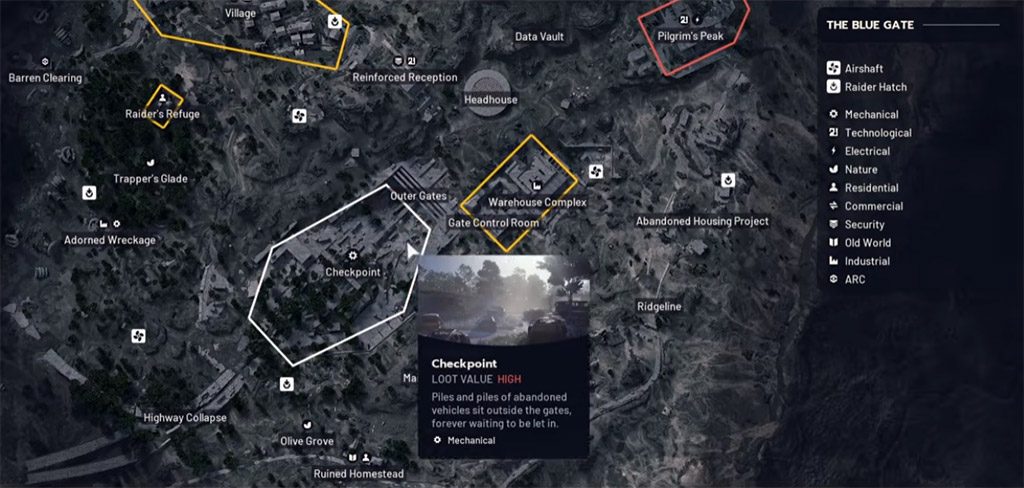
Our reliable loop
- Prioritize high-density container zones (medical/industrial style areas)
- Loot until the bag is near full
- Extract immediately
- Repeat 4–6 runs
Field-tested expectation
In decent PvE-leaning lobbies, a handful of clean loot-and-leave runs often gets you into the I can buy upgrades without flinching range. The exact number varies by loot RNG, but the key is consistency: short runs beat heroic runs.
If/then trigger
If you spawn far from your preferred loot zone, then loot nearby containers briefly and extract—don't force a long cross-map hike early.
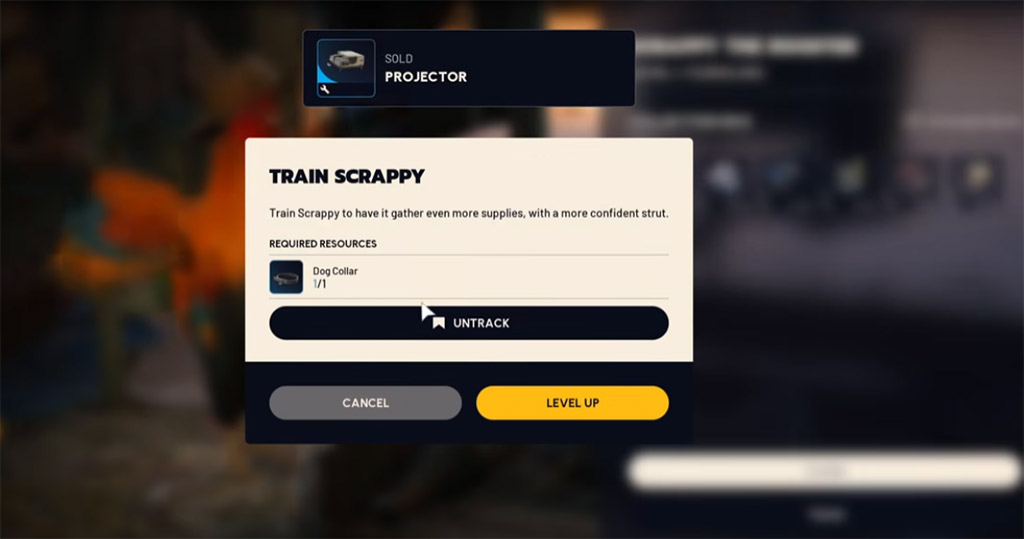
↖ Max Scrappy Early (It's a Hidden Progress Multiplier)
Scrappy upgrades are one of those systems that feels optional… until you realize it quietly removes friction everywhere.
What to keep (shopping list)
Below is a compact don't accidentally sell this table.
| Scrappy Level Target | Items to Save | Where We Usually Find Them |
|---|---|---|
| Level 2 | Dog collar | Residential spawns |
| Level 3 | Lemons (x3), Apricots (x3) | Fruit baskets / event loot |
| Level 4 | Prickly pears (x6), Olives (x6), Cat bed (x1) | Baskets; cat bed in residential/commercial |
| Level 5 | Mushrooms (x12), Apricots (x12 more; 15 total), Very comfortable pillow (x3) | Baskets; pillows residential/commercial |
Targeted go get it now method
- If you need pillows/beds/collars, then run a short residential/commercial sweep route and leave.
- A couple focused runs beats ten maybe it drops raids.
↖ The Skill Tree That Snowballs (Order Matters)
We're building a character that:
- moves faster,
- loots faster,
- carries more,
- and breaks into locked value earlier.
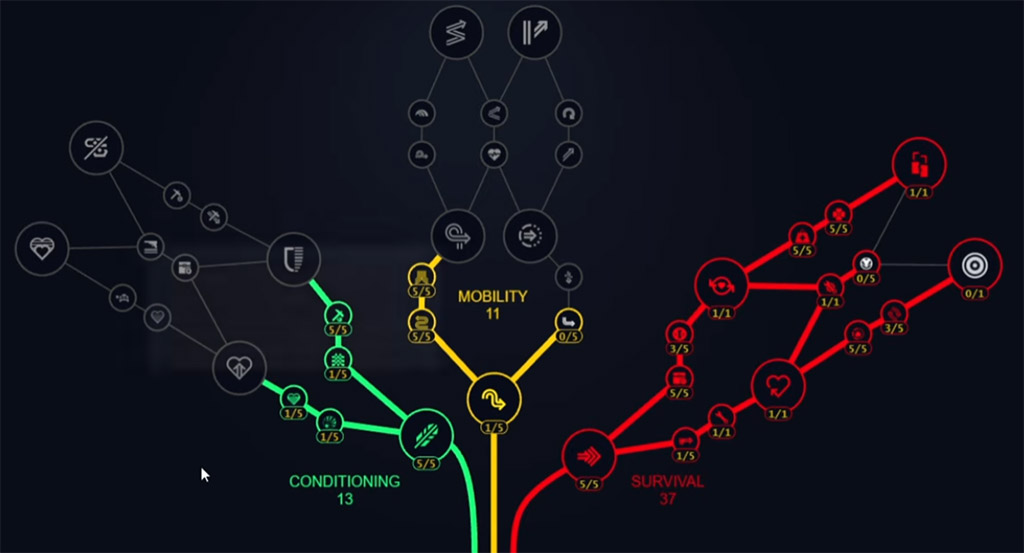
Our priority philosophy
Mobility first isn't a meme—it's economics:
- Faster movement = more containers per raid
- Faster looting = less time exposed
- Higher carry = fewer painful decisions about what to drop
Recommended progression order (early to mid)
This table shows the intent and the payoff, so you know why each chunk exists.
| Phase | Focus | Why It Pays Off |
|---|---|---|
| 1 | Mobility core (climb/sprint-related) | More map coverage per minute |
| 2 | Loot speed + crafting access | Faster searches + smoother raid flow |
| 3 | Broad shoulders (carry weight spike) | You stop hemorrhaging value to overweight |
| 4 | Loot luck (double loot procs) | Raises ceiling on every container |
| 5 | Security breach (early locked loot) | Unlocks wipe-era value many players miss |
| 6 | Loaded arms path (more carry/handling) | Makes bring tools + bring loot feasible |
If/then trigger
- If you're constantly overweight, then push carry-weight perks earlier than planned.
- If you're seeing many locked rooms on your routes, then Security Breach jumps in priority.
↖ Fast XP: Combine Search XP + Arc Kills (The No-Waste Rule)
Leveling quickly isn't about one trick; it's about never wasting actions.
The rule
- Search every container you pass (even already-open ones) for XP.
- Kill Arc that you can safely and efficiently kill.
- Extract once resources/time efficiency drops.
Extra XP habit
If you see a dead raider body, touch/loot it for a quick XP bump.
Even in PvE-leaning lobbies, this adds up over dozens of raids.
↖ Our Favorite Repeatable XP Route: Bastion Loop
We like routes with:
- predictable big Arc spawns,
- hard cover,
- short extraction windows,
- and steady part income.
Core technique (Bastion)
1. Break a leg joint until it's stunned.
2. Rotate to a safe angle.
3. Dump damage into the core (multiplier payoff).
4. Alternatively, break the back battery to expose the core, then finish.
What we see in practice
A clean one Bastion + small Arc along the way loop can land around 20k–30k XP in ~10 minutes when executed smoothly, even on modest gear.
Speed tools: cost vs value
| Tool | Cost Profile | Best Use | Why We Like/Don't Like It |
|---|---|---|---|
| Deadline mine | Moderate; limited availability | Secure burst during stun | Low risk, fast kills |
| Hullcracker | Higher upfront + ammo cost | Core damage during stun | Very fast if disciplined |
| Impact grenades | Cheap craft | Leg stun help or core burst | Great early, scales with skill |
| Sticky/trigger grenades | Cheap-to-mid craft | Attach only to weak points | Highest efficiency when aimed well |
If/then trigger
- If your fights feel slow, then add grenades first (cheapest acceleration).
- If you're consistently safe and extracting, then Hullcracker-style investment starts paying back via faster runs and more parts.
↖ Push All Stations to Level 3 (While XP Farming)
This is where we fuse XP runs with upgrade materials, so we're never doing chores twice.
Below is a condensed upgrade tracker (save it, follow it, stop forgetting one weird item).
| Station (Level 3) | Key Items Needed | How We Farm It Without Detours |
|---|---|---|
| Gear Bench | Industrial batteries; Bastion cells; advanced electrical comps | Bastion loop + warehouse/industrial container sweeps |
| Refiner | Motors; arc circuitry; Bombardier cells | Vehicle looting on route; craft circuitry; target Bombardiers when needed |
| Gunsmith | Rusted gears; advanced mechanical comps; Sentinel firing cores | Vehicles near checkpoints; refine comps; farm Sentinel spawns |
| Explosives | Lab reagents; explosive compound; Rocketeer drivers | Medical locations; Comet drops; Rocketeer kills/looting events |
| Utility | Fried motherboards; advanced electrical comps; Leaper pulse units | Server stacks; refine comps; kill Leapers on sight |
| Medical Lab | Rusted med kits; antiseptic; Surveyor items | Hospital/medical zones; target Surveyors or courier loots |
Why this approach works
Because every upgrade item is attached to a route you already want to run for XP or Coins. That means your base grows while your level climbs—two bars filling at once.
↖ Blueprint Quests That Actually Matter
Not all blueprints are equal. We prioritize what changes raid tempo and kill speed.
High-impact unlocks
- Trigger grenades (top-tier efficiency on weak points)
- Hullcracker / launcher-related lines (if you commit to that playstyle)
If/then trigger
- If your XP route is Bastion-heavy, then prioritize anything that shortens time-to-core-kill.
- If you're still building economy, then don't over-invest in expensive ammo loops until your stash and benches support it.
↖ FAQ
↖ 1) Why do we purposely die to fix matchmaking?
Because early progression is about removing volatility. When PvP pressure drops, we can safely chain short loot and XP runs, which compounds faster than occasional big wins mixed with repeated gear losses.
↖ 2) Why is Gear Bench 2 the first big milestone?
Looting Mark 2 increases slots, safe pocket capacity, augment options, and carry weight. That combination raises your value per extract and reduces overweight friction, which is one of the biggest early-game time sinks.
↖ 3) Pharaoh vs Anvil—when do we switch?
We use Pharaoh because it's efficient and cheap to scale early.
If you're consistently extracting and you've got cash buffer, then switching to Anvil-style upgrades is a clean power spike because you kill faster and spend less time exposed.
↖ 4) What's the fastest way to level if our gear is still weak?
Search XP + controlled Arc kills.
If you can safely kill one large Arc (like a Bastion) per run, your XP rate becomes stable, and parts income starts funding better tools that speed the next run.
↖ 5) We keep getting overweight—what should we change first?
Two levers:
- Skill points into carry-weight perks sooner
- Earlier push to Looting Mark 2
If you're dropping valuable heavy items repeatedly, then you're losing more than you realize—fix carry first.
↖ 6) Are grenades worth it early?
Yes, especially impact grenades. They're a cheap way to shave minutes off large Arc fights.
If you only throw them at weak points, they become one of the best time-to-XP upgrades you can craft.
↖ Closing Takeaways
This day-one plan works because every step feeds the next: we reduce PvP variance, upgrade carry capacity early, fund ourselves with short extractions, then turn XP routes into upgrade routes. Once that loop is running, level 75 stops being a grind and starts feeling like a schedule.

Most Popular Posts
- ARC Raiders Riven Tides Key Room Guide: Best Hotel Keys, Loot Routes, Secure & Crane Storage
- ARC Raiders Damage Fireflies Trial Guide: Best Farm Method on Buried City Night Raid
- ARC Raiders Riven Tides Update: New Map & Items, ARC Turbine, Rewards, and Best Early Strategy
- ARC Raiders Bettina Guide: Best Build, Buffs, and How to Use It Against ARC
- Arc Raiders Season 4 Riven Tides Update, Rewards, Safe Skins, and Release Timeline
- ARC Raiders Solo Search Supply Drops Guide: Best Buried City Route, Beacon Locations
Popular Category Lists
- Grow a Garden / (286)
- ARC Raiders / (262)
- CoD: Black Ops 7 / (166)
- Monopoly Go / (146)
- MLB 26 / (145)
- Star Citizen / (112)
- Steal a Brainrot / (89)
- Sailor Piece / (68)
- ARK Survival Ascended / (67)
- Diablo IV / (61)
- Forza Horizon 6 / (60)
- Blox Fruits / (60)
- CoD: BLACK OPS 6 / (55)
- Adopt Me / (53)
- Path of Exile 2 / (48)
- Monster Hunter Wilds / (46)
- Windrose / (44)
- Path of Exile / (40)
- Grow a Garden 2 / (40)
- Bee Swarm Simulator / (36)


