0
0ARC Raiders Expedition Fast Rebuild Routes for Items, Blueprints, and Skill Priorities
- KIVRI
- Share
- ARC Raiders
- 12/22/25
- 1596
A wipe in ARC Raiders doesn't just sting—you wake up broke in four different ways: items, workshop upgrades, blueprints, and your skill tree. The good news is that the rebuild is predictable once you stop roaming and start running repeatable routes.
I'm writing this from the perspective of someone who's rebuilt after multiple resets and learned the hard way: early progress isn't about the best loot, it's about the most reliable loot per minute with the lowest chance of getting deleted by shredders or other hungry players. Below is a rebuild plan you can execute tonight.
- What the Expedition Wipe Changes
- Why this matters
- The Rebuild Priority
- Best Locations by Resource Type
- Quick-reference loot table (use this as your raid planner)
- My real-world rule of thumb
- Workshop Upgrade Materials
- A practical upgrade sprint approach
- Workshop-target table (example-driven, not exhaustive)
- Blueprint Recovery: What to chase first
- Early core weapon blueprints (e.g., Anvil/Ventor-type priorities)
- Augment blueprints (high demand, high competition)
- Attachment blueprints (compensators, light mags, etc.)
- Wolfpack / high-demand utility blueprints (timing matters)
- XP and Leveling After Reset: Fast Methods Without Gear
- Method A: Loot XP loops (my default)
- Method B: Higher-risk, higher-reward loops (only after you regain tools)
- Skill Tree Priorities: My access + speed path (with reasoning)
- The principle
- My early path (conceptual ordering)
- Simple First 6 Raids Rebuild
- Raid 1–2: Stabilize crafting inputs
- Raid 3–4: Workshop progress push
- Raid 5–6: Blueprint attempts with a plan
- FAQ
- 1) After a wipe, what should I prioritize first: blueprints or workshop levels?
- 2) I keep losing fights in Stella Montis. Is it still worth running?
- 3) Where do processors and sensors come from most reliably?
- 4) Are medical areas genuinely good for augment blueprints?
- 5) How do I level fast without strong gear?
- Closing Notes
↖ What the Expedition Wipe Changes
You're effectively restarting your operational capability:
- Workshop levels reset → crafting depth collapses
- Blueprints reset → you can't reliably replace loadouts
- Inventory stash reset → no buffer gear for risky runs
- Skill tree reset → slower looting, weaker survivability, less access
↖ Why this matters
If you try to play normal, you'll burn time and die with half-finished objectives. Early wipe is won by short raids with specific shopping lists.
↖ The Rebuild Priority
Here's the order that consistently gets me stable fastest:
1. Stockpile uncraftables (magnets, wires, springs, processors, sensors)
2. Push workshop upgrades (so your crafting stops feeling like a toy set)
3. Target key blueprints (Anvil/Ventor/Augments early; attachments as you stabilize)
4. Level efficiently (loot XP is underrated; don't force PvE boss strats naked)
5. Skill tree toward access + speed (breaching + looting speed = economy)
This means you're aiming for repeatable income first, not glory runs.
↖ Best Locations by Resource Type
Different maps/areas shine for different reasons. I'm not listing every container, I'm listing where I go when I need X right now.
↖ Quick-reference loot table (use this as your raid planner)
| Goal | Best Area (Primary) | What to Loot / Do | Why It Works | Risk Notes |
|---|---|---|---|---|
| Magnets / Wires / Oil (early essentials) | Lobby Metro (specific loot room pattern) | Hit the repeatable room spawns, leave immediately | High consistency for early upgrade mats | Don't overstay; players learn this spot fast |
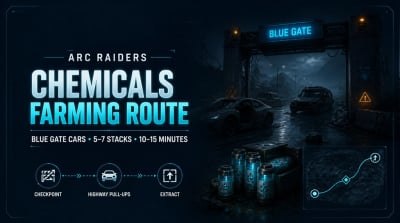
| Chemicals / Plastic parts (grenade economy) | Seed Vault | Sweep containers fast; prioritize volume | You can convert these into lots of throwables | Low-to-mid risk; still watch corners |
| Mechanical components / metal parts | Checkpoint + vehicle clusters | Loot vehicles, seats, and general containers | Mechanical parts appear broadly; metal parts can be converted | Medium risk; predictable traffic |
| Advanced mechanical components | Spaceport (fuel container area + rocket assembly) | Breach containers that spawn advanced parts | Best target farm when you need upgrades now | Breaching noise attracts trouble |
| Processors / Sensors | Server cabinets (multiple areas) | Breach server cabinets; also loot androids in Stella Montis | Cabinets are everywhere; predictable category drops | Breaching creates commitment time |
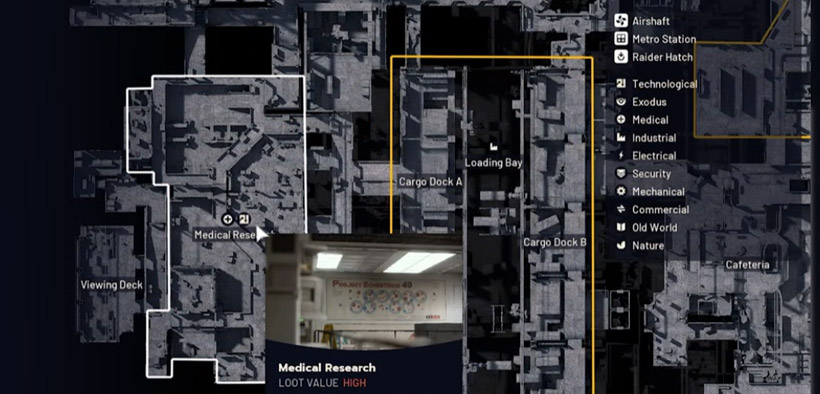
| Everything but peace (high density) | Stella Montis | Run tight routes, loot medical/research containers | High container density = fast XP + materials | Close quarters + shredders + players |
↖ My real-world rule of thumb
If my stash is empty and my skills are reset, I start with Seed Vault + Metro-style quick hits. Why? Because early wipe deaths are common, and short raids reduce the cost of bad luck.
↖ Workshop Upgrade Materials
Workshop rebuilding feels overwhelming because you're missing one annoying part every time. The trick is to treat workshop progress like a checklist, not a grind.
↖ A practical upgrade sprint approach
- Sprint 1 (2–3 raids): uncraftables + basics (wires, magnets, oil, chemicals, plastics)
- Sprint 2 (next 2 raids): mechanical parts (Checkpoint/vehicles)
- Sprint 3 (as needed): advanced components (Spaceport breach route)
This means you're not bouncing between five maps for one missing gear.
↖ Workshop-target table (example-driven, not exhaustive)
| Upgrade Need (Typical) | Common Bottleneck Items | Where I Farm It | What I Avoid |
|---|---|---|---|
| Gunsmith early levels | Mechanical components, rusted gears/tools-type parts | Checkpoint + vehicle routes | Long fights; your early ammo economy is fragile |
| Explosives progression | Chemicals, plastic parts, explosive-related inputs | Seed Vault | One more room greed—leave when bag is decent |
| Higher-tier mechanics | Advanced mechanical components | Spaceport breach containers | Breaching every door—pick a loop and stick to it |
If you find you're always missing one item (say, springs), then you stop doing general loot runs and do one dedicated run where every container you open has a reasonable chance to drop it. That's the difference between progress and frustration.
↖ Blueprint Recovery: What to chase first
Blueprints are your wipe recovery multiplier. The earlier you regain a core weapon blueprint, the faster your raids become self-sustaining.
↖ Early core weapon blueprints (e.g., Anvil/Ventor-type priorities)
Where I focus: Raider-style containers
- Raider caches
- Weapon boxes
- Ammo cases
- Grenade cases
Why this is your best early bet
These containers have a blueprint-friendly loot identity. In practice, that means every raid can be a blueprint attempt and a materials run—two birds, one backpack.
↖ Augment blueprints (high demand, high competition)
Most players hard-push Bluegate's Security Wing underground because augment drops are commonly associated with that cluster.
My practical adjustment after several wipes:
If Security Wing is a warzone, I pivot to medical-heavy areas with lots of medical containers. I've personally pulled augment blueprints there often enough that I now treat it as a legitimate secondary route.
This means: if you spawn far from Security Wing or you hear a fight already popping off, you don't force it. You go medical containers, get out alive, and keep rolling attempts.
↖ Attachment blueprints (compensators, light mags, etc.)
I've had the best consistency in residential-style areas (think villages/plaza-style housing clusters). These areas produce lots of civilian container volume, which seems to bias toward attachments.
↖ Wolfpack / high-demand utility blueprints (timing matters)
If you're chasing a blueprint that overwhelmingly appears in night raids, then forcing daytime runs is just volunteering for disappointment.
- If you're hunting Wolfpack-type drops: run night raids intentionally
- If an alternative like a Deadline-style option is available in your meta: it can substitute earlier than people think, but only if your workshop level supports crafting it
↖ XP and Leveling After Reset: Fast Methods Without Gear
When you're level 1 again, you're tempted to copy late-game XP methods. Don't. Your power is gone.
↖ Method A: Loot XP loops (my default)
- Go to Seed Vault
- Loot everything quickly
- Leave as soon as your bag hits your planned value
Why it works: Looting gives steady XP and doesn't require winning fights.
What this means: you can level while rebuilding economy instead of gambling it.
↖ Method B: Higher-risk, higher-reward loops (only after you regain tools)
Once you have a reliable throwable supply (or a key blueprint), then PvE-heavy XP routes become realistic again. Until then, treat boss-hunting as optional.
↖ Skill Tree Priorities: My access + speed path (with reasoning)
Skill resets hurt because they remove the invisible power: faster looting, better stamina handling, breaching efficiency, survival passives.
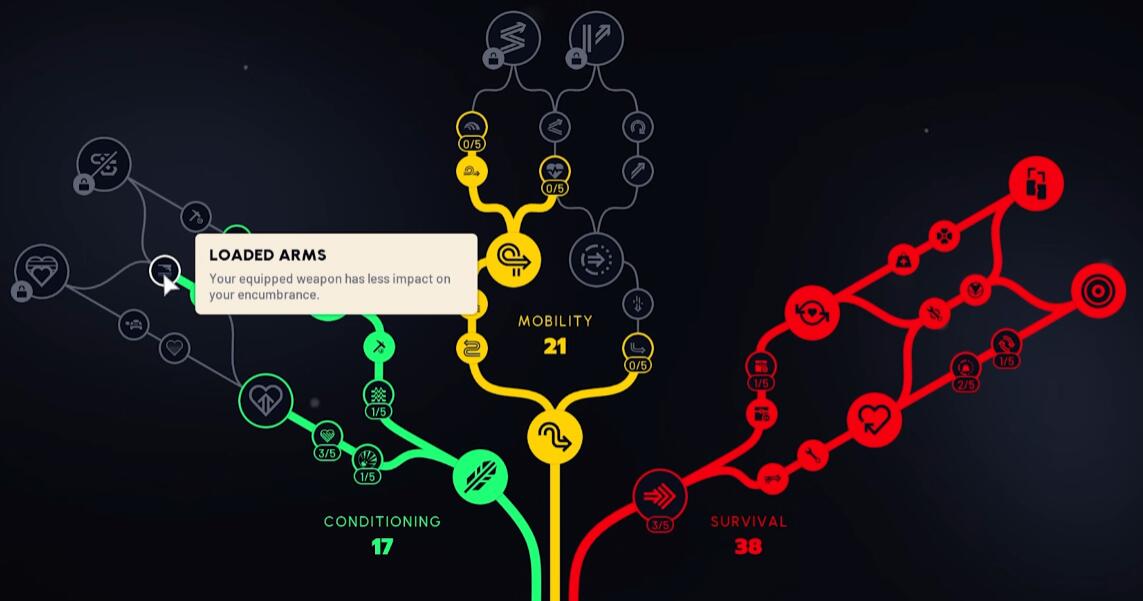
↖ The principle
I prioritize skills that:
- Increase access (breaching, opening the good stuff)
- Increase time efficiency (loot speed, carry, stamina recovery)
- Reduce wipe-causes (trap/mines survivability tools)
↖ My early path (conceptual ordering)
1. Core looting speed + consistency perks (anything that reduces time stuck in UI/containers)
2. Survival baseline (enough to survive mistakes and escape)
3. Security/Breach access as early as you can justify
4. Breaching efficiency perks (you'll breach a lot when rebuilding)
5. Mobility and carry improvements (more loot per raid = fewer raids)
Why I rush breach access (even if spawns are randomized)
Even with randomization, early breach access creates an economy edge: fewer people can open the good containers, so your exclusive pulls happen earlier.
If you notice you're consistently dying while breaching, then delay deeper breach investment and take 1–2 survivability points first. Being able to breach doesn't matter if you're a loot piñata.
↖ Simple First 6 Raids Rebuild
This is what I do when I want momentum fast:
↖ Raid 1–2: Stabilize crafting inputs
- Seed Vault sweep for chemicals/plastics
- One Metro-style hit for wires/magnets/oil
- Craft throwables and cheap sustain items
↖ Raid 3–4: Workshop progress push
- Checkpoint/vehicle route for mechanical parts + springs
- Avoid extended fights; leave with the upgrade parts
↖ Raid 5–6: Blueprint attempts with a plan
- Raider container loop for core weapon blueprints
- If Security Wing is overcrowded, pivot to medical container clusters for augment attempts
- Leave early if you got one good thing (blueprint, rare component, or a full stack of bottlenecks)
This means each raid has a job, and you're never wandering for vibes while broke.
↖ FAQ
↖ 1) After a wipe, what should I prioritize first: blueprints or workshop levels?
I do workshop basics + uncraftables first, then blueprints. If you land a blueprint but can't craft anything around it (or can't sustain ammo/throwables), it doesn't convert into progress.
↖ 2) I keep losing fights in Stella Montis. Is it still worth running?
Yes, but only with short-route discipline. If you're dying often, treat it like a high-variance investment: one tight loop, loot dense containers, and extract. If you can't extract 50%+ of the time, move to Seed Vault/Checkpoint until your economy recovers.
↖ 3) Where do processors and sensors come from most reliably?
Server cabinets are the most dependable target category, and they're widespread. If you're not breaching cabinets, you're turning a predictable farm into a lottery.
↖ 4) Are medical areas genuinely good for augment blueprints?
In my experience, yes as a secondary augment route—especially when the obvious hotspot is contested. Your success rate depends on container volume and survival rate, not just theoretical drop chance.
↖ 5) How do I level fast without strong gear?
Run loot XP loops. It's boring in the way that paying rent is boring: it keeps you alive long enough to do the fun stuff later.
↖ Closing Notes
A wipe rebuild becomes manageable when you stop treating it like I need everything and start treating it like three repeatable shopping lists: uncraftables, workshop bottlenecks, and blueprint attempts. If you keep raids short, target container types on purpose, and rush skills that increase access and looting speed, you'll feel online again far earlier than the players who insist on forcing contested hotspots every run.

Most Popular Posts
- ARC Raiders Riven Tides Key Room Guide: Best Hotel Keys, Loot Routes, Secure & Crane Storage
- ARC Raiders Damage Fireflies Trial Guide: Best Farm Method on Buried City Night Raid
- ARC Raiders Riven Tides Update: New Map & Items, ARC Turbine, Rewards, and Best Early Strategy
- ARC Raiders Bettina Guide: Best Build, Buffs, and How to Use It Against ARC
- Arc Raiders Season 4 Riven Tides Update, Rewards, Safe Skins, and Release Timeline
- ARC Raiders Solo Search Supply Drops Guide: Best Buried City Route, Beacon Locations
Popular Category Lists
- Grow a Garden / (285)
- ARC Raiders / (260)
- CoD: Black Ops 7 / (166)
- Monopoly Go / (146)
- MLB 26 / (142)
- Star Citizen / (109)
- Steal a Brainrot / (89)
- Sailor Piece / (68)
- ARK Survival Ascended / (64)
- Forza Horizon 6 / (59)
- Diablo IV / (59)
- Blox Fruits / (59)
- CoD: BLACK OPS 6 / (55)
- Adopt Me / (51)
- Path of Exile 2 / (48)
- Monster Hunter Wilds / (46)
- Windrose / (44)
- Path of Exile / (40)
- Grow a Garden 2 / (37)
- Bee Swarm Simulator / (36)