0
0Arc Raiders Fast Blueprint Farm Guide after Post‑Reset (New Rare Sources)
- KITE
- Share
- ARC Raiders
- 12/10/25
- 2257
If you're still farming Arc Raiders blueprints using launch‑week habits, you've probably felt it: you can clear a map, get decent loot, but somehow the blueprints you actually want refuse to show up.
- How Blueprint Drops Really Work?
- What Changed and Where to Actually Get Them Now
- Post‑Reset Blueprint Strategy: Different Phases, Different Goals
- Practical Reset Route: What to Do at Each Stage in One Glance
- Common Questions About Arc Raiders Blueprints
- Blueprint Farming Is RNG, But It's RNG With Rules You Can Exploit
That's not just bad luck. The devs quietly shifted how some blueprints enter the loot pool:
- The Hidden Bunker is disabled.
- The Locked Gate event is gone (after being around briefly).
- But weapons like Bobcat and Vulcano, which used to be effectively event‑locked, are now showing up in Trial rewards.
This changes the blueprint meta completely.
It affects what you should farm, when you should farm it, and how painful Expedition resets feel.
↖ How Blueprint Drops Really Work?
Blueprint farming only starts making sense once you stop thinking in terms of one big random pool and start thinking in layers of filters.
Every time you open a container, the game is roughly going through:
Does a blueprint drop? → If yes, what category? → What rarity? → Which exact blueprint?
Four main factors push those odds around.
1.1 The Four Pillars of Drop Logic
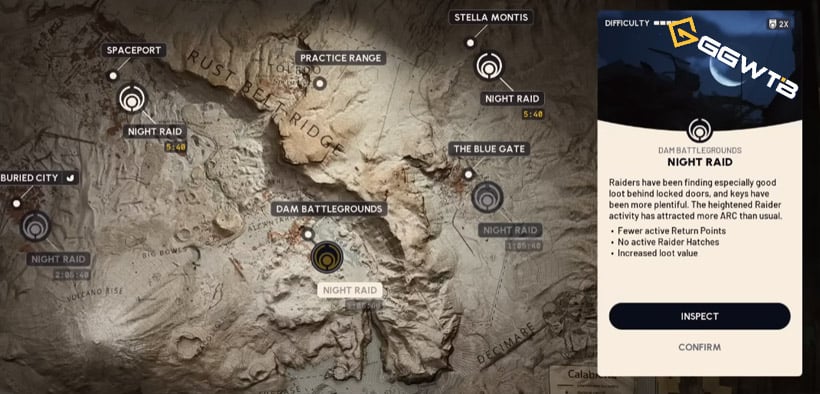
Map conditions (global modifiers)
These are the things shown when you queue in:
- Night Raid
- Storm / Electromagnetic Storm
- Special events (Hidden Bunker, Locked Gate – currently disabled)
They often mention increased loot value in the description.
In practice, that means:
- The whole loot table shifts slightly upward in rarity.
- You're rolling more often on uncommon/rare weights instead of commons.
So if you're farming anything blueprint‑related and have a choice, you generally want:
Night or Storm > plain daytime maps, all else equal.
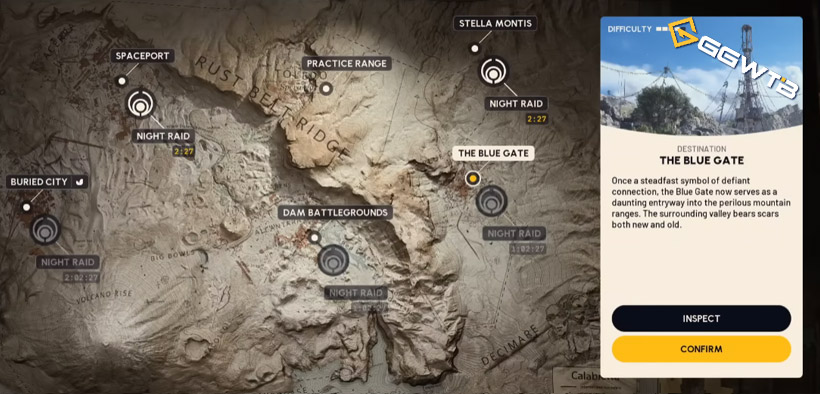
2. Location loot value & tags
Maps are divided into regions with:
- Loot value colors – Red > Yellow > Normal.
- Tags – e.g. Nature, Industrial, Security, Technological, Commercial/Residential, Old World.
Blueprint types are strongly correlated with these tags:
- Security – heavily associated with augment (mod) blueprints and certain high‑end weapons.
- Industrial / Mechanical – more crafting components, some weapon/attachment overlap.
- Residential / Old World – general goods, lower to mid‑tier attachments, utility items.
- Medical / Tech – support gear, tech components, some special attachments.
Put simply:
Where you loot is almost as important as what you open.
3. Container type
If you open the wrong kind of container for your target, you're basically rolling against the game's logic.
Examples:
- Weapon crates → weapons + weapon‑related blueprints.
- Servers / tech cabinets → wiring, tech components, some tech mods.
- Cars & mechanical wrecks → things like Rusted Gear, mechanical components.
- Drawers, lockers, wardrobes → multi‑purpose: attachments, basic items, utility blueprints.
So if you want:
- Rusted Gear → cars in a mechanical/industrial checkpoint.
- Green/Blue gun attachments → drawers/lockers in residential/old world regions.
- Augments → security/tech regions, especially armories.
4. Your progression stage & desired rarity
This one is psychological but very real:
- Early after a reset, you don't actually want purple gear yet.
- Purple mods often carry downsides and cost more resources to craft.
- At that stage, you want simple, cheap, no‑downside green and blue blueprints: basic attachments, utility items, core workshop upgrades.
If you find yourself saying:
I opened high‑end red zones at night and got a purple with awful drawbacks and can't even afford to craft it. then you've just experienced over‑optimizing rarity at the wrong phase.
Rusted Gear and Why Random Looting Feels Bad
Take the classic Rusted Gear example – something nearly everyone needed to max out workshop upgrades.
Goal: Get a lot of Rusted Gear quickly.
Logical farming setup:
| Factor | Choice | Why it works |
|---|---|---|
| Region | Red‑border mechanical checkpoint | High loot value + lots of cars |
| Tag | Industrial / Mechanical | Container contents match target |
| Container type | Vehicles / mechanical wrecks | Rusted Gear lives here |
| Map condition | Night / Storm | Global rarity bump |
If instead you:
- Wandered daytime low‑value areas
- Opened random drawers and kitchen cabinets
and then complained about Rusted Gear drop rates being bad, the problem wasn't the drop rate.
It was that you were in the wrong place, opening the wrong stuff, under the least favorable conditions.
The same logic applies to blueprints.
↖ What Changed and Where to Actually Get Them Now
Let's tackle the juicy part: the mythical blueprints.
These include:
- Named weapons like Jupiter, Equalizer, Affilion.
- Condition‑locked ones like Snap Hook and Tempest.
- Former event‑locked ones like Vulcano and Bobcat.
- Augments tied to very specific places.
Here's a big‑picture snapshot of how blueprints are currently distributed.
Blueprint Source Landscape at a Glance
| Blueprint Type | Main Sources | Condition‑sensitive? | Practical Note |
|---|---|---|---|
| Core functional (Anvil, etc.) | Drawers/lockers in residential/old world + Night/Storm | Lightly sensitive | High priority post‑reset |
| Normal weapon blueprints | Weapon crates, battlefield weapon points, Trials | Not very | You get these naturally while playing |
| Rare named weapons | Specific ARC cores (Queen, Harvester, Matriarch) | Event/ARC‑locked | Kill event bosses, loot cores |
| Affilion & similar | Matriarch core | ARC‑specific | Don't skip that event |
| Condition‑based (Snap Hook, Tempest) | Specific map modifiers + region types + lots of containers | Strongly condition‑locked | Must follow rules to not waste time |
| Vulcano / Bobcat | Originally event‑locked → now surfaced in Trials rewards | Event disabled; Trials fill the gap | Weekly Trials are now extremely valuable |
| Augment blueprints | Security + Tech regions, especially armories | Strong location/tags | Best farmed in dedicated rooms |
So no, your dream guns are not gone with the events; they're just coming from different buckets now.
Condition‑Locked Blueprints: Snap Hook, Tempest, Vulcano, Bobcat
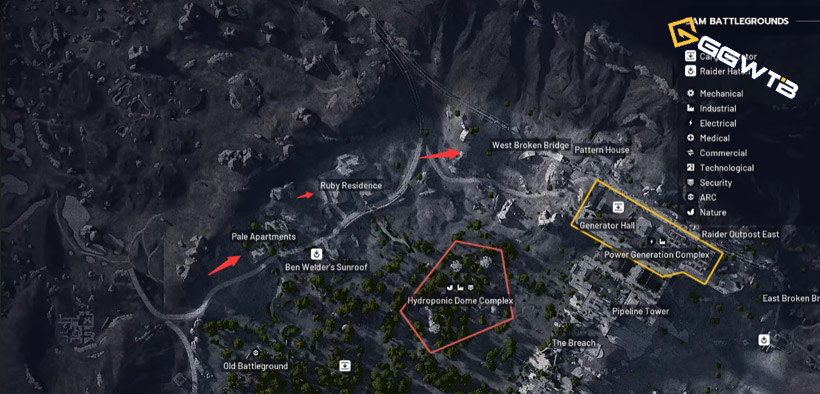
Snap Hook – The Electromagnetic Storm Special
Based on community tests and actual drops:
| Element | Recommended Choice |
|---|---|
| Map event | Electromagnetic Storm |
| Map/region | Damn Battlegrounds – especially Annex and similar |
| Region type | Medium/high value residential/old world |
| Containers | Drawers, lockers, cabinets |
Why this works:
- Snap Hook appears to only be in the loot pool during Electromagnetic Storm.
- Damn Battlegrounds' Annex combines:
- Medium‑high loot value,
- Tons of drawers/lockers in tight spaces,
- Easy routing from container to container.
Multiple players (including the original script you gave) have had runs where they found two Snap Hooks within seconds in Annex during the storm. That's not coincidence; that's correct conditions plus high container density.
If you're hunting Snap Hook during a non‑storm, in random low‑value offices, you're essentially farming against the system.
Tempest – Nighttime + Medium Residential Is the Real Core
There's been a lot of rumor that: Tempest only drops in Buried City's Grandiose Apartments.
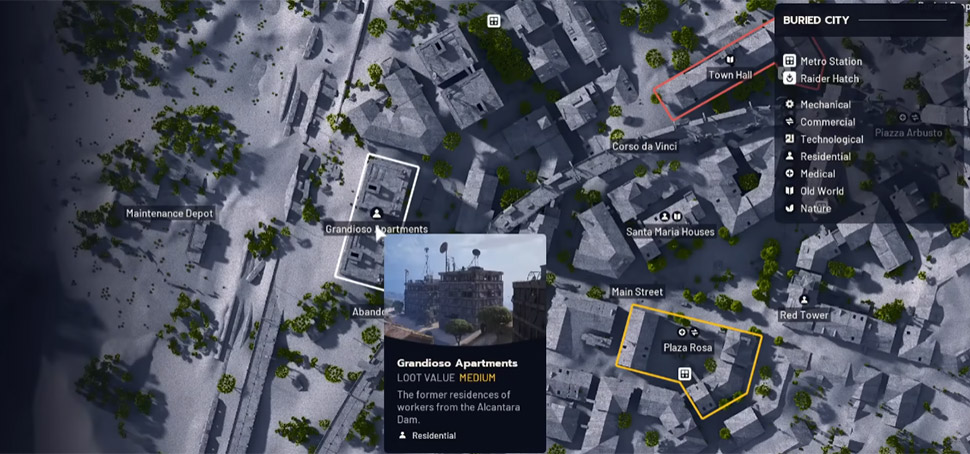
A more consistent read of the anecdotal data is:
- Tempest appears to drop only at night (or overwhelmingly more often at night).
- Grandiose Apartments is a medium‑value residential area with very high drawer/locker density.
- People naturally farm there at night, remember the success, and the legend is born.
In practice, that means:
The real recipe seems to be Night + medium‑value residential + lots of drawers, not this one exact building name.
So:
- If you find another map with:
- Medium loot value residential tag,
- Apartment‑style layouts packed with drawers,
- You go there at night and spam containers,
you're giving yourself good Tempest odds as well.
Vulcano & Bobcat – No Events, Still Obtainable
Original situation:
- Vulcano shotgun – discovered in the Hidden Bunker event.
- Bobcat – associated with the Locked Gate event (barely live before removal).
Current situation:
- Hidden Bunker and Locked Gate are disabled.
- But Bobcat (and other rare blueprints) are appearing in Trial reward screens.
- Post‑bunker screenshots show blueprints that used to be event‑exclusive dropping from Trials.
So your realistic path for both Vulcano and Bobcat now is: Weekly Trials (full 3‑star clears) → Random Trials reward pool.
Is it still RNG? Yes. Is it now long‑term accessible rather than I missed a two‑week event and I'm doomed? Also yes.
ARC Cores: High Value Targets You Should Never Walk Past
Let's lay out the major ARC enemies and what they can drop.
| ARC Enemy/Event | Core Type | Blueprint Potential | Recommendation |
|---|---|---|---|
| Queen + Harvester | Queen Core | Jupiter / Equalizer | Always clear; double dips rewards |
| Matriarch | Matriarch Core | Affilion | Focus core after kill |
| Surveyors | Surveyor Core | Weapon + attachment blueprints | Shoot on sight – especially post‑reset |
| Leapers, Rocketeers, Bastions, Bombarders | Drives | Mostly drive components, not prime blueprint sources | Treat as materials, not main BP farm |
In practice, Surveyors are far more valuable than they look. If you're on a fresh reset and you see Surveyors:
- Burn heavy ammo,
- Use your best anti‑ARC weapons (Pharaoh, etc.),
- Pick up those cores.
They can easily be the difference between stuck with trash gear and suddenly having solid weapon/attachment options.
↖ Post‑Reset Blueprint Strategy: Different Phases, Different Goals
The big mental blocker with Expedition resets isn't the first reset. It's the fear that: On my second/third reset, I'll be too exhausted to refarm everything.
That fear is fair – unless you adopt a phase‑based blueprint plan that aims to:
1. Regain functional power quickly (so gameplay feels good again).
2. Spread out high‑RNG goals across weeks instead of trying to hit everything in 48 hours.
Let's go phase by phase.
Reset Day: Forget Purples – You Want Volume, Not Peak Rarity
Day 0 objective:
- Reach a comfortable combat baseline quickly.
- Secure the core functional blueprints + a set of green/blue attachments.
Core idea: Get good enough, fast, instead of chasing best‑in‑slot.
What to prioritize on reset day
| Priority | Blueprint Type | Examples | Why now? |
|---|---|---|---|
| S | Functional / workshop | Anvil, early upgrade components | They unlock your crafting ceiling |
| S | Green/Blue attachments | Basic grips, scopes, magazines | No downsides, cheap to craft |
| A | Basic armor/defense mods | Armor plates, generic defenses | Makes early fights forgiving |
| A | Utility / deployables | Barricade, useful grenades | Big tactical value, low cost |
| B | Purple mods / weapons | Fancy stuff with negatives | Great later, awkward now |
Practical routes:
Apartment sweeps for green/blue blueprints
Maps:
- Damn Battlegrounds – Pale, Ruby, Patton apartments.
- Buried City – Grandiose Apartments.
Conditions:
- Definitely playable during the day, but Night/Storm makes it better.
How to run them:
- Do tight loops through apartment floors.
- Focus on drawers, cabinets, wardrobes – open everything.
Target outcome:
- Nail core workshop blueprints and a spread of green/blue attachments + utility BPs.
Uncovered Caches / Raider Cache routes
Pick a path connecting Raider Caches + weapon/grenade/backpack containers.
Map example:
- Damn Battlegrounds is extremely good for this – familiar layouts, lots of on the way containers.
Benefit:
- You stack resources, meds, ammo, early weapons and have many chances at modest‑rarity blueprints suitable for day‑1 crafting.
If on reset day you're sprinting into red zones chasing purple drops, you'll quickly hit:
- High crafting costs
- Fragile builds
- Repeated deaths and tilted mood
when you could have had a well‑rounded green/blue kit in the same playtime.
Early Game (Days 1–2): Rush Level 15 and Unlock Trials
Objective:
- Hit level 15 as fast as is reasonable.
- Unlock Trials and lay the groundwork for weekly blueprint injections.
Why Trials are now even more important
Trials used to be nice side content. Now they are, effectively:
A weekly blueprint banner with:
- Weapons
- Attachments
- Rare/ex‑event items (e.g., Bobcat, Vulcano‑tier stuff)
- Some augments
Realistic expectation:
If you 3‑star all Trials in a week, pulling 5–10 blueprints from Trials alone is very realistic.
That's why your early progression plan should treat:
15 + full Trials as a hard Week 1 goal.
Efficient ways to reach level 15
- Always favor maps with loot value modifiers (Night / Storm / special events).
While blueprint farming, route through quest objectives:
Some quests directly award blueprints:
- Bleta pistol
- Hullcracker
- Launcher ammo blueprints
- Lure and trigger grenades
Once you complete your key objective in a raid:
- Evac promptly, don't overstay just to clear every trash mob.
- EXP/hour and blueprints/hour is better if you chain more successful short runs.
Midgame: Armories & ARC Cores – Focus on Augments and Named Weapons
By midgame, you likely have:
- Comfortable weapons and armor.
- Some core attachments.
- Trials unlocked, with several rewards claimed.
Now the focus shifts from can I function? to: How can I scale my power efficiently and diversify builds?
Two huge levers:
1. Augment blueprints from Security/Tech armories.
2. Named weapon blueprints from ARC cores.
Augments: Security Tags + Armories Are the Real Jackpot
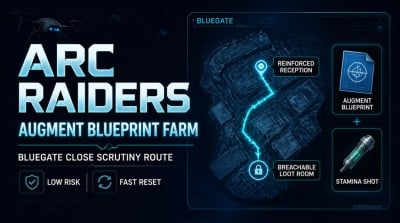
Let's take Blue Gate as a reference, since it's a well‑known augment farm:
Reinforced Reception
- Tags: Security + Technological
- Contains: Manticore Labs → Armory room.
- Features: black high‑tier lockers, special weapon cases, dense loot.
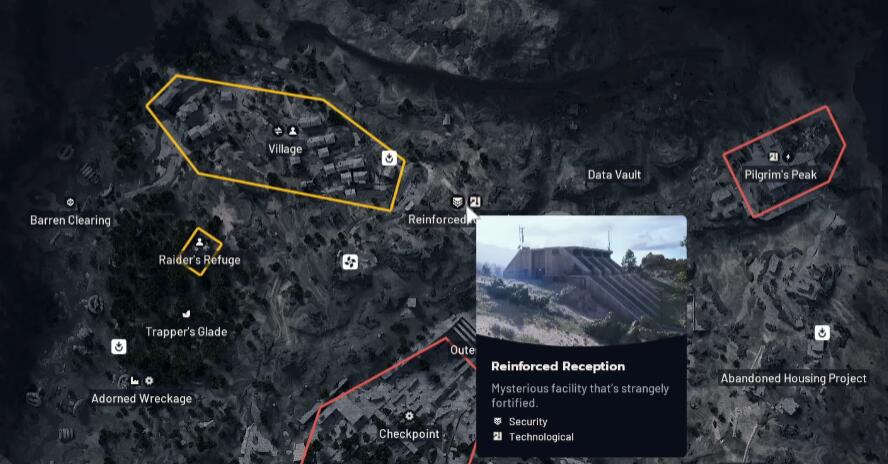
Community/shared experience:
- Augment blueprints drop much more frequently here than in random zones.
Similar spots exist on other maps:
| Map | Area / Room | Tag/Value Traits | Best Targets |
|---|---|---|---|
| Blue Gate | Reinforced Reception + Manticore Labs Armory | Security + Tech, high‑value armory | Augments + rare weapons |
| Stella Montis | Medical Research armory | High loot value + Medical/Tech + armory-like | Augments + med/weapon BPs |
| Stella Montis | Lobby key room + armory | Medium loot + Security + Tech | Stable augment farming |
If you're complaining about having no augments but you've never done dedicated armory runs, the system isn't punishing you; you're just skipping the main augment faucet.
How to run armory sessions:
- Choose 1–2 maps with strong armory locations.
- Create a short route: spawn → armory(ies) → evac.
- Ignore most side fights; open every high‑tier locker, crate, armory box.
- Do 3–5 of these sessions in the first few days after a reset.
That's usually enough to assemble:
- Several augments that support your main build.
- A handful of alternatives to experiment with.
Stabilized Phase: Conditional Blueprints & Min‑Maxing Your Favorites
Once you've:
- Filled out functional blueprints,
- Built a decent augment pool,
- Grabbed your key ARC‑core weapons,
- Established a comfortable Trial routine,
you're in the stabilized phase.
Your goals shift to:
- Completing specific conditional blueprints (Snap Hook, Tempest, etc.).
- Farming perfect or preferred‑roll blueprints for your favorite guns.
Good habits in this phase:
1. For your main 2–3 guns:
- Identify their best‑synergy containers/regions/tags.
- Run short, focused farming sessions there during favorable map conditions.
2. For condition‑locked blueprints:
- Dedicate entire evenings to theme runs:
- Tonight: only Electromagnetic Storm on Damn Battlegrounds Annex (Snap Hook runs).
- Tomorrow: only night residential medium‑value apartments (Tempest runs).
3. Maintain weekly Trials discipline:
- Treat Trials like your regular free pulls in a gacha game, except here it's earned with gameplay.
- Even if you're busy, at least clear them 2‑star, ideally 3‑star.
↖ Practical Reset Route: What to Do at Each Stage in One Glance
Let's compress all this into something you can literally follow as a checklist after an Expedition reset.
| Time/Phase | Main Goal | Recommended Play & Focus |
|---|---|---|
| Reset Day | Functional BPs + green/blue attachments | Apartment sweeps (Damn Battlegrounds, Buried City); focus drawers/lockers, preferably at Night/Storm |
| Days 1–2 | Hit level 15 + unlock Trials | Play maps with conditions; route through BP‑granting quests (Bleta, Hullcracker, grenades, etc.) |
| First Week | 3‑star all Trials, grab all rewards | Don't tunnel on hardest; prioritize finishing all Trials at 3‑star once |
| Early–Midgame | Augment blueprints + named ARC weapons | Regular Security/Tech armory runs (Blue Gate, Stella Montis); never skip Surveyors, Queen/Harvester, Matriarch cores |
| Mid–Late Game | Conditional BPs (Snap Hook, Tempest) | Snap Hook: Electromagnetic Storm + Damn Battlegrounds Annex; Tempest: Night + medium‑value residential with many drawers |
| Stable Endgame | Personalized weapon pool & perfect rolls | Targeted farming for favorites; keep up weekly Trials as your blueprint update stream |
If you follow this kind of rhythm, each Expedition reset becomes less of a total wipe of your life and more of:
A new season where you rebuild fast, then experiment with fresh builds and weapons.
↖ Common Questions About Arc Raiders Blueprints
Q1. Did they secretly nerf blueprint drop rates? It feels worse than at launch.
Not in a simple everything is lower chance way. It's more that:
- Some blueprints moved sources (events → Trials, etc.).
- Hidden Bunker and Locked Gate being gone made their associated drops feel missing.
- If you're not proactively doing Trials, ARC cores, and armory rooms, your blueprint intake will feel dry.
Once you align with the current sources (especially Trials and Security/Tech armories), the flow of blueprints is respectable again.
Q2. After a reset, should I rush purple blueprints as fast as possible?
Generally no.
Purple items have downsides and higher crafting costs.
Early post‑reset, your bottleneck is usually resources and survivability, not raw DPS ceiling.
A better curve is:
- Fill out green/blue functional pieces,
- Stabilize income and survivability,
- Then chase purples for your 1–2 favorite builds.
Rushing purples tends to leave you with awesome things on paper that you can't afford to craft or sustain.
Q3. Do I need to clear Trials on the very hardest settings for good blueprints?
No.
- 2‑star and 3‑star rewards both have shown blueprints; 3‑star is just better.
- For long‑term value, it's usually better to:
- Secure 3‑stars on all Trials once,
- Over trying to perfect one super hard Trial and ignoring others.
Think of breadth (all Trials covered) before depth (super‑optimized single Trial).
Q4. Are armory rooms mandatory every day? I don't have that much time.
You don't need to live in them, but doing at least a few armory runs soon after a reset is hugely worth it:
- They are one of the most concentrated sources of augment blueprints.
- After 3–5 runs, you usually have enough different augments to support:
- Your primary DPS build,
- A tankier or utility‑focused loadout,
- Maybe a PvP‑leaning variant if you like that.
After that, you can treat armories as opportunistic stops rather than a daily obligation.
Q5. With Bunker and Locked Gate gone, is it still realistic to complete a weapon blueprint collection?
Yes, and more realistically than when they were strictly event‑locked.
- Weapons like Bobcat and Vulcano are now documented as dropping from Trials rewards.
- Devs are clearly using Trials as a long‑term safety net:
- Even if you weren't around for a given event,
- You can, over time, pull that weapon from Trials.
So the collection game becomes more long‑term engagement and less you missed a two‑week window, too bad forever.
↖ Blueprint Farming Is RNG, But It's RNG With Rules You Can Exploit
Once you see Arc Raiders' blueprint system as structured RNG instead of pure chaos, it becomes a game of aligning with the rules:
- Map conditions raise the floor of loot quality.
- Region tags and loot value filter what kind of blueprint you can expect.
- Container types decide whether your target is even in the pool.
- Trials, ARC cores, and armories are designed funnels for rare and structural blueprints.
Play it this way, and each Expedition reset stops feeling like a full wipe of your progress, and starts feeling more like a new season where you already know the blueprint meta and can bend RNG in your favor.

Most Popular Posts
- Arc Raiders Canto Guide: Best Build, Solo vs Trios Tips, and Blueprint Farm
- Arc Raiders Weapon Tier List 2026: Best PvP Guns, Budget Builds, and Meta Guides
- ARC Raiders Assessors Guide: Easy Solo Loot Strategy With or Without Smoke Grenades
- ARC Raiders Riven Tides Key Room Guide: Best Hotel Keys, Loot Routes, Secure & Crane Storage
- ARC Raiders Damage Fireflies Trial Guide: Best Farm Method on Buried City Night Raid
- ARC Raiders Scrappy Guide: Best Fruits, and What Apricots & Agave Actually Drop
Popular Category Lists
- Grow a Garden / (283)
- ARC Raiders / (244)
- CoD: Black Ops 7 / (163)
- Monopoly Go / (145)
- MLB 26 / (128)
- Star Citizen / (93)
- Steal a Brainrot / (86)
- Sailor Piece / (67)
- CoD: BLACK OPS 6 / (55)
- Forza Horizon 6 / (52)
- Blox Fruits / (52)
- ARK Survival Ascended / (48)
- Path of Exile 2 / (48)
- Monster Hunter Wilds / (46)
- Diablo IV / (45)
- Adopt Me / (45)
- Windrose / (43)
- Path of Exile / (40)
- Battlefield 6 / (34)
- Bee Swarm Simulator / (31)