


 0
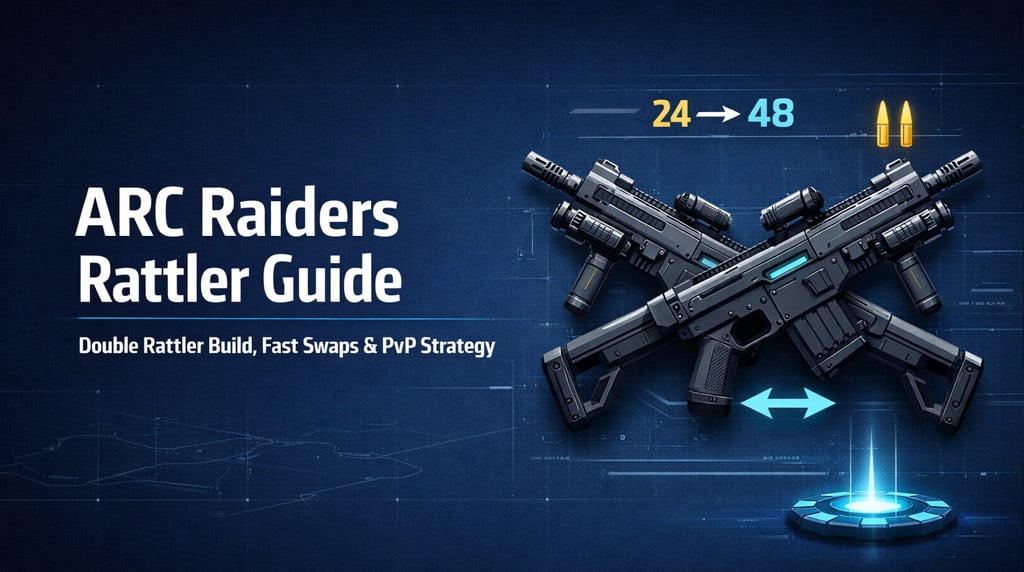
0ARC Raiders Rattler Guide: Best Double Rattler Build, Attachments, and PvP Strategy
- KITE
- Share
- ARC Raiders
- 05/08/26
- 399
The Rattler is not bad because it lacks damage.
It is bad because of one thing: the reload.
You get 24 rounds, then the gun reloads one bullet at a time. If you try to reload mid-fight, you usually die.
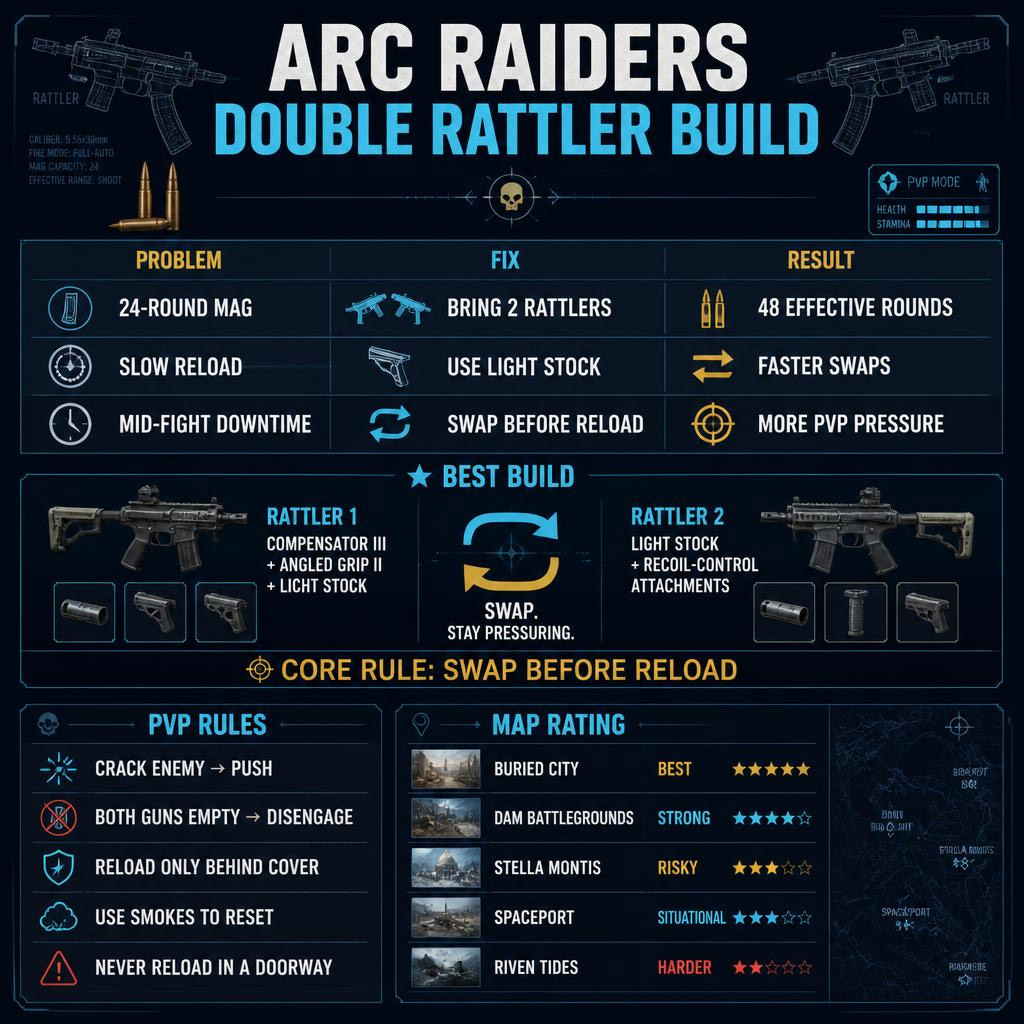
The fix is simple: bring two Rattlers.
Run Light Stock on both. Empty the first gun, swap to the second, keep shooting. That turns the Rattler from a painful 24-round weapon into a much smoother 48-round pressure setup.
- Why the Rattler Feels Bad in ARC Raiders
- Best Rattler Strategy: Run Two Rattlers
- Fight Loop
- Best Double Rattler Build
- Three Tested Rattler Builds
- Build 1: Fast Swap Rattler
- Use This If You Want
- Attachments
- How to Play It
- Build 2: Recoil Control Rattler
- Best Use Cases
- Weakness
- Build 3: Long-Range Rattler
- Attachments
- Best Maps
- Best Maps for the Double Rattler
- Rattler PvP Rules That Actually Matter
- When to Reload the Rattler
- Solo vs Duo Rattler Play
- Common Rattler Mistakes
- Reloading After the First Mag
- Running One Rattler Only
- Ignoring Light Stock
- Spraying Both Mags Instantly
- Taking Bad Long-Range Fights
- Best Practical Rattler Loadout
- Is the Rattler Actually Good?
- FAQ
- Is the Rattler worth using in ARC Raiders?
- What is the best Rattler build?
- Why is Light Stock so important?
- Is the Rattler good for solo PvP?
- What is the best map for the Rattler?
- Summary
↖ Why the Rattler Feels Bad in ARC Raiders
The Rattler's first mag is fine. The problem starts after it runs dry.
| Rattler Trait | PvP Impact |
|---|---|
| 24-round mag | Missed shots hurt badly |
| One-by-one reload | Terrible under pressure |
| Good burst damage | Strong if you start the fight |
| Cheap weapon | Easy to double-stack |
| Works with Light Stock | Fast swap fixes downtime |
The mistake most players make is trying to reload like it is a normal gun.
It is not.
With the Rattler, swap first, reload later.
↖ Best Rattler Strategy: Run Two Rattlers
The double Rattler setup solves the gun's biggest weakness without pretending the reload is good.
↖ Fight Loop
1. Open with Rattler 1.
2. Dump controlled shots.
3. If the enemy lives, swap instantly.
4. Finish with Rattler 2.
5. Reload only behind cover.
| Setup | Effective Ammo Before Reload | Result |
|---|---|---|
| One Rattler | 24 rounds | Punishing if you miss |
| Two Rattlers | 48 rounds | Much better fight uptime |
| Two Rattlers + Light Stock | 48 rounds + fast swap | Best practical setup |
This is the whole trick.
We are not fixing the reload.
We are avoiding it during the fight.
↖ Best Double Rattler Build
If you only copy one setup, use this.
| Slot | Attachment | Why It Matters |
|---|---|---|
| Muzzle | Compensator III | Better recoil control |
| Grip | Angled Grip II | Faster, cleaner close-mid handling |
| Stock | Light Stock | Faster weapon swap |
| Secondary | Second Rattler | Doubles pressure before reload |
Light Stock is mandatory.
Without it, the double Rattler idea feels clunky. With it, you can punish players who push after hearing your first mag go empty.
↖ Three Tested Rattler Builds
These are the only three Rattler setups worth considering.
| Build | Attachments | Best For | Weakness |
|---|---|---|---|
| Fast Swap Rattler | Comp III, Angled Grip II, Light Stock | Close-mid PvP | Still punishes bad aim |
| Recoil Control Rattler | Vertical recoil setup, Light Stock | Cleaner tracking | Less explosive up close |
| Long-Range Rattler | Horizontal grip, Extended Barrel, Light Stock | Dam Battlegrounds, open angles | Not a real long-range weapon |
Best overall: Fast Swap Rattler.
It gives the best mix of control, pressure, and speed.
↖ Build 1: Fast Swap Rattler
This is the strongest general PvP build.
↖ Use This If You Want
- Fast building fights
- Better close-mid pressure
- Quick swaps instead of panic reloads
- A cheap but nasty PvP kit
↖ Attachments
| Attachment | Purpose |
|---|---|
| Compensator III | Controls spray |
| Angled Grip II | Improves handling |
| Light Stock | Speeds up weapon swap |
↖ How to Play It
- Fight at close to mid range.
- Use cover before the first mag ends.
- Swap instead of reloading.
- Push cracked players immediately.
- Reload only after winning space.
This build feels best in messy fights. Staircases, rooftops, doors, third parties — that is where it works.
↖ Build 2: Recoil Control Rattler
This version is for players who miss too many shots with the standard build.
It focuses on vertical recoil control, because the Rattler's horizontal bounce is already manageable.
↖ Best Use Cases
| Good For | Why |
|---|---|
| Mid-range tracking | Easier to stay on target |
| Team fights | Helps finish cracked players |
| Slower PvP | Better spray control |
| Support pressure | Keeps enemies pinned |
↖ Weakness
It is not as snappy.
In sweaty close-range fights, especially against shotguns, trigger grenades, and fast pushes, raw recoil control may not save you. You still need cover and fast swaps.
↖ Build 3: Long-Range Rattler
The long-range Rattler works, but only if you understand its limits.
↖ Attachments
| Attachment | Purpose |
|---|---|
| Extended Barrel | Better range pressure |
| Horizontal Control Grip | Cleaner side-to-side recoil |
| Light Stock | Keeps swap speed usable |
↖ Best Maps
| Map / Area | Why It Works |
|---|---|
| Dam Battlegrounds | More open sightlines |
| Control Tower area | Good for holding angles |
| Hill fights | Lets you pressure rotations |
| Extraction approaches | Strong for tagging and breaking players |
Do not ego-peek snipers with this build.
The Rattler can pressure at range. It does not become a true marksman rifle.
↖ Best Maps for the Double Rattler
The Rattler depends heavily on map layout.
| Map | Rating | Why |
|---|---|---|
| Buried City | High | Rooftops, stairs, interiors, third-party fights |
| Dam Battlegrounds | Medium-high | Strong with long-range build and cover |
| Stella Montis | Medium | Good burst, risky against sweats and explosives |
| Spaceport | Medium | Works indoors, weaker in open spaces |
| Riven Tides | Medium-low | ARC pressure punishes reload downtime |
Best Rattler map: Buried City.
Why? You can break line of sight, swap around corners, and punish players in tight buildings.
↖ Rattler PvP Rules That Actually Matter
Follow these and the gun becomes much more consistent.
- If Rattler 1 is empty, swap.
- If both Rattlers are empty, disengage.
- If the enemy is cracked, push before they heal.
- If you hear footsteps while reloading, cancel and move.
- If you get third-partied, smoke and reset.
- If you are fighting at range, burst fire.
- If you are indoors, pre-aim corners.
- If you are solo, never reload in a doorway.
The Rattler wins through pressure.
The second you stop pressuring, its reload problem comes back.
↖ When to Reload the Rattler
Reloading is allowed. Reloading in the wrong place is what kills you.
| Safe Reload | Bad Reload |
|---|---|
| Behind hard cover | In a doorway |
| After a kill | While being pushed |
| Teammate holding angle | While cracked |
| After using smoke | During a third party |
| Enemy disengaged | In open ground |
If you feel forced to reload in the open, you already made a positioning mistake.
↖ Solo vs Duo Rattler Play
The double Rattler is better in duos, but still works solo.
| Mode | How to Play |
|---|---|
| Solo | Use cover hard. Swap fast. Avoid long reload windows. |
| Duo | One player pressures, one covers reloads and finishes cracks. |
| Trio | Rattler player starts pressure while teammates nade, flank, or clean up. |
Call out clearly:
- Swapping means we can keep fighting.
- Reloading means we need cover.
That difference matters.
↖ Common Rattler Mistakes
↖ Reloading After the First Mag
Do not do this under pressure.
Swap first. Reload later.
↖ Running One Rattler Only
One Rattler works, but it exposes the reload problem every fight.
Two Rattlers are simply more reliable.
↖ Ignoring Light Stock
This is the build's key attachment.
No Light Stock, no smooth swap.
↖ Spraying Both Mags Instantly
You have 48 effective rounds, not infinite ammo.
Burst when needed. Track properly.
↖ Taking Bad Long-Range Fights
Even with Extended Barrel, the Rattler is not a sniper.
Use cover. Tap fire. Do not ego-peek.
↖ Best Practical Rattler Loadout
| Slot | Recommended Pick |
|---|---|
| Weapon 1 | Rattler: Compensator III + Angled Grip II + Light Stock |
| Weapon 2 | Rattler: Light Stock + recoil attachments |
| Utility | Smoke grenades |
| Healing | Herbal Bandages / strong heals |
| Shields | Shield recharge |
| Playstyle | Close-mid pressure, fast swaps, cover resets |
Smokes are huge.
They let you reload, revive, cross open space, or escape when both Rattlers are dry.
↖ Is the Rattler Actually Good?
Yes, but it is not top tier.
It becomes good when we build around its weakness.
| Category | Rating | Note |
|---|---|---|
| Close-range pressure | 8/10 | Strong with fast swap |
| Mid-range control | 7/10 | Good with attachments |
| Long-range fighting | 5/10 | Usable, not ideal |
| Reload safety | 3/10 | Still awful |
| Double Rattler value | 8/10 | Best way to use it |
| Solo reliability | 6/10 | Needs discipline |
| Duo reliability | 8/10 | Much stronger with cover |
The Rattler is a momentum weapon.
If you control tempo, it slaps.
If you get stuck reloading, it folds.
↖ FAQ
↖ Is the Rattler worth using in ARC Raiders?
Yes, if you run two Rattlers with Light Stock. One Rattler feels clunky because of the reload. Two Rattlers give you 48 effective rounds before you need to reload.
↖ What is the best Rattler build?
The best all-around build is Compensator III + Angled Grip II + Light Stock. Run it with a second Rattler using Light Stock.
↖ Why is Light Stock so important?
Light Stock improves weapon swap speed. That matters because the double Rattler setup is built around swapping instead of reloading during fights.
↖ Is the Rattler good for solo PvP?
Yes, but it is harder solo. You need cover, discipline, and clean swaps. Never reload in the open. Never reload in a doorway.
↖ What is the best map for the Rattler?
Buried City is the best Rattler map. It has tight buildings, rooftops, stairs, and plenty of close-mid fights where fast swapping beats slow reloading.
↖ Summary
The Rattler's problem is not damage.
It is the 24-round mag plus the painfully slow one-by-one reload.
The best fix is simple: run two Rattlers with Light Stock. Fire one, swap to the second, keep pressure, then reload after the fight slows down.
Best build: Compensator III + Angled Grip II + Light Stock.
Best map: Buried City.
Best rule: swap before reload.
If one Rattler feels annoying, bring two and make the reload problem somebody else's problem.

Most Popular Posts
- ARC Raiders Riven Tides Key Room Guide: Best Hotel Keys, Loot Routes, Secure & Crane Storage
- ARC Raiders Damage Fireflies Trial Guide: Best Farm Method on Buried City Night Raid
- ARC Raiders Riven Tides Update: New Map & Items, ARC Turbine, Rewards, and Best Early Strategy
- ARC Raiders Bettina Guide: Best Build, Buffs, and How to Use It Against ARC
- Arc Raiders Season 4 Riven Tides Update, Rewards, Safe Skins, and Release Timeline
- ARC Raiders Solo Search Supply Drops Guide: Best Buried City Route, Beacon Locations
Popular Category Lists
- Grow a Garden / (286)
- ARC Raiders / (262)
- CoD: Black Ops 7 / (166)
- Monopoly Go / (146)
- MLB 26 / (144)
- Star Citizen / (111)
- Steal a Brainrot / (89)
- Sailor Piece / (68)
- ARK Survival Ascended / (66)
- Diablo IV / (61)
- Forza Horizon 6 / (60)
- Blox Fruits / (60)
- CoD: BLACK OPS 6 / (55)
- Adopt Me / (53)
- Path of Exile 2 / (48)
- Monster Hunter Wilds / (46)
- Windrose / (44)
- Path of Exile / (40)
- Grow a Garden 2 / (38)
- Bee Swarm Simulator / (36)


