0
0ARC Raiders Solo Farm Harvest Plants Rank Points on Damn Battlegrounds
- KITE
- Share
- ARC Raiders
- 12/28/25
- 1370
If you're trying to stack Rank Points through the Harvest Plants objective, the good news is: this isn't a gear-check or an aim duel. It's a route efficiency challenge—know what counts, hit the densest zones early, avoid backtracking, and keep enough stamina to actually extract.

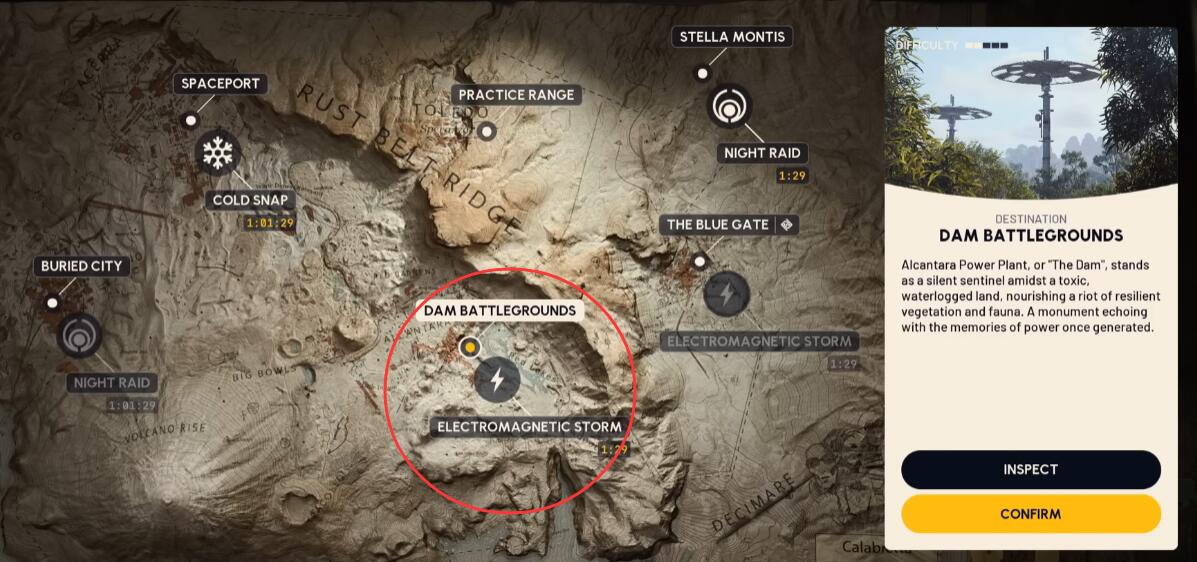
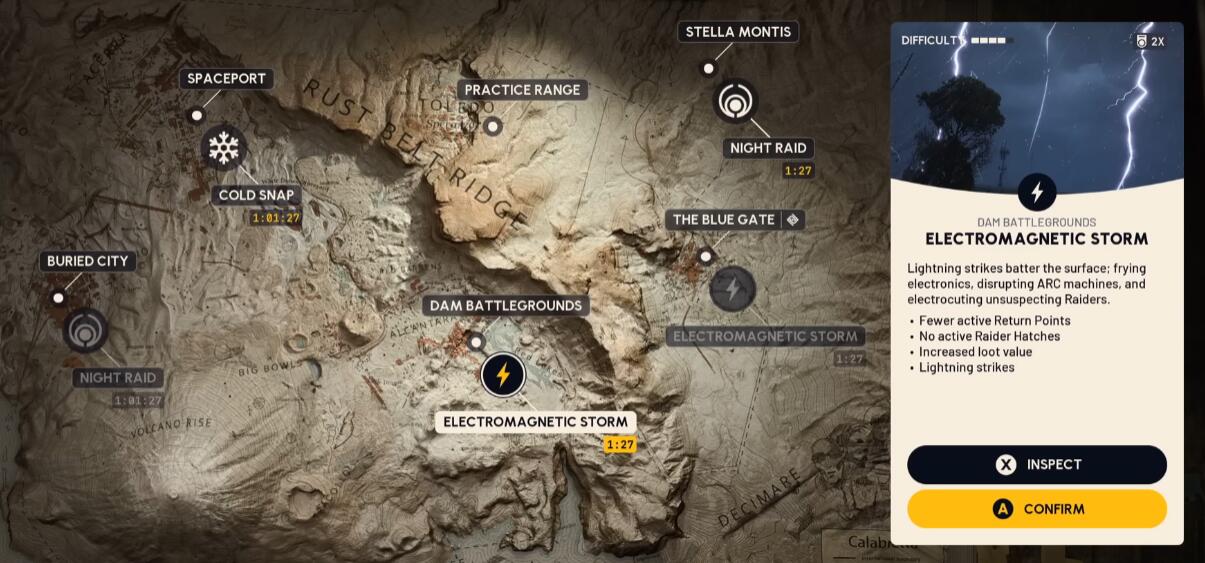
In a Damn Battlegrounds electromagnetic storm match, I pulled 50 qualifying plants for 16K points in a full 30-minute run. Below is the exact loop and the decision rules that kept it clean and repeatable.
- 1) Know the scoring: what to harvest (and what to ignore)
- Qualifying plants to prioritize
- Don't waste time on these
- 2) Loadout & match timing: you're building a 30-minute loop
- What I bring (solo)
- Combat expectations
- Match timing rule (why it matters)
- 3) Spawn logic: where you start changes your first 5 minutes
- Spawn priority (practical)
- 4) No-backtrack loop
- 4.1 Route overview (in order)
- 4.2 Why Hydrodomes is the first must-try stop
- 5) Area cheat sheet (where the points come from)
- 6) Stamina & adrenaline rules (the difference between 12k and 16k)
- The simple system I use
- Common mistakes to avoid
- FAQ
- 1) Do I need strong weapons/armor for this solo method?
- 2) Why does a full 30-minute match matter so much?
- 3) What if I spawn at Red Lakes or Testing Annex?
- 4) Are mushrooms worth prioritizing?
- 5) What if someone already cleared Hydrodomes?
- Summary
↖ 1) Know the scoring: what to harvest (and what to ignore)
The fastest way to tank your run is harvesting things that don't count or aren't worth the detour.
↖ Qualifying plants to prioritize
- Great Mullen
- Moss
- Agave
- Mushrooms
↖ Don't waste time on these
Roots, fruits, fruit trees (commonly don't count for this challenge)
Because time is your limiting resource, every wrong harvest is a double loss: you lose seconds and you lose route momentum. That means: see non-qualifying stuff → ignore it instantly.
↖ 2) Loadout & match timing: you're building a 30-minute loop
This farm is mostly about movement. You don't need best-in-slot—you need stamina management and enough combat ability to clear nuisance threats.
↖ What I bring (solo)
~15 adrenaline shots
- Save 5 for the last 5 minutes so extraction is never a panic jog.
- Use shots when you're exhausted and there aren't plants immediately ahead.
- Don't pop them right before a cluster of plants, because harvesting restores a lot of stamina—otherwise you waste the shot's value.
↖ Combat expectations
Plan to occasionally deal with:
- Wasps
- Hornets
- Snitches
And in certain hotspots: bastions / leapers / rocketeers can complicate your life.
↖ Match timing rule (why it matters)
You want a full 30-minute match so you can complete the loop. My preference is queueing near the top of the hour to maximize the chance of a full timer. Players may still join in progress until ~18 minutes remain, so don't assume you'll be alone.
↖ 3) Spawn logic: where you start changes your first 5 minutes
This objective is simple, but competition matters. If another raider is doing the same trial, spawns determine who gets the best early harvest.
↖ Spawn priority (practical)
| Spawn Area | How good it is | Why | What you do |
|---|---|---|---|
| Pattern House → Pale Apartments corridor | Great | Close to the main loop and early Great Mullen/Agave | Run the standard route immediately |
| Swamp spawns | Good | Easy access to a long Great Mullen line | Start on the stream line, then pivot |
| Red Lakes / Testing Annex | Rough | Farther from early high-density zones | Don't force the hotspot—run an outer-loop version |
If you spawn at Red Lakes or Testing Annex and someone else is farming: you're at a real disadvantage trying to race to the best area. Play the map you got, not the map you wanted.
If nobody else is farming the trial: spawn matters far less—resources will still be there when you arrive.
↖ 4) No-backtrack loop
The golden rule: minimize backtracking. A little is fine, but if you're spending more than 1–2 minutes doubling back, you're likely losing more plants than you'll gain.
Here's my exact route from a Pattern House-adjacent spawn:
↖ 4.1 Route overview (in order)
1) Pattern House: grab nearby Great Mullen
2) Hydrodomes (core zone): clear all four main domes for Moss
3) Ruby Apartments: harvest Great Mullen by the stream in front
4) Pale Apartments: pick up Agave on the way and within the area
5) Follow the stream into the Swamp: it guides you through repeated Great Mullen
6) Old Battleground: snag scattered Great Mullen around the area
7) South Swamp Outpost area: more Great Mullen, mushrooms only if they're obvious
8) Water Treatment Facility (below / water section): possible Great Mullen + lucky Mushrooms
9) Power Generation Complex extraction backside: a few Agave
10) Red Legs: several Great Mullen spawns
11) Forest near Testing Annex: check big tree trunks for Moss (hit or miss)
12) Rotate toward Water Treatment extract: top off any Agave en route, then extract
↖ 4.2 Why Hydrodomes is the first must-try stop
Hydrodomes is where your run can jump from decent to leaderboard.
- Moss spawns in growers throughout the domes
- You can also find Moss in growers outside, but risk/reward varies
- One dome has a small water area that can spawn Great Mullen and sometimes Mushrooms
- In my experience, this section can be 25%+ of your total score depending on RNG
The cost: it's dangerous. Raiders go there during electromagnetic storms, and you may deal with bastions, hornets, and a roaming leaper.
The choice is simple: high reward, high heat. If you're pushing points, you take the risk—but you don't take unnecessary fights.
↖ 5) Area cheat sheet (where the points come from)
Use this table to make quick stay or go decisions mid-run.
| Area | Primary plants | Points value | Risk | Recommended time | My rule |
|---|---|---|---|---|---|
| Hydrodomes (4 domes) | Moss (+ some Great Mullen/Mushrooms) | Very high | High | 6–10 min | Sweep growers fast; avoid prolonged combat |
| Pattern House outskirts | Great Mullen | Medium | Low | 1–2 min | Quick grab on the way |
| Ruby Apartments stream | Great Mullen | Medium | Medium | 1–3 min | Harvest and keep moving |
| Pale Apartments | Agave | Med–High (varies) | Medium | 3–6 min | If it's dry, don't force it |
| Stream → Swamp path | Great Mullen (consistent) | High | Medium | 8–12 min | Don't backtrack; keep flow |
| Old Battleground edges | Great Mullen (scattered) | Medium | Medium | 2–4 min | Take freebies, don't linger |
| Water Treatment (below water) | Great Mullen + Mushrooms (lucky) | Med–High | Medium | 2–5 min | Quick dip; leave if hot |
| Red Legs | Great Mullen | Medium | Medium | 2–4 min | If a leaper blocks a spawn, skip it |
| Testing Annex forest | Moss (RNG-heavy) | Low–Med | Medium | 1–3 min | Check big trunks only, then rotate |
↖ 6) Stamina & adrenaline rules (the difference between 12k and 16k)
Adrenaline shots are what let you finish the loop instead of finishing most of the loop.
↖ The simple system I use
- Save 5 shots for the last 5 minutes (non-negotiable)
- Use a shot when:
- you're exhausted and
- you don't have plants within the next short stretch
- Avoid using a shot right before harvesting clusters, since harvesting restores stamina
↖ Common mistakes to avoid
- Over-backtracking: more than 1–2 minutes of retracing usually costs you a whole section later.
- Mushroom hunting: mushrooms are great when they appear, but actively searching often burns time for tiny returns. Pick them up when they're obvious; otherwise, keep pace.
↖ FAQ
↖ 1) Do I need strong weapons/armor for this solo method?
No. You're not playing for kills—you're playing for route completion. Bring enough to handle wasps/hornets/snitches and disengage from bigger threats.
↖ 2) Why does a full 30-minute match matter so much?
Because this strategy is a full-map loop. Shortened matches cut off the end of your route, which is where you stack extra Great Mullen/Agave and still have time to extract safely.
↖ 3) What if I spawn at Red Lakes or Testing Annex?
If you spawn far, don't force a desperate race to Hydrodomes—especially if you suspect another farmer. Start with local Moss/Great Mullen, then transition into the stream/swamp segment and Water Treatment for consistent gains.
↖ 4) Are mushrooms worth prioritizing?
Usually not as a primary target. Treat them as a bonus. If you're spending real time searching, you're probably losing points compared to harvesting guaranteed Great Mullen/Moss/Agave.
↖ 5) What if someone already cleared Hydrodomes?
Pivot immediately. Your points come from total harvest count and flow, not one location. Shift to Ruby/Pale → stream → swamp, then Water Treatment and outer-ring Agave.
↖ Summary
This solo Harvest Plants Rank Points method works because it's built around a clean loop: hit Hydrodomes early for high-density Moss, roll through Ruby/Pale for Great Mullen and Agave, let the stream guide you into the swamp for consistent pickups, then finish with Water Treatment and outer-ring cleanup while saving adrenaline for extraction.

Most Popular Posts
- ARC Raiders Riven Tides Key Room Guide: Best Hotel Keys, Loot Routes, Secure & Crane Storage
- ARC Raiders Damage Fireflies Trial Guide: Best Farm Method on Buried City Night Raid
- ARC Raiders Riven Tides Update: New Map & Items, ARC Turbine, Rewards, and Best Early Strategy
- ARC Raiders Bettina Guide: Best Build, Buffs, and How to Use It Against ARC
- Arc Raiders Season 4 Riven Tides Update, Rewards, Safe Skins, and Release Timeline
- ARC Raiders Solo Search Supply Drops Guide: Best Buried City Route, Beacon Locations
Popular Category Lists
- Grow a Garden / (285)
- ARC Raiders / (260)
- CoD: Black Ops 7 / (166)
- Monopoly Go / (146)
- MLB 26 / (142)
- Star Citizen / (109)
- Steal a Brainrot / (89)
- Sailor Piece / (68)
- ARK Survival Ascended / (64)
- Forza Horizon 6 / (59)
- Diablo IV / (59)
- Blox Fruits / (59)
- CoD: BLACK OPS 6 / (55)
- Adopt Me / (51)
- Path of Exile 2 / (48)
- Monster Hunter Wilds / (46)
- Windrose / (44)
- Path of Exile / (40)
- Grow a Garden 2 / (37)
- Bee Swarm Simulator / (36)