


 0
0ARC Raiders: Tips & Advanced Tricks & Hidden Mechanics For 2026
- KIVRI
- Share
- ARC Raiders
- 01/24/26
- 1996
We've all had that why did I die there? moment in ARC Raiders—same route, same gear, somehow louder footsteps, slower escape, and our stash still looks like a junk drawer. This guide with tips, advanced tricks, and hidden mechanics: backpack noise scaling, stamina/adrenaline routing, AI counters, ADS fire trick, repair vs recycle math, trader buys, stash sorting, and ammo planning.
We're writing this from the perspective of people who've spent an unhealthy number of raids testing small mechanics (yes, including does inventory weight change noise?). Let's turn that time sink into your advantage.
- 1) Movement & Noise
- Backpack noise scales with filled slots
- Quick value check mid-match (fast sanity check)
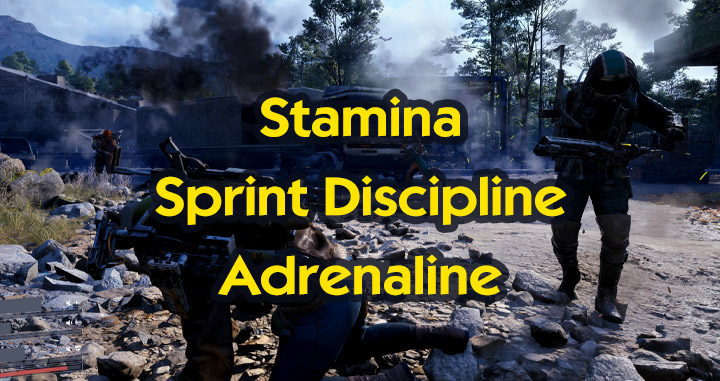
- 2) Stamina & Sprint Discipline & the Adrenaline Escape Pattern
- Sprint in bursts, not until empty
- Adrenaline is a budget superpower
- Good as New + fabric: stamina management you feel immediately
- 3) Combat Handling Tricks That Quietly Win Fights
- You can keep firing while transitioning into ADS
- Not all reduced ADS speed is good
- 4) AI & Utility: Quiet Kills, Safe Explosions, and Camera Control
- Pops (explosive kamikaze bots): make the explosion yours
- Dodging pops: run toward them (space permitting)
- Quiet tools: hammer/pickaxe aren't just memes
- Shock utility versus big threats
- 5) Inventory, Stash, and Trader Habits
- Attachments: stop dragging items like it's a moving day
- Keys are color-coded by location family
- Stash sorting by value reveals space leaks
- 6) Repair vs Recycle vs Recraft
- Recycling low durability often beats selling
- Blueprint economics: Vita Spray example
- Snap Hook example: expensive repair, smarter recraft
- 7) Weapons, Ammo, and Upgrades
- ARC penetration: ammo class matters more than the displayed stat
- Ammo planning: account for the spawn reload
- Upgrade strategy: power without emotional damage
- FAQ
- 1) Why does our character sometimes sound louder even when we move the same way?
- 2) Should we sprint everywhere to rotate faster?
- 3) Are pops safe to detonate up close?
- 4) Is reduced ADS speed a good attachment stat?
- 5) When should we repair weapons instead of recycling them?
- 6) Why do we start raids feeling like we have less ammo than we packed?
- Finally
↖ 1) Movement & Noise
A lot of players assume noise is tied to item type or heavy loot. The practical behavior we've repeatedly observed is simpler:

↖ Backpack noise scales with filled slots
- What happens: the more backpack slots you fill, the more jingle you produce while moving.
- Why: it appears tied to slot fill level, not item weight/value.
- This means: two players moving identically can broadcast very different audio ranges if one is half-full and the other is stuffed.
If you find yourself getting tracked more often late-raid, then treat loot like a stealth tax. When you're near full, stop taking unnecessary detours, avoid long open rotations, and plan a tighter extraction line.
| Decision point | If you're… | Do this | Why it works |
|---|---|---|---|
| Mid-raid rotation | Backpack < 50% full | Rotate wider, take safer loot lines | You're quieter and harder to trail |
| Late-raid extraction | Backpack ~full | Shortest covered path, fewer sprints | You're louder; minimize exposure time |
| Loot greed check | One more room? temptation | Drop low-value stacks first | Reduces noise + increases mobility options |
↖ Quick value check mid-match (fast sanity check)
- What happens: your displayed loadout value drops when you drop an item.
- If you find your bag is full, then drop one item at a time to see what actually matters and keep the pieces that move your total the most.
↖ 2) Stamina & Sprint Discipline & the Adrenaline Escape Pattern
Stamina is your real health bar in ARC Raiders: if it's empty, you can't reposition, break line of sight, or dodge pressure.
↖ Sprint in bursts, not until empty
- Why: sprint is loud and drains too fast; empty stamina makes you predictable.
- Rule we use: keep stamina above ~50%, ideally around 2/3, unless you're committing to a full disengage.
If you hear shots or see a push angle opening, then stop marathon sprinting and start burst sprinting. You want stamina available when the fight begins, not after.
↖ Adrenaline is a budget superpower
- What happens: adrenaline effectively gives a temporary infinite stamina window and instantly refills what you spent.
- This means: it's one of the fastest ways to survive a bad rotation, cross danger, or hard-reset an engagement.
Pattern we rely on
- Burst sprint to cover.
- When you drop low, pop adrenaline.
- Use the window to change angle twice (not once).
- Re-enter cover and stop sprinting to re-stabilize.
↖ Good as New + fabric: stamina management you feel immediately
- Why: stamina regen increases while healing with that perk.
- This means: cheap healing inputs can become movement fuel.
If you're running that perk, then carry fabric intentionally—not as loot, but as a stamina tool.
↖ 3) Combat Handling Tricks That Quietly Win Fights
↖ You can keep firing while transitioning into ADS
A lot of players treat ADS like a mode switch. It isn't.
- What you can do: start firing hipfire, keep holding the trigger, then ADS—your shots don't pause.
- Why it matters: attachments that slow ADS can still be worth it if you're already firing.
- This means: you can pay the ADS time while bullets are already leaving the gun.
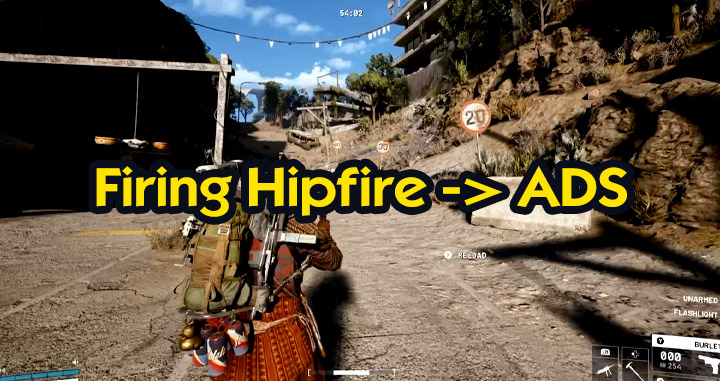
If you're using attachments with an ADS penalty, then start firing first and ADS second—especially in close-range fights where hipfire is already accurate enough.
| Situation | Better habit | What you gain |
|---|---|---|
| Close-range SMG pressure | Hipfire first → ADS while firing | No dead time; smoother tracking |
| Peeking tight corners | Short prefire hipfire → ADS on confirm | Faster damage start |
| Long-range tags | ADS first | Accuracy matters more than tempo |
↖ Not all reduced ADS speed is good
- Common trap: reduced ADS speed sounds like faster ADS.
- Reality in practice: it typically means ADS is slower (speed reduced).
- If you're comparing attachments, then check the workshop indicators rather than trusting wording.
↖ 4) AI & Utility: Quiet Kills, Safe Explosions, and Camera Control
↖ Pops (explosive kamikaze bots): make the explosion yours
- Key behavior: if you detonate them (by damaging them), the explosion doesn't damage you, even at close range.
- But if they self-detonate, it hurts.
- This means: you can use them as safe self-clearing mines if you control the pop.
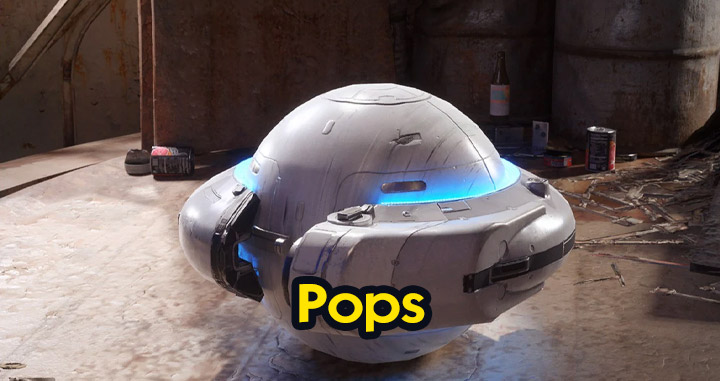
If you're forced into close quarters with a pop, then commit to detonating it yourself (melee or shots) instead of backpedaling and letting it decide the timing.
↖ Dodging pops: run toward them (space permitting)
- Observed behavior: when there's enough space, running away often gets predicted by the roll; running toward can avoid the blast radius.
- Condition: this fails in narrow corridors where you can't create the needed spacing.
If you have room, then sprint toward (or past) the pop instead of away. If you're in a tight hallway, don't gamble—detonate it yourself.
↖ Quiet tools: hammer/pickaxe aren't just memes
- Cameras: melee clears cameras quietly.
- Vertical swing: there's a vertical attack variant (useful for height/angle), with reach utility not damage utility.
If you're missing camera hits by a few pixels, then use the vertical swing instead of jump-timing a horizontal swipe.
↖ Shock utility versus big threats
- Shock items can heavily disrupt certain ARC enemies (notably those that punish you at mid-range).
- This means: you can turn a scary AI into a controlled takedown window.
If you're dealing with a high-pressure ARC unit, then prioritize stun/disrupt tools over more bullets. Time-to-kill matters less when the enemy can't act.
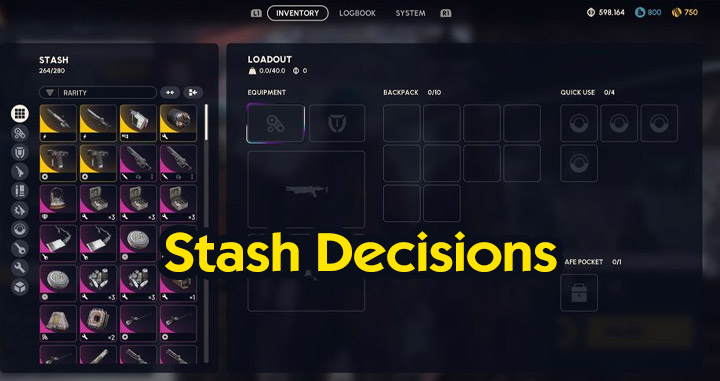
↖ 5) Inventory, Stash, and Trader Habits
Gunfights are flashy; stash decisions are compounding interest.
↖ Attachments: stop dragging items like it's a moving day
- Inspect the weapon and manage attachments from there; stash attachments are accessible in one place.
- This means: you spend less time in menus and make fewer oops, wrong attachment mistakes.
↖ Keys are color-coded by location family
- What happens: keys share consistent stripe colors tied to map/location sets.
- This means: you can pick the right key fast when you're gearing for a specific area.
If you're prepping a run and your stash is key-cluttered, then sort mentally by color first before reading every key name.
↖ Stash sorting by value reveals space leaks
- Sorting by value surfaces small stacks and low-value clutter that silently occupies space.
- Note: value sorting typically reflects stack value, not just per-item value.
If your stash feels full but you can't see why, then sort by value and scroll the bottom. That's usually where the why is this even here? items hide.
Related: ARC Raiders Stash Management Guide: Early, Mid, and Endgame
↖ 6) Repair vs Recycle vs Recraft
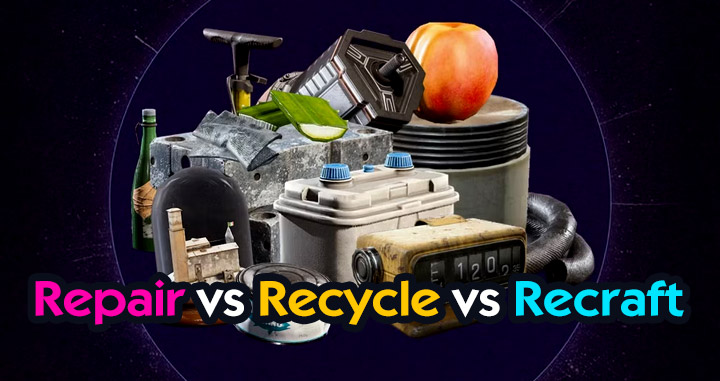
↖ Recycling low durability often beats selling
- Observed rule: recycling a zero-durability item tends to return the same resources as a full one of that type.
- This means: low-durability weapons are usually better as materials, not cash.
If a weapon is getting low and you don't love it, then recycle instead of selling. If you love it, repair around the point where you'd realistically risk it in-raid (we often do this around the 20–30 durability band for regular use, earlier for high-risk runs).
↖ Blueprint economics: Vita Spray example
When you have the blueprint, repair can be a trap because you can recoup materials via recycling.
| Item | Repair cost (to restore partial durability) | Craft cost (new) | Why recycle changes the equation |
|---|---|---|---|
| Vita Spray (with blueprint) | Costs meaningful antiseptic + canister for partial restore | Crafting can be cheaper in net terms | Recycling returns components that offset new crafting |
If you have the blueprint, then treat empty/low Vita Spray as recycle → craft new, not repair. It's fewer rare components burned per effective full heal.
↖ Snap Hook example: expensive repair, smarter recraft
- Crafting is expensive on paper.
- Repair can demand high-value parts for only partial restoration.
- Recycling returns a chunk of what you need.
If you own the blueprint, then compare repair to recycle + recraft before paying the repair bill. In practice, recraft often costs about what a partial repair costs once recycling refunds are counted.
↖ 7) Weapons, Ammo, and Upgrades
↖ ARC penetration: ammo class matters more than the displayed stat
- Practical takeaway: ARC damage performance tracks strongly with ammo type (light < medium < heavy), with exceptions like energy/explosives/fire/shock being standout tools.
- This means: don't overvalue a penetration number if the ammo class is inherently weak into ARC targets.
If you're struggling into ARC enemies, then switch tool category (energy, explosive, fire, shock) rather than just bring more light ammo.
↖ Ammo planning: account for the spawn reload
- On raid start, your weapon may auto-load, pulling from carried ammo.
- This means: bring roughly one magazine's worth extra so you don't start effectively short.
| Weapon prep check | Do this | Why |
|---|---|---|
| We always run out of ammo teammate | Add +1 mag worth beyond comfort | Covers spawn load + early fight chaos |
| Inventory tight | Bring a bit extra rather than exact-splitting | Less menu time, fewer mistakes |
| Free loadout runs | Keep it lean but not empty | Free money only works if you can fight/escape |
↖ Upgrade strategy: power without emotional damage
We don't upgrade because it's fun; we upgrade because it raises win rate.
- Level 2: cheap, noticeable.
- Level 3: the sweet spot for value in many loadouts.
- Level 4: commit when you have parts depth and you're bringing higher-tier gear.
If you're carrying a high-rarity weapon, then upgrade it before risking it. Otherwise you're wagering good loot with avoidably worse stats.
↖ FAQ
↖ 1) Why does our character sometimes sound louder even when we move the same way?
Because movement noise scales with how many backpack slots are filled. The more full your pack, the more jingle you broadcast, even if the items are light or identical.
↖ 2) Should we sprint everywhere to rotate faster?
No. Sprint drains stamina and increases noise. Burst sprint to keep stamina above half so you can react when you get shot at or need to reposition.
↖ 3) Are pops safe to detonate up close?
If you cause the detonation (you damage-trigger it), it won't damage you even if it's right on top of you. If it self-detonates, it can hurt you.
↖ 4) Is reduced ADS speed a good attachment stat?
Usually it's a negative: ADS becomes slower. Check workshop indicators rather than trusting the phrasing.
↖ 5) When should we repair weapons instead of recycling them?
If you plan to keep using the weapon soon, repair before it becomes a liability in-raid. If you don't plan to keep it, recycling low durability is often better value than selling.
↖ 6) Why do we start raids feeling like we have less ammo than we packed?
Because the game may load your magazine on spawn from your carried ammo pool. Bring about one magazine worth extra to avoid starting short.
↖ Finally
ARC Raiders rewards small mechanical truths more than big heroic plays. If you control your backpack noise, preserve stamina like it's currency, force pops to explode on your terms, and treat repair/recycle decisions like math instead of vibes, you'll feel the difference within a few sessions—more clean extracts, fewer mystery deaths, and a stash that finally breathes.
The game stays brutal, but it becomes predictable brutal, and that's the kind we can plan around.

Most Popular Posts
- ARC Raiders Riven Tides Key Room Guide: Best Hotel Keys, Loot Routes, Secure & Crane Storage
- ARC Raiders Damage Fireflies Trial Guide: Best Farm Method on Buried City Night Raid
- ARC Raiders Riven Tides Update: New Map & Items, ARC Turbine, Rewards, and Best Early Strategy
- ARC Raiders Bettina Guide: Best Build, Buffs, and How to Use It Against ARC
- Arc Raiders Season 4 Riven Tides Update, Rewards, Safe Skins, and Release Timeline
- ARC Raiders Solo Search Supply Drops Guide: Best Buried City Route, Beacon Locations
Popular Category Lists
- Grow a Garden / (286)
- ARC Raiders / (262)
- CoD: Black Ops 7 / (166)
- Monopoly Go / (146)
- MLB 26 / (144)
- Star Citizen / (111)
- Steal a Brainrot / (89)
- Sailor Piece / (68)
- ARK Survival Ascended / (66)
- Diablo IV / (61)
- Forza Horizon 6 / (60)
- Blox Fruits / (60)
- CoD: BLACK OPS 6 / (55)
- Adopt Me / (53)
- Path of Exile 2 / (48)
- Monster Hunter Wilds / (46)
- Windrose / (44)
- Path of Exile / (40)
- Grow a Garden 2 / (38)
- Bee Swarm Simulator / (36)


