0
0Helldivers 2 Tactical Equipment and Codes Stratagems Tier List
- Hell
- Share
- Helldivers 2
- 02/15/25
- 1247
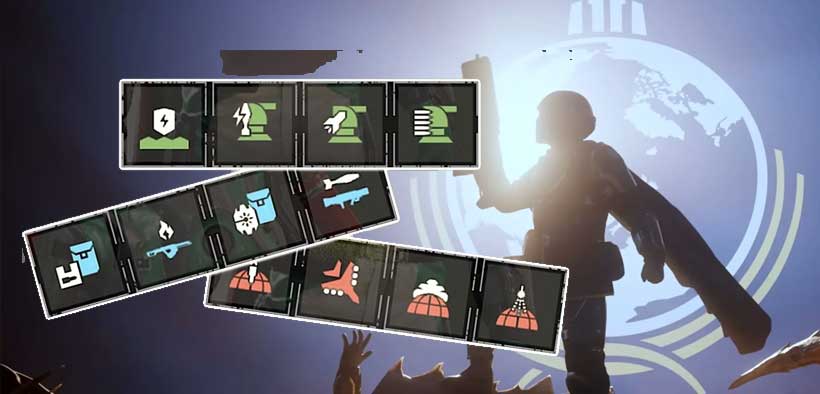
There's plenty of Stratagems available for use in Helldivers 2. Players can enhance their tactical options by unlocking them through requisition points. This article provides an extensive breakdown Stratagems from S-Tier to C-Tier and their corresponding codes for both controller and PC. Whether you choose to go on the offense, build a solid defense, or support your teammates, this article provides the information you need to make the right choice regarding your loadout.
- What are Stratagems in Helldivers 2?
- Helldivers 2: Best Stratagems and Their Codes
- - S-Tier
- - A-Tier
- - B-Tier
- - C-Tier
- How to Use Codes for Stratagems
- Using the Right Stratagem for Your Op Mission
- Extra Advice
↖ What are Stratagems in Helldivers 2?
These are tactical tools that can be earned and utilized in a mission. They include everything from offensive weapons and orbital strikes, to turrets or any other defensive accessories. They can be activated during the game by inputting a code from a data pad. Each Stratagem has a purpose and specific equipment is needed to match the mission goals.
↖ Helldivers 2: Best Stratagems and Their Codes
↖ - S-Tier
| Stratagem (Offensive) | Stratagem Code (Controller) | Stratagem Code (PC) |
|---|---|---|
| Orbital Rail Cannon Strike | ➡︎⬆︎⬇︎⬇︎➡︎ | DWSSD |
| Adler - Cluster Bomb | ⬆︎➡︎⬇︎⬇︎➡︎ | WDSSD |
| Orbital Laser | ➡︎⬇︎⬆︎➡︎⬇︎ | DSWDS |
| Adler - Airstrike | ⬆︎➡︎⬇︎➡︎ | WDSD |
| Orbital Napalm Barrage | ➡︎➡︎⬇︎⬅︎➡︎⬆︎ | DDSADW |
↖ - A-Tier
| Stratagem (Offensive) | Stratagem Code (Controller) | Stratagem Code (PC) |
|---|---|---|
| Adler - 500-KG Bomb | ⬆︎➡︎⬇︎⬇︎⬇︎ | WDSSS |
| Gatling Orbital Barrage | ➡︎⬇︎⬅︎⬆︎⬆︎ | DSAWW |
| 380-MM HE Orbital Barrage | ➡︎⬇︎⬆︎⬆︎⬅︎⬇︎⬇︎ | DSWWASS |
| 120-MM HE Orbital Barrage | ➡︎➡︎⬇︎⬅︎➡︎⬇︎ | DDSADS |
| Adler - 110-MM Rocket Pods | ⬆︎➡︎⬆︎⬅︎ | WDWA |
| Orbital Gas Attack | ➡︎➡︎⬇︎➡︎ | DDSD |
| Linear Orbital Barrage | ➡︎⬇︎➡︎⬇︎➡︎⬇︎ | DSDSDS |
↖ - B-Tier
| Stratagem (Offensive) | Stratagem Code (Controller) | Stratagem Code (PC) |
|---|---|---|
| Orbital-EMS Fire | ➡︎➡︎⬅︎⬇︎ | DDAS |
| Orbital Airburst Strike | ➡︎➡︎➡︎ | DDD |
| Orbital Precision Strike | ➡︎➡︎⬆︎ | DDW |
| Adler - Low-Altitude Bombing Run | ⬆︎➡︎➡︎ | WDD |
| Adler - Napalm Airstrike | ⬆︎➡︎⬇︎⬆︎ | WDSW |
↖ - C-Tier
| Stratagem (Offensive) | Stratagem Code (Controller) | Stratagem Code (PC) |
|---|---|---|
| Adler - Smoke Bombardment | ⬆︎➡︎⬆︎⬇︎ | WDWS |
| Orbital Smoke Bombardment | ➡︎➡︎⬇︎⬆︎ | DDSW |
↖ How to Use Codes for Stratagems
Stratagems can be a quarter indexed. However, their usage is partially based on cooldowns, so players should plan accordingly. On PS 5, use the L1 button while on PC, hold the Ctrl button. The directional pad or arrow keys must then be used to key in the code if you so wish. The code is displayed on the screen's top left corner for easy access.
↖ Using the Right Stratagem for Your Op Mission
Using tier lists and objectives is one of the simpler ways to use a Mission's objectives fully. Some good recommendations include:
Defensive Operations: Ignore the controlled area and focus on deploying Tesla Towers or Automated Cannon Turrets for area control purposes.
Supportive Roles: For increased survivability, use the SH-32 Shield Generator Backpack or LIFT-850 Jump Pack.
Offensive Missions: For taking out the tougher enemies such as the Hulk or Titan armor the Orbital Rail Cannon Strike works well. If crowd control is your aim, Eagle's Cluster Bomb or Orbital Laser is the best choice.
↖ Extra Advice
Try different mixes to see which suits your playstyle the most.
Work with teammates so you don't duplicate efforts, and increase productivity.
Be cautious of friendly fire while using gas-attack and napalm-strike-style area-of-effect Stratagems.
Your loadout in Helldivers 2 can be adjusted for any obstacle the game puts in front of you by knowing the capabilities and shortcomings of each Stratagem. Whether you are laying down orbital fire or building up, systematically employing these assets will guarantee victory on the battlefield.
Most Popular Posts
- Helldivers 2 Best Solo Loadouts: Ultimate Allround, Bug, Bot & Illuminate Builds Explained
- Helldivers 2 Weapon Customization Guide: Everything You Need to Know
- Helldivers 2 New Illuminate: Flesh Mob, Interloper and Crescent Overseer
- Helldivers 2 Masters of Ceremony Warbond: Is It Worth Buying?
- Helldivers 2 Best Weapons Loadouts for Solo Dominance
- Helldivers 2 Best Weapons for New Illuminate Weakpoint
Popular Category Lists
- Grow a Garden / (286)
- ARC Raiders / (261)
- CoD: Black Ops 7 / (166)
- Monopoly Go / (146)
- MLB 26 / (143)
- Star Citizen / (110)
- Steal a Brainrot / (89)
- Sailor Piece / (68)
- ARK Survival Ascended / (66)
- Diablo IV / (61)
- Forza Horizon 6 / (60)
- Blox Fruits / (60)
- CoD: BLACK OPS 6 / (55)
- Adopt Me / (53)
- Path of Exile 2 / (48)
- Monster Hunter Wilds / (46)
- Windrose / (44)
- Path of Exile / (40)
- Grow a Garden 2 / (37)
- Bee Swarm Simulator / (36)