0
0PoE 2 Endgame Progession Guide: Waystones, Atlas and Challenges
- Davis
- Share
- Path of Exile 2
- 02/21/25
- 7645
Endgame content kicks in after the main campaign and major bosses/missions are completed in PoE 2. At this point, players get to interact with the Atlas, a colossal network of maps which serves as the major focus for endgame progression. This guide will help you with: Map navigation, Crafting and upgrading Waystones, Gearing optimization for endgame challenges, Effective strategies for map progression and much more.
- How to Start the Endgame?
- Step 1: Complete Tier 1 Maps
- Waystones
- How to Get Atlas Skill Points?
- Step 2: Unlimited Way Stones Setup
- Atlas Build
- Percussor Towers
- Main Strategies
- Ritual
- Delirium
- Expedition
- Breach
- Step 3: Advanced Mapping Strategies
- T1 to T15 Preparation
↖ How to Start the Endgame?
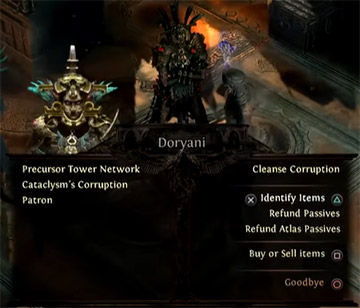
When you complete the campaign, you will unlock a new region Ziga Trio and meet an NPC called Doryani. He waits for you as the main vendor of Waystones which are very important for progressing on the map.
- Key NPC: Doryani
- Sells Waystones (used to unlock maps).
- Offers essential items for endgame mapping.
Note: In case you run out of Waystones, don't panic! You can buy them back from Duani.
↖ Step 1: Complete Tier 1 Maps
Your first goal in the endgame is to complete Tier 1 maps. Follow these steps to get started:
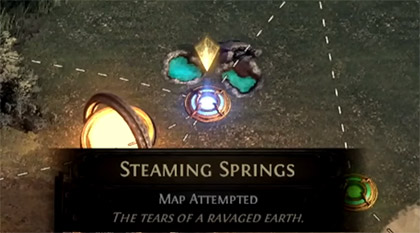
- Select Maps: Look for maps marked with Green Dots (completed maps) and Blue Dots (available maps). Red Dots indicate inaccessible maps.
- Unlock Hideouts: Locate the hideout icon on your map. Clearing this area allows you to customize your hideout for easier navigation and access to NPCs.
- Map Types: Maps may include special mechanics such as bridges or expeditions. Failing a map will result in losing bonuses, so plan carefully before attempting special map types.
- Done Maps: Defeat all magic, rare monsters, and bosses (if applicable) to mark a map as completed.
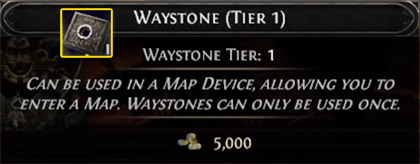
↖ Waystones
If you want to access the maps in Atlas, then Waystones are indispensable!

How to Use Waystones?
Place a Waystone into the map device to open six portals to the map, Each portal represents one attempt. Leaving or disconnecting will close one portal.
How to Upgrade Waystones?
Combine three Tier 1 Waystones at the Forging Bench to create a Tier 2 Waystone, Use crafting materials like Transmutation Shards or Augmentation Shards to enhance Waystones with bonuses:
| Material | Effect |
|---|---|
| Transmutation | Adds magic properties |
| Augmentation | Adds additional modifiers |
| Regal Shard | Upgrades to rare quality |
Note: Avoid using high-value crafting currencies like Exalted Orbs on Waystones early in your progression.
↖ How to Get Atlas Skill Points?
Atlas skill points are essential for customizing your endgame experience through the Atlas passive skill tree. Here are the 2 most common ways to earn them:
Way 1. Complete Maps:
After defeating all elite monsters on a map, return to Duani in Ziggratui.
Way 2. Claim Rewards:
Duani will provide books that grant Atlas skill points upon completion of specific map objectives.
| Map Tier | Skill Points Earned |
|---|---|
| Tier 1-5 | 1-2 per book |
| Tier 6-10 | 3-4 per book |
| Tier 11-15 | 5-6 per book |
↖ Step 2: Unlimited Way Stones Setup
The main goal of Step 2 is to establish a setup that allows for unlimited Waystones, which are essential for progressing through higher-tier maps.
| Task | Action | Outcome |
|---|---|---|
| Complete Maps | Finish suggested tier maps | Unlock Atlas skill points |
| Identify Tower Clusters | Find clusters with corruption modifiers | Higher monster levels and Waystone tier |
| Purchase Waystones | Buy from Doryani if needed | Maintain map progression |
| Optimize Tower Ranges | Focus on towers affecting multiple maps | Efficient resource usage |

↖ Atlas Build
Create an efficient Atlas skill tree that supports higher-tier Waystone farming, increased monster density, and valuable loot drops.
Recommended Skill Allocation
| Phase | Skill Tree Focus | Benefits |
|---|---|---|
| Early-Game | Constant Crossroads (right side) | Increased Waystone availability |
| Mid-Game | High-tier Waystone nodes (left) | Access to higher-tier maps |
| Late-Game | Monster pack and loot nodes | More monsters and valuable item drops |
Notes:
- For item hunters: Focus on nodes on the right side of the tree.
- For monster farming: Invest in the left side for increased density.
- For maximizing map tiers: Head toward the top section of the Atlas skill tree.
↖ Percussor Towers
Utilize Percussor Towers effectively to progress through maps, activate Beacons, and secure valuable resources.
Key Mechanics
- Basic Waystone Usage: If unsure about your character's strength, use basic (gray) Waystones without bonuses.
- Enhanced Waystones: Use an Orb of Transmutation on a Waystone to increase drop chances for higher-tier stones.
- Tower Activation Process:
- Locate the large white stairs within the tower area.
- Enter the door at the top of the stairs to find a Percussor Beacon.
- Interact with the Beacon to activate the tower and complete the map objective.
Common Features
- Most towers resemble those from Act 2 in design.
- The main objective is not defeating monsters but finding and activating the Percussor Beacon.
↖ Main Strategies
Leverage Percursor Tablets and Atlas Towers to create maps with enhanced modifiers, higher monster levels, and increased rewards.
| Tip 1. Collect Percursor Tablets |
|
| Tip 2. Identify Tower Zones |
|
| Tip 3. Prepare the Zone |
|
| Tip 4. Apply Tablets |
|
Example Setup:
| Tower Cluster | Affected Maps | Bonus Applied |
|---|---|---|
| Left Cluster | 5–10 maps | +1 Monster Level |
| Right Cluster | 5–10 maps | +1 Monster Level |
| Overlap Zone | 7 maps | +2 Monster Level |
Notes: Target corruption zones for additional rewards, as they provide opportunities to farm rare loot and experience in high-density areas.
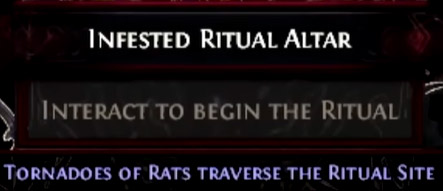
↖ Ritual
Ritual is a rewarding activity that involves interacting with ritual sites within maps. The mechanics are straightforward but require preparation and awareness to maximize efficiency.

How Ritual Works?
- Locate Ritual Sites: Ritual sites are scattered across the map, They are marked by glowing circles and become accessible after clearing nearby enemies.
- Clear the Area: Before activating the ritual, eliminate surrounding mobs to avoid interruptions, Rituals often take place in enclosed spaces, making it crucial to control the environment.
- Activate the Ritual: Interact with the ritual site to start the encounter, Be prepared for various debuffs or environmental effects specific to the map (e.g., red zones that deal significant damage).
- Defeat Enemies: Waves of enemies will spawn. Defeating them fills the ritual meter, Each completed ritual contributes to unlocking rewards in the Ritual Shop.
Related: PoE 2 Ritual Farming Guide
Ritual Rewards:
| Reward Type | Details |
|---|---|
| Ritual Shop | Offers items and currency purchasable with Tribute earned during rituals |
| Defer Items | If you can't afford an item, defer it for a lower cost in future maps |
| Locked Rewards | Some rewards require completing multiple rituals within the same map to unlock |
Notes: Always review map modifiers before entering to prepare for potential debuffs; Use AoE skills to handle clustered enemy waves efficiently; Spend Tribute wisely by prioritizing rare or valuable items in the Ritual Shop.
↖ Delirium
Delirium is a high-intensity challenge that introduces escalating difficulty as you progress through encounters. It rewards players with unique crafting materials and other valuable items.

How Delirium Works?
- Start the Encounter: Look for the Delirium mirror at the start of the zone. Interact with it to activate the encounter.
- Follow the Fog: A mist will spread across the map, spawning Delirium-specific monsters, Stay within the mist while defeating enemies to fill the Delirium meter.
- Manage Difficulty: Each tier of Delirium increases monster difficulty but also enhances rewards, If enemies become too challenging, consider ending the encounter early by leaving the mist area.
Related: PoE 2 Delirium Farming Guide
Delirium Rewards:
| Reward Type | Details |
|---|---|
| Delirium Orbs | Used to craft maps with Delirium modifiers for additional rewards |
| Distilled Emotions | Dropped during encounters; can be combined in a crafting bench to create higher-tier items |
| Passive Skill Tree Recipes | Unlock recipes that allow you to enhance amulets with passive skill nodes from distant parts of the tree |
How to Craft with Delirium Materials?
Use distilled emotions on your amulet to gain passive skill bonuses from other parts of the skill tree, The order of crafting matters; experiment with combinations for optimal results.
Notes: Use builds with strong AoE and mobility to handle dense packs of enemies efficiently; Monitor your survivability—don't overextend if enemies become too tanky or dangerous; Plan your crafting carefully by consulting recipes available on your passive skill tree.
↖ Expedition
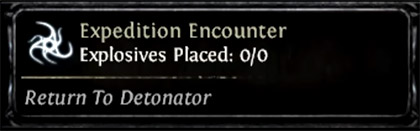
Expedition is an engaging activity where players uncover explosive sites, strategically place bombs, and battle waves of monsters. The goal is to maximize loot while navigating modifiers that can enhance or hinder your progress.

How Expedition Works?
- Look for the Expedition Marker on the map (indicated by flags and minefields).
- Clear the surrounding area of monsters to ensure uninterrupted gameplay.
- Interact with the Expedition NPC in the area to begin.
How to Complete Expedition?
| Step | Action | Notes |
|---|---|---|
| 1 | Place Bombs | Analyze modifiers before placing bombs. Avoid harmful effects (e.g., extra fire damage if your fire resistance is low) |
| 2 | Activate Detonator | After placing all bombs, activate the detonator to trigger explosions and spawn monsters |
| 3 | Defeat Monsters | Monsters will spawn near red flags. Clear them to protect yourself and collect loot |
| 4 | Loot Rewards | Gather Expedition chests, currency, and artifacts after clearing the area |
Expedition Rewards:
- Artifacts: Used for trading and crafting with Expedition NPCs.
- Exotic Coinage: Allows you to reroll shop inventories for better items.
- NPCs: Four unique NPCs offer different services and trades: Purchase rings, amulets, belts, and other gear, Modify items by removing or adding modifiers for specific costs.
Notes: Stockpile currency before trading or crafting for better results. Avoid modifiers that counter your build (e.g., immunity to your primary damage type). Use Exotic Coinage wisely to refresh shop inventories for optimal gear.
↖ Breach
Breach is a fast-paced activity where players enter a growing portal area filled with monsters and loot opportunities. The objective is to clear as many enemies as possible before the portal collapses.

How Breach Works?
- Look for purple effects on the map indicating a nearby Breach.
- Locate the Breach Hand (a purple icon) and interact with it to begin.
How to Complete a Breach?
| Step | Action | Notes |
|---|---|---|
| 1 | Activate Breach Hand | Touch the hand to start expanding the Breach area |
| 2 | Clear Monsters | Defeat waves of Breach monsters while staying within the expanding area |
| 3 | Interact with Additional Hands | Touch other Breach Hands revealed within the zone to earn more loot |
| 4 | Collect Rewards | Gather Breach-specific loot before the area collapses |
Related: PoE 2 Breach Farming
Breach Rewards:
- Breach Splinters: Combine these to create Breachstones for further encounters.
- Unique Items: Use these to enhance amulets and rings with powerful modifiers.
- Boss Encounters: Occasionally, you'll face bosses from the campaign—defeating them yields even greater rewards.
Note: Stay near the edges of the expanding Breach area to maximize monster spawns and loot opportunities. Activate shrines within the Breach zone for temporary buffs—these are usually beneficial. Prioritize clearing monsters over chasing loot, as the area will shrink once time runs out.
↖ Step 3: Advanced Mapping Strategies
Step 3 introduces maps with stronger enemies, better loot, and additional challenges.
Key Points:
- Map Difficulty: These maps are inherently more challenging. Avoid using overly powerful Watchstones (W Stones) initially. Start with lower-tier W Stones to test your build's capabilities.
- Character Readiness: Ensure your character can handle the map's mechanics. If you're at risk of being one-shotted by basic attacks, consider upgrading your defenses first.
- Modifiers: Enhance maps with Delirium currency or high-tier W Stones for better rewards, but only if your build can handle the increased difficulty.
Efficient Strategy:
| Task | Action | Outcome |
|---|---|---|
| Test Map Difficulty | Use lower-tier W Stones on Step 3 maps | Assess your build's readiness for advanced challenges |
| Gradual Progression | Increase map modifiers gradually using Delirium currency or additional mechanics | Higher loot drops and unique rewards from Delirium encounters |
| Focused Map Selection | Prioritize maps with bonuses from Persecutor Towers but fewer complex mechanics (e.g., no bridges/delirium) | Easier progression with consistent rewards |
| Adapt Build | Ensure your build has sufficient DPS and survivability before attempting harder content | Smooth progression without frequent deaths |
Notes: Delirium Encounters: Adding Delirium modifiers increases difficulty but offers unique loot and bosses. Use this feature cautiously; Loot Optimization: Step 3 maps are excellent for farming Atlas points, waypoints, and high-tier items.
↖ T1 to T15 Preparation
Preparing your character for T1 to T15 maps is essential for tackling Path of Exile 2's toughest challenges.
Baseline Requirements:
- Resistances: Cap all elemental resistances at 75% or higher. Account for debuffs that may reduce resistances during mapping.
- Main Ability DPS:
- Minimum: 10,000 DPS to start mapping.
- Recommended: 30,000–50,000 DPS for T15 comfort.
- Survivability:
- Health Pool: Aim for at least 3,000 total HP (or HP + Energy Shield).
- Optimal Health: Around 6,000 total HP for better survivability against one-shots.
Defensive Strategies:
| Defense Type | Recommendation |
|---|---|
| Armor | Useful but less effective than evasion in many cases |
| Evasion | Prioritize evasion or a combination of armor + evasion for better mitigation |
| Energy Shield | Combine with HP if your build supports it for added survivability |
Gear Progression:
- Start Mapping: Use gear with capped resistances and sufficient DPS to begin T1 maps confidently.
- Upgrade Gradually: As you gain currency, invest in better gear to scale your damage and defenses for higher-tier maps.
- Trading Tips: Leverage the in-game trading system to acquire affordable upgrades efficiently.
Endgame progression in Path of Exile 2 requires preparation, adaptability, and a solid understanding of your build's strengths and weaknesses. By following the strategies outlined above, you can confidently tackle boss maps and progress through T1-T15 content.
Most Popular Posts
- Path of Exile 2 Witch Class Overview: Blood Mage vs Infernalist
- PoE 2 Passive Tree Guide: Classes and Builds Application
- Path of Exile 2 Mercenary Overview: Witchhunter vs Gemling Legionnaire
- PoE 2 Leech Mechanics: Types, Statistics, Example and Keypoints
- PoE 2 Sanctum Farm Guide: Trial of the Sekhemas
- Path of Exile 2 Warrior Class Overview: Titan vs Warbringer
Popular Category Lists
- Grow a Garden / (286)
- ARC Raiders / (262)
- CoD: Black Ops 7 / (166)
- Monopoly Go / (146)
- MLB 26 / (145)
- Star Citizen / (112)
- Steal a Brainrot / (89)
- Sailor Piece / (68)
- ARK Survival Ascended / (67)
- Diablo IV / (61)
- Forza Horizon 6 / (60)
- Blox Fruits / (60)
- CoD: BLACK OPS 6 / (55)
- Adopt Me / (53)
- Path of Exile 2 / (48)
- Monster Hunter Wilds / (46)
- Windrose / (44)
- Path of Exile / (40)
- Grow a Garden 2 / (40)
- Bee Swarm Simulator / (36)