0
Created: Oct 29,2026 | RuneScape: Dragonwilds
RuneScape Dragonwilds Staff of Light Quests and Crafting Guide

- Prepare and Start the Quest
- Find the Vault Password
- Reach the Dragonkin Statue
- Return to the Wizard Statue
- Charge the Orb at Three Pedestals
- Craft the Staff of Light
- FAQ (Frequently Asked Questions)
- Do we need to clear the vault for the Staff of Light recipe?
- Where is the Highlighting the Problem password?
- What do we do after receiving the mysterious orb?
- Does the quest give us the Staff of Light?
- What should we do if we cannot reach a pedestal?
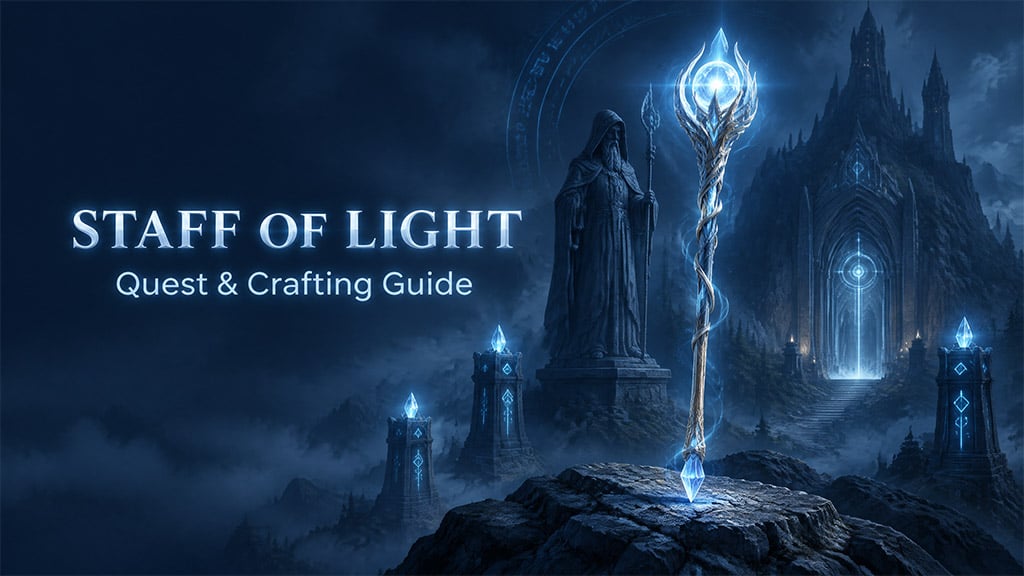
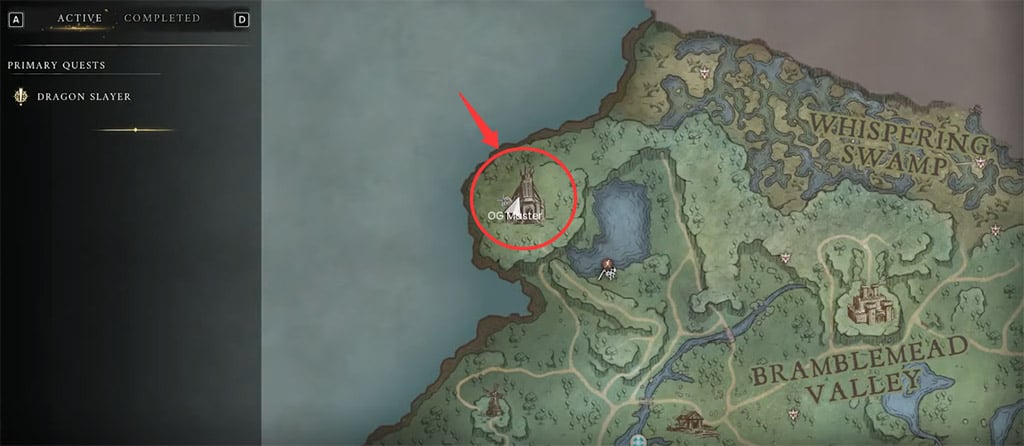
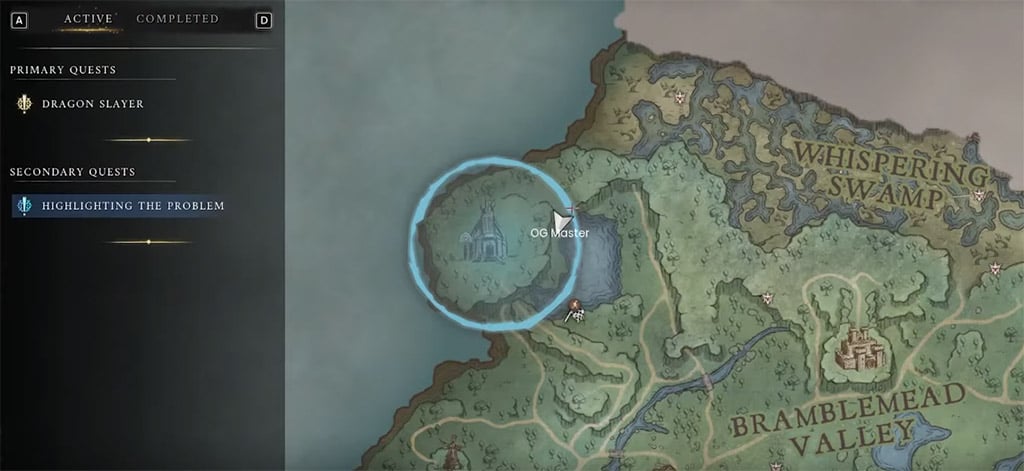
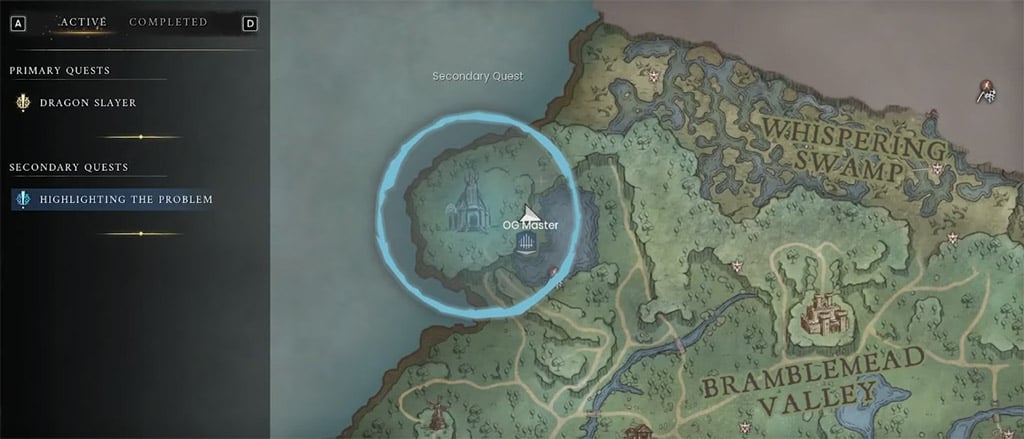
We get the Staff of Light recipe by completing Highlighting the Problem at the Runecrafting Guild north of Temple Woods. Find the password in the vault below, charge an orb at three tower pedestals, and return to the wizard statue.
Prepare and Start the Quest
Bring Wind Step, weapons, armor, and food. Wind Step gets us onto the raised vault path and toward the tower pedestals; food covers combat and accidental falls.
At the Runecrafting Guild in Bramblemead Valley, interact with the wizard statue to start Highlighting the Problem. If enemies crowd the statue, clear enough space to complete the conversation.
We can collect the crafting ingredients later. That keeps the quest trip shorter and leaves more inventory space for supplies.
Find the Vault Password
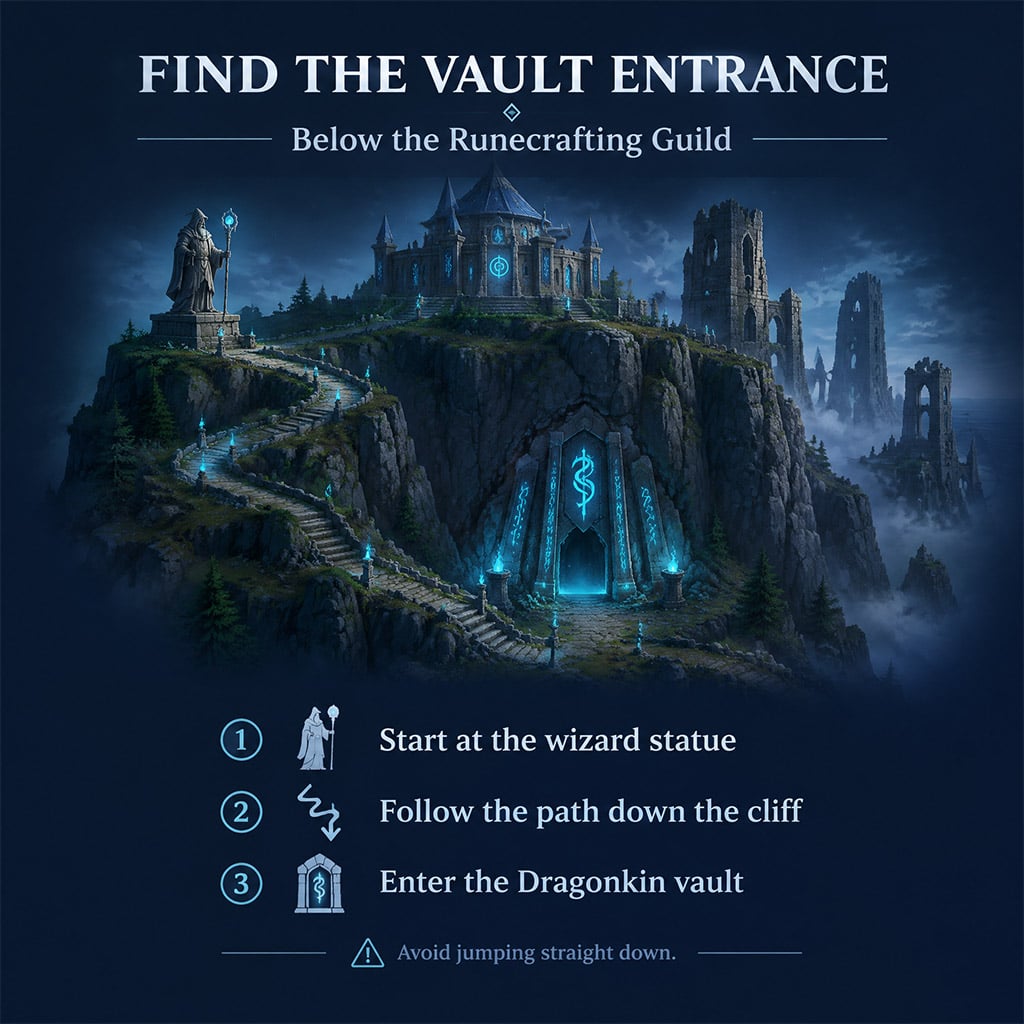
The password is inside the Dragonkin vault beneath the guild cliffs. Look for a route down rather than dropping straight off the cliff and taking unnecessary fall damage.
Reach the Dragonkin Statue
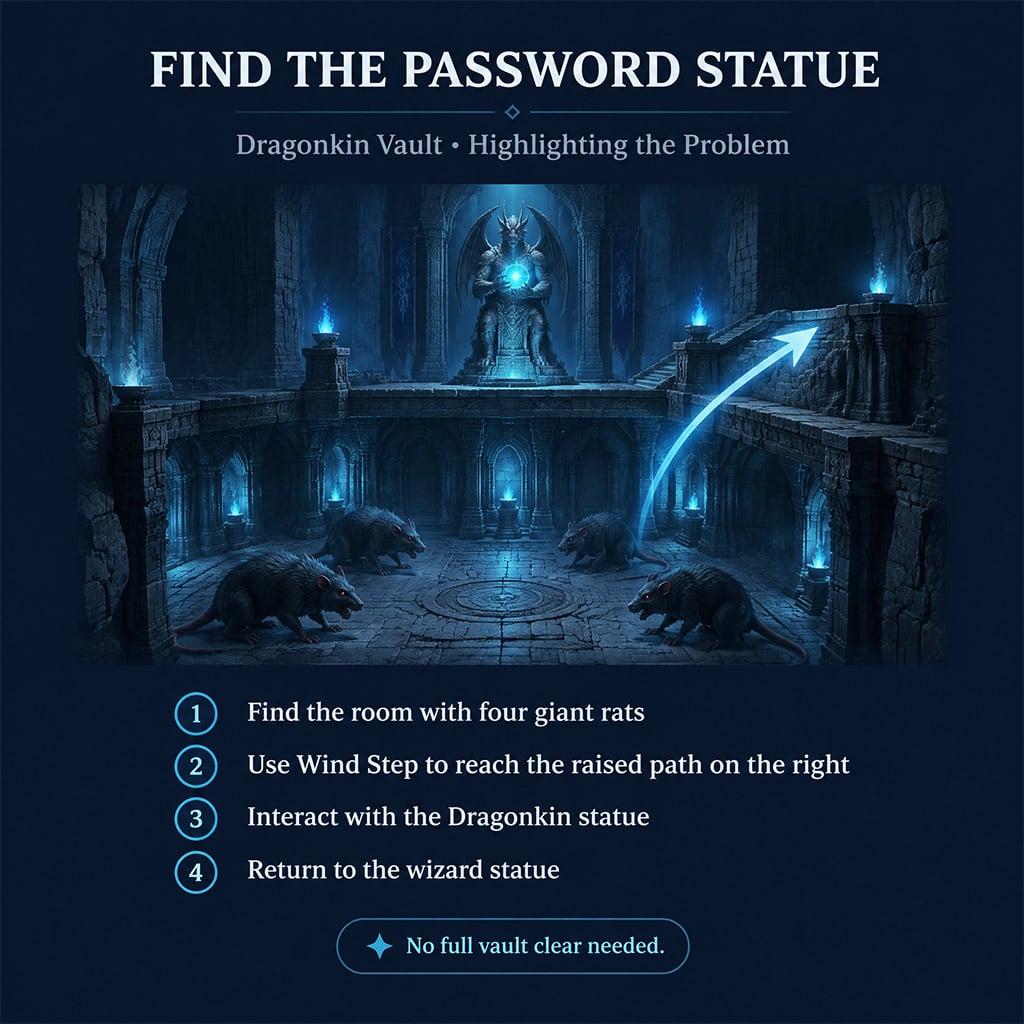
Use the four giant rats as your landmark, then take the raised path on the right.
1. Enter the vault and reach the room with four giant rats.
2. Use Wind Step to reach the elevated path on the right.
3. Interact with the Dragonkin statue to learn the password.
4. Retrace your route out and climb back to the guild.
We do not need to clear the entire vault for the password. If guardians follow you, keep moving after the interaction: their flame pillars can reach the raised position.
Return to the Wizard Statue
Select the answer revealed by the Dragonkin statue when you speak to the wizard statue again. Available guide accounts disagree on the password's spelling, so use the wording shown in your game.
The conversation gives us an uncharged mysterious orb.
Charge the Orb at Three Pedestals
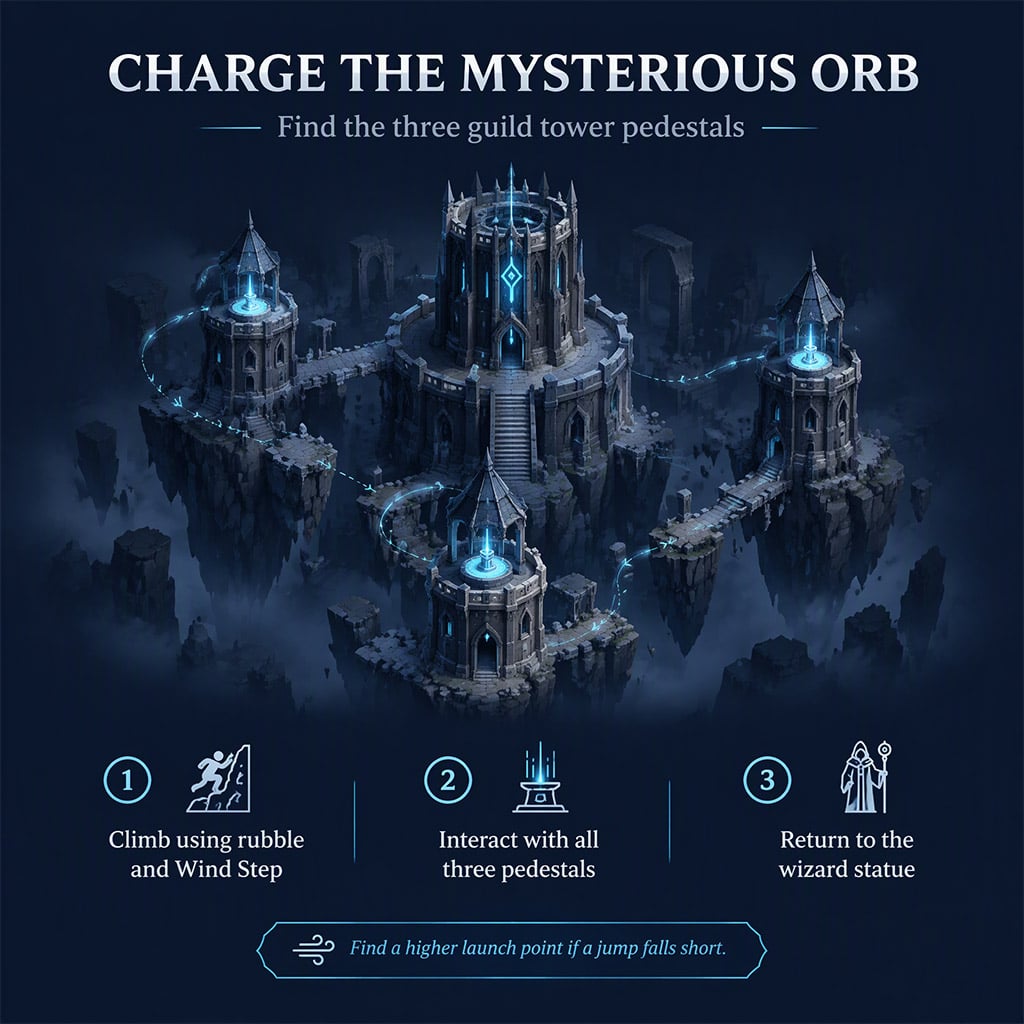
The three pedestals sit on smaller towers around the main guild tower. A direct jump is not always the safest route; use rubble, boxes, and broken structures to gain height before using Wind Step.
1. Climb onto a smaller tower and interact with its pedestal.
2. Find raised ground for the next approach and activate the second pedestal.
3. Reach and activate the third pedestal.
4. Return to the original wizard statue and interact with it to receive the recipe.
If you keep falling short, change your launch point before trying again. You do not need to activate the pedestals in a particular order described by this guide.
Craft the Staff of Light
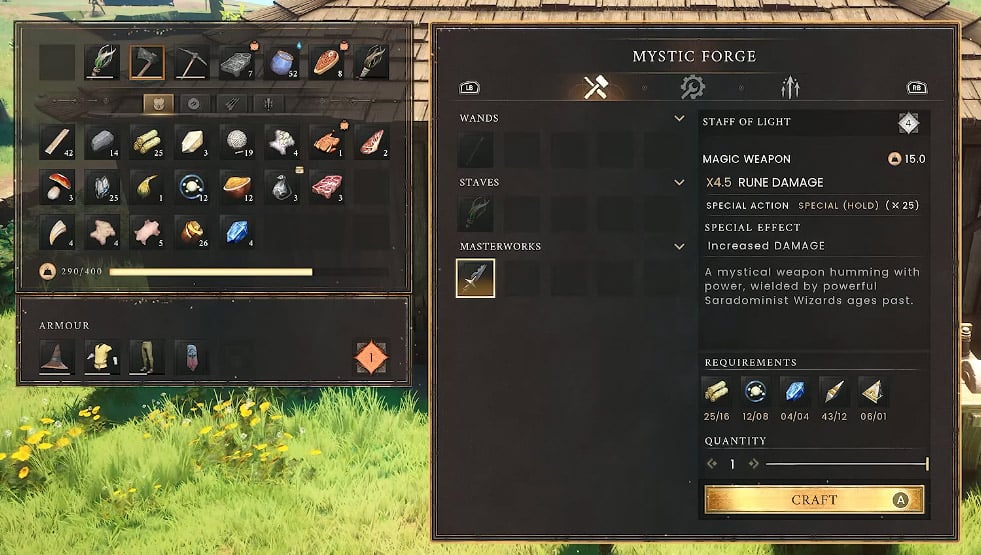
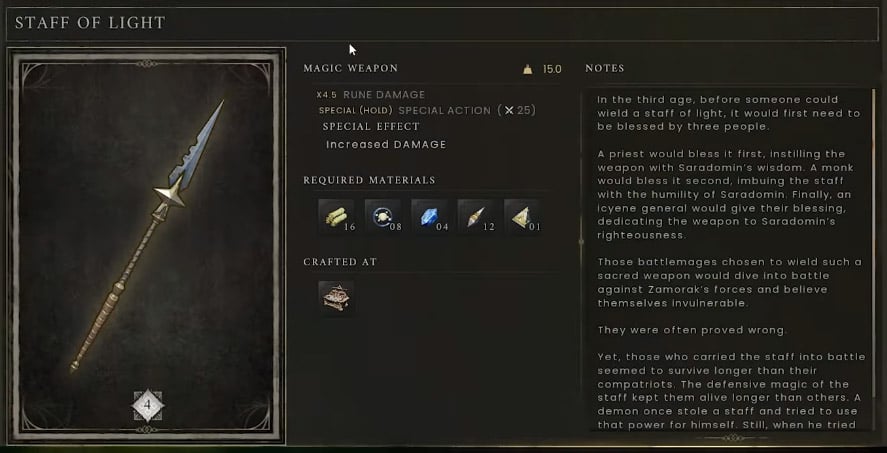
The recipe requires a Mystic Forge and the materials listed below; quantities match the Dragonwilds Database's forge listing.
| Material | Amount | Where to look |
|---|---|---|
| Blightwood | 16 | Chop pale roots in Bloodblight Swamp. |
| Wild Anima | 8 | Gather anima bark in Fractured Plains and process it in a kiln. |
| Sapphire | 4 | Look for drops while mining gold nodes. |
| Vault Shard | 12 | Collect from Dragonkin vaults. |
| Vault Core | 1 | Collect from a Dragonkin vault. |
Prioritize the ingredients you are missing after checking the Mystic Forge recipe, rather than farming every area twice.
For Wild Anima, look beneath white trees with red leaves in Fractured Plains for anima bark. Bring poison protection when gathering Blightwood in Bloodblight Swamp.
Sapphires are drops, not guaranteed rewards from every gold node. Mine extra nodes while you are in the area rather than assuming four nodes will finish the job.
FAQ (Frequently Asked Questions)
Do we need to clear the vault for the Staff of Light recipe?
No, we only need to reach the Dragonkin statue and learn its password. Crafting the staff still requires a vault core and vault shards.
Where is the Highlighting the Problem password?
The password is given by a Dragonkin statue on a raised path near the room with four giant rats. Use Wind Step to reach the path on the room's right side.
What do we do after receiving the mysterious orb?
We must activate three pedestals on the smaller towers surrounding the main guild tower. Return to the wizard statue after activating all three.
Does the quest give us the Staff of Light?
No, the quest gives us its crafting recipe. We must make the staff at a Mystic Forge using the required materials.
What should we do if we cannot reach a pedestal?
Use rubble, a box, or higher ground as a launch point, then use Wind Step. If the jump still falls short, look for a higher approach before trying again.

I’m Amara Okafor, a Nigerian Contributing Writer at GGWTB covering sports, racing, and driving games, alongside casual mobile titles. My guides focus on timing a pass, finding a braking point, and choosing upgrades that suit your playstyle. For shorter sessions, I keep the priorities clear: less menu-hopping, more time playing.
Most Popular Posts
- RuneScape Dragonwilds: Dreaming Stone Shards Route & Puzzle Guide
- RuneScape: Dragonwilds Best Weapons by Power Level and Core Upgrade Priority
- RuneScape Dragonwilds Early Game Guide: What to Build & Upgrade First
- RuneScape Dragonwilds: Best Lodestone Locations and Fast Travel Routes
- RuneScape Dragonwilds Abyssal Whip Guide: Crafting Route & Upgrade
- RuneScape Dragonwilds Best Weapons: Tier Scaling & Upgrade Traps
Popular Category Lists
- ARC Raiders / (359)
- Grow a Garden / (295)
- CoD: Black Ops 7 / (167)
- Star Citizen / (164)
- MLB 26 / (159)
- Monopoly Go / (153)
- ARK Survival Ascended / (128)
- Steal a Brainrot / (99)
- Blox Fruits / (74)
- Adopt Me / (74)
- Forza Horizon 6 / (72)
- Sailor Piece / (68)
- Grow a Garden 2 / (68)
- Diablo IV / (62)
- CoD: BLACK OPS 6 / (55)
- Aion 2 / (55)
- Path of Exile 2 / (48)
- Monster Hunter Wilds / (46)
- Windrose / (44)
- Maplestory Classic / (44)