0
0Star Citizen Beginner Guide: Gather Gear & Gear Up | Section 3
- RCHM
- Share
- Star Citizen
- 06/05/26
- 318
Before your first real mission, gear up properly. In Star Citizen, most beginner deaths come from poor preparation: no medpens, no ammo, no helmet, no food, no multi-tool, or gear bought but left in local inventory.
This guide gives you the shortest reliable path: leave the hangar, reach the city shops, buy the right gear, equip it correctly, and learn the hotkeys that keep you alive.
- 1. From Hangar to Spaceport
- Basic Flow
- Useful Movement Controls
- 2. Key Spaceport Services
- 3. Renting Ships
- When Renting Makes Sense
- 4. Paying Off Crime Stat Fees
- Avoid Early Crime Stat Problems
- 5. Taking the Tram to the City
- Tram Checklist
- 6. City Landmarks Worth Knowing
- 7. MobiGlas Minimap Navigation
- Best Use
- 8. Purchasing Gear & Weapons
- Priority Shopping List
- Recommended Starter Kit
- 9. Armor: Light vs Medium vs Heavy
- 10. Weapon Recommendation: P4-AR
- 11. Inventory System Basics
- Inventory Locations
- Local Inventory Rule
- 12. Equipping Armor, Gear, and Weapons
- Equipping Methods
- Correct Gear-Up Order
- 13. Multi-Tool Attachments
- 14. Returning to the Hangar
- Return Path Example: Area18
- 15. Hotkeys for Using Equipped Gear
- MedPen Use
- Multi-Tool Use
- Weapon Safety
- 16. Common Beginner Mistakes
- FAQs
- Q1 - What Should Beginners Buy First In Star Citizen?
- Q2 - Do I Need Armor Before My First Mission?
- Q3 - Why Is My Purchased Gear Not On My Character?
- Q4 - What Is Local Inventory?
- Q5 - How Do I Rent A Ship?
- Q6 - Can I Pay Off Every Crime Stat?
- Q7 - How Do I Get From The Spaceport To Shops?
- Q8 - How Do I Use The Mobiglas Minimap?
- Q9 - What Is The Best Beginner Gun?
- Q10 - How Much Ammo Should I Carry?
- Q11 - How Do I Equip Multi-tool Attachments?
- Q12 - How Do I Put Weapons Away?
- Summary
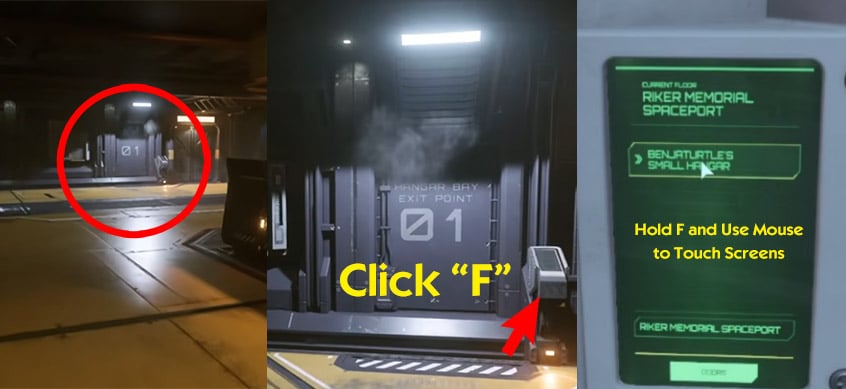
↖ 1. From Hangar to Spaceport
Your hangar is where your ship lives. The spaceport is where you access city transit, ship terminals, rentals, storage kiosks, and other services.
↖ Basic Flow
| Step | Action | Why It Matters |
|---|---|---|
| 1 | Find the hangar elevator | This connects your hangar to the spaceport |
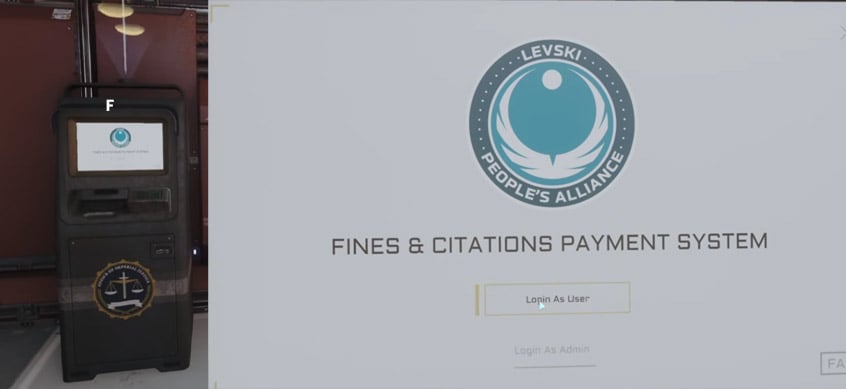
| 2 | Press or hold F on the panel | Interaction key for most terminals and buttons |
| 3 | Select the spaceport destination | Example: Riker Memorial Spaceport at Area18 |
| 4 | Exit into the spaceport | You can now access transit, shops, rentals, and kiosks |
↖ Useful Movement Controls
| Input | Function |
|---|---|
| W/A/S/D | Move |
| Mouse wheel while walking | Adjust walking speed |
| Shift | Sprint |
| Hold F + mouse | Interact with screens/buttons |
| Hold F + scroll wheel | Zoom view |
| Y | Stand up from seats |
If you feel like you are walking painfully slowly, scroll your mouse wheel up while moving. Many new players miss this.
↖ 2. Key Spaceport Services
Spaceports work like airports mixed with train stations. Learn the important terminals early.
| Service | Use | Beginner Priority |
|---|---|---|
| Fleet Manager / ASOP | Retrieve, store, or claim ships | High |
| Storage kiosk | Access local inventory | High |
| Ship rental kiosk | Rent ships with in-game credits | Medium |
| Fine payment terminal | Pay minor legal fines | Medium |
| Food/supply shop | Buy snacks, drinks, tools, small items | Medium |
| Transit platform | Travel into the city | High |
Do not rush past storage kiosks. They are often where you solve Where did my gear go? problems.
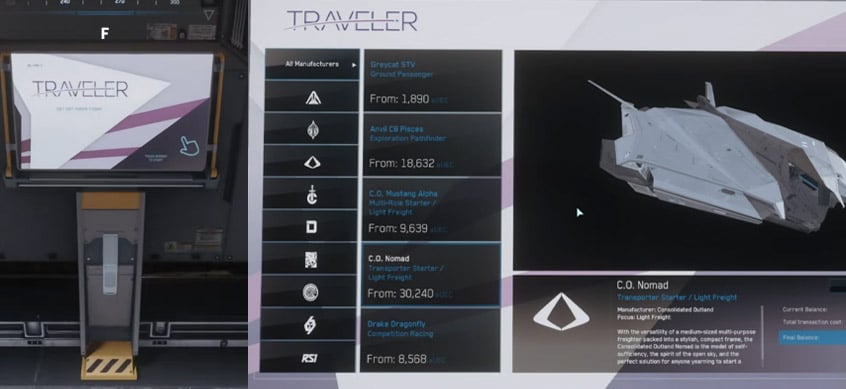
↖ 3. Renting Ships
Ship rentals let you test ships without buying them. Rental time runs in real-world time, not just playtime.
| Rental Length | Meaning | Best Use |
|---|---|---|
| 1 day | Around 24 real hours | Test a ship in one session |
| 3 days | Three real days | Weekend testing |
| 7 days | One real week | Try a gameplay loop seriously |
↖ When Renting Makes Sense
| Goal | Renting Helps Because… |
|---|---|
| Try cargo hauling | You can test cargo space before buying |
| Practice combat | You can fly a fighter without committing credits |
| Learn ship handling | Larger ships feel very different from starters |
| Test career loops | Mining, hauling, combat, and exploration require different ships |
Do not rent right before logging off. The timer keeps ticking.
↖ 4. Paying Off Crime Stat Fees
Minor fines can often be paid at fine terminals. Serious crimes cannot.
| Legal Issue | Can Usually Pay It Off? | Beginner Advice |
|---|---|---|
| Minor fine | Yes | Pay it immediately |
| Small infraction | Often | Clear it before leaving |
| Trespassing | Sometimes | Depends on mission/location |
| Homicide | No | Expect bounty hunters/prison |
| Major crime stat | No simple payoff | Requires crime stat clearing or prison |
↖ Avoid Early Crime Stat Problems
- Do not shoot unless you are sure the target is hostile.
- Do not test weapons in public zones.
- Read mission descriptions.
- Avoid restricted areas unless the mission requires it.
- Pay small fines before they become a bigger problem.
If you accidentally kill an NPC or player, that is not a parking ticket. You may become a bounty target.
↖ 5. Taking the Tram to the City
Most major cities separate the spaceport from the shopping district. You need transit.
↖ Tram Checklist
| Step | Action |
|---|---|
| 1 | Follow signs to Transit |
| 2 | Check the destination board |
| 3 | Wait for the correct tram |
| 4 | Board only if it goes where you need |
| 5 | Exit at the city shopping hub |
At Area18, the usual route is:
| From | To | Purpose |
|---|---|---|
| Riker Memorial Spaceport | ArcCorp Plaza | Access shops, hospital, TDD, retail areas |
| ArcCorp Plaza | Riker Memorial Spaceport | Return to hangars |

If you take the wrong tram, you lose time. Always read the destination sign before boarding.
↖ 6. City Landmarks Worth Knowing
Use landmarks to avoid getting lost. Signs are part of the game's navigation system.
| Area18 Landmark | Why It Matters |
|---|---|
| ArcCorp Plaza | Main hub |
| ArcCorp Tower | Visual anchor |
| TDD | Commodity and trade sales |
| Hospital | Respawn and medical services |
| Retail Plaza / Retail Bridges | Gear shops |
| Transit Platform | Return to spaceport |
If you get turned around, return to the main plaza first. From there, signs are easier to follow.
↖ 7. MobiGlas Minimap Navigation
Press F2 to open the map. It can help with local navigation, but it is not always reliable.
| Control | Function |
|---|---|
| F2 | Open map |
| Mouse drag | Move/rotate map |
| Scroll wheel | Zoom |
| Click location | Select point of interest |
| R | Set route when supported |
↖ Best Use
| Navigation Tool | Reliability | Use It For |
|---|---|---|
| Physical signs | High | City navigation |
| Landmarks | High | Reorientation |
| MobiGlas map | Medium | Layout overview |
| HUD minimap | Medium | Direction checks |
If route setting fails, do not fight the UI for five minutes. Close the map and follow signs.
↖ 8. Purchasing Gear & Weapons
Your first kit should be cheap, useful, and replaceable. Do not spend all your credits on fashion armor.
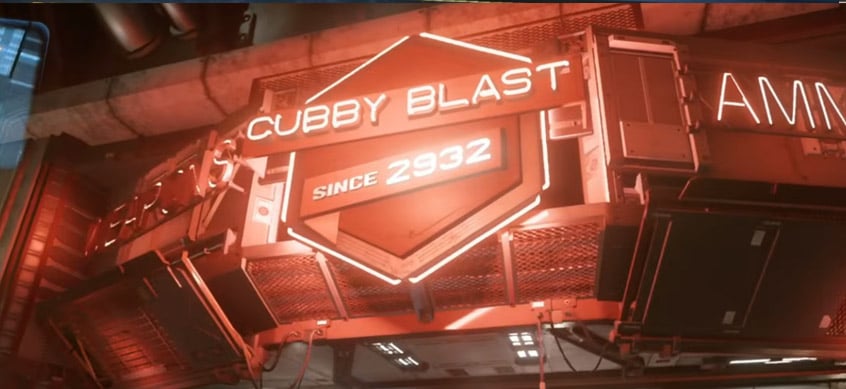
At Area18, use Cubby Blast for armor, weapons, ammo, and tools. Use Dumper's Depot for extra utility items like repair-related attachments.
↖ Priority Shopping List
| Item | Priority | Reason |
|---|---|---|
| Pyro Multi-Tool | Essential | Core utility tool |
| TruHold Tractor Beam Attachment | Essential | Moves boxes, loot, mission objects |
| Food/drink | Essential | Prevents hunger/thirst problems |
| MedPens | High | Emergency healing |
| Backpack | High | More storage |
| Light/medium armor | High | Protection and extra slots |
| Rifle | Medium-high | Needed for FPS combat |
| Rifle magazines | High | Weapon is useless without ammo |
| SRT attachment | Medium | Repair/engineering use |
| SRT canister | Medium | Required for SRT function |
| Mining attachment | Optional | Only if hand mining |
↖ Recommended Starter Kit
| Category | Recommended Setup |
|---|---|
| Tool | Pyro Multi-Tool |
| Main attachment | TruHold Tractor Beam |
| Backup attachment | SRT attachment |
| Consumables | 2–4 food/drink items |
| Medical | 2–4 MedPens |
| Armor | Medium armor if affordable |
| Storage | Backpack |
| Weapon | P4-AR or similar rifle |
| Ammo | 10–20 matching magazines |
| Sidearm | Starter pistol is fine |
The multi-tool plus tractor beam is the most important non-weapon purchase. It helps with missions, cargo, looting, and general problem-solving.
↖ 9. Armor: Light vs Medium vs Heavy
Do not automatically buy heavy armor. Protection is useful, but mobility and cost matter.
| Armor Type | Protection | Mobility | Best For |
|---|---|---|---|
| Light | Low | High | Delivery, exploration |
| Medium | Balanced | Balanced | Best beginner default |
| Heavy | High | Low | Combat-heavy missions |
For most new players, medium armor is the best first set. It gives protection without making you feel like a walking cargo crate.
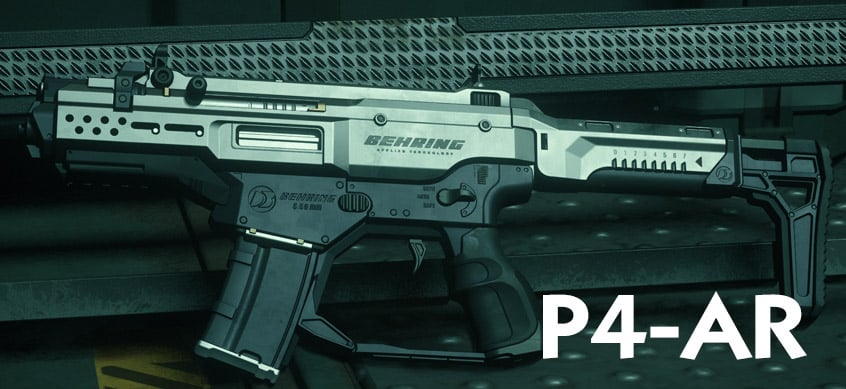
↖ 10. Weapon Recommendation: P4-AR
The P4-AR is a strong beginner rifle because it is simple, reliable, and supported by commonly found ammo sources in many FPS situations.
| Why P4-AR Works | Beginner Benefit |
|---|---|
| Easy handling | Low learning curve |
| Good general damage | Works in early missions |
| Common ammo type | Easier to resupply |
| Flexible range | Useful indoors and outdoors |
Any rifle can work if you buy the correct magazines. The common beginner mistake is buying a gun and forgetting ammo.
↖ 11. Inventory System Basics
Press I to open inventory. Star Citizen inventory is location-based. Buying gear does not equip it. Items bought at Area18 stay in Area18 local inventory unless you equip or carry them.
↖ Inventory Locations
| Storage Type | Meaning |
|---|---|
| Character | Gear worn or held by you |
| Armor storage | Items inside armor |
| Backpack | Items carried in backpack |
| Local inventory | Items stored at current city/station |
| Ship inventory | Items stored on a ship |
| Weapon slots | Primary, secondary, sidearm |
| Utility slots | Multi-tool and gadgets |
↖ Local Inventory Rule
| Where Item Is | Can You Use It? |
|---|---|
| Equipped | Yes |
| In backpack | Yes |
| In armor | Yes |
| In current local inventory | Yes, at that location |
| In another city's local inventory | No |
| In ship inventory | Yes, if the ship is accessible |
If gear seems missing, check where you bought it. It may be stored at that city, not lost.
↖ 12. Equipping Armor, Gear, and Weapons
Use a storage kiosk or inventory screen where your items are available.
↖ Equipping Methods
| Action | Method |
|---|---|
| Equip item | Double-click |
| Equip manually | Drag item to slot |
| Move to backpack/armor | Drag into container |
| Quick move | Shift + left click, when working |
| Remove item | Drag off character |
If double-click fails, drag and drop. If shift-click fails, drag manually. Inventory can be finicky.
↖ Correct Gear-Up Order
| Order | Item | Reason |
|---|---|---|
| 1 | Undersuit | Base layer |
| 2 | Core armor | Adds protection/storage |
| 3 | Arms/legs | Completes armor |
| 4 | Helmet | Needed for vacuum and protection |
| 5 | Backpack | Adds storage |
| 6 | Primary weapon | Main combat tool |
| 7 | Sidearm | Backup weapon |
| 8 | Magazines | Required for reloads |
| 9 | MedPens | Enables hotkey healing |
| 10 | Multi-tool | Utility slot |
| 11 | Tractor beam attachment | Main tool function |
| 12 | Food/drink | Sustains long sessions |
Equip armor first because armor creates many of the slots used for ammo, medpens, and storage.
↖ 13. Multi-Tool Attachments
The Pyro Multi-Tool is only useful when fitted with the right attachment.
| Attachment | Use | Priority |
|---|---|---|
| TruHold Tractor Beam | Move boxes, loot, objects | Essential |
| SRT attachment | Repair/salvage-related tasks | Medium |
| Mining attachment | Hand mining | Optional |
For your first loadout, keep the tractor beam equipped. Carry the SRT attachment only if you have space.
↖ 14. Returning to the Hangar
After buying and equipping gear, return to the spaceport.
↖ Return Path Example: Area18
| From | To |
|---|---|
| Retail Plaza | ArcCorp Plaza |
| ArcCorp Plaza | Transit Platform |
| Transit Platform | Riker Memorial Spaceport |
| Spaceport | Hangar elevators |
| Elevator | Assigned or persistent hangar |
At your home location, you may have a persistent hangar. Its size usually depends on the largest ship you own. If it bugs out, check Fleet Manager, wait, try another elevator, or relog.
↖ 15. Hotkeys for Using Equipped Gear
Learn these before combat. Panic is a bad time to discover your medpen key.
| Hotkey | Action |
|---|---|
| 1 | Draw primary weapon |
| 2 | Draw secondary weapon |
| 3 | Draw sidearm |
| 4 | Draw MedPen |
| 5 | Draw multi-tool |
| 6 | Raise fists |
| R | Reload |
| Hold R | Stow held item |
| Right mouse | Aim |
| Left mouse | Fire/use item |
| J with multi-tool | Change attachment menu |
| Left Alt + 1 | Ammo-related function depending on bindings/patch |
Check your keybinds if something behaves differently.
↖ MedPen Use
| Input | Effect |
|---|---|
| 4 | Draw MedPen |
| Left click | Heal yourself |
| Right click | Heal another player |
↖ Multi-Tool Use
| Input | Effect |
|---|---|
| 5 | Draw multi-tool |
| J | Open attachment selection, when supported |
| Left click | Use active attachment |
| Hold R | Stow tool |
↖ Weapon Safety
Stow weapons in cities and stations. Do not test-fire in public areas. Accidental shots can trigger security problems or player conflict.
↖ 16. Common Beginner Mistakes
| Mistake | Fix |
|---|---|
| Buying gear but not equipping it | Use inventory/storage kiosk |
| Forgetting ammo | Buy matching magazines |
| Buying too much armor too early | Start with medium or light |
| Leaving without food/drink | Carry 2–4 supplies |
| Skipping the multi-tool | Always bring one |
| Taking the wrong tram | Read destination boards |
| Ignoring fines | Pay minor fines early |
| Drawing weapons in public | Hold R to stow |
| Assuming inventory is global | Remember local inventory |
| Forgetting helmet | Always equip before leaving atmosphere-safe areas |
↖ FAQs
↖ Q1 - What Should Beginners Buy First In Star Citizen?
Buy a Pyro Multi-Tool, TruHold Tractor Beam Attachment, food/drink, MedPens, a backpack, and basic armor. Add a rifle and ammo if you plan to do FPS missions.
↖ Q2 - Do I Need Armor Before My First Mission?
For simple delivery missions, not always. For bunkers, investigations, or hostile zones, yes. Medium armor is the safest beginner choice.
↖ Q3 - Why Is My Purchased Gear Not On My Character?
Because purchases go into local inventory. Open inventory with I or use a storage kiosk, then equip the items manually.
↖ Q4 - What Is Local Inventory?
Local inventory is storage tied to a city, station, or location. Gear bought at Area18 stays at Area18 unless you carry it.
↖ Q5 - How Do I Rent A Ship?
Use a ship rental kiosk, choose a ship, select 1/3/7 days, and pay with credits. Rental time uses real-world time.
↖ Q6 - Can I Pay Off Every Crime Stat?
No. Minor fines can often be paid. Serious crimes, especially homicide, cannot simply be cleared with credits.
↖ Q7 - How Do I Get From The Spaceport To Shops?
Follow transit signs. At Area18, take the tram from Riker Memorial Spaceport to ArcCorp Plaza, then follow signs to retail areas.
↖ Q8 - How Do I Use The Mobiglas Minimap?
Press F2, zoom/rotate the map, select a location, and set a route if supported. If routing fails, follow physical signs.
↖ Q9 - What Is The Best Beginner Gun?
The P4-AR is a reliable starter rifle. It is easy to use and has practical ammo availability.
↖ Q10 - How Much Ammo Should I Carry?
For FPS combat, carry 10–20 magazines for your primary weapon. For non-combat jobs, fewer magazines are fine.
↖ Q11 - How Do I Equip Multi-tool Attachments?
Equip the multi-tool in a utility slot, then attach the TruHold Tractor Beam or another attachment through inventory or the J attachment menu when available.
↖ Q12 - How Do I Put Weapons Away?
Hold R briefly to stow weapons, tools, or handheld items.
Related: Star Citizen Beginner Guide (Section 4): Flight & Ships
↖ Summary
Gear up before leaving the city. The minimum reliable beginner kit is:
| Must-Have | Why |
|---|---|
| Pyro Multi-Tool | Core utility |
| Tractor Beam Attachment | Moves objects and mission items |
| Food/drink | Prevents survival issues |
| MedPens | Emergency healing |
| Helmet | Protects in unsafe environments |
| Backpack | More carrying space |
| Armor | Protection and slots |
| Rifle + ammo | FPS combat readiness |
The core rule: Buy Gear, Equip Gear, Carry Gear, Then Leave. If it stays in local inventory, it is not helping you in the field.

Most Popular Posts
- Star Citizen Covalex Cargo Hauling 4.8: Fast Reputation Route, Best Ships, and Master Unlocks
- Star Citizen 4.8 Solo Ship Guide: Best Purchasable PvP & PvE Ships, Loadouts, Components
- Star Citizen 4.8 Salvage Guide: Best RMC Farming, Adagio Rep, and Ships to Use
- Star Citizen 4.8 Best Component Blueprints: Fast Farming Roadmap for Crafting
- Star Citizen 4.8.3 XenoThreat Event Guide: Fast Points, Best Missions, Rewards, and Ship Strategy
- Star Citizen 4.8 aUEC Farming Guide: Best Money Methods, First Ships, and Fast Progression
Popular Category Lists
- Grow a Garden / (286)
- ARC Raiders / (263)
- CoD: Black Ops 7 / (166)
- Monopoly Go / (146)
- MLB 26 / (145)
- Star Citizen / (113)
- Steal a Brainrot / (89)
- ARK Survival Ascended / (70)
- Sailor Piece / (68)
- Forza Horizon 6 / (61)
- Diablo IV / (61)
- Blox Fruits / (60)
- CoD: BLACK OPS 6 / (55)
- Adopt Me / (53)
- Path of Exile 2 / (48)
- Monster Hunter Wilds / (46)
- Windrose / (44)
- Path of Exile / (40)
- Grow a Garden 2 / (40)
- Bee Swarm Simulator / (36)