


 0
0Windrose Best Starter Build Guide: OP Rapier + Pistol Setup for Early to Mid Game
If you want a build that comes online early, scales well into mid game, and still feels practical in real fights, this is one of the best setups to run in Windrose right now.
We're using a simple but very efficient combat loop:
- open with a pistol shot,
- stack Bleed with Rapier of a Thousand Cuts,
- then swap to Sturdy Rapier for better sustained damage.
What makes this build strong is that every Windrose weapon has a clear job. From my experience with early progression builds, that usually matters more than flashy numbers. A setup feels powerful when it is easy to repeat under pressure, and this one absolutely is.
- Core Build Setup
- Best Rotation
- Early Version vs Mid Game Version
- Best Talents at Level 6
- Safe Path
- Damage Path
- Best Attributes
- Best Food and Armor
- Common Mistakes
- FAQ
- Is this build good before I get ascended weapons?
- Why is Sturdy Rapier better after 5 Bleed stacks?
- Is the safe talent path better than the damage path?
- What stat should I level first?
- Final Thoughts
↖ Core Build Setup
Here's the short version of the build:
| Slot | Best Choice | Why It Matters |
|---|---|---|
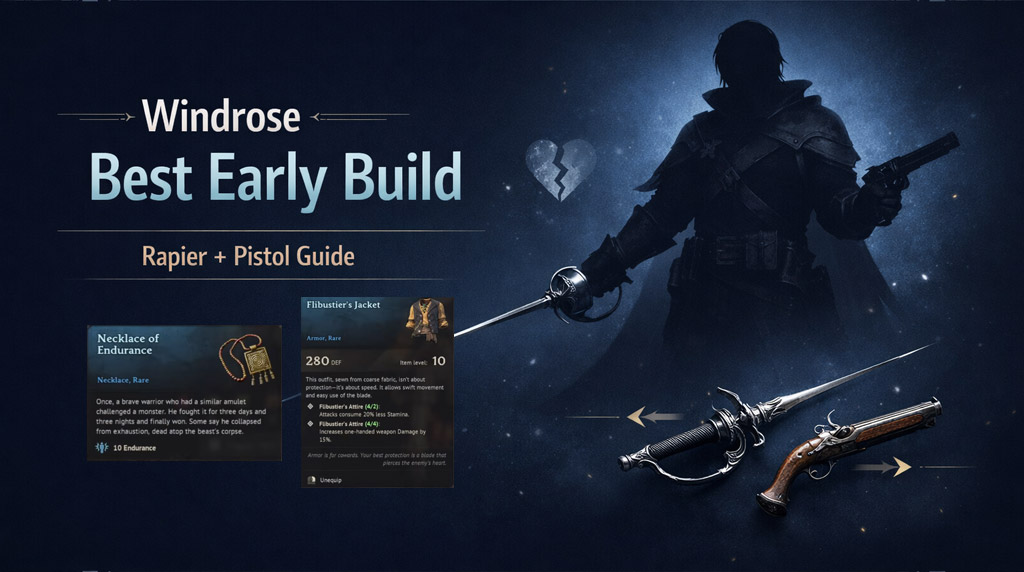
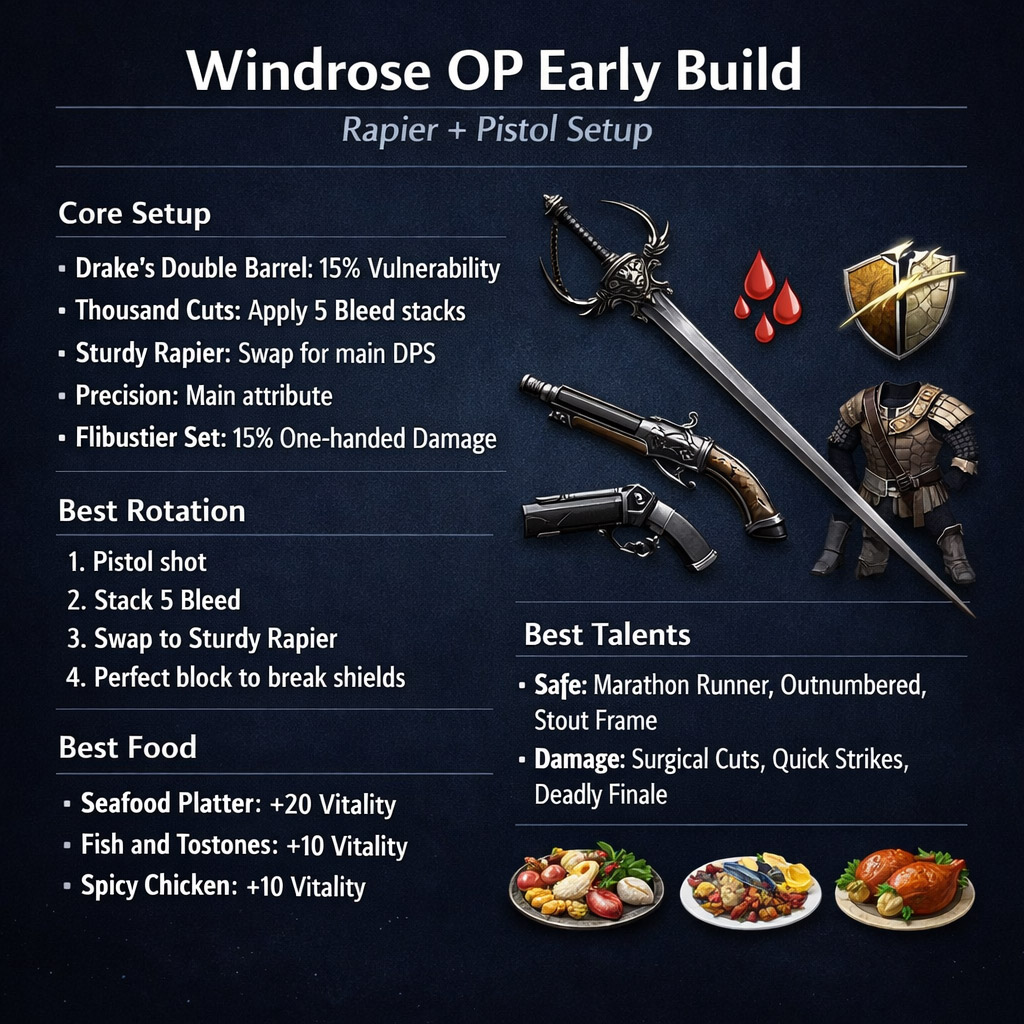
| Pistol | Drake's Double Barrel Pistol | Applies 15% Vulnerability in the stronger version |
| Bleed Weapon | Rapier of a Thousand Cuts | Quickly builds 5 Bleed stacks |
| Main DPS | Sturdy Rapier | Better Precision scaling and stronger regular hits |
| Armor | Flibustier Set | 15% more one-handed weapon damage |
| Main Stat | Precision | Best damage scaling for rapiers and pistols |
The key detail: don't stay on Thousand Cuts too long.
Once the target has 5 Bleed stacks, its job is done. After that, Sturdy Rapier gives better value because it scales harder with Precision and hits more consistently.
That is where a lot of players lose damage without realizing it.
↖ Best Rotation
This build works because the rotation is clean and easy to repeat.
| Step | Action | Goal |
|---|---|---|
| 1 | Shoot with pistol | Apply Vulnerability if available |
| 2 | Swap to Thousand Cuts | Start stacking Bleed |
| 3 | Reach 5 Bleed stacks | Finish setup |
| 4 | Swap to Sturdy Rapier | Deal better sustained damage |
| 5 | Use perfect blocks when possible | Break shields and create stun windows |
In practice, this means we are not trying to force one weapon to do everything. We set up first, then cash out damage with the weapon that scales better.
A small but important tip: guns reload passively during combat. So after firing, just continue the rotation normally instead of worrying about manual reload timing.
↖ Early Version vs Mid Game Version
The full setup is strongest in mid game, but the build still works earlier with blue gear.
| Version | What Changes | Should You Use It? |
|---|---|---|
| Early / Blue | Pistol may not apply Vulnerability | Yes, still strong |
| Mid Game / Ascended | Full opener + better scaling | Best version |
If you're still early, just use any pistol you have access to and focus on the main loop:
Bleed first, swap second.
That part is what carries the build.
↖ Best Talents at Level 6
There are two clean ways to build this depending on whether you want more safety or more damage.
↖ Safe Path
| Talent | Why Pick It |
|---|---|
| Marathon Runner | More stamina means safer fights |
| Outnumbered | Up to 10% damage in common multi-enemy fights |
| Stout Frame | Extra max HP helps a lot early |
This path is better if you're still learning enemy patterns or pushing harder areas.
↖ Damage Path
| Talent | Why Pick It |
|---|---|
| Surgical Cuts | Crit chance is low, but the burst is noticeable |
| Quick Strikes / Perfect Counter / Duelist | Pick based on fight type |
| Deadly Finale | Stronger consecutive-hit damage |
A practical rule:
- Quick Strikes for general use
- Perfect Counter if you can parry consistently
- Duelist for bosses
One of the nice things here is that talents can be reset, so we can adapt instead of locking ourselves into one route.
↖ Best Attributes
For this build, the stat priority is simple.
| Attribute | Priority | Reason |
|---|---|---|
| Precision | Max | Best scaling for both rapier and pistol damage |
From testing similar early-game weapon setups, split stats usually feel worse than they look on paper. Since each point gives around 2% value in its matching stat, putting everything into Precision gives the cleanest return.
If you find your damage falling off, this is the first thing to check.
↖ Best Food and Armor
Food is a bigger part of survivability than many players expect in early progression.
| Option | Bonus | Use Case |
|---|---|---|
| Seafood Platter | +20 Vitality | Best early-to-mid game food |
| Fish and Tostones | +10 Vitality | Good secondary option |
| Spicy Chicken | +10 Vitality | Another solid backup |
| Flibustier Set | 15% one-handed damage | Best armor for this build |
If you unlock Seafood Platter after the first boss, use it. The extra Vitality is very noticeable in real combat, especially if you're taking chip damage or learning perfect block timings.
↖ Common Mistakes
These are the mistakes that usually make the build feel weaker than it really is:
- staying on Thousand Cuts after 5 Bleed stacks
- spreading attribute points instead of stacking Precision
- ignoring perfect block value on Sturdy Rapier
- underusing food buffs for survivability
- picking damage talents when you really need consistency
If you fix those, the build feels much smoother almost immediately.
↖ FAQ
↖ Is this build good before I get ascended weapons?
Yes. The stronger version needs better gear, but the core setup already works with blue weapons. The most important part is still applying Bleed and swapping to Sturdy Rapier at the right time.
↖ Why is Sturdy Rapier better after 5 Bleed stacks?
Because Rapier of a Thousand Cuts is mainly a setup weapon. After Bleed is fully stacked, Sturdy Rapier gets more value from your Precision investment and deals better regular-hit damage.
↖ Is the safe talent path better than the damage path?
For most players early on, yes. It is more forgiving and easier to use consistently. The damage path becomes better once you are comfortable with parries and enemy patterns.
↖ What stat should I level first?
Precision, every time, for this build.
↖ Final Thoughts
This is one of the cleanest early-to-mid game builds in Windrose because it has a clear loop, strong scaling, and very little wasted motion. We open, stack Bleed, swap weapons, and keep pressure high while staying surprisingly safe through perfect blocks and Vitality support.
It is not just strong on paper. It holds up in real fights, which is usually the best test of whether a build is truly worth recommending.

Most Popular Posts
- Windrose Best Weapons Tier List, Traits, and Build Picks
- Windrose Completion Guide: Max Comfort, Weapons, Armor, Quests and Missable Items
- Windrose Best Rings, OP Necklaces, Blackbeard Maps & Upgrade Tips
- Windrose Best Starter Build Guide: OP Rapier + Pistol Setup for Early to Mid Game
- Windrose OP Guide: Combat, Skills, Gear, Food, Jewelry, and Armor Sets
- Windrose Agility Build Guide: Best Stats, Weapons, Talents, Food and Boss Setup
Popular Category Lists
- Grow a Garden / (286)
- ARC Raiders / (262)
- CoD: Black Ops 7 / (166)
- Monopoly Go / (146)
- MLB 26 / (144)
- Star Citizen / (111)
- Steal a Brainrot / (89)
- Sailor Piece / (68)
- ARK Survival Ascended / (66)
- Diablo IV / (61)
- Forza Horizon 6 / (60)
- Blox Fruits / (60)
- CoD: BLACK OPS 6 / (55)
- Adopt Me / (53)
- Path of Exile 2 / (48)
- Monster Hunter Wilds / (46)
- Windrose / (44)
- Path of Exile / (40)
- Grow a Garden 2 / (38)
- Bee Swarm Simulator / (36)


