0
0Windrose Dry Dock and Coastal House Build Guide: Pirate Port Layout, Ship Frame, and Decoration Tips
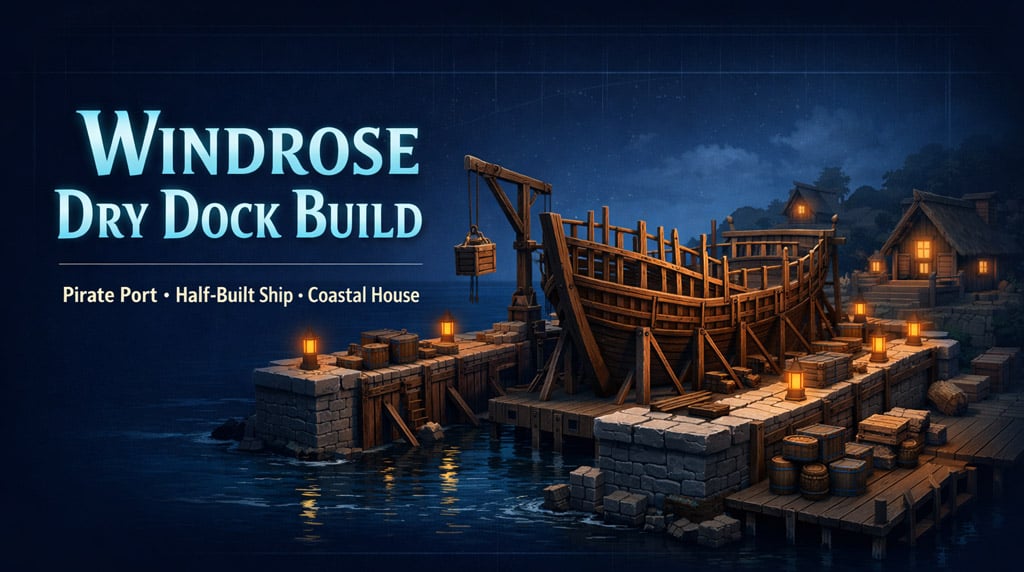
A strong pirate port needs a reason to exist. In Windrose, the fastest way to make your harbor feel alive is to add a dry dock with a half-built ship and a coastal house beside it.
- Windrose Dry Dock Build: Best Layout and Dimensions
- Core Dry Dock Dimensions
- Dry Dock Shape
- How to Build the Dry Dock Structure
- Step 1: Place the Raised Foundations
- Step 2: Add Stairs and Access Points
- Step 3: Add Structural Supports
- Windrose Ship Skeleton Build: Half-Built Hull Guide
- Ship Frame Layout
- Step 1: Build the Hull Outline
- Step 2: Add Ribs and Partial Planking
- Step 3: Build the Stern Cabin
- Step 4: Add Unfinished Masts
- Dry Dock Decoration: Make It Look Like a Working Shipyard
- Best Dry Dock Decorations
- Add a Rear Workshop
- Windrose Coastal House Build: Compact Pirate Port House
- Best Coastal House Dimensions
- How to Build the Coastal House
- Step 1: Build the Stone Storage Floor
- Step 2: Hide Door and Window Edges
- Step 3: Add the Upper Floor
- Step 4: Build Balcony and Flower Boxes
- Roof, Dormers, and Exterior Details
- Main Roof Setup
- Add Roof Extensions
- Common Windrose Building Problems and Fixes
- FAQ
- What is the best dry dock size in Windrose?
- Should the ship in the dry dock be finished?
- How do I make a Windrose dry dock look realistic?
- What materials work best for a coastal house in Windrose?
- How do I stop pieces from clipping or snapping badly?
- Summary
The dry dock gives your base a shipbuilding story.
The house adds height, storage, and a lived-in coastline.
Build it right, and the area stops looking like some docks near water. It starts looking like a working pirate town.
↖ Windrose Dry Dock Build: Best Layout and Dimensions
Start with the dry dock. It should sit right on the waterline, with the open end facing the sea.
↖ Core Dry Dock Dimensions
| Part | Recommended Size | Why It Works |
|---|---|---|
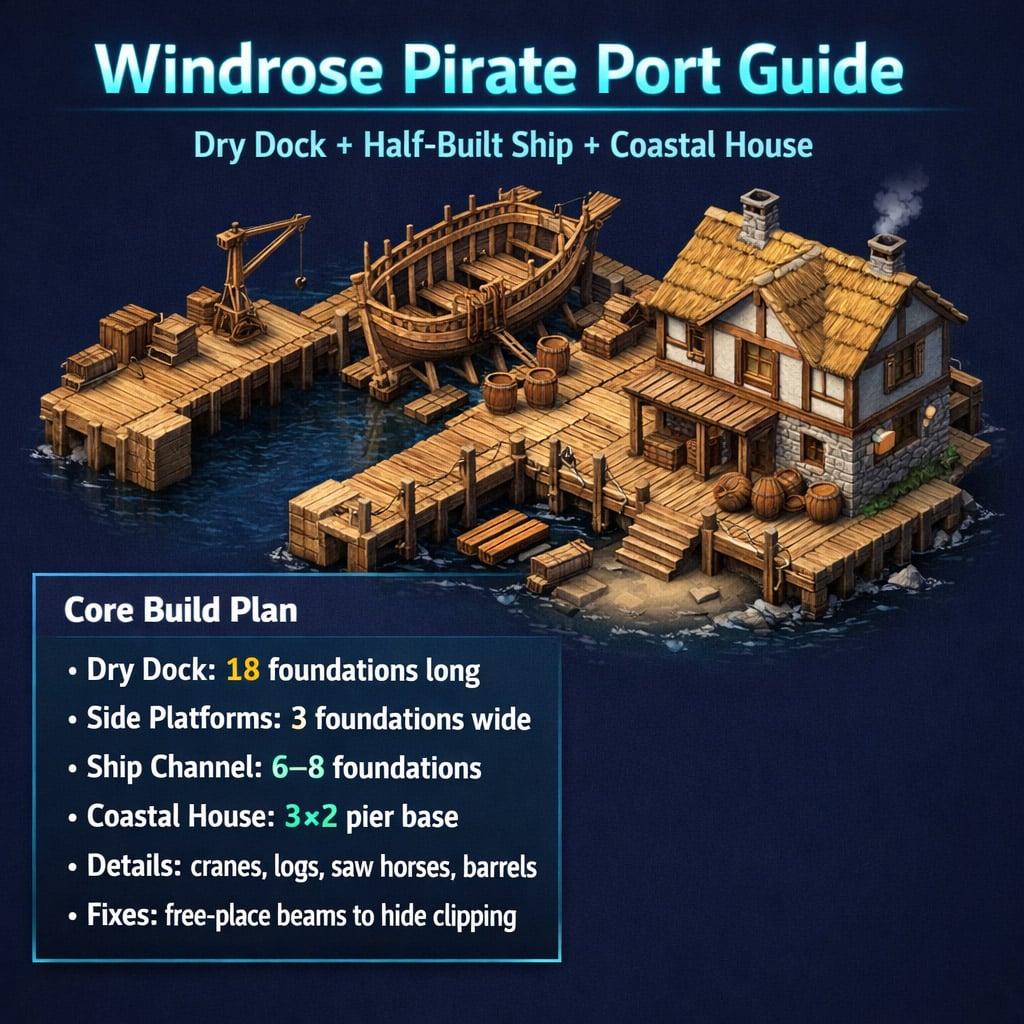
| Main length | 18 foundations | Fits a small-to-medium ship |
| Side platform width | 3 foundations | Enough room for walking and clutter |
| Rear platform depth | 3 foundations | Good space for a workshop |
| Inner ship channel | 6–8 foundations wide | Leaves room for hull ribs |
| Support spacing | Every 4 foundations | Clean, readable structure |
Raise the dock slightly above the terrain. This matters.
If the ship sits too low, the hull frame disappears into the floor. If the platform is raised, the supports, ribs, and launch slope read clearly from a distance.
↖ Dry Dock Shape
Build a simple U-shaped dock:
- Left platform
- Right platform
- Rear work platform
- Open front facing water
- Ship skeleton in the center
Keep the sea-facing end open. A dry dock should look like the ship can eventually slide into the water.
↖ How to Build the Dry Dock Structure
The base does not need to be complicated. It needs to look heavy.
↖ Step 1: Place the Raised Foundations
Build one side first:
- Place 18 foundations in a straight line.
- Make it 3 foundations wide.
- Add stairs before closing the dock shape.
- Mirror the second side.
- Connect both sides at the rear.
If the ground slopes, raise the whole platform instead of fighting the terrain. Uneven coastal ground is normal in Windrose. A raised dock hides it better.
↖ Step 2: Add Stairs and Access Points
Good access keeps the build believable.
| Access Point | Use |
|---|---|
| Side stairs | Connects dry dock to town path |
| Rear stairs | Leads into workshop zone |
| Small ship ramps | Makes the ship look actively worked on |
If stairs do not snap cleanly, turn snapping off and free-place them. Hide small gaps with timber beams or rope railings.
↖ Step 3: Add Structural Supports
Inside the dry dock, use beams to create ship supports.
Place:
- Long bottom rails down the center
- Side supports every 4 foundations
- Vertical pillars around dock edges
- Sloped beams toward the water
This gives the dock a launch-track feel. It also stops the center from looking empty.
↖ Windrose Ship Skeleton Build: Half-Built Hull Guide
The ship is the focal point. Do not fully finish it.
A dry dock looks better with a half-built ship: exposed ribs, partial decking, unfinished masts, and scattered materials.
↖ Ship Frame Layout
| Ship Section | Build Style |
|---|---|
| Bow / front | Narrow, pointed, steep |
| Middle | Wider, open ribs |
| Stern / rear | Taller, heavier |
| Bottom | Continuous beam line |
| Deck | Partly filled |
| Sides | Some planks, visible gaps |
↖ Step 1: Build the Hull Outline
Start with the bottom.
- Place a central beam line.
- Add angled beams upward on both sides.
- Mirror the shape.
- Taper the front.
- Raise the rear slightly.
The silhouette matters more than perfect symmetry. From a distance, players should read it instantly as a ship.
↖ Step 2: Add Ribs and Partial Planking
Use beams for ribs. Keep gaps.
Best pattern:
- Fill some side panels.
- Leave other ribs exposed.
- Add a partial deck.
- Keep the bow more open.
- Build up the stern.
This creates the under construction look. Too much planking makes it look finished. Too little makes it look like scaffolding.
↖ Step 3: Build the Stern Cabin
The rear needs height. Add a small captain's section.
Use:
- Raised rear deck
- Small cabin wall
- Door opening
- Windows
- Railings
If the stairs look too fancy, cover the sides with rough timber beams. It fits the pirate worksite style better.
↖ Step 4: Add Unfinished Masts
Place one or two bare mast beams.
No sails. No full rigging.
The ship is still being built. Bare masts sell that idea immediately.
↖ Dry Dock Decoration: Make It Look Like a Working Shipyard
Clutter only works when it has a job. Random barrels do not help. Work zones do.
↖ Best Dry Dock Decorations
| Decoration | Best Placement | Purpose |
|---|---|---|
| Logs | Beside ship / workshop | Raw materials |
| Saw horses | Rear platform | Wood cutting area |
| Cranes | Side platforms | Lifting ship parts |
| Barrels | Corners / workshop | Supplies, tar, water |
| Storage boxes | Near walls | Tools and fittings |
| Lanterns | Under roof / stairs | Night work detail |
| Rope railings | Outer edges | Safety and polish |
↖ Add a Rear Workshop
At the back of the dry dock, build a small roofed work area.
Use:
- Timber pillars
- Simple roof
- Partial walls
- Workbench
- Storage
- Logs
- Barrels
If you can place a wharf object partly near the water, sink it slightly so it blends into the dock. It makes the dry dock feel functional, not decorative.
↖ Windrose Coastal House Build: Compact Pirate Port House
The coastal house should support the dock visually. It gives the harbor height and a clear storage/living split.
↖ Best Coastal House Dimensions
| Part | Recommended Setup |
|---|---|
| Foundation | 3 by 2 pier foundations |
| Lower floor | Stone storage area |
| Upper floor | Plaster + timber living area |
| Roof | Reed or large roof pieces |
| Style | Weathered coastal / pirate |
Pier foundations are ideal here. They already look like dockside construction.
If the ground is uneven, sink the pier foundations slightly. Keep them just above ground. Cover ugly edges later with stone blocks and beams.
↖ How to Build the Coastal House
↖ Step 1: Build the Stone Storage Floor
Use stone for the lower level.
Recommended setup:
| Feature | Best Choice |
|---|---|
| Wall height | 5 small wall units |
| Door | Double door |
| Windows | Few and narrow |
| Corners | Stone block reinforcement |
| Trim | Timber beams |
This floor should feel tough. It sits near water, so stone makes sense.
↖ Step 2: Hide Door and Window Edges
Windrose doors and windows often show unwanted trim. Hide it.
Use this method:
1. Free-place the door slightly behind the wall face.
2. Add stone around it.
3. Place timber pillars on both sides.
4. Add a horizontal beam above.
5. Repeat around windows.
This makes the build look custom instead of snapped together.
↖ Step 3: Add the Upper Floor
Use plaster walls and timber framing.
Best placements:
- Beams on corners
- Beams under roofline
- Beams around windows
- Horizontal beams across plaster walls
- Vertical supports under balconies
If beams sink into plaster, free-place the first one slightly outward. Then snap the rest from that anchor.
↖ Step 4: Build Balcony and Flower Boxes
A coastal house needs exterior life.
Add:
- Small balcony
- Custom railing
- Diagonal supports
- Seed-bed flower boxes
- Coco plum, pepper, or other compact plants
Frame flower boxes with beams. It stops them from looking like random farming objects glued to the wall.
↖ Roof, Dormers, and Exterior Details
The roof decides whether the house looks average or advanced.
↖ Main Roof Setup
Use:
- Main gable roof
- One-block overhang
- Roof ridge
- Beam trim
- Dormer windows
- Chimney
Build temporary scaffolding. Do not try to roof this house from the ground. It wastes time.
↖ Add Roof Extensions
Good roof details:
| Detail | Effect |
|---|---|
| Front extension | Breaks flat wall shape |
| Dormer windows | Adds usable top-floor feel |
| Curved eaves | Gives custom coastal style |
| Chimney | Makes house feel functional |
| Beam trim | Hides rough edges |
For curved roof edges, use rotated beams:
- First beam straight
- Next beam turned 15 degrees
- Next beam turned 30 degrees
- Connect back into the roofline
Do the cleaner side first. Then copy it.
↖ Common Windrose Building Problems and Fixes
| Problem | Fix |
|---|---|
| Ship looks flat | Raise side ribs and stern |
| Dry dock feels empty | Add logs, cranes, saw horses |
| House looks boxy | Add balcony, dormers, roof trim |
| Door trim looks ugly | Hide it with beams and stone |
| Beams clip through roof | Remove and free-place higher |
| Stairs do not align | Free-place, then cover gaps |
| Decorations feel random | Group them into work zones |
| Roof is hard to build | Use scaffolding |
The best fix is usually free placement. Snapping builds the structure. Free placement makes it look good.
↖ FAQ
↖ What is the best dry dock size in Windrose?
Use 18 foundations long and 3 foundations wide for each side platform. Keep the inner channel around 6–8 foundations wide. This size fits a readable half-built ship without making the dock oversized.
↖ Should the ship in the dry dock be finished?
No. A half-built ship looks better. Use exposed ribs, partial planking, bare masts, and unfinished decking. It makes the dry dock feel active instead of decorative.
↖ How do I make a Windrose dry dock look realistic?
Use work zones. Place logs, saw horses, cranes, barrels, and storage boxes where they make sense. Keep access ramps open and leave the water-facing end clear.
↖ What materials work best for a coastal house in Windrose?
Use stone for the lower storage floor and plaster with timber beams for the upper floor. This gives the house a strong coastal look: heavy below, detailed above.
↖ How do I stop pieces from clipping or snapping badly?
Use free placement. Place a temporary beam or wall as an anchor if needed. Once the piece sits correctly, remove the temporary support and hide minor gaps with beams.
↖ Summary
Build the dry dock first, then the ship skeleton, then the worksite details. After that, add the coastal house as the vertical anchor for the harbor.
Key numbers:
- Dry dock length: 18 foundations
- Side platform width: 3 foundations
- Ship channel: 6–8 foundations
- Coastal house base: 3 by 2 pier foundations
- Storage floor height: 5 small wall units
- Support spacing: every 4 foundations
The result is a compact Windrose pirate port that looks functional: ships under construction, supplies stacked nearby, workers' areas defined, and a coastal house tying the whole harbor together.

Most Popular Posts
- Windrose Best Weapons Tier List, Traits, and Build Picks
- Windrose Completion Guide: Max Comfort, Weapons, Armor, Quests and Missable Items
- Windrose Best Rings, OP Necklaces, Blackbeard Maps & Upgrade Tips
- Windrose Best Starter Build Guide: OP Rapier + Pistol Setup for Early to Mid Game
- Windrose OP Guide: Combat, Skills, Gear, Food, Jewelry, and Armor Sets
- Windrose Agility Build Guide: Best Stats, Weapons, Talents, Food and Boss Setup
Popular Category Lists
- Grow a Garden / (286)
- ARC Raiders / (262)
- CoD: Black Ops 7 / (166)
- Monopoly Go / (146)
- MLB 26 / (144)
- Star Citizen / (111)
- Steal a Brainrot / (89)
- Sailor Piece / (68)
- ARK Survival Ascended / (66)
- Diablo IV / (61)
- Forza Horizon 6 / (60)
- Blox Fruits / (60)
- CoD: BLACK OPS 6 / (55)
- Adopt Me / (53)
- Path of Exile 2 / (48)
- Monster Hunter Wilds / (46)
- Windrose / (44)
- Path of Exile / (40)
- Grow a Garden 2 / (38)
- Bee Swarm Simulator / (36)