


 0
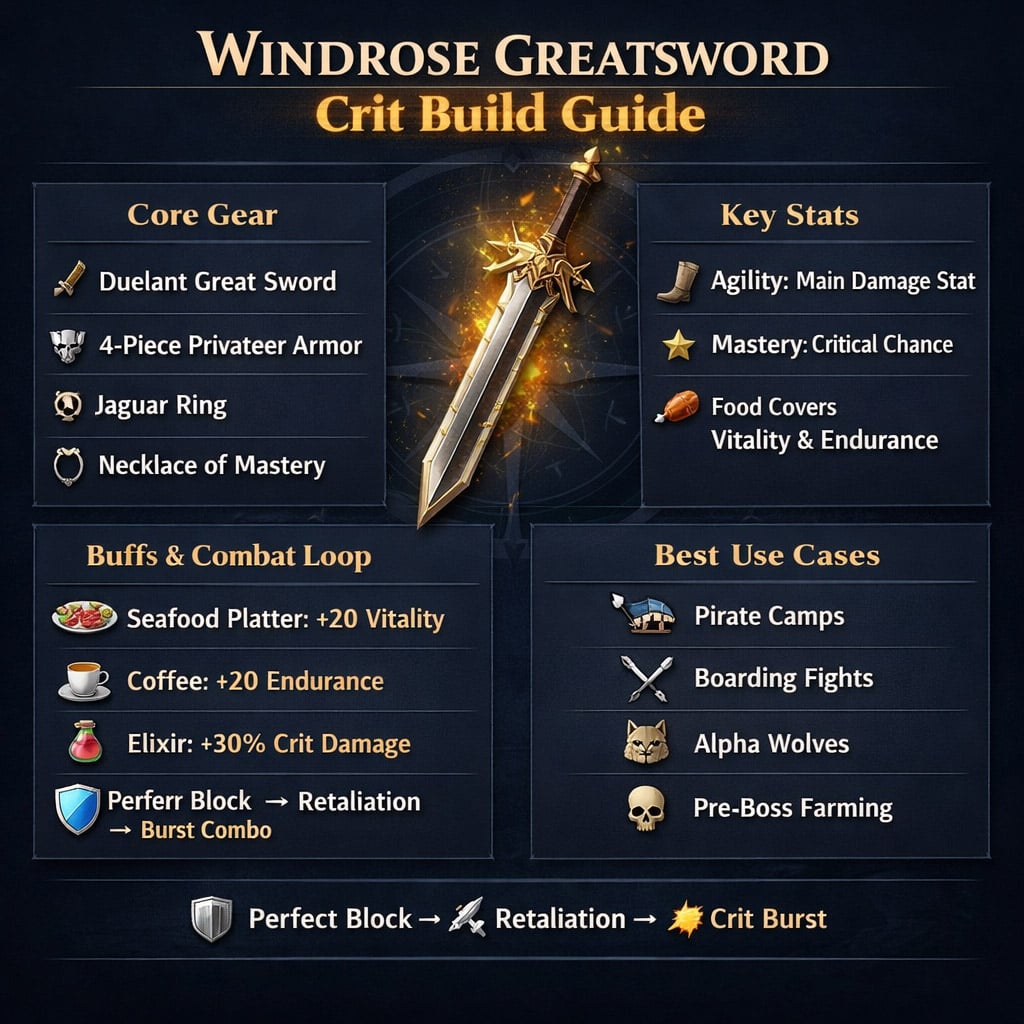
0Windrose Greatsword Crit Build Guide: Best Privateer Armor Setup for High Damage
This Windrose Greatsword build is built for one job: delete enemies fast.
We stack crit chance, crit damage, Retaliation, and slash damage. The trade-off is simple: lower natural health and stamina. Food fixes most of that, but only if you keep buffs active.

If you like aggressive melee but still want skill-based defense, this setup is nasty.
- Windrose Greatsword Crit Build Overview
- Best Gear for the Windrose Greatsword Build
- Duelant Great Sword
- Privateer Armor Set
- Jewelry and Consumables
- Best Stats for the Windrose Crit Greatsword Build
- Attribute Priority
- Should You Go Past the Agility Soft Cap?
- Best Talents for the Build
- Food Buffs Are Mandatory
- Healing Rules
- Combat Rotation: How to Play the Build
- Standard Melee Loop
- Enemy Priority
- Needle in a Haystack Quest Route
- Main Route
- Camp Loot to Watch For
- Bitter Pill Quest Route
- Objective Flow
- Why This Quest Is Worth It
- Naval Combat Strategy
- Ship Prep Checklist
- Fight Plan
- Boarding Combat Tips
- Base Upgrades Worth Keeping
- Best Pre-Boss Checklist
- FAQ
- What is the best armor for this Windrose Greatsword crit build?
- Is the Duelant Great Sword worth using?
- What stats should I level first?
- Do I need Vitality for this build?
- Why does this build run out of stamina?
- What food should I use?
- When should I use Elixir of Concentration?
- What enemies are most dangerous?
- Is the Rapier of a Thousand Cuts good?
- Should I complete Bitter Pill before the next boss?
- Summary
↖ Windrose Greatsword Crit Build Overview
This build uses the Duelant Great Sword with 4-piece Privateer Armor.
The damage spikes hard once you land perfect blocks and start chaining hits.
| Slot | Best Choice | Reason |
|---|---|---|
| Weapon | Duelant Great Sword | Retaliation stacks from perfect blocks |
| Armor | 4-piece Privateer Armor | Crit chance and crit damage |
| Main Stat | Agility | Boosts Greatsword damage |
| Secondary Stat | Mastery | Raises base crit chance |
| Food | Seafood Platter + Coffee | Covers health and stamina |
| Consumable | Elixir of Concentration | Big crit damage boost |
The build hits harder than a safe Vitality setup, but it punishes sloppy stamina use.
↖ Best Gear for the Windrose Greatsword Build
↖ Duelant Great Sword
The weapon effect carries the build.
| Effect | Value |
|---|---|
| Perfect block grants Retaliation | +10% melee damage |
| Max stacks | 3 stacks |
| Total bonus | +30% melee damage |
| At max stacks | Perfect blocks restore extra health |
This means perfect blocking is not optional. It is your damage ramp and your sustain tool.
If you keep getting hit, you lose Retaliation. If you block cleanly, enemies melt.
↖ Privateer Armor Set
Use 4 pieces.
| Set Bonus | Value |
|---|---|
| Critical hit chance | +10% |
| Critical damage per nearby enemy | +10% |
| Crit damage cap | +30% |
This set is excellent in pirate camps and boarding fights because enemies usually group up.
More nearby enemies means more crit damage. Dangerous? Yes. Profitable? Also yes.
↖ Jewelry and Consumables
| Item | Use |
|---|---|
| Necklace of Mastery | Adds +10 Mastery |
| Jaguar Ring | Adds crit chance |
| Elixir of Concentration | Adds +30% crit damage for 15 minutes |
| Bandages | Cheap healing between trades |
| Potions | Emergency heal only |
With this setup, crits over 2,000 damage are realistic. In crowded fights or boarding battles, the burst can spike much higher.
↖ Best Stats for the Windrose Crit Greatsword Build
↖ Attribute Priority
| Stat | Priority | Why |
|---|---|---|
| Agility | High | Scales Greatsword damage |
| Mastery | Medium | Boosts crit chance |
| Vitality | Low | Covered by food |
| Endurance | Low | Covered by food |
A strong setup is:
- Agility: push high
- Mastery: reach around 20 effective
- Vitality: food-supported
- Endurance: food-supported
Example:
| Source | Mastery |
|---|---|
| Assigned points | 10 |
| Necklace bonus | +10 |
| Effective total | 20 |
That frees more level-up points for Agility.
↖ Should You Go Past the Agility Soft Cap?
Yes, if you are surviving.
A soft cap means weaker returns. It does not mean zero returns.
If your damage still rises, the point still works. If you start dying too often, stop forcing Agility and add Vitality or Endurance.
↖ Best Talents for the Build
| Talent | Effect | Why It Matters |
|---|---|---|
| Deep Cuts | +6% slash damage | Greatsword uses slash damage |
| Perfect Counter | +12% crit chance after perfect block | Core burst trigger |
| Deadly Finale | +5% damage per hit, up to 5 hits | Rewards clean combos |
| Agile | Less stamina used by dash/jump | Helps repositioning |
The main combo is:
1. Perfect block
2. Gain Retaliation
3. Trigger Perfect Counter
4. Chain hits for Deadly Finale
5. Back off before stamina hits zero
Do not greed. Greed is how musketeers and wolves turn you into floor decoration.
↖ Food Buffs Are Mandatory
This build skips natural tankiness. Food replaces it.
| Food | Buff | Purpose |
|---|---|---|
| Seafood Platter | +20 Vitality | Bigger health pool |
| Coffee | +20 Endurance | Bigger stamina pool |
Use both before:
- Pirate camps
- Ruins
- Boss fights
- Ship boarding
- Alpha wolf fights
- Any level 10 enemy zone
If your food expires mid-fight, your build drops from crit monster to paper pirate.
↖ Healing Rules
| Situation | Use |
|---|---|
| Small damage | Bandage |
| Heavy burst | Potion |
| Poison or bleed | Potion early |
| Before boarding | Heal to full |
| Before boss | Full food, full healing, elixir active |
Carry more bandages than you think you need. Around 8–12 feels comfortable.
↖ Combat Rotation: How to Play the Build
↖ Standard Melee Loop
Use this against most enemies:
1. Let the enemy swing.
2. Land a perfect block.
3. Attack 2–3 times.
4. Stop before stamina empties.
5. Reposition.
6. Repeat.
This build dies when stamina hits zero. Keep enough stamina to dodge, block, or sprint behind cover.
↖ Enemy Priority
| Enemy | Threat | Answer |
|---|---|---|
| Musketeer | High ranged burst | Rush after shot or use cover |
| Grenadier | Area denial | Bait bombs, punish recovery |
| Lieutenant | Tanky melee | Stack Retaliation first |
| Sailor | Basic melee | Block and counter |
| Wolf | Fast pressure | Perfect block bites |
| Alpha Wolf | Heavy lunge | Bait, dodge, punish |
Kill ranged enemies first whenever possible. One musket shot can erase your Retaliation and force a heal.
↖ Needle in a Haystack Quest Route
This quest sends you after three temple keys.
Do not waste time re-clearing old ruin puzzles unless the objective points there. The clue is usually at the camp near the ruins, not inside every old chamber.
↖ Main Route
| Step | Task |
|---|---|
| 1 | Search the camp near the ruins |
| 2 | Read the note on the table |
| 3 | Track down three ritual keys |
| 4 | Clear pirate camps |
| 5 | Loot lieutenants, chests, and bodies |
| 6 | Return to the temple gate |
↖ Camp Loot to Watch For
| Loot | Why It Matters |
|---|---|
| Ritual Keys | Main quest progress |
| Rapier of a Thousand Cuts | Strong bleed weapon for future builds |
| Silver Ingots | Upgrade material |
| Decorations | Base comfort and building options |
| Rum / supplies | Crafting and selling |
The Rapier of a Thousand Cuts is worth storing. Its bleed stacks can support a full bleed build later.
↖ Bitter Pill Quest Route
This side quest is worth doing before the next boss.
It gives XP, gold, story progress, and a serious naval fight.
↖ Objective Flow
| Step | Task |
|---|---|
| 1 | Search the pirate island |
| 2 | Clear level 10 enemies |
| 3 | Find marked gunpowder crates |
| 4 | Report the evidence |
| 5 | Track the hostage lead |
| 6 | Fight ships and board the target vessel |
The island is bigger than it looks. Expect hidden sections, underground chambers, and a lot of enemies.
↖ Why This Quest Is Worth It
| Reward | Value |
|---|---|
| Gold Ingots | Great for jewelry upgrades |
| XP | Helps push level progression |
| Decorations | Adds comfort and base detail |
| Ship combat practice | Prepares you for harder naval fights |
| Story progress | Advances the Tortuga betrayal plot |
Some containers refill later, and gold containers can become a strong farming spot. Mark the location mentally.
↖ Naval Combat Strategy
You may fight multiple level 10 ships during this route.
Do not spread damage. Remove one ship at a time.
↖ Ship Prep Checklist
| Item | Recommended |
|---|---|
| Repair Kits | As many as possible |
| Damage Grog | 1+ |
| Damage Reduction Grog | 1+ |
| Food Buffs | Active |
| Bandages / Potions | Stocked for boarding |
↖ Fight Plan
1. Focus one ship.
2. Use broadside damage.
3. Repair before danger level.
4. Disable the main ship.
5. Board only when healed.
One sunk ship means fewer cannons shooting at you. Simple math. Good math.
↖ Boarding Combat Tips
Boarding fights are messy. Your sailors help, but do not trust them to win alone.
| Problem | Fix |
|---|---|
| Enemy pileup | Fight from the edge |
| Low visibility | Watch nameplates and armor colors |
| Heavy melee pressure | Back off and bandage |
| Friendly body-blocking | Reposition around the deck |
| Sergeants survive too long | Let allies distract, then burst |
Do not jump into the center of the brawl with low stamina. That is the fastest way to waste a good run.
↖ Base Upgrades Worth Keeping
Base comfort is not just cosmetic. Better comfort gives better rest value and stamina support.
| Unlock | Use |
|---|---|
| Luxurious Bed | Big comfort boost |
| Books and Scrolls | Shelf/table decoration |
| Pier Canopy | Dock detail |
| Rope Bundles | Dock clutter |
| Crane Pieces | Port-style base design |
| Flag Pole | Large dock decoration |
Push comfort when you unlock new items. A comfort level around the mid-20s already feels useful.
↖ Best Pre-Boss Checklist
Before the next boss, do this:
| Goal | Reason |
|---|---|
| Finish 1–2 side quests | More XP and rewards |
| Upgrade Greatsword | Direct damage gain |
| Upgrade Privateer Armor | Better survival |
| Improve jewelry | More crit scaling |
| Farm gold | Needed for upgrades |
| Stock bandages and potions | Prevents dumb deaths |
| Refresh food supply | Keeps build functional |
If you are dying often, add defense. If fights feel clean, keep pumping Agility.
↖ FAQ
↖ What is the best armor for this Windrose Greatsword crit build?
Use 4-piece Privateer Armor. It gives +10% crit chance and up to +30% crit damage based on nearby enemies.
↖ Is the Duelant Great Sword worth using?
Yes. Its Retaliation effect gives up to +30% melee damage from perfect blocks. It also adds sustain at max stacks.
↖ What stats should I level first?
Prioritize Agility, then Mastery. Use food to cover Vitality and Endurance.
↖ Do I need Vitality for this build?
Not early, if you keep Seafood Platter active. If you keep dying, add Vitality instead of forcing more damage.
↖ Why does this build run out of stamina?
You are probably over-swinging. Attack 2–3 times, then reset. Keep stamina for blocking and repositioning.
↖ What food should I use?
Use Seafood Platter for +20 Vitality and Coffee for +20 Endurance.
↖ When should I use Elixir of Concentration?
Use it before major camps, boss fights, and boarding fights. The +30% crit damage boost is too strong to waste on small skirmishes.
↖ What enemies are most dangerous?
Musketeers and grenadiers. They interrupt your rhythm, remove Retaliation, and force healing.
↖ Is the Rapier of a Thousand Cuts good?
Yes. Keep it. The bleed stacks make it a strong candidate for a future bleed build.
↖ Should I complete Bitter Pill before the next boss?
Yes. It gives XP, gold, upgrades, decorations, and naval combat practice. It is one of the better pre-boss side quests.
↖ Summary
This Windrose Greatsword crit build is a high-risk, high-reward melee setup.
Core pieces:
- Duelant Great Sword
- 4-piece Privateer Armor
- High Agility
- Effective 20 Mastery
- Seafood Platter
- Coffee
- Elixir of Concentration
- Perfect block timing
Play it clean and it crushes pirate camps, wolves, lieutenants, and boarding fights. Play it greedy and stamina will betray you fast.
The best version of this build blocks first, bursts second, and never enters a serious fight without food buffs active.

Most Popular Posts
- Windrose Best Weapons Tier List, Traits, and Build Picks
- Windrose Completion Guide: Max Comfort, Weapons, Armor, Quests and Missable Items
- Windrose Best Rings, OP Necklaces, Blackbeard Maps & Upgrade Tips
- Windrose Best Starter Build Guide: OP Rapier + Pistol Setup for Early to Mid Game
- Windrose OP Guide: Combat, Skills, Gear, Food, Jewelry, and Armor Sets
- Windrose Agility Build Guide: Best Stats, Weapons, Talents, Food and Boss Setup
Popular Category Lists
- Grow a Garden / (286)
- ARC Raiders / (262)
- CoD: Black Ops 7 / (166)
- Monopoly Go / (146)
- MLB 26 / (144)
- Star Citizen / (112)
- Steal a Brainrot / (89)
- Sailor Piece / (68)
- ARK Survival Ascended / (67)
- Diablo IV / (61)
- Forza Horizon 6 / (60)
- Blox Fruits / (60)
- CoD: BLACK OPS 6 / (55)
- Adopt Me / (53)
- Path of Exile 2 / (48)
- Monster Hunter Wilds / (46)
- Windrose / (44)
- Path of Exile / (40)
- Grow a Garden 2 / (40)
- Bee Swarm Simulator / (36)


