


 0
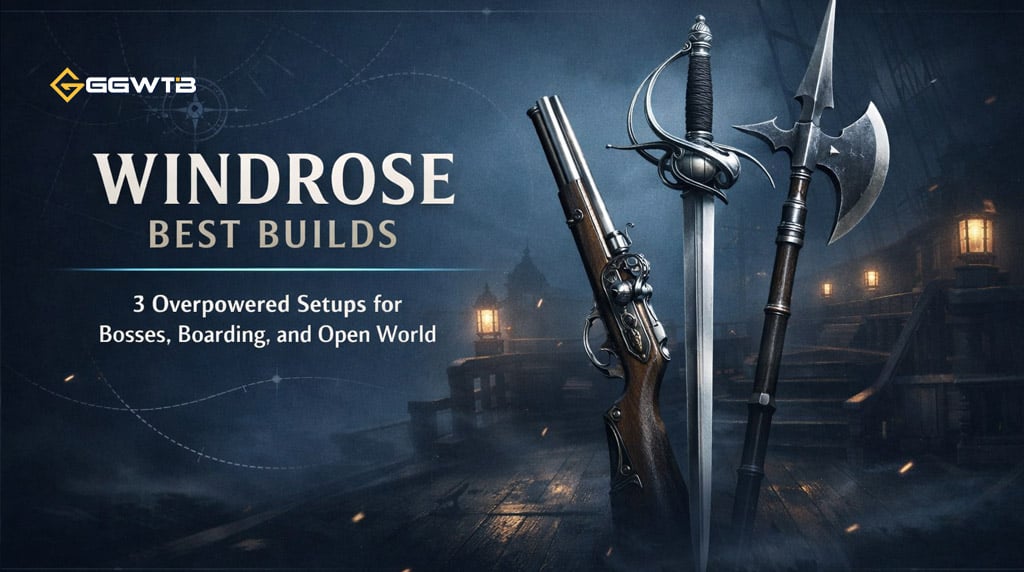
0Windrose Build Guide: Strongest Builds for Bosses, Boarding, and Open World
Windrose has a lot of viable weapons, but after testing builds across open-world farming, boarding runs, elites, and boss fights, three setups clearly perform above the rest. The reason is simple: each one solves a different problem better than anything else we tried.
One build deletes dangerous targets before they touch us. One turns boss openings into massive burst windows. One clears crowded boarding fights faster and more safely than most alternatives.
- Why These 3 Builds Are the Best
- Big Game Hunter Build
- Best Gear
- Best Stats and Talents
- How It Plays
- Boss Killer Build
- Best Gear
- Best Stats and Talents
- How It Plays
- Boarding Bomber Build
- Best Gear
- Best Stats and Talents
- How It Plays
- Best Food and Elixirs
- Which Build Should You Use?
- FAQ
- What is the best build in Windrose right now?
- Is the Rapier of Devastation worth using in the open world?
- Why is the Plague Halberd build not using crit gear?
- What is the best musket for the ranged build?
- Final Thoughts
This guide keeps things practical. We'll cover what to equip, why it works, when to use it, and what to avoid.
↖ Why These 3 Builds Are the Best
The biggest mistake in Windrose is trying to use one build for everything. In practice, the strongest setup depends on the fight.
| Build | Best For | Core Strength |
|---|---|---|
| Big Game Hunter | Open world, elites, plague hunters, crocodiles | Safe ranged burst |
| Boss Killer | Bosses, single-target fights | Very high burst damage |
| Boarding Bomber | Boarding actions, mob-heavy fights | Fast AoE clear + healing |
In our testing, these three gave the best overall results because they are efficient, easy to optimize, and scale well with the right gear and consumables.
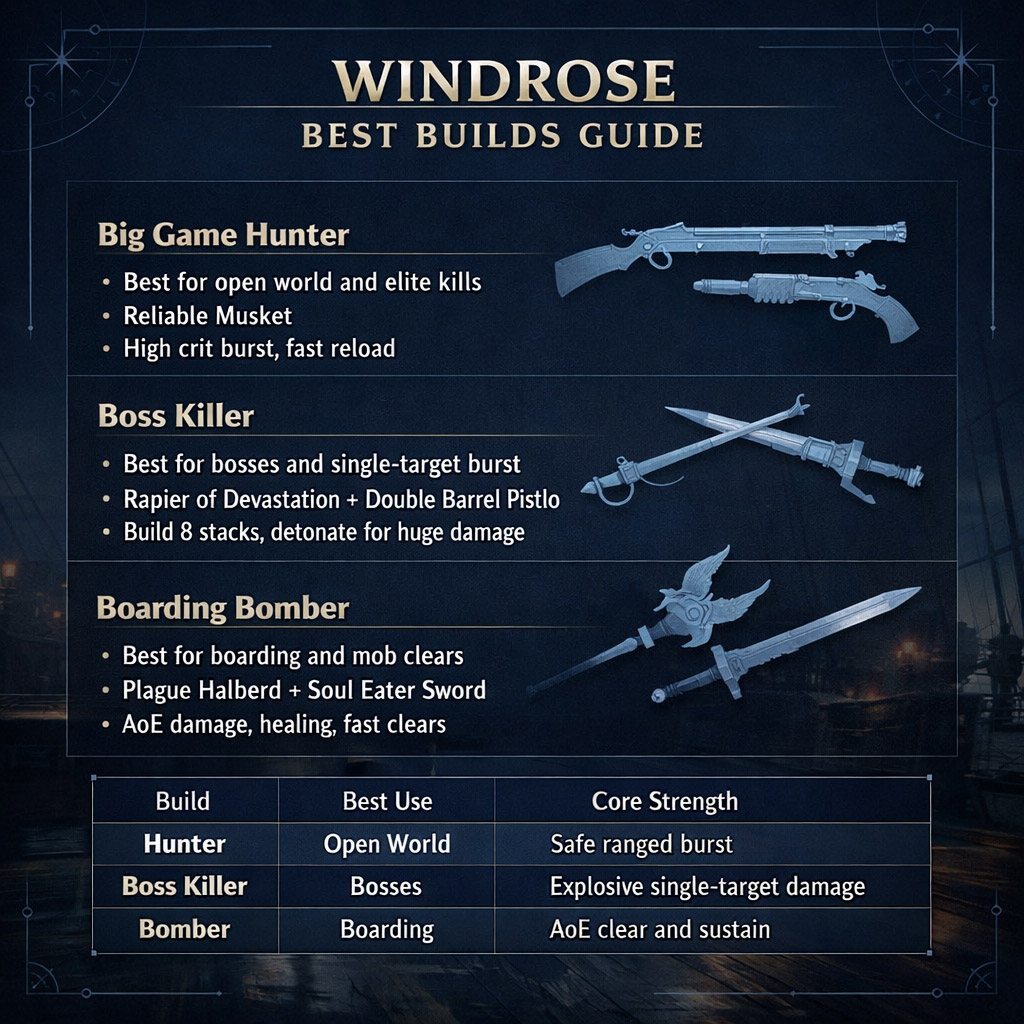
↖ Big Game Hunter Build
This is the build we use when we do not want to brawl. It is excellent for deleting annoying enemies at range, especially plague hunters and crocodiles.
↖ Best Gear
| Slot | Item | Why It's Best |
|---|---|---|
| Weapon | Reliable Musket | Fast reload and +20% crit damage |
| Armor | Pikeman Set | +15% two-handed weapon damage |
| Ring | Major Cutthroat Ring | +30% crit damage |
| Necklace | Necklace of Precision | Best stat scaling for musket damage |
↖ Best Stats and Talents
| Priority | Choice | Reason |
|---|---|---|
| Stat 1 | Precision | Main damage stat |
| Stat 2 | Endurance | Helpful but secondary |
| Key Talents | Crit damage, ranged damage, reload speed, distance damage, Sniper Focus | All directly improve burst |
We still stack Precision hard even after diminishing returns start. Why? Because the build is built around maximizing damage per shot, not balanced stat efficiency.
↖ How It Plays
Start aiming early, let Sniper Focus stack, then fire before the enemy closes distance. If you play it correctly, many open-world threats die before melee even starts.
Best use case: safe exploration, elite picks, annoying ranged enemies
Weak point: poor AoE and weaker in cramped fights
↖ Boss Killer Build
If your main goal is melting bosses, this is the strongest build we tested. It revolves around the Rapier of Devastation, which applies plague stacks with light attacks and detonates them with heavy attacks.
At full setup, this build can produce huge burst windows. In our testing against the Priestess, a clean detonation hit for roughly 2,500 non-crit and around 8,500 crit, with even more possible using crit damage consumables.
↖ Best Gear
| Slot | Item | Why It's Best |
|---|---|---|
| Main Weapon | Rapier of Devastation | Stack and detonate mechanic |
| Secondary | Drake's Double Barrel Pistol | +15% damage boost |
| Armor | Privateer Set | Crit chance and crit damage |
| Ring | Major Cutthroat Ring | Strong burst scaling |
| Necklace | Necklace of Mastery | Better crit consistency |
↖ Best Stats and Talents
| Priority | Choice | Reason |
|---|---|---|
| Stat 1 | Precision | Main damage stat |
| Stat 2 | Mastery | Helps crit consistency |
| Stat 3 | Endurance | Helps maintain combo flow |
| Key Talents | One-handed damage, crit chance, consecutive hit damage, single-target damage | Ideal for boss burst |
↖ How It Plays
The core combo is simple:
1. Apply 8 light attacks
2. Wait for a safe damage window
3. Use heavy attack to detonate
4. Reposition and repeat
This build is outstanding in boss fights, but much less comfortable in open-world exploration. If you find yourself constantly getting interrupted by groups, this is not the setup to roam with.
Best use case: bosses and single-target elites
Weak point: awkward against groups and less forgiving in general play
↖ Boarding Bomber Build
For boarding, nothing felt more efficient than the Plague Halberd setup. It deals strong AoE damage, triggers an explosive payoff, and gives solid sustain through healing.
The key detail here is that the explosion cannot crit. That changes how we build it.
↖ Best Gear
| Slot | Item | Why It's Best |
|---|---|---|
| Main Weapon | Plague Halberd | AoE swings and explosion |
| Secondary | Soul Eater Sword | Extra healing utility |
| Armor | Pikeman Set | Boosts two-handed damage |
| Ring | Major Ring of Bravery | Better than crit ring here |
| Necklace | Strength-based option | Stronger than crit scaling for this build |
↖ Best Stats and Talents
| Priority | Choice | Reason |
|---|---|---|
| Stat 1 | Strength | Best scaling for halberd |
| Stat 2 | Endurance | Sustained swings matter |
| Key Talents | Two-handed weapon damage, stamina reduction, melee damage, Dominating Presence | Improves clear speed and uptime |
Because the explosion does not crit, we skip crit-focused gearing and scale Strength + melee damage instead.
↖ How It Plays
Build your hits, trigger the explosion in the middle of a pack, and use the healing to stay aggressive. Boarding fights are all about speed and pressure, and this setup handles both better than most weapons we tested.
Best use case: boarding, dense packs, sustained mob clears
Weak point: lower burst against isolated bosses
↖ Best Food and Elixirs
Consumables make a real difference here, especially when they match the build's job.
| Build | Best Food | Best Drink / Elixir | Why |
|---|---|---|---|
| Big Game Hunter | Precision food + Precision food | Crit damage elixir | Maximum ranged burst |
| Boss Killer | Precision food | Coffee + crit damage elixir | Better combo stamina and burst |
| Boarding Bomber | Meaty Croc Keep-up | Coffee + melee damage elixir | Strength scaling and stamina sustain |
A useful detail from testing: the halberd explosion counts as melee damage, so melee damage elixirs improve it even though the effect looks more like a ranged burst.
↖ Which Build Should You Use?
If you only want the short answer, use this:
| If You Need… | Use This Build |
|---|---|
| Safer open-world combat | Big Game Hunter |
| Faster boss kills | Boss Killer |
| Better boarding clears | Boarding Bomber |
That is the cleanest way to think about it. Instead of searching for one universal build, we get much better results by swapping based on the encounter.
↖ FAQ
↖ What is the best build in Windrose right now?
There is no single best build for every activity. The musket build is best for safe ranged play, the rapier build is best for boss burst, and the halberd build is best for boarding and AoE clears.
↖ Is the Rapier of Devastation worth using in the open world?
Not really as a main roaming weapon. It is extremely strong in boss fights, but it feels slower and less convenient than the musket or halberd when clearing normal enemies.
↖ Why is the Plague Halberd build not using crit gear?
Because its explosion cannot crit. That means raw melee damage and Strength give more value than crit scaling.
↖ What is the best musket for the ranged build?
The Reliable Musket is the best choice because it reloads faster than other muskets and comes with a built-in 20% crit damage bonus.
↖ Final Thoughts
These three builds stand out because each one has a clear job and performs that job extremely well. The musket build controls fights before they start. The rapier build turns boss windows into massive burst damage. The halberd build makes boarding fast, stable, and far less messy.

Most Popular Posts
- Windrose Best Weapons Tier List, Traits, and Build Picks
- Windrose Completion Guide: Max Comfort, Weapons, Armor, Quests and Missable Items
- Windrose Best Rings, OP Necklaces, Blackbeard Maps & Upgrade Tips
- Windrose Best Starter Build Guide: OP Rapier + Pistol Setup for Early to Mid Game
- Windrose Agility Build Guide: Best Stats, Weapons, Talents, Food and Boss Setup
- Windrose OP Guide: Combat, Skills, Gear, Food, Jewelry, and Armor Sets
Popular Category Lists
- Grow a Garden / (286)
- ARC Raiders / (266)
- CoD: Black Ops 7 / (166)
- Monopoly Go / (146)
- MLB 26 / (145)
- Star Citizen / (118)
- Steal a Brainrot / (89)
- ARK Survival Ascended / (75)
- Sailor Piece / (68)
- Forza Horizon 6 / (63)
- Diablo IV / (61)
- Blox Fruits / (60)
- CoD: BLACK OPS 6 / (55)
- Adopt Me / (53)
- Path of Exile 2 / (48)
- Monster Hunter Wilds / (46)
- Windrose / (44)
- Grow a Garden 2 / (44)
- Path of Exile / (40)
- Bee Swarm Simulator / (36)


