0
0Windrose Endgame Guide: Best Things to Do After Beating the High Priestess
You beat the High Priestess. The screen says To Be Continued. Good. That does not mean you are done.
Most players stop too early. If your gear is around level 10–12, your ship is only partly ascended, and half the map is still foggy, you are not at the endgame ceiling yet. You are at the real grind wall.
- Windrose Endgame Priority Checklist
- Farm Meer Metal Ingots: Fastest Gear Upgrade Route
- Best Meer Metal Farm
- Farming Loop
- Upgrade Order
- Replay Bosses on Higher Difficulty
- Ascend Ship Parts, Not Just Weapons
- Best Ascension Targets
- Farm Tumbaga Ingots for Epic Upgrades
- Best Tumbaga Sources
- Spend Tumbaga Wisely
- Max All Four Factions to Rank 4
- Faction Rank 4 Priorities
- Best Endgame Insignia Farm
- Clear the Full Windrose Map
- What Map Clearing Gives You
- Build a Fast Travel Bell Network
- Upgrade Your Base for Comfort and Utility
- Base Upgrades That Matter
- Best Windrose Building Tricks
- Custom Flower Boxes
- Hidden Seed Beds
- Double Walls
- Mask Doors and Windows
- Custom Railings and Stairs
- Use Piers as Rustic Floors
- Stone Corner Pillars
- Build Higher With Larger Pieces
- Hide the Bonfire
- Move Bonfire for Decorations
- Use Click-and-Drag Building
- Raise Floors Above Beams
- Prepare for Ashlands
- Stockpile Before Ashlands
- Best Endgame Route
- FAQ
- What should I do first after beating the High Priestess in Windrose?
- Where is the best Meer Metal farm in Windrose?
- How do I get Tumbaga Ingots fast?
- Is faction Rank 4 worth it?
- How should I prepare for Ashlands?
- Summary
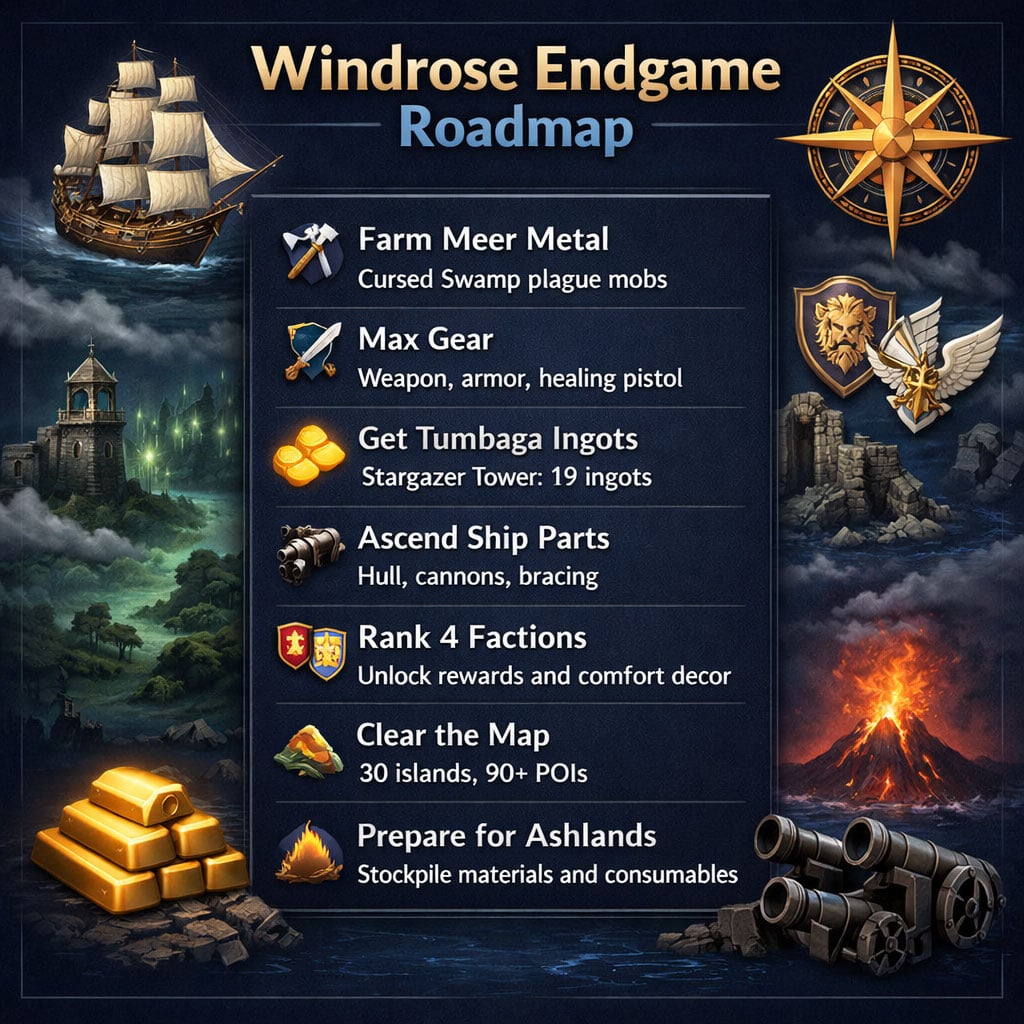
Here is the clean post-boss route: max gear, ascend your ship, farm factions, clear the map, upgrade your base, then prepare for Ashlands.
↖ Windrose Endgame Priority Checklist
Use this if you want the shortest path to real endgame readiness.
| Priority | Goal | Best Method |
|---|---|---|
| 1 | Max gear past level 10 | Farm Meer Metal Ingots |
| 2 | Ascend ship parts | Farm Tumbaga Ingots |
| 3 | Replay bosses | Raise difficulty settings |
| 4 | Max all factions | Farm insignias through ship combat |
| 5 | Clear the map | Search all islands, ruins, and POIs |
| 6 | Upgrade base comfort | Use People of Tortuga cosmetics |
| 7 | Prepare for Ashlands | Stockpile high-tier materials |
The mistake is only upgrading your favorite weapon. Windrose rewards full-system prep.
↖ Farm Meer Metal Ingots: Fastest Gear Upgrade Route
If your gear is stuck around level 10, your bottleneck is usually Meer Metal Ingots.
Normal exploration gives too few. The reliable farm is the Cursed Swamp.
↖ Best Meer Metal Farm
| Material | Source | Use |
|---|---|---|
| Quagmire Powder | Plague enemies | Smelt into Meer Metal Ingots |
| Meer Metal Ingots | Smelted material | Gear upgrades past level 10 |
↖ Farming Loop
1. Go to the Cursed Swamp.
2. Find a plague-heavy island.
3. Place a fast travel bell nearby.
4. Clear all plague mobs.
5. Loot Quagmire Powder.
6. Smelt it into Meer Metal Ingots.
7. Repeat.
This is faster than wandering ruins and hoping for drops. It is boring, but it works.
↖ Upgrade Order
| Upgrade | Priority | Why |
|---|---|---|
| Main weapon | Very High | Faster kills |
| Main armor set | Very High | Survive hard-mode bosses |
| Plague pistol / healing weapon | High | Strong sustain |
| Backup weapon | Medium | Covers bad matchups |
| Secondary armor set | Medium | Build flexibility |
If you die fast, upgrade armor.
If fights drag forever, upgrade your weapon.
↖ Replay Bosses on Higher Difficulty
Once your gear is maxed, boss rematches become the real skill check.
High-difficulty bosses punish sloppy play. They test:
- Dodge timing
- Stamina control
- Healing windows
- Weapon choice
- Damage uptime
- Build synergy
Before you raise difficulty, bring:
| Requirement | Reason |
|---|---|
| Maxed armor | Prevents burst deaths |
| Maxed main weapon | Keeps fights short |
| Healing setup | Covers long mistakes |
| Consumables | Avoids wasted attempts |
| Backup weapon | Handles awkward boss patterns |
If you want to know whether your build is actually good, replay bosses on harder settings. The answer arrives quickly.
↖ Ascend Ship Parts, Not Just Weapons
A lot of players ascend one main weapon and ignore the rest. Bad habit.
Epic-tier upgrades often unlock new passive effects. These are not tiny stat bumps. Some change how your ship or build performs.
↖ Best Ascension Targets
| Upgrade Target | Why It Matters |
|---|---|
| Main weapons | Core damage |
| Backup weapons | Matchup flexibility |
| Cannons | Faster ship combat farming |
| Hull bracing | Better survivability |
| Secondary armor | Specialized builds |
| Keelhold Hull | Strong repair-duration value |
The Keelhold Hull is a standout. Upgrading it from rare to epic adds 30% longer repair duration. In naval combat, that means fewer panic repairs and smoother farming.
↖ Farm Tumbaga Ingots for Epic Upgrades
Your next bottleneck is Tumbaga Ingots.
You need them for key ascensions, especially ship upgrades.
↖ Best Tumbaga Sources
| Source | Value |
|---|---|
| Biome ruins | High |
| Stargazer Tower questline | Very High |
| Full map cleanup | Medium to High |
| Exploration loops | Medium |
The Stargazer Tower questline gives 19 Tumbaga Ingots. Do it. That is one of the cleanest fixed rewards in the current game.
↖ Spend Tumbaga Wisely
| Spend First | Delay |
|---|---|
| Hull upgrades | Rarely used weapons |
| Cannons | Low-impact side gear |
| Strong epic passives | Cosmetic-only choices |
| Ship survivability | Duplicate builds |
Upgrade what improves farming first. Faster farming pays for everything else.
↖ Max All Four Factions to Rank 4
Do not stop at rank 3 unless you enjoy leaving rewards on the table.
Rank 4 unlocks some of the best faction rewards in Windrose. The People of Tortuga are especially valuable because their cosmetics help base comfort.
↖ Faction Rank 4 Priorities
| Faction | Why Rank 4 Matters |
|---|---|
| Smugglers | Utility and economy rewards |
| Buccaneers | Pirate build rewards |
| Brethren | Frigate and naval identity |
| People of Tortuga | Decorations and comfort value |
↖ Best Endgame Insignia Farm
The best late-game faction farm is ship combat.
1. Sink pirate ships.
2. Loot caches.
3. Sell valuables at faction island buyers.
4. Push insignia progress.
5. Repeat with upgraded cannons.
This loop gives money, materials, faction progress, and naval practice at the same time.
↖ Clear the Full Windrose Map
Windrose has around 30 procedurally generated islands and 90+ handcrafted points of interest.
The map does not show everything. If you only followed quests, you missed loot.
↖ What Map Clearing Gives You
| Location | Possible Rewards |
|---|---|
| Ruins | Recipes, ingots, lore |
| Hidden POIs | Rare loot, faction items |
| Camps | Combat rewards |
| Caches | Valuables and materials |
| Biome landmarks | Better farming routes |
↖ Build a Fast Travel Bell Network
Do not sail the same long route ten times. Place bells with intent.
| Bell Location | Purpose |
|---|---|
| Cursed Swamp farm | Meer Metal |
| Faction island cluster | Insignia farming |
| Ruin-heavy biome | Tumbaga and recipes |
| Main base | Crafting and storage |
| Remote islands | Map cleanup |
A good bell network saves hours. It also makes future updates easier to tackle.
↖ Upgrade Your Base for Comfort and Utility
Base building is not only decoration. In Windrose, unique decoration categories increase comfort.
That makes People of Tortuga cosmetics worth farming.
↖ Base Upgrades That Matter
| Base Feature | Benefit |
|---|---|
| Higher comfort | Better base value |
| Organized storage | Faster crafting |
| Dedicated production rooms | Cleaner workflow |
| Bell access | Faster travel |
| NPC assignments | Better automation |
| Decoration variety | Comfort scaling |
If your base is still a chest pile near a bonfire, fix it before Ashlands.
↖ Best Windrose Building Tricks
These are the building tricks that actually matter in long-term bases.
↖ Custom Flower Boxes
Use seed beds instead of basic flower boxes.
- Sink a seed bed halfway into the wall.
- Place it below a window.
- Plant chili, linen, herbs, or flowers.
- Frame it with beams or small wall parts.
Result: better-looking window boxes with more plant options.
↖ Hidden Seed Beds
For natural gardens:
- Place seed beds into uneven ground.
- Keep a few millimeters visible.
- Do not fully bury them, or you may lose planting access.
This removes the ugly grid farm look.
↖ Double Walls
Double walls solve several problems at once.
| Problem | Fix |
|---|---|
| Outside decor clips inside | Add inner wall |
| Interior needs different material | Layer walls |
| Windows look plain | Shape openings manually |
| Stone walls look thin | Add thickness |
Use this for villas, forts, taverns, and serious endgame bases.
↖ Mask Doors and Windows
Some doors and stained-glass windows have ugly frames.
Fix them with:
- Beams
- Pillars
- Small wall pieces
- Free-placed trim
This makes prefab pieces look custom.
↖ Custom Railings and Stairs
Mahogany stairs look too clean. Stick stairs look too primitive.
Use beams over existing stairs to create rugged harbor stairs. Then match the railing with the same beam style.
Best for:
- Taverns
- Warehouses
- Harbor bases
- Basement entrances
↖ Use Piers as Rustic Floors
Piers work well as first-floor flooring.
Good use cases:
- Storage rooms
- Cellars
- Docks
- Warehouses
- Early-game houses
Avoid them for upper floors unless you want massive support posts hanging below.
↖ Stone Corner Pillars
For stone buildings, use stone blocks as corner pillars instead of wood beams.
It looks heavier, cleaner, and more believable.
↖ Build Higher With Larger Pieces
Windrose structural support works heavily by distance, not just part count.
Use:
| Goal | Best Piece |
|---|---|
| Build taller | Large pillars or stacked piers |
| Build longer bridges | Long angled triangular walls |
| Reduce support clutter | Larger structural pieces |
In practice, stability tends to cap around 22 connected parts, depending on layout.
↖ Hide the Bonfire
You can bury the bonfire below floors or even underwater. It still works.
But smoke may show, so mask it with:
- Fireplace
- Chimney
- Stone foundation
- Raised floor
Warning: moving the bonfire can reset NPC work assignments. Check workers afterward.
↖ Move Bonfire for Decorations
Decorations must usually be placed in bonfire range.
Workaround:
1. Move bonfire.
2. Place decorations.
3. Move bonfire back.
4. Reassign NPCs if needed.
This is mandatory for large bases.
↖ Use Click-and-Drag Building
Click-and-drag helps when snapping fails.
Use it to:
- Fill terrain gaps
- Build into sand
- Place walls behind objects
- Close basement edges
- Extend awkward foundations
This trick stops bases from looking like they float above the ground.
↖ Raise Floors Above Beams
Default snapping can put floors through the middle of beams. Ugly.
Fix:
1. Snap one floor to the beam.
2. Turn snapping off.
3. Free-place a new floor slightly higher.
4. Delete the lower piece.
5. Snap the rest from the raised floor.
Now beams sit below the floor like real support beams.
↖ Prepare for Ashlands
Ashlands is confirmed as the next major Windrose content update. It is expected to bring a biome tier above level 15, new enemies, bosses, story content, and later lava caves.
That means your current gear ceiling will likely move.
↖ Stockpile Before Ashlands
| Prepare | Why |
|---|---|
| Meer Metal Ingots | Future gear upgrades |
| Tumbaga Ingots | Ship and epic upgrades |
| Faction insignias | Future unlock safety |
| Building materials | New outposts |
| Consumables | Boss attempts |
| Bell network | Faster access routes |
If you wait until Ashlands drops, you will grind under pressure. Farm now while the routes are solved.
↖ Best Endgame Route
Follow this order if you want the cleanest progression path.
| Step | Objective |
|---|---|
| 1 | Farm Meer Metal in Cursed Swamp |
| 2 | Max main weapon and armor |
| 3 | Finish Stargazer Tower for 19 Tumbaga Ingots |
| 4 | Ascend hull, cannons, and key gear |
| 5 | Farm ship combat for faction progress |
| 6 | Push all factions to Rank 4 |
| 7 | Clear every island and ruin |
| 8 | Upgrade base comfort and storage |
| 9 | Replay bosses on higher difficulty |
| 10 | Stockpile for Ashlands |
This order works because every step speeds up the next one.
↖ FAQ
↖ What should I do first after beating the High Priestess in Windrose?
Check your gear. If your weapon or armor is below max, farm Meer Metal Ingots in the Cursed Swamp first. Gear progression is the biggest post-boss power spike.
↖ Where is the best Meer Metal farm in Windrose?
Farm plague mobs in the Cursed Swamp. They drop Quagmire Powder, which smelts into Meer Metal Ingots. Place a fast travel bell near a dense plague island and repeat the route.
↖ How do I get Tumbaga Ingots fast?
Clear biome ruins and finish the Stargazer Tower questline. The questline gives 19 Tumbaga Ingots, making it one of the best fixed sources.
↖ Is faction Rank 4 worth it?
Yes. Rank 4 unlocks stronger faction rewards. People of Tortuga is especially useful because its decoration sets increase base comfort through unique decoration categories.
↖ How should I prepare for Ashlands?
Max gear, ascend ship parts, stockpile Meer Metal and Tumbaga Ingots, finish faction ranks, build a bell network, and prepare consumables. Ashlands is expected to push progression above level 15.
↖ Summary
After the High Priestess, Windrose shifts from story progression to real endgame prep.
The smart route is simple: farm Meer Metal, max gear, get 19 Tumbaga Ingots from Stargazer Tower, ascend ship parts, push every faction to Rank 4, clear the full map, and turn your base into a proper production hub.
Do that, and Ashlands will feel like a new challenge instead of a wall.

Most Popular Posts
- Windrose Best Weapons Tier List, Traits, and Build Picks
- Windrose Best Rings, OP Necklaces, Blackbeard Maps & Upgrade Tips
- Windrose Completion Guide: Max Comfort, Weapons, Armor, Quests and Missable Items
- Windrose Best Starter Build Guide: OP Rapier + Pistol Setup for Early to Mid Game
- Windrose Agility Build Guide: Best Stats, Weapons, Talents, Food and Boss Setup
- Windrose OP Guide: Combat, Skills, Gear, Food, Jewelry, and Armor Sets
Popular Category Lists
- Grow a Garden / (283)
- ARC Raiders / (257)
- CoD: Black Ops 7 / (166)
- Monopoly Go / (146)
- MLB 26 / (139)
- Star Citizen / (106)
- Steal a Brainrot / (88)
- Sailor Piece / (68)
- Forza Horizon 6 / (58)
- Blox Fruits / (58)
- ARK Survival Ascended / (57)
- CoD: BLACK OPS 6 / (55)
- Diablo IV / (55)
- Adopt Me / (49)
- Path of Exile 2 / (48)
- Monster Hunter Wilds / (46)
- Windrose / (43)
- Path of Exile / (40)
- Grow a Garden 2 / (35)
- Bee Swarm Simulator / (35)