


 0
0ARC Raiders Best Builds Ranked: Sniper Squad, Loot Goblin, ARC Hunter & More
- KITE
- Share
- ARC Raiders
- 01/02/26
- 1185
I've spent the last few weeks running the same routes, forcing the same fights, and tweaking these loadouts until they stopped feeling cool and started feeling reliable.
These aren't the obvious combos everyone parrots. Each build here has a job, clear trade-offs, and a simple question behind it: what do you want to win today—time, loot, PvP, or ARC kills? Below is a ranked breakdown you can copy, adapt, and actually execute.
- Loadout Selection at a Glance (Ranked)
- 1) The Most Lethal Man Alive (Renegade + Torrene)
- Core Idea (Why it Works)
- Recommended Setup (Weapons, Mods, Shield)
- Ammo & Weight Reality Check (What This Means)
- Field Notes (My Small Sample)
- Common Mistakes
- 2) Sniper Squad Protocol (2× Osprey + 1× Renegade)
- Core Idea (The 3-2-1 Delete)
- Recommended Setup
- Where This Build Prints Value
- Anti-Ambush Protocol
- Common Mistakes
- 3) Master Chief (Arpeggio + Toro) — The Special Ops Marine
- Core Idea (Balance Your Fire Rates)
- Recommended Variants (Budget → Premium)
- Utility Loadout (Simple but Complete)
- Common Mistakes
- 4) Loot Goblin (Key Rooms, Night Raids, Fast Extract)
- Core Idea (Stay Light, Stay Alive, Stay Rich)
- Recommended Setup
- The Mean Trap Combo (Zipline Punisher)
- Cheaper Substitutes
- Common Mistakes
- 5) ARC Annihilator (Batina + Cracker, Disengage-First Utility)
- Core Idea (Kill ARC Fast, Exit Fights Faster)
- Must-Have Equipment (Why Each One Matters)
- Augment Choice (Credible Value)
- Secondary Weapon
- Common Mistakes
- Honorable Mention: The No Free Loadout Efficient Starter (Upgraded Stitcher)
- Setup
- FAQ
- 1) If I only play solo, which build should I start with?
- 2) What if I'm always low on medium ammo?
- 3) How do I stop getting third-partied at events?
- 4) I want key-room loot, but I keep dying on the way out. What changes the most?
- 5) Are lures really worth the slot?
- Conclusion
↖ Loadout Selection at a Glance (Ranked)
Use this table to pick fast; then I'll unpack each build with the why and the how.
| Rank | Build Name | Best For | Primary / Secondary | Must-Have Gear | Main Risk |
|---|---|---|---|---|---|
| 1 | The Most Lethal Man Alive | All-range PvP + PvE | Renegade + Torrene (upgrade path: Bobcat) | Medium/Heavy shield, explosives | Medium ammo hunger, heavy weight |
| 2 | Sniper Squad Protocol (Team) | Event overwatch, anti-third-party | 2× Osprey + 1× Renegade / Stitcher backups | Mines/barricade, lures | Getting collapsed in close range |
| 3 | Master Chief (Special Ops) | Versatile solo/squad | Arpeggio + Toro (budget: Rattler + Toro; premium: Tempest + Toro) | Medium shield, mixed grenades | Mismanaging ranges, slow swaps |
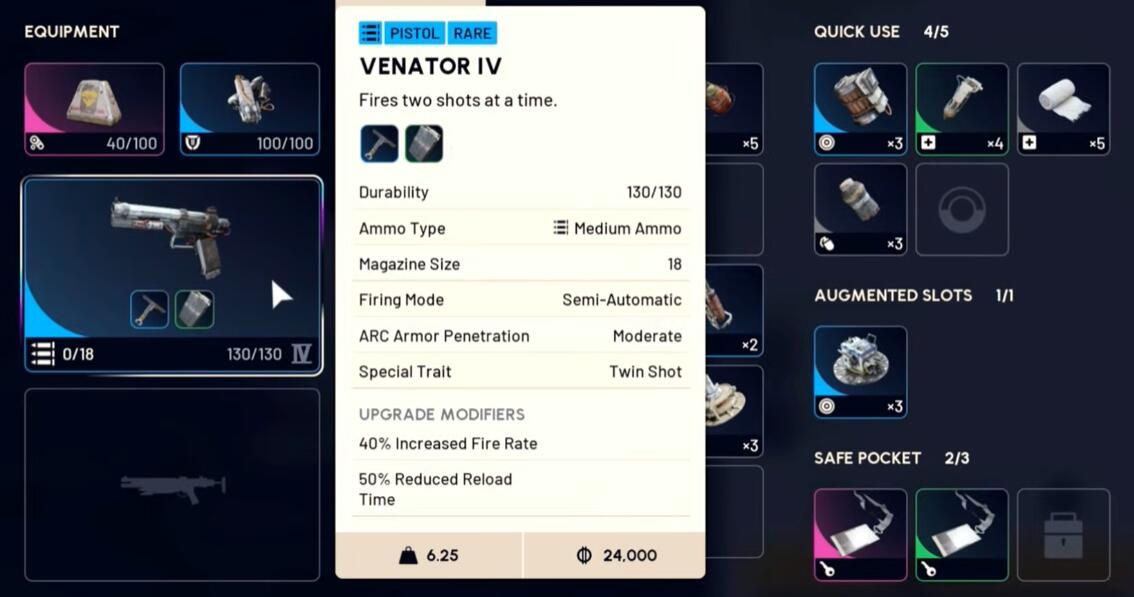
| 4 | Loot Goblin (Key Rooms) | Night raid looting, extraction speed | Single Venerator (alt: silenced Anvil / upgraded Kettle) | Traps + adrenaline shots | Greed spiral, trap misplacement |
| 5 | ARC Annihilator | ARC farming + PvP disengage | Batina + The Cracker / silenced sidearm | Seekers, lures, smokes, 3 safe pockets | Burning ammo, overcommitting |
↖ 1) The Most Lethal Man Alive (Renegade + Torrene)
This is the build I put on when I'm not interested in fair fights. If you want one setup that answers almost every distance and most ARC threats, this is it.
↖ Core Idea (Why it Works)
- Renegade covers medium-to-long fights with consistency.
- Torrene deletes close-range pushes that would normally punish a heavy rifle user.
- The combo creates a simple rule: if they're close, Torrene; if they're not, Renegade. That clarity wins fights.
↖ Recommended Setup (Weapons, Mods, Shield)
- Primary: Renegade
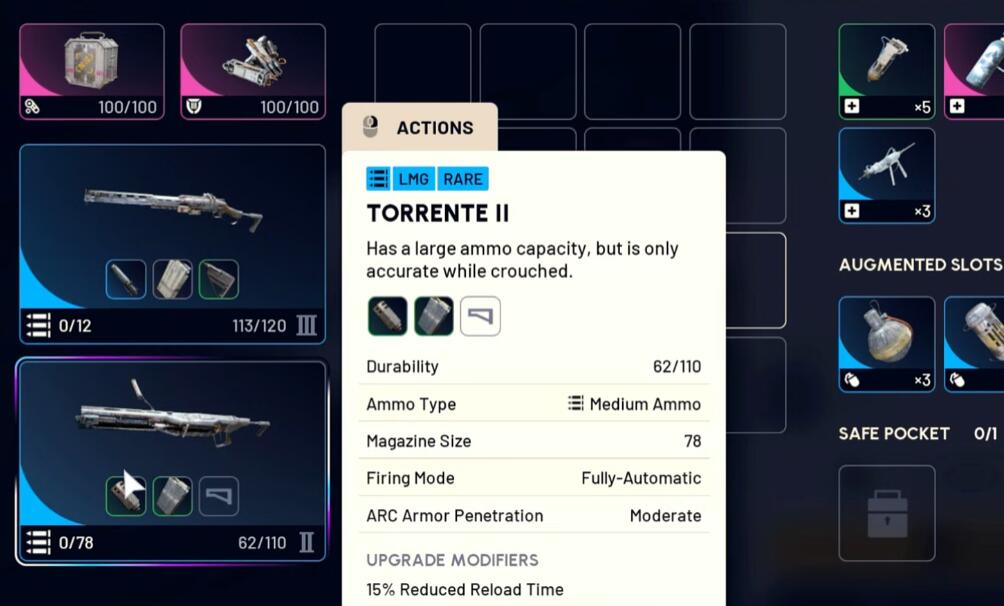
- Secondary: Torrene
- Shield: Medium or Heavy (pick based on map + squad tempo)
- Augment: A quality combat augment that offsets heavy handling (the aggressive style shines here)
Mods I prioritize
- On Torrene: fire-rate boosting stock/mods are disproportionately scary.
- On high-RPM options like Bobcat (upgrade path): padded stock + compensator to turn recoil into a suggestion rather than a rule.
↖ Ammo & Weight Reality Check (What This Means)
Both guns can chew medium ammo, and the build is heavy. That means:
- If you find yourself saving bullets, you're already losing value.
- If your bag is half loot, your movement becomes a tax you pay every second.
In my own raids, this build only feels bad when I'm understocked. If you can't bring enough medium ammo, downgrade to a cheaper close-range secondary rather than pretending you'll just hit headshots.
↖ Field Notes (My Small Sample)
Across a week of testing (mostly mixed PvP + events), my fights improved when I followed one rule:
don't ego-peek with Renegade inside Torrene distance.
The moment I stopped trying to prove something, my win rate in building/zipline ambushes jumped noticeably.
↖ Common Mistakes
- Pushing into tight interiors while holding Renegade because it's out already.
- Running light shield to stay nimble and then getting melted anyway.
- Forgetting that heavy loadouts demand pre-planned rotations.
↖ 2) Sniper Squad Protocol (2× Osprey + 1× Renegade)
This one is pure teamwork. If you have two friends who can count to three and resist the urge to sprint downhill, you'll have a ridiculous amount of control.
↖ Core Idea (The 3-2-1 Delete)
- Two Ospreys enable synchronized shots: on 3-2-1, both shoot the same target.
- That's how you turn a poke into an instant down before enemies can react.
- The Renegade player plays slightly forward—flanks, pressures, and baits angles—while the Ospreys hold overwatch.
If you've ever thought, we had them but they always slip away, this build fixes that. Bursting one player instantly changes the whole fight.
↖ Recommended Setup
2 players: Osprey + Stitcher backup
- Mods: silencer strongly recommended; lightweight stock is one of the few times I value ADS speed above other stats.
1 player: Renegade + Stitcher backup
Team gear: mines, barricade cover, lure grenades
↖ Where This Build Prints Value
- Best during large events (harvester/matriarch-style scenarios) where third parties swarm.
- Your job isn't to dive the main group; your job is to control the chaos:
- pick off opportunists,
- punish late rotations,
- protect a team doing the objective (yes, even if they're strangers).
↖ Anti-Ambush Protocol
If you discover you keep getting clapped from behind, then your squad is treating high ground like a throne instead of a position to defend.
Do this instead:
1. Drop mines on the most likely climb/zip routes.
2. Use barricade cover to survive counter-snipes.
3. Hold lures to redirect ARC into enemy pushes (it's petty, and it works).
↖ Common Mistakes
- Snipers helping by pushing close-range.
- No traps placed, then acting surprised when someone wraps behind you.
- Taking long fights without a reset plan (smoke/cover/rotation).
↖ 3) Master Chief (Arpeggio + Toro) — The Special Ops Marine
When people ask for an all-around best build, they often default to two slower, semi-auto styles. I don't love that because it makes you predictable and punishes missed timing.
↖ Core Idea (Balance Your Fire Rates)
- Arpeggio gives you controlled medium-range pressure and rhythm.
- Toro handles close-range emergencies with authority.
- You get tempo (AR pressure) plus finisher power (shotgun), which covers most real fights.
↖ Recommended Variants (Budget → Premium)
Standard: Arpeggio + Toro
- Arpeggio mods: green stock + extended magazine is the sweet spot for consistent mid-range.
Budget: Rattler (tier 2–3) + Toro
- Tier 3 with 20 rounds is enough in most skirmishes if you don't panic-spray.
Premium: Tempest + Toro
- Tempest stretches fights outward; Toro keeps you safe when someone forces a doorway.
↖ Utility Loadout (Simple but Complete)
- Shield: at least Medium
- Explosives: fuse grenades or shrapnels (stack)
- Disengage/Control: a couple smokes and/or gas
If you find you're dying while reloading, then you're either missing the extended mag value or you're taking fights without cover. This setup expects you to shoot, relocate, shoot again—not stand still and negotiate with recoil.
↖ Common Mistakes
- Trying to out-AR someone inside Toro range (just swap).
- Bringing no smokes, then being forced to hard-commit every fight.
↖ 4) Loot Goblin (Key Rooms, Night Raids, Fast Extract)
This build is about one thing: turning time into money. The secret isn't a magic gun; it's staying light and denying pursuit.

↖ Core Idea (Stay Light, Stay Alive, Stay Rich)
- Carry one primary to keep weight low and leave a weapon slot open for found loot.
- Use traps to punish the predictable routes people take when hunting you.
↖ Recommended Setup
Weapon: single Venerator
- Strong enough at close-to-mid without pretending you'll take long-range duels.
Gear: traps/mines + 2 adrenaline shots + deterrent grenades
Adrenaline shots (how I actually use them)
1. One at the start: sprint to the objective so you're first on scene.
2. One at the end: sprint to extraction when you're overweight and tempted to just loot one more box.
↖ The Mean Trap Combo (Zipline Punisher)
If you want one setup that feels borderline unethical:
Blaze trap + Jolt mine
The jolt forces them to sit in it longer, turning a mild burn into real damage.
Alternative budget cruelty: Jolt mine + Gas mine
Cheap, stamina-draining, and it turns panic into paralysis.
In one of my night runs, I heard the zipline trigger and then the unmistakable stuck-in-bad-decisions delay. The follow-up shot was easy because the trap did the hard part: it removed movement.
↖ Cheaper Substitutes
- Single silenced Anvil works if you like that style.
- Upgraded Kettle is fine if the goal is simply go light and leave with loot.
↖ Common Mistakes
- Bringing two guns just in case, then losing the whole point (weight + space).
- Greed pushing you into PvP when you're already winning by leaving.
↖ 5) ARC Annihilator (Batina + Cracker, Disengage-First Utility)
Sometimes you want ARC kills, not drama. This build is tuned to delete ARC efficiently while keeping PvP optional.
↖ Core Idea (Kill ARC Fast, Exit Fights Faster)
- Batina can slap ARC hard if you commit to ammo.
- The Cracker is the specialist ARC tool.
- The real sauce is equipment: seekers + lures + smokes.
↖ Must-Have Equipment (Why Each One Matters)
- Seeker grenades: not just for flyers; they pressure mobile ARC (like fast jumpy targets) because they remove the need to track perfectly.
- Lure grenades: save you, redirect ARC into enemy raiders, and create space to reload/heal.
- Smokes: a single smoke often breaks line-of-sight long enough to disengage.
If you discover you can't leave fights, then you're probably trying to win every trade instead of ending the fight.
↖ Augment Choice (Credible Value)
I like a survivor-style looting augment here because 3 safe pockets changes what you can risk:
- expensive utility (wolf packs, cloaks, extra lures, specialty nades),
- without turning every raid into a bankruptcy simulator.
↖ Secondary Weapon
Cheap, silenced options shine (quiet turret/mini-ARC cleanup).
↖ Common Mistakes
- Overfighting players because they showed up.
- Bringing ARC tools but not enough ammo to capitalize on Batina damage.
↖ Honorable Mention: The No Free Loadout Efficient Starter (Upgraded Stitcher)
If you want to enter raids cheaply without rolling the dice on awkward freebies, this is pure efficiency.
↖ Setup
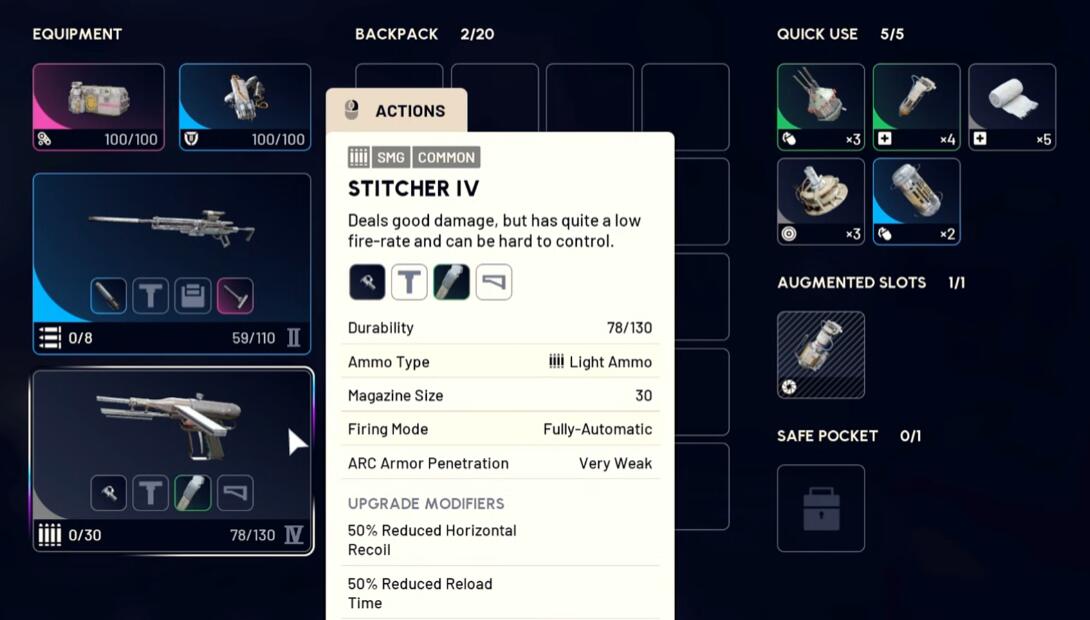
- Stitcher upgraded once (to level 2)
- Gray compensator + gray extended mag
- Light shield even with no augment
- One open safe pocket (quietly huge)
This kind of build is often around the cheap enough to not care, strong enough to win threshold. If you find your free kits keep handing you mismatched weapons, then crafting this consistent baseline stops the bleeding.
↖ FAQ
↖ 1) If I only play solo, which build should I start with?
If you find you're dying because fights happen at weird ranges, then start with Master Chief (Arpeggio + Toro). It's forgiving, versatile, and doesn't demand perfect positioning like the sniper team setup.
↖ 2) What if I'm always low on medium ammo?
Then avoid pairing two medium-ammo hogs until your economy stabilizes. Run Arpeggio + Toro (or Rattler + Toro), or keep Renegade but choose a secondary that doesn't drain the same pool.
↖ 3) How do I stop getting third-partied at events?
If you discover the real enemy is the random team showing up late, then use Sniper Squad Protocol: take high ground, trap your approaches, and focus on deleting opportunists rather than diving the objective pile.
↖ 4) I want key-room loot, but I keep dying on the way out. What changes the most?
Two things: weight discipline (one weapon) and planned speed (adrenaline shot saved for extraction). This means you win by leaving, not by negotiating with every gunshot you hear.
↖ 5) Are lures really worth the slot?
Yes—because lures don't just distract ARC. They reshape the fight. If you find enemies keep pushing your cover, then dropping a lure to redirect ARC pressure can force them to back off or eat chaos.
↖ Conclusion
These five builds work because each one answers a specific problem with a repeatable plan: delete at range (Sniper Squad), cover all distances (Most Lethal), stay flexible (Master Chief), convert time into loot (Loot Goblin), or farm ARC without getting dragged into PvP (ARC Annihilator).

Most Popular Posts
- ARC Raiders Riven Tides Key Room Guide: Best Hotel Keys, Loot Routes, Secure & Crane Storage
- ARC Raiders Damage Fireflies Trial Guide: Best Farm Method on Buried City Night Raid
- ARC Raiders Riven Tides Update: New Map & Items, ARC Turbine, Rewards, and Best Early Strategy
- ARC Raiders Bettina Guide: Best Build, Buffs, and How to Use It Against ARC
- Arc Raiders Season 4 Riven Tides Update, Rewards, Safe Skins, and Release Timeline
- ARC Raiders Solo Search Supply Drops Guide: Best Buried City Route, Beacon Locations
Popular Category Lists
- Grow a Garden / (286)
- ARC Raiders / (262)
- CoD: Black Ops 7 / (166)
- Monopoly Go / (146)
- MLB 26 / (145)
- Star Citizen / (112)
- Steal a Brainrot / (89)
- Sailor Piece / (68)
- ARK Survival Ascended / (67)
- Diablo IV / (61)
- Forza Horizon 6 / (60)
- Blox Fruits / (60)
- CoD: BLACK OPS 6 / (55)
- Adopt Me / (53)
- Path of Exile 2 / (48)
- Monster Hunter Wilds / (46)
- Windrose / (44)
- Path of Exile / (40)
- Grow a Garden 2 / (40)
- Bee Swarm Simulator / (36)


