0
0ARC Raiders Best Ways to Defeat Every ARCs in 2026 Guides
- KIVRI
- Share
- ARC Raiders
- 01/29/26
- 1118
Below are the guides we use for farming ARC parts for trophy-display expeditions. Winning against ARCs isn't just about finding one magical ARC Raiders blueprints. It's about having repeatable setups. It comes down to line-of-sight control, predictable movement, and precise explosive placement on the weakest points of the armor.

We put these methods through the wringer in numerous battles and the results started feeling like systems you can trust, rather than random lucky clips. Whether you can spend money and need speed, or are cash strapped and need budget Defeats, here's ways to make every shot hit.
- 1. The One Metric That Makes Everything Click: XP → Damage
- How ARC HP really shows up
- Why this matters
- 2. Universal Solo Rules: Fight on Your Terms
- 3. Bastion: Fast, Cheap, and Safe Methods
- 3.1 The Jump-Plant-Exit (Fastest & Most Reliable)
- 3.2 The Knee-Break (Safest Setup)
- 3.3 Light Impact Spam (Cheapest)
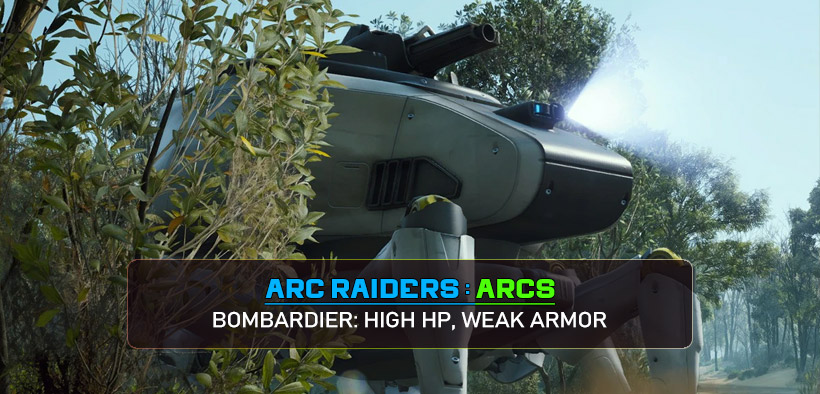
- 4. Bombardier: High HP, Weak Armor
- 4.1 Lure Grenade → Deadline (Best Method)
- 4.2 Wolf Pack (Reliable Backup)
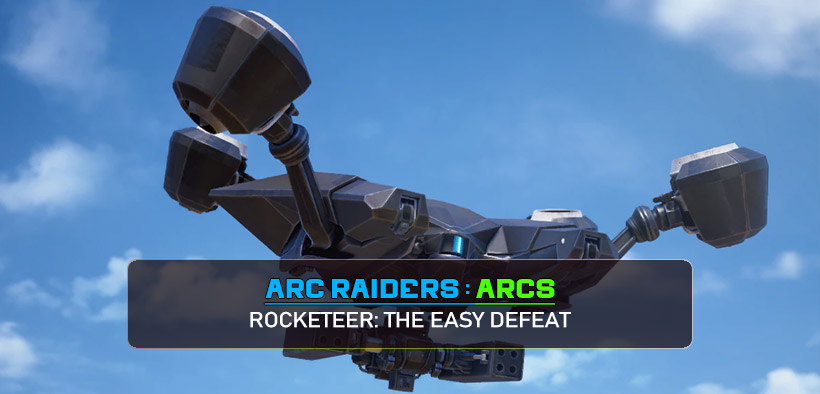
- 5. Rocketeer: The Easy Defeat
- 5.1 Stair-Lip Peeking (Cheapest)
- 5.2 The Stun-Drop Tech
- 6. Leaper: Don't Overthink It
- 7. Quick Reference: Loadouts & Reliability
- Best Methods by ARC Type (Solo-Focused)
- Explosive Behavior Guide
- 8. Blueprints & Materials: Farming Loop
- Where to farm Blueprints
- Where to farm Materials (Fuel, Crude, Compound)
- FAQ
- Summary
↖ 1. The One Metric That Makes Everything Click: XP → Damage
Before we talk loadouts, we need a way to measure what actually works. You can't optimize what you can't measure.
↖ How ARC HP really shows up
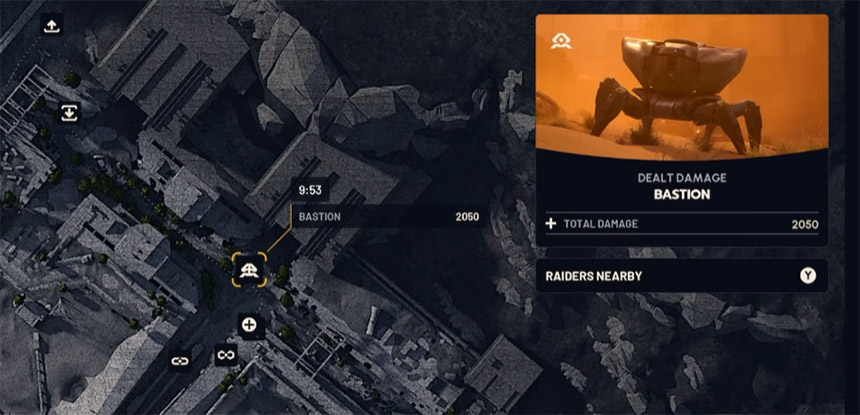
In our testing, ARC damage XP tracks at approximately 2 XP per 1 damage for Damaged ARC events.
If you see +4,100 XP, that's roughly 2,050 damage dealt.
If your match log shows total damage dealt to an ARC equals its full HP, you can back-calculate the exact thresholds for one-shots.
↖ Why this matters
Once you can estimate damage from XP, you stop guessing. You can instantly validate if a grenade placement was perfect or if it looked good but actually hit armor. This allows you to decide in real-time whether to re-commit to the fight or disengage.
↖ 2. Universal Solo Rules: Fight on Your Terms
Every method below gets exponentially easier if we follow three core rules.
2.1 Line-of-sight (LoS) is your real armor
Bastions need a clean line-of-sight to shred you with their minigun. If you break LoS with hard cover, you force them to walk toward you. This means the map layout matters less than the immediate geometry: roofs, stair lips, and door frames are damage multipliers because they let you act while the ARC is forced to reposition.
2.2 Safe window beats high DPS
If a method has slightly lower damage but keeps you alive, it wins every time in solo play. A 30-second safe Defeat is infinitely better than a 10-second Defeat that sends you back to the lobby 40% of the time.
2.3 Placement > Payload
For armored targets, where the explosive lands matters more than what explosive you use. We'll say this a lot because it's the difference between a clean one-shot and an embarrassing half-health tickle.
↖ 3. Bastion: Fast, Cheap, and Safe Methods
Bastions are lethal because the minigun deletes you in seconds if you misplay exposure. However, they are also very abusable with vertical positioning.
Weak-Armor Mental Model:
- Best Zone: The central top strip (weaker armor).
- Bad Zone: Shoulder/flank plates (heavy armor).
- Control Point: Knees (break armor → disable window).
↖ 3.1 The Jump-Plant-Exit (Fastest & Most Reliable)
This is our default because it's quick and reproducible.
- 1. Bait: Tag the Bastion, then break LoS so it walks toward you.
- 2. Mount: Approach from a ledge or roof so you can land on top.
- 3. Plant: Place the Deadline on the central strip (avoid the shoulder pad).
- 4. Exit: Jump off the back and take hard cover immediately.
Why it works:
You exploit the Bastion's slow turn speed. If you plant on the shoulder, you often get a half-health result. The XP pop-up will confirm this instantly.
↖ 3.2 The Knee-Break (Safest Setup)
If mounting feels too risky with your current gear:
- Use third-person peeking from cover.
- Dump heavy rounds into a knee until it breaks.
- Once it's incapacitated, run around and plant a Deadline on the underbelly or rear.
↖ 3.3 Light Impact Spam (Cheapest)
Low on premium explosives? This is the budget answer.
Use elevated cover so the minigun can't track you.
Arc throws onto the central top strip.
Cost:
Plan for 25–30 Light Impact grenades to account for misses and armor hits (usually takes ~22 good hits).
↖ 4. Bombardier: High HP, Weak Armor
Bombardiers are awkward because rockets don't require direct LoS, meaning they can punish rooftop peeking.
↖ 4.1 Lure Grenade → Deadline (Best Method)
This is the cleanest solo Defeat pattern we've found.
- 1. Toss a Lure close to the Bombardier (tight placement is key).
- 2. While it fixates on the lure, walk in and plant a Deadline on the lower body.
- 3. Back off behind cover and let it pop.
Why it works:
Bombardiers struggle to delete lures quickly up close, often tunneling on them long enough for a safe plant.
↖ 4.2 Wolf Pack (Reliable Backup)
Because Bombardiers have weaker armor surfaces, Wolf Packs convert damage better here than on Bastions. Plan on using 2 Wolf Packs for reliability. Bring a third only if there are other ARCs nearby that might steal the seekers.
↖ 5. Rocketeer: The Easy Defeat
Rocketeers feel scary until you realize they have a major weakness: they are incredibly vulnerable to range control and peek geometry.
↖ 5.1 Stair-Lip Peeking (Cheapest)
Find stairs or ledges where you can peek just enough to shoot, but the Rocketeer fails to return effective fire.
Tag it to pull attention.
Drop to a staircase lip and peek over minimally.
Focus fire on the central eye or engines.
Why it works:
The geometry breaks its firing solution. If you maintain a firing cadence, you interrupt its approach behavior, stalling it outside effective range.
↖ 5.2 The Stun-Drop Tech
Hornet Drivers are wildly underrated here. Thrown near a Rocketeer, they zap/stun and often force it to drop to the ground.
If you have Deadline: Zap → Mount → Plant → Bail.
If you don't: Zap → Unload heavy ammo into the eye while it recovers.
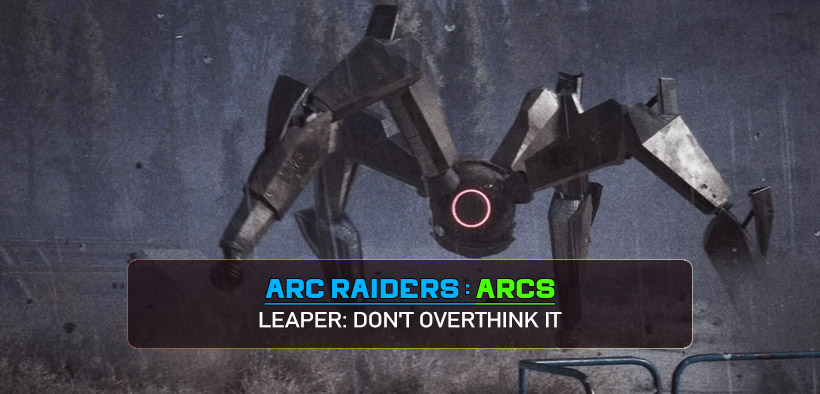
↖ 6. Leaper: Don't Overthink It
Leapers are dangerous in the open but easy to standardize.
The Strategy:
Pull the Leaper toward a building and stand inside a doorway or solid frame. Focus fire as it commits to the entry line.
Note:
Explosives are optional here. We usually save premium explosives (Deadlines) for the bigger threats. A disciplined gun-down is boring, but boring gets you extracted.
↖ 7. Quick Reference: Loadouts & Reliability
Here is the decision sheet we actually use mid-session to decide what to bring and how to fight.
↖ Best Methods by ARC Type (Solo-Focused)
| ARC Type | Fastest Reliable | Cheapest Reliable | Safest (Low Exposure) | Main Gotcha |
|---|---|---|---|---|
| Bastion | Deadline (Central Top Strip) | 25–30 Light Impact Grenades | Knees → Plant | Wrong plant spot hits heavy armor |
| Bombardier | Lure → Deadline (Lower Body) | Blaze Chip (Slow) | Lure Control + Cover | Rockets punish lazy rooftop peeks |
| Rocketeer | Stair-lip Heavy Fire | Heavy Ammo + Geometry | Hornet Driver Stun-Drop | High altitude reduces stun window |
| Leaper | Doorway Gun-down | Doorway Gun-down | Doorway Gun-down | Open ground gets you launched |
↖ Explosive Behavior Guide
| Item | Strength | Weakness | When we use it |
|---|---|---|---|
| Deadline | Huge burst, consistent if placed right | Placement-sensitive on armor | Primary finisher for Bastion/Bombardier |
| Light Impact | Cheap, stackable | Needs volume; time attracts players | Budget Bastion Defeats from safe angles |
| Wolf Pack | Fast burst, good vs. weak armor | Targeting spreads to nearby ARCs | Bombardier cleanup or chunking Rocketeers |
| Trailblazer | Can spike high damage | High variance; movement sensitive | When we can constrain target movement |
↖ 8. Blueprints & Materials: Farming Loop
We treat crafting like combat: repeatable routes, predictable outputs.
↖ Where to farm Blueprints
Night runs on Stellar are excellent. Focus on a fast loop:
- Loot security cases, bins, drawers, and lockers.
- If you see a dense lobby, commit to a fast sweep.
- Extract immediately when your bag turns blueprint heavy.
↖ Where to farm Materials (Fuel, Crude, Compound)
- For high-volume crafting, Bluegate Underground is the workhorse.
- Breach and open everything (cars, containers).
- Prioritize oil and chemicals.
- Grab breakdown items that convert into oil.
Once your oil and chemical supply is stable, premium explosives stop being rare treats and become routine tools.
↖ FAQ
1. How do we confirm a one-shot on a Bastion?
You can check the XP. If the Damaged ARC XP is around double the damage you estimated, or aligns with the total HP (which means you completely Defeated them). If the XP is low, you hit a plate.
2. Why does my Deadline sometimes fail to Defeat a Bastion?
It is almost always placement. If the explosive lands on the heavy shoulder or flank plates, the damage conversion is poor. You must hit the central top strip or the exposed internals after a knee-break.
3. Are Lures worth carrying for Bastions?
Not as a primary tool. Bastions delete lures too quickly and re-acquire you. Lures shine on Bombardiers, where the fixation behavior is stronger and safer to exploit.
4. Why do Trailblazers feel so random?
Trailblazer damage depends on the target staying in the active effect line. If the ARC steps out, or you throw it off-angle, the damage collapses. Use them only when you can force the enemy into a tight lane.
5. What and how can I farm Rocketeers with the least amount of tech needed?
Heavy ammo stair-lip peeking. You can defeat them with zero explosive investment if you use geometry to break their firing angle.
↖ Summary
The most reliable forms of consistent ARC farming in 2026 boils down to 2 things: gauging damage with XP and manipulating LoS to force predictable engagements.
If you can do mount-and-plant the right way, Deadline absolutely steamrolls Bastions and Bombardiers. If you can't, Rocketeers collapse to stair-lip peeks and Leapers gun down with good control through the door. Remember: flashy plays get liked, but the boring plays get you extracted with the loot.

Most Popular Posts
- ARC Raiders Riven Tides Key Room Guide: Best Hotel Keys, Loot Routes, Secure & Crane Storage
- ARC Raiders Bettina Guide: Best Build, Buffs, and How to Use It Against ARC
- Best ARC Raiders Attachments for Every Weapon: Complete Weapon Mod Guide
- ARC Raiders Turbine Boss Guide: Spawn Time, Weak Points, Best Weapons, and Loot
- Arc Raiders Patch 1.27: Regional Pricing, Augment Rework, and Expedition Catch-Up
- ARC Raiders Update Guide: Best Nomadic Envoy Trades, Rascal Grenade Launcher, Durability Buffs
Popular Category Lists
- ARC Raiders / (291)
- Grow a Garden / (286)
- CoD: Black Ops 7 / (166)
- MLB 26 / (150)
- Monopoly Go / (148)
- Star Citizen / (129)
- ARK Survival Ascended / (91)
- Steal a Brainrot / (90)
- Sailor Piece / (68)
- Forza Horizon 6 / (67)
- Diablo IV / (62)
- Blox Fruits / (62)
- Adopt Me / (58)
- Grow a Garden 2 / (57)
- CoD: BLACK OPS 6 / (55)
- Path of Exile 2 / (48)
- Monster Hunter Wilds / (46)
- Windrose / (44)
- Path of Exile / (40)
- Bee Swarm Simulator / (37)