0
0ARC Raiders Beat Big Enemy: Bastions, Bombardiers, Rocketeers, Leapers
- KITE
- Share
- ARC Raiders
- 01/29/26
- 1443
Let's face it: ARC Raiders isn't for the faint-hearted. The game throws Bastions, Bombardiers, Rocketeers, and Leapers your way, each with their own unique challenges. Over the past few weeks, We've spent countless hours experimenting with different strategies to take them down—some fast, some cheap, and some just downright fun.

- 1. Bastion: How to Kill?
- 1.1> Arc HP & Damage
- 1.3> The Fastest Kill Methods
- 1.4> Choosing The Right Method
- 1.5> Positioning Rules We Don't Break
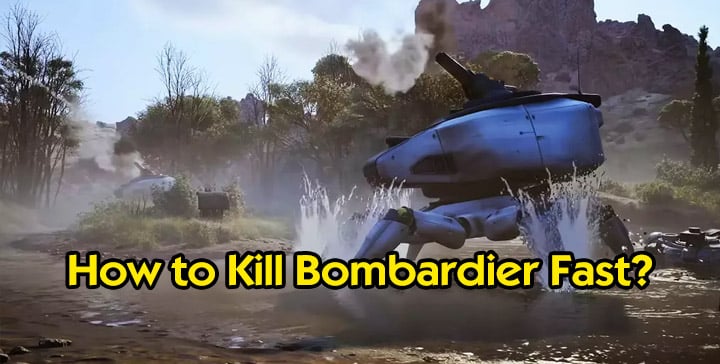
- 2. Bombardier: How To Kill?
- 2.1> What Makes A Bombardier Different?
- 2.2> #1 Reliable Kill: Lure Grenade + Plant
- 2.3> Alternative Fast Kills
- 2.4 Quick-Choose Table
- 2.5> Micro-Tactics
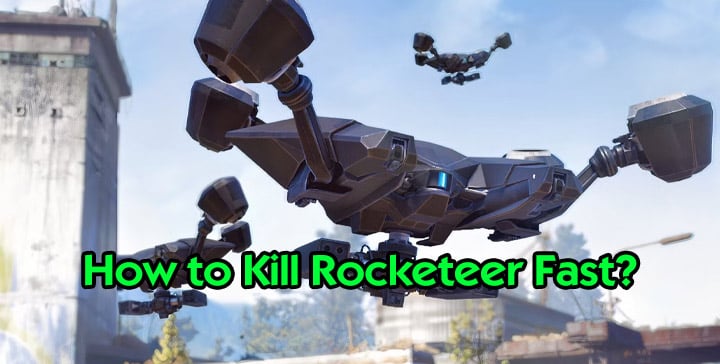
- 3. Rocketeer: How to Kill?
- 3.1> Rocketeer Numbers: Hp And Practical Damage Benchmarks
- 3.2> The High-End Route: Wolf Pack + Finish
- 3.3> The Best No-Blueprint Method: Stair-Lip Peek
- 3.4> The "Stun-Lock at Range" Method
- 3.5> The Most Fun Control Tech: Hornet Driver Knockdown → Easy Plant
- 3.6> Method Comparison Table
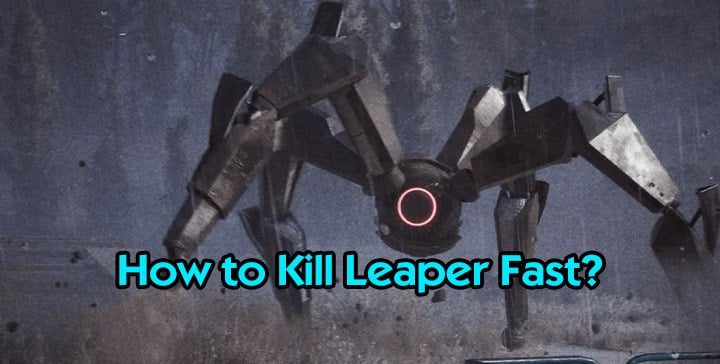
- 4. Leaper: How to Kill?
- 4.1> Leaper Snapshot: Why It's Easier Than It Looks?
- 4.2> The Core Strategy: Turn The Map Into A Leaper Trap
- 4.3> Where We Aim: Eye vs Legs?
- 4.4> Best Ways To Kill A Leaper
- 4.5> Small ARC Cleanup While Fighting Big Targets
- 5. Blueprint & Material Farming
- 5.1> Where We Farm Explosive Blueprints?
- 5.2> Where We Farm Crafting Materials?
- 5.3> Farming Table: What To Loot And Why?
- FAQs
- How Do We Estimate Bastion Hp During The Fight?
- Why Didn't My "one-shot Explosive" Kill It?
- What's The Safest Solo Method With No Premium Blueprints?
- Are Knees Worth Targeting If We Just Want Speed?
- Why Do Trailblazers Sometimes Feel Amazing And Sometimes Terrible?
- How Much Hp Does A Bombardier Have?
- Why Are Bombardiers Sometimes Easier To Kill Than Bastions Even With More Hp?
- What's The Most Reliable Solo Method?
- Are Trailblazers Good On Bombardiers?
- How Much Hp Does A Rocketeer Have?
- How Many Wolf Packs To Kill A Rocketeer?
- Where Should We Aim With Heavy Ammo?
- Why Do Stairs/ledge Peeks Make Rocketeers "Not Shoot"?
- Are Hornet Drivers Reliable On Aggroed Rocketeers?
- What's The Easiest Way To Kill A Leaper?
- How Much Hp Does A Leaper Have?
- Are Trailblazers Good On Leapers?
- Should We Use Wolf Packs On Leapers?
- What's The Fastest Way To Clear Small Arcs During A Big Fight?
- Where Do We Farm The Blueprints And Materials To Support All This?
- Finally
The goal? To find methods that work consistently across different scenarios. No relying on elusive blueprints or hoping for a lucky break. These strategies are tried, tested, and ready to help you farm ARC parts for those shiny new trophy display expeditions. So grab your gear, and let's dive into the smartest ways to kill every ARC in 2026!
↖ 1. Bastion: How to Kill?
Bastions feel "unfair" for one reason: their minigun deletes mistakes in a second, while their armor punishes lazy targeting. Once we treat the fight like a positioning puzzle + damage math problem, they become predictable—and surprisingly farmable.

↖ 1.1> Arc HP & Damage
If you're guessing whether your hits "did anything," you'll play scared. If you can measure it, you can optimize.
The Rule We Use In Real Matches:
Arc damage XP is ~2 XP per 1 HP dealt.
- Damage dealt ≈ (Damaged Arc XP) ÷ 2
- One-shot expectation: if an Arc has 2050 HP, a true one-shot should show ~4100 XP for that hit.
Why does this matter? Because it turns every attempt into data. If you place an explosive and you only see ~2100 XP, that means you hit a tougher plate or the blast didn't "bite" the weak zone—so you change placement, not just "try again harder."
What we've observed for Bastion HP?
From repeated kill logs, we typically see Bastion total damage-to-kill around: Bastion HP ≈ 2050 (so full kill credit ≈ 4100 XP)
If you find your kill log shows a lower number, then either it wasn't full HP when engaged, or teammates/other Arcs contributed. Bastions aren't "tankier everywhere." They're tanky in the wrong places to shoot.
The Reliable Weak Zones We Aim For:
- Top "central strip": comparatively light armor and the best consistency for explosives.
- Knees (yellow plates): break armor → expose → ignite/pop → incapacitation window.
- Rear peg / back weak spot: good follow-up angle, especially after a knee break.
The Zones We Avoid:
Shoulder-pad areas on top: heavier armor. If your explosive lands here, you'll see the XP/HP math immediately punish you—same item, half the damage.
That's the core lesson: placement beats rarity. A premium explosive on the wrong plate can lose to cheap grenades aimed correctly.
↖ 1.3> The Fastest Kill Methods
We rotate methods depending on whether we're solo, how safe the terrain is, and what we can afford to lose.
Method A: "Jump + Plant" One-Shot
This is the most consistent high-end kill we've used.
Execution Loop:
- Break line of sight to force the Bastion to walk toward you.
- Stow weapon to sprint faster, then jump onto its top.
- Plant the explosive on the top central strip (not the shoulder plates).
- Jump off the back and take hard cover immediately.
- Detonation should show ~4100 XP if it was full HP.
If you plant on the flank/shoulder zone, you often get the "why didn't it die?" moment—because you essentially paid for a one-shot and bought a half-shot.
What This Means In Practice?
Your real skill check isn't planting; it's choosing a roof/ledge/doorway where you can safely drop off and break sight before the minigun tracks you.
Method B: Knee Break → Free Window → Plant
If you're struggling to get the clean top-plant, we use this as the "training wheels" version.
- Peek from cover and chip the knees with heavy ammo (we usually see the armor break in ~5–6 solid hits).
- When the knee pops and it collapses, you get a short incapacitation window.
- Then you rotate behind/under and plant safely.
If you discover you keep dying right after planting, then you're planting too early (while it can still rotate and track). Knee break reduces that risk massively.
Method C: Trailblazers
Trailblazers can delete a Bastion quickly—but they're moody.
Why The Damage Swings?
They create a gas line and chained explosions; the Bastion's movement and where it "stands" inside the cloud changes how many blasts connect.
- Good connects: ~1000+ HP equivalent on a strong hit
- Bad connects: a few hundred (you'll see it instantly via XP)
Best Practice We Follow:
Throw under/through the legs so it remains inside the cloud. If you notice it stepping out of the cloud, then don't "double down" blindly—reposition and re-throw.
Method D: Light Impact Grenade Spam
This is the "anyone can do it" method, and it's way better than it sounds.
How We Do It Safely?
- Lure it to a spot where its gun can't maintain direct line of sight (raised ledge, hard cover).
- Arc the throws onto the top central strip.
- Expect roughly 22 grenades for a clean kill; 25–30 if you miss or hit armored plates.
Cost Logic
If you buy 30 impacts, it's roughly the price of a single premium play—yet it can kill a Bastion in ~30 seconds of clean spam from safety. If you find your count climbing above 30, then you're probably tagging shoulder armor or splashing the sides.
Method E: Wolf Packs
Wolf Packs can kill in 2–3 throws depending on whether submunitions stay on target.
Trade-off:
- Pros: very quick burst kills when they cluster into the weak top strip.
- Cons: they can chase other nearby Arcs, and the Bastion's mixed armor zones increase damage variance.
If you're fighting in a "busy" area with other Arcs around, then reliability drops—plan for three.
↖ 1.4> Choosing The Right Method
| Method | Typical Throws/Shots | Reliability | Risk (time in LOS) | Best Target Zone | Notes |
|---|---|---|---|---|---|
| Deadline top-plant | 1 | Very high (if placed correctly) | Medium (during drop-off) | Top central strip | Misplace to shoulder/flank → often half damage |
| Knee break → plant | 5–6 knee hits + 1 plant | High | Low–Medium | Knees, then underside/back | Great for learning safe timing |
| Trailblazers | 2–5 | Medium (variance) | Low–Medium | Under legs / midline | Movement decides your DPS |
| Light impact spam | 22–30 | High (with good angle) | Low | Top central strip | Cheapest consistent solo method |
| Wolf Packs | 2–3 | Medium–High | Low | Top central strip | Submunitions may get distracted |
The takeaway: if you want minimum drama, go Deadline top-plant (or knee-break into it). If you want minimum cost, go light impacts.
↖ 1.5> Positioning Rules We Don't Break
Damage methods change; survival rules don't.
The Line-of-sight Rule:
Bastions need direct line of sight to melt you. So we fight them where we can toggle vision: doorway edges, roof lips, thick pillars, ramp corners. If you notice you're dying during "reposition," then you're moving in open ground without a planned hard-cover stop. Fix the route, not the aim.
The "Jump Off The Back" Habit:
After planting on top, we drop off the rear so the turret has to rotate further before it can track. That small delay is often the difference between "clean one-shot" and "respawn screen."
Target Discipline:
- Aim for top central strip when tossing or planting.
- Avoid shoulder plates unless you enjoy paying extra for sadness.
↖ 2. Bombardier: How To Kill?
Bombardiers look scarier than Bastions because they act scarier: they can sit at range and rain rockets without needing line of sight. The twist is that they're also less armored overall, so the right explosive setup can delete them faster than you'd expect—especially if we use lures to "freeze" their attention and plant on the lower half where placements don't get canceled.
↖ 2.1> What Makes A Bombardier Different?
If you fight a Bombardier like a Bastion, you'll keep asking "why won't it come closer?"—and the rockets will answer for it.
Hp, Armor, And What That Means:
- Bombardier HP: ~2670
- Using the same XP heuristic many players track for Arc damage:
- Damage dealt ≈ (Damaged Arc XP) ÷ 2
- Full HP kill credit tends to land near ~5340 XP total contribution if you do all the damage yourself.
Because their armor is weaker than Bastions, single throws like Wolf Packs often chunk them harder than you'd see on a Bastion—even though Bombardiers have more HP.
Threat Kit You Must Respect:
- Rocket battery (top launchers): doesn't require line of sight, so "roof-peek safety" is unreliable.
- Spotters (two small drones): you can pop them for breathing room, but they respawn after a couple minutes.
- Close-range AoE shock spin + knee bumps: if you hug them, you risk knockdowns that interrupt planting animations.
If you notice your explosive placement keeps canceling at point-blank range, then you're standing in the danger zone where knees/AoE can juggle you.
↖ 2.2> #1 Reliable Kill: Lure Grenade + Plant
This is our favorite because it turns a chaotic rocket platform into a distracted statue.
Why Lures Work So Well On Bombardiers?
Bombardiers are oddly bad at deleting small objects close to them quickly. So when a lure lands near their feet, they often:
- commit to it,
- waste attacks on it,
- and stop scanning for you.
That means you get the most valuable resource in this fight: time to plant.
The Exact Sequence We Use:
- Throw a lure close to the Bombardier (near its lower body). If you find it's still tracking you, then your lure is too far or too exposed; place it tighter to the Bombardier.
- Approach while it's focused and plant your explosive on the lower half (legs/underside/body).
- Back off to hard cover (not just "kinda far away"—rockets still punish lazy exits).
- Watch for the damage XP spike. A clean full-HP delete commonly shows near ~5200–5300 Damaged Arc XP (≈2670 HP).
Placement Rule: Lower Half Beats Upper Half
Why does "lower half" matter so much? Because the upper assembly rotates more, and rotation plus knock effects are what cancel the plant.
- Plant low → fewer cancels, more consistent kills.
- Plant high → more animation interrupts, more panic, more rockets.
↖ 2.3> Alternative Fast Kills
Wolf Packs: Usually A Clean 2-tap
Wolf Packs shine here because Bombardiers aren't armored like Bastions.
What We Commonly See In Logs?
- One Wolf Pack hit often contributes around 1200–1600 damage worth of XP (variance depends on submunitions staying on target).
- So 2 throws frequently finish a full HP Bombardier.
- If other Arcs are nearby, submunitions can get "distracted," and it can slip to 3 throws.
If you notice your first Wolf Pack chunks for way less than expected, then reposition to reduce nearby targets—your damage didn't vanish, it went sightseeing.
Photoelectric Cloak "Walk-Up Plant":
This works best when you already understand Bombardier shove/AoE timing.
Rule:
- Approach cloaked, plant on the lower half, then break away.
- If you try to plant on the top section, then the spin can cancel you mid-place.
It's flashy, but the lure setup is still more consistent because it manipulates the Bombardier's behavior, not just your stealth.
Trailblazers: Big Highs, Awkward Lows
Trailblazers can stack explosive damage rapidly, but their damage is hard to predict.
What Causes The Variance?
- Bounces off legs/angles,
- Bombardier micro-movement out of the blast path,
- Explosion sequencing missing the core.
We've seen throws that "look perfect" produce tiny XP numbers (a couple hundred damage), and other throws spike much higher.
If you're relying on Trailblazers, then pack enough for the worst case—we plan for 4–5 unless we're also running a lure + another finisher.
Blaze Grenades: Cheap, Safe, Slow
Blaze is the "I'm not dying today" option. You throw, take cover, let burn ticks do the work.
- Typical contribution per Blaze is often around 400–500 damage worth of ticks.
- Expect roughly 6–7 to kill a full HP Bombardier.
This is a good plan when you're undergeared or playing cautious in contested areas, because you spend less time exposed—even if the kill takes longer.
↖ 2.4 Quick-Choose Table
Here's the loadout decision table we actually use.
| Method | Typical Resources | Time-to-kill | Consistency | Main Risk | Best Use Case |
|---|---|---|---|---|---|
| Lure + one-shot plant (Deadline-style) | 1 lure + 1 plant | Very fast | Very high | Getting juggled if you plant too close without distraction | Solo deletes, controlled farming |
| Wolf Packs | 2 (sometimes 3) | Fast | High–medium | Submunitions get distracted by nearby Arcs | Busy zones, quick burst windows |
| Cloak + plant | 1 cloak + 1 plant | Fast | Medium | Plant cancel from spin/knees/AoE | When you can't safely place lures |
| Trailblazers (stacked) | 3–5 | Medium | Medium–low | Damage variance, bounce angles | When you can throw repeatedly from cover |
| Blaze grenades (burn) | 6–7 | Slow | High | Time attracts third parties | Budget, safe chip damage |
A practical takeaway: Bombardiers reward commitment to control tools (lures) more than pure DPS toys, because rockets punish "standing around" more than they punish "running in to finish."
↖ 2.5> Micro-Tactics
These little adjustments save more runs than upgrading your gear.
Spotters:
- Popping spotters buys you a short calmer moment.
- They respawn, so we treat them like a temporary debuff removal, not the objective.
If you find the spotters are constantly keeping you lit up while you reposition, then clear them once, plant/finish, and leave—don't get dragged into a drone side quest.
Rocket-safe Positioning:
High ground is not automatically safe here. Rockets arc.
We play around hard cover you can fully break behind (thick walls, solid structures), and we time exposures: peek → throw/plant → disappear.
Planting Discipline:
If you're close enough to plant, you're close enough to get bumped.
- Approach on a clean line,
- Plant on the lower half,
- Don't linger to "confirm"—your XP log will confirm for you.
↖ 3. Rocketeer: How to Kill?
Rocketeers feel dangerous for one simple reason: they punish movement mistakes, not damage mistakes. If we stand in the open, their rockets delete us; if we fight on our terms—outside their comfortable range, from a stair lip, or by forcing a knockdown—they turn into one of the most repeatable Arc farms in the game.
↖ 3.1> Rocketeer Numbers: Hp And Practical Damage Benchmarks
Before we talk tactics, we anchor expectations. When you know the math, you stop overcommitting.
Hp And What "two-tap" Really Means:
Rocketeer HP: ~1100
A good Wolf Pack hit often contributes about ~1000 damage on a clean connect (in practice you'll see variance).
That means:
- 2 Wolf Packs is the realistic "always works" plan.
- 1 Wolf Pack + heavy weapon cleanup is usually the best efficiency plan.
Heavy Weapon Baseline:
From repeated fights, we typically see: - Anvil hit ≈ 40 damage (often reflected as ~80 Arc-damage XP if you track that way)
So if your Wolf Pack leaves the Rocketeer with ~200 HP, then you're looking at: - ~5 shots (sometimes 6 if you miss armor breaks or hit weird angles)
Why does this matter? Because it tells us the optimal rhythm: chunk with explosives, finish with guaranteed hits—no heroic gambling required.
↖ 3.2> The High-End Route: Wolf Pack + Finish
This is the "we want it dead right now" option.
The Clean Sequence:
- Tag it at range with heavy ammo (Anvil / Feroh) while it's still traveling.
- When it closes distance, throw a Wolf Pack to chunk/near-kill it.
- Immediately swap back to heavy ammo and finish with 4–6 clean shots.
If you discover your Wolf Pack consistently leaves it alive, that's normal—submunitions don't always land in unarmored areas. The fix isn't "throw harder," it's "plan the cleanup."
Can Wolf Pack One-shot A Rocketeer?
Yes, it can happen if the payload lands under/into softer parts. But reproducibly doing a true one-shot is tricky because:
- height and angle decide how many explosives actually connect,
- some submunitions hit ground or scatter.
If you notice lots of submunitions burying into the ground, then you threw too late or at the wrong height. Either throw earlier (as it's higher) or accept the 1-pack + cleanup plan.
↖ 3.3> The Best No-Blueprint Method: Stair-Lip Peek
This is our favorite "low tech" kill because it removes the hardest part of Rocketeer fights: surviving the first rocket volley.
Why Stairs Work?
When we peek just over a stair lip, we expose a tiny slice of our body while keeping most of our hitbox protected. Rocketeers often fail to get a clean firing angle, so they either hesitate, miss, or don't fire at all.
That means: we get to aim calmly and dump heavy ammo without paying the usual rocket tax.
How We Run It?
- Aggro the Rocketeer with a few heavy shots so it commits.
- Drop to a staircase (any stairs with a good lip can work).
- Peek over the edge—not fully up, just enough to shoot.
- Aim at the red eye (center) to break armor, then keep hitting. (Alternative: focus engines; after two engines destroyed, it can fall.)
If you find it occasionally drifts wide to get a better angle, then stop peeking for a second, reposition one step, and re-establish the lip. The staircase is your shield; don't abandon it mid-fight.
Cost-to-kill Feel:
- With steady hits at ~40 damage each, you're often looking at roughly 25–30 Anvil hits for a full solo kill from scratch.
- The real advantage is not speed—it's survivability and consistency.
↖ 3.4> The "Stun-Lock at Range" Method
This method is especially strong with two players, but still workable solo.
The Behavior We Exploit:
Rocketeers tend to: advance toward you, then stall near the edge of their effective range if they're taking repeated hits, only push again when pressure drops.
So if you can keep landing shots on the red eye/engines consistently, you can make it "hover uselessly" while you farm damage.
How We Apply It?
- Start the fight beyond its range.
- Maintain a steady cadence of hits (don't allow long gaps).
- If you're solo and reload timing is your issue, then: bring a second heavy weapon if possible (swap to reduce downtime), or use cover timing so reload happens while it's stalled.
↖ 3.5> The Most Fun Control Tech: Hornet Driver Knockdown → Easy Plant
This is the method we recommend when you want style and control, especially if you have a strong planted explosive available.
Why Hornet Drivers Beat Other "Stun" Tools For Us?
In our testing, Hornet Drivers are more reliable than some dedicated stun grenades against Rocketeers because:
- they don't need a perfect direct hit,
- the shock proximity effect can trigger a brief disable,
- Rocketeers often drop altitude or fall after the zap.
If you throw one and it doesn't drop, don't panic—throw timing and aggro state matter.
Reliability Rules:
Best case: the Rocketeer is not aggroed yet.
If you can walk up without sprinting, you often get closer before it reacts. If you must close distance, a cloak can help—but the core is "don't alert it early."
Height matters:
If it's very high, it may enter stun while airborne and float down slowly, and the stun can wear off as it lands. So if you notice it's high, then be ready to mount/plant immediately as it drops.
The Sequence We Use:
- Approach quietly and throw Hornet Driver near it (not necessarily a direct hit).
- When it zaps and loses control, close in and climb on.
- Plant your explosive, then dismount to safety.
- If it glitches upside down or gets stuck, you can even finish with melee/heavy shots, but don't rely on that happening.
Why plant during knockdown? Because it compresses the risk window. You're not trying to "out-duel rockets," you're removing rockets from the equation.
↖ 3.6> Method Comparison Table
Here's how we choose based on inventory and terrain.
| Method | Gear Requirement | Typical Kill Pattern | Consistency | Exposure Risk | Common Failure | Fix |
|---|---|---|---|---|---|---|
| Wolf Pack + Anvil cleanup | Wolf Pack + heavy ammo | 1 pack + 4–6 shots (or 2 packs) | High | Medium | Pack scatters / hits ground | Pre-damage at range; plan cleanup |
| Stair-lip peek (no blueprint) | Heavy ammo + stairs | 25–30 steady hits | Very high | Low | Rocketeer shifts angle | Re-peek/reset one step; keep lip |
| Range "stun-lock" pressure | Heavy ammo (2 players best) | Continuous hits outside range | Medium–high | Low–medium | Reload gaps allow push | 2nd weapon swap; tighter cadence |
| Hornet Driver knockdown → plant | Hornet Drivers + planted explosive | Zap → drop → plant → disengage | Medium–high | Medium | Too high / stun wears off | Wait for lower altitude; approach unaggroed |
The key takeaway here is practical: terrain is a weapon. If you have stairs, you don't need fancy explosives to win.
↖ 4. Leaper: How to Kill?
Leapers are the rare "big ARC" that we don't dread seeing—most of the time. They hit hard and move fast, sure, but their aggression is predictable, and that means we can script the fight: pull them into a building, force clean angles, and turn the chaos into target practice.
The real danger is getting distracted by small ARCs or a third party while you're mid-kill, so how we kill Leapers cheaply, how we clear small ARCs instantly, and how we keep our explosive supply stocked.
↖ 4.1> Leaper Snapshot: Why It's Easier Than It Looks?
We treat Leapers like a positioning check, not a DPS check.
Hp And What Our Damage Tests Suggest:
Leaper HP: ~1100 (typical full kill contribution)
With explosive testing, a well-placed Trailblazer can nearly delete it in one go:
- We've seen a Trailblazer pop around ~2100 "Damaged Arc XP", which maps to roughly ~1050 damage if you use the common 2 XP ≈ 1 HP rule of thumb.
- That leaves the Leaper with "one bullet of health" energy—finish with a couple of shots and move on.
If you notice your Trailblazer sometimes feels weak, that's not you hallucinating. Leaper movement changes how many explosions connect, so we plan for a backup finisher every time.
Leaper's Real Threat Pattern:
- It wants to close distance and jump/pressure.
- That's good news, because unlike rocket platforms, it willingly walks into our trap: doorways, stairs, tight halls.
That means: we don't chase Leapers across open ground. We let them come to us, on our geometry.
↖ 4.2> The Core Strategy: Turn The Map Into A Leaper Trap
This is the method we use when we want consistency and minimal resource spend.
Building Bait: The "Doorframe Blender"
- Tag the Leaper with a few shots to grab aggro.
- Back into a building with a clean doorway and hard cover inside.
- Hold the angle and punish it as it commits through the entrance.
Why does this work? Because the doorway limits its lateral movement, so your shots land more reliably and you spend less time exposed.
If you find it keeps landing on you with a clean jump, then you're standing too close to the threshold. Step deeper into the room so it has to fully enter before it can connect.
Don't "Dance" In The Open:
- Short version: don't duel a Leaper in a plaza.
- Longer version: if you fight in open ground, you're giving it maximum pathing freedom, which increases your miss rate and your time-to-kill—and that's exactly when other players show up.
If you discover third parties keep arriving before you finish, then your fix is not higher DPS; it's faster control: move the fight indoors and end it cleanly.
↖ 4.3> Where We Aim: Eye vs Legs?
Leapers give you two practical routes depending on your weapon and comfort.
The "Eye" Route:
- Aim for the central eye area.
- With heavy ammo, we can strip armor and then keep drilling the same point.
This is our default because it's simple: one target, repeated hits, quick collapse.
The "Legs" Route:
- Shoot the legs with heavy ammo to reduce mobility / slow the pressure.
- Once it's less agile, finishing becomes trivial.
If you notice you're getting chain-hit by jumps and can't stabilize your aim, then legs first is the calm, grown-up solution.
↖ 4.4> Best Ways To Kill A Leaper
Leapers are easy enough that we treat premium explosives as optional, not mandatory.
Cheap And Clean: Just Gun It Down From Inside
- Bait into a building.
- Hold a tight angle.
- Aim eye/legs and keep firing.
This works with surprisingly modest weapons because your safety comes from geometry, not gear.
Trailblazer: Near-one-shot When Placed Under It
- How we throw it: We try to land it under the Leaper's path so it stays inside the blast line.
- What can go wrong: If it dodges out of the cloud, damage drops sharply.
If you find the first throw low-rolls, then don't panic-spam into the open. Re-bait it into the doorway, then throw again when its movement is committed.
Blaze Grenades: Safe Chip Damage When You Don't Want Exposure
Blaze is slower, but it lets you play patient:
- Toss, take cover, let burn tick.
- Repeat as needed.
If you're under-geared or you're hearing footsteps (players nearby), then Blaze buys time without donating your hitbox.
Wolf Packs: Effective, But Usually Wasteful
Wolf Packs will hurt Leapers, but we rarely spend them here.
Why does that matter? Because Wolf Packs are high value against Rocketeers, Bombardiers, and Bastions—targets that either punish mistakes harder or are slower to kill without explosives.
If you're short on premium explosives, then keep Wolf Packs for the threats that actually demand them.
↖ 4.5> Small ARC Cleanup While Fighting Big Targets
Small ARCs are the real fight-ruiners: they chip you, displace you, and steal your focus.
Why Seeker Grenades Are Our Go-to?
We use Seeker grenades as "instant housekeeping." They behave like a tiny, single-target tracking payload:
- throw upward,
- payload acquires,
- it hunts a nearby small ARC.
That means we don't waste our main magazine or our positioning on pests.
Practical Kill Expectations:
If you throw from above so it hits unarmored engine parts (top/back angles), then:
- Wasps often die in 1 Seeker
- Hornets often take 2 Seekers
- Snitches can go down in 1–2 Seekers depending on angle/armor
If you notice Seekers failing to one-shot a Wasp, then your angle is probably frontal; gain height or throw so it drops onto engines.
Small Arc Quick-reference Table:
| Small ARC | Seeker Grenade Expectation | Best Angle | If it doesn't die, then… |
|---|---|---|---|
| Wasp | 1 | From above onto engines | Re-throw from higher angle |
| Hornet | 2 | Above/behind | Don't chase—clear from cover |
| Snitch | 1–2 | Above/side | Confirm armor; adjust approach |
↖ 5. Blueprint & Material Farming
Killing is easy once. Killing repeatedly requires supply.
↖ 5.1> Where We Farm Explosive Blueprints?
Our most consistent route is Stellar Montis (Night mode) focusing on high-frequency loot containers:
- Security cases
- Trash bins
- Drawers
- Blue cases / lockers
- Security lockers
We've pulled premium explosive blueprints (Wolf Pack / Deadline / Seeker / Trailblazer) from "boring" containers like bins often enough that we now treat bins as mandatory stops, not filler.
↖ 5.2> Where We Farm Crafting Materials?
For explosives like Deadline/Wolf Pack/Trailblazer, the bottleneck is usually explosive inputs.
Bluegate Underground is our preferred material run because it stacks multiple needs in one loop:
Breach and open everything (cars, breachable containers, caches)
You'll commonly walk out with:
- lots of chemicals (often 100+; strong runs can be higher)
- oil and oil-sources (motors, coolant, filters, pumps) to break down
- sometimes synthesized fuel depending on route
That means: one run can translate into multiple crafting sessions worth of crude explosives / explosive compound equivalents, which keeps your "premium options" available without credit bleeding.
↖ 5.3> Farming Table: What To Loot And Why?
| Goal | Best Location | What to Loot | Why it works |
|---|---|---|---|
| Explosive blueprints | Stellar Montis (Night) | Bins, drawers, security cases, lockers | High container density, fast resets |
| Synthesized fuel | Stellar Montis | Red containers, desks/trolleys | Direct ingredient source for Trailblazer crafting |
| Oil + chemicals (bulk) | Bluegate Underground | Breachables, cars, breakdown items | Converts into explosive crafting chain at scale |
| Extra explosive compound | Storm mode (when available) | Fossilized lightning, security containers | Supplemental source for crafting inputs |
↖ FAQs
↖ How Do We Estimate Bastion Hp During The Fight?
We watch the Damaged Arc XP pop-up. Since it's about 2 XP per 1 HP, we divide by 2 to estimate damage dealt and compare to ~2050 HP total.
↖ Why Didn't My "one-shot Explosive" Kill It?
Most commonly: placement hit armored plates (shoulders/flanks) instead of the top central strip. The XP readout will usually show roughly half the expected value.
↖ What's The Safest Solo Method With No Premium Blueprints?
Light impact grenades from a position that denies line of sight. Plan for 25–30 while learning, then you'll tighten to the low 20s.
↖ Are Knees Worth Targeting If We Just Want Speed?
Yes—if you're dying during plants. Knee breaks create an incap window that converts a risky plant into a controlled one.
↖ Why Do Trailblazers Sometimes Feel Amazing And Sometimes Terrible?
Because their explosions "tick" along a line; if the Bastion steps out of the cloud, fewer blasts connect. Same throw quality, different movement outcome.
↖ How Much Hp Does A Bombardier Have?
About 2670 HP. Using the common Arc XP heuristic, a full solo kill tends to correspond to roughly ~5340 Damaged Arc XP worth of damage contribution.
↖ Why Are Bombardiers Sometimes Easier To Kill Than Bastions Even With More Hp?
Because they generally have weaker armor, so explosives (especially Wolf Packs) chunk them harder per throw—assuming the payload stays on target.
↖ What's The Most Reliable Solo Method?
Lure grenade + plant a one-shot explosive on the lower half. The lure "locks" their attention long enough to place safely, and lower-half placement reduces cancel risk.
↖ Are Trailblazers Good On Bombardiers?
They can be, but they're inconsistent. If you use them, plan for 4–5 or pair them with a lure and a backup finisher.
↖ How Much Hp Does A Rocketeer Have?
About 1100 HP. That's why a strong Wolf Pack hit can nearly delete it, and why heavy ammo cleanup is so efficient.
↖ How Many Wolf Packs To Kill A Rocketeer?
Usually 2 if you rely only on Wolf Packs. More commonly, we do 1 Wolf Pack + 4–6 Anvil hits to finish.
↖ Where Should We Aim With Heavy Ammo?
We prioritize the red eye (center) to break armor and keep consistent damage. If you prefer control, shooting engines can also force it down after two engines destroyed.
↖ Why Do Stairs/ledge Peeks Make Rocketeers "Not Shoot"?
Because you're minimizing exposure and often breaking their clean firing angle. If you see rockets start landing anyway, then your peek is too high or the Rocketeer has drifted to a better angle—reset your position.
↖ Are Hornet Drivers Reliable On Aggroed Rocketeers?
They can work, but we get the best results when the Rocketeer is not yet aggroed. If it's already angry and moving unpredictably, then combine Hornet Drivers with hard cover and be ready to switch back to heavy ammo pressure.
↖ What's The Easiest Way To Kill A Leaper?
Bait it into a building and shoot it down from cover. If you're getting pressured, shoot legs first; if you're stable, drill the eye.
↖ How Much Hp Does A Leaper Have?
Roughly ~1100 HP. A strong Trailblazer can nearly one-shot if it connects cleanly.
↖ Are Trailblazers Good On Leapers?
Yes—when thrown under their movement path. If the Leaper sidesteps the blast line, damage can drop, so always plan a quick gun finisher.
↖ Should We Use Wolf Packs On Leapers?
Usually no. They work, but they're better saved for Rocketeers/Bombardiers/Bastions where the opportunity cost is lower and the danger is higher.
↖ What's The Fastest Way To Clear Small Arcs During A Big Fight?
Seeker grenades. Throw them so the payload drops onto engines from above; Wasps often die in 1, Hornets in 2, Snitches in 1–2.
↖ Where Do We Farm The Blueprints And Materials To Support All This?
- Blueprints: Stellar Montis (Night), prioritizing bins/drawers/security containers.
- Materials: Bluegate Underground for bulk chemicals/oil sources; Stellar for synthesized fuel.
↖ Finally
We don't win these fights by out-aiming robots—we win by controlling sightlines, forcing predictable behavior, and placing explosives where armor is weakest. Once you start using XP as a damage meter, every method becomes testable: you'll know immediately whether a throw was perfect, acceptable, or a waste.

Most Popular Posts
- ARC Raiders Riven Tides Key Room Guide: Best Hotel Keys, Loot Routes, Secure & Crane Storage
- ARC Raiders Bettina Guide: Best Build, Buffs, and How to Use It Against ARC
- Best ARC Raiders Attachments for Every Weapon: Complete Weapon Mod Guide
- ARC Raiders Turbine Boss Guide: Spawn Time, Weak Points, Best Weapons, and Loot
- Arc Raiders Patch 1.27: Regional Pricing, Augment Rework, and Expedition Catch-Up
- ARC Raiders Update Guide: Best Nomadic Envoy Trades, Rascal Grenade Launcher, Durability Buffs
Popular Category Lists
- ARC Raiders / (291)
- Grow a Garden / (286)
- CoD: Black Ops 7 / (166)
- MLB 26 / (150)
- Monopoly Go / (148)
- Star Citizen / (129)
- ARK Survival Ascended / (91)
- Steal a Brainrot / (90)
- Sailor Piece / (68)
- Forza Horizon 6 / (67)
- Diablo IV / (62)
- Blox Fruits / (62)
- Adopt Me / (58)
- Grow a Garden 2 / (57)
- CoD: BLACK OPS 6 / (55)
- Path of Exile 2 / (48)
- Monster Hunter Wilds / (46)
- Windrose / (44)
- Path of Exile / (40)
- Bee Swarm Simulator / (37)