


 0
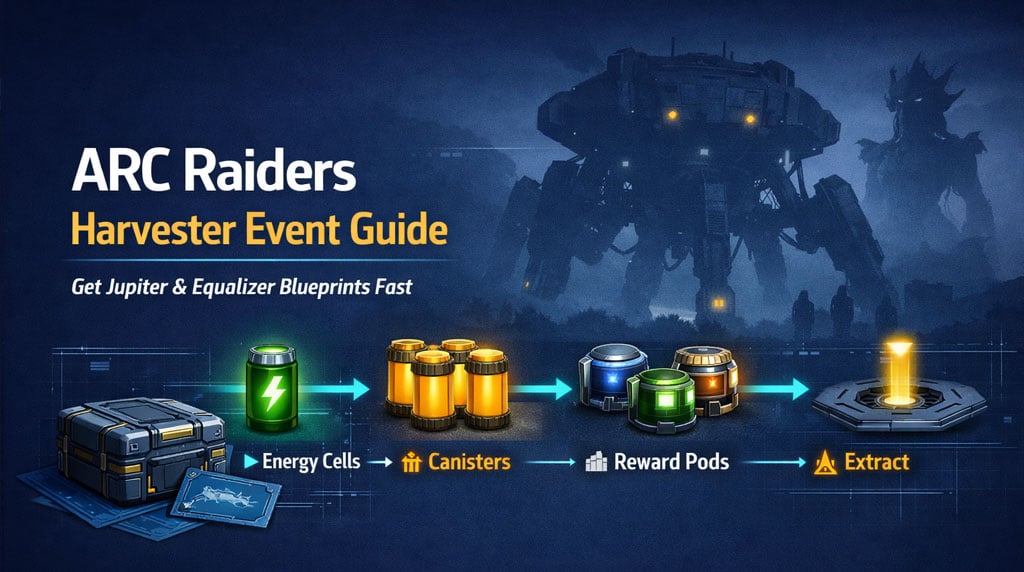
0ARC Raiders Harvester Event Guide: Get Jupiter and Equalizer Blueprints Fast
- KITE
- Share
- ARC Raiders
- 05/17/26
- 331
The Harvester event is easier than it looks. Most failed runs happen because players fight the Queen, miss the energy cells, or stand too far from the reward pods.
Do the objective. Ignore the ego fight. Loot fast.
Harvester can drop two top PvE weapon blueprints: Jupiter and Equalizer. If you solo it, you can loot all 3 reward pods yourself. That is the best shot at pulling one blueprint, or both if the loot roll is kind.

- ARC Raiders Harvester Event Rewards
- Best Loadout for the Harvester Event
- How to Complete the Harvester Event
- Step 1: Breach Upper Chambers for Energy Cells
- Step 2: Avoid Fire and Blue Electrical Attacks
- Step 3: Insert the 3 Cells
- Step 4: Destroy Yellow Canisters
- How to Secure Harvester Reward Pods
- Solo vs Squad Harvester: What Is Better?
- Optional Queen Core Farm After Harvester
- Common Harvester Mistakes
- Fighting the Queen Too Early
- Missing the Energy Cell Drop
- Keeping Shield On During Electrical Pulse
- Standing Too Far From Reward Pods
- Greeding After Blueprint Drop
- FAQ
- How do you complete the Harvester event in ARC Raiders?
- Can you solo the Harvester event?
- How do you get the Jupiter blueprint in ARC Raiders?
- What weapon is best for Harvester?
- Why remove shield during Harvester?
- Summary
↖ ARC Raiders Harvester Event Rewards
The reason we run Harvester is simple: weapon blueprints.
| Reward | Value | Notes |
|---|---|---|
| Jupiter Blueprint | S+ | Best prize; top-tier PvE weapon |
| Equalizer Blueprint | S | Strong PvE weapon |
| ARC materials | A | Useful crafting loot |
| Energy clips | B | Often gained while breaching |
| Reward pod loot | A–S | Blueprint not guaranteed |
Jupiter is usually the priority. If it drops, extract. Do not donate it to the next squad.
↖ Best Loadout for the Harvester Event
Bring gear that clears mechanics quickly.
| Slot | Best Pick | Why |
|---|---|---|
| Weapon | Full-auto rifle / SMG | Melts yellow canisters fast |
| Backup | Anvil | Works, but reloads slowly |
| Shield | Optional | Blue electrical attack can drain or disable it |
| Utility | Meds + shield rechargers | Fix chip damage and mistakes |
| Exit Plan | Nearby hatch route | Fast escape after loot |
| Team Size | Solo / Duo | Solo gets more loot; Duo is safer |
Full-auto weapons are best.
The canisters do not have huge health, but the damage window is short. Reload downtime kills solo clears.
↖ How to Complete the Harvester Event
The event has one job: find 3 energy cells, insert them, then shoot yellow canisters.
| Step | Action | Key Detail |
|---|---|---|
| 1 | Enter Harvester | Avoid unnecessary PvP |
| 2 | Breach upper chambers | Cells drop from these sections |
| 3 | Find 3 energy cells | They drop on the floor, not inside the loot menu |
| 4 | Stage cells near center | Saves time later |
| 5 | Insert all cells | Use the 3 center slots |
| 6 | Shoot yellow canisters | Full-auto is fastest |
| 7 | Loot 3 reward pods | Move before other raiders do |
| 8 | Extract | Especially if you got a blueprint |
Do not overcomplicate it. The Harvester is an objective puzzle, not a boss fight.
↖ Step 1: Breach Upper Chambers for Energy Cells
Go around the upper Harvester sections and breach them. You need 3 energy cells.
Important: the cell usually drops physically onto the floor after the breach. It is not always inside the container UI.
| Breach Result | What to Do |
|---|---|
| Energy cell drops | Pick it up, carry it near center |
| ARC parts drop | Loot only if safe |
| Energy clips drop | Grab if quick |
| No cell | Move to next chamber |
Best habit: drop each cell near the center slot area. Once all three are staged, you can insert them quickly, even solo.
↖ Step 2: Avoid Fire and Blue Electrical Attacks
The Harvester attacks while you work. Learn the cues and stop wasting meds.
| Attack | Threat | Correct Play |
|---|---|---|
| Fire attack | Burns inside Harvester | Step out through a hatch/opening |
| Blue electrical pulse | Drains/disables shield | Unequip shield or avoid pulse |
| Stomp damage | Random chip damage | Keep moving, heal fast |
| Projectile cycle | Forces downtime | Wait, then continue breaching |
The blue electrical attack is the sneaky one. If your shield keeps getting zapped, remove it during the event phase. Re-equip it later when you leave or fight.
↖ Step 3: Insert the 3 Cells
Once all 3 energy cells are ready, place them in the center slots.
| Team Size | Best Method |
|---|---|
| Solo | Stage all 3 cells first, then insert fast |
| Duo | One breaches, one stages cells |
| Squad | Split chambers and finish quickly |
| Public lobby | Stay close to a reward pod before completion |
Solo is slower, but the reward upside is huge. If nobody contests you, all 3 pods are yours.
↖ Step 4: Destroy Yellow Canisters
After the cells go in, yellow canisters expose themselves. Shoot them until the phase ends.
| Weapon | Performance | Verdict |
|---|---|---|
| Full-auto rifle | Excellent | Best choice |
| SMG | Excellent | Great uptime |
| High-capacity weapon | Excellent | Fewer reload issues |
| Anvil | Good | Strong but slow reload |
| Slow semi-auto | Average | May need extra cycles |
Solo players may need 2–3 damage cycles depending on weapon and reloads. A duo or squad can often finish in one cycle.
Reload before the canisters expose. Small detail, big difference.
↖ How to Secure Harvester Reward Pods
When the event completes, 3 reward pods drop. These are first-come, first-served.
If other raiders are around, positioning matters more than damage.
| Situation | Best Play |
|---|---|
| Alone | Loot all 3 pods fast |
| Other players helping | Stand near one pod before finish |
| Final canisters almost dead | Stop over-shooting, move to pod |
| Blueprint drops | Extract immediately |
| Pod is exposed | Smoke, grab, leave |
If you are still shooting from far away when the last canister dies, someone else will take your reward. Harsh, but true.
↖ Solo vs Squad Harvester: What Is Better?
| Method | Pros | Cons | Best For |
|---|---|---|---|
| Solo | Can loot all 3 pods | Slower, riskier | Blueprint hunting |
| Duo | Fast and controlled | Split loot | Consistent clears |
| Squad | Very fast | High loot competition | Easy completion |
| Public event | Low effort | Loot often stolen | Opportunistic farming |
If you need Jupiter or Equalizer, solo gives the best ceiling. If you only want completion, duo is the sweet spot.
↖ Optional Queen Core Farm After Harvester
The Queen is optional. Do not fight her during the Harvester objective unless she blocks you.
After the event, you can farm Queen legs for cores.
| Target | Drops | Notes |
|---|---|---|
| Queen leg | Queen Core, magnetic accelerators, ARC parts | Core common, not guaranteed |
| Multiple legs | 5–8 cores possible | Risk rises fast |
| Damaged/rusted leg | Break is close | Get ready to loot |
Best method:
- Shoot one leg until it breaks.
- Run in.
- Grab loot.
- Heal and reposition.
- Repeat only if safe.
If you are carrying Jupiter or Equalizer, skip this. Blueprint first. Cores later.
↖ Common Harvester Mistakes
↖ Fighting the Queen Too Early
You do not need to kill the Queen to complete Harvester. Ignore her unless she is directly blocking the event.
↖ Missing the Energy Cell Drop
The cell drops on the ground after breaching. Check the floor, not just the loot screen.
↖ Keeping Shield On During Electrical Pulse
The blue pulse can drain or disable your shield. Remove it during that mechanic if needed.
↖ Standing Too Far From Reward Pods
When the last canister is nearly dead, move close to a pod. Loot is not reserved.
↖ Greeding After Blueprint Drop
If Jupiter or Equalizer drops, leave. Extra Queen cores are not worth losing the blueprint.
↖ FAQ
↖ How do you complete the Harvester event in ARC Raiders?
Breach the upper chambers, find 3 energy cells, place them in the center slots, shoot the yellow canisters, then loot the 3 reward pods.
↖ Can you solo the Harvester event?
Yes. Solo Harvester is very doable. It usually takes longer and may need 2–3 canister damage cycles, but you can loot all 3 reward pods if uncontested.
↖ How do you get the Jupiter blueprint in ARC Raiders?
The Jupiter blueprint can drop from Harvester reward pods. Complete the event, loot the pods, and extract immediately if it drops.
↖ What weapon is best for Harvester?
A full-auto rifle or SMG is best. Yellow canisters have short damage windows, so high uptime beats slow reload weapons.
↖ Why remove shield during Harvester?
The blue electrical attack can drain or disable your shield. Removing it during that phase saves shield resources and rechargers.
↖ Summary
Harvester is simple when you stop treating it like a boss fight.
Breach upper chambers. Find 3 energy cells. Stage them near the center. Insert them. Destroy yellow canisters with a full-auto weapon. Loot the 3 reward pods fast.
Solo gives the best shot at Jupiter and Equalizer because you can claim every pod. Duo is safer. Public events are messy.
If a blueprint drops, extract. That is the win.

Most Popular Posts
- ARC Raiders Riven Tides Key Room Guide: Best Hotel Keys, Loot Routes, Secure & Crane Storage
- ARC Raiders Damage Fireflies Trial Guide: Best Farm Method on Buried City Night Raid
- ARC Raiders Riven Tides Update: New Map & Items, ARC Turbine, Rewards, and Best Early Strategy
- ARC Raiders Bettina Guide: Best Build, Buffs, and How to Use It Against ARC
- Arc Raiders Season 4 Riven Tides Update, Rewards, Safe Skins, and Release Timeline
- ARC Raiders Solo Search Supply Drops Guide: Best Buried City Route, Beacon Locations
Popular Category Lists
- Grow a Garden / (286)
- ARC Raiders / (262)
- CoD: Black Ops 7 / (166)
- Monopoly Go / (146)
- MLB 26 / (145)
- Star Citizen / (112)
- Steal a Brainrot / (89)
- Sailor Piece / (68)
- ARK Survival Ascended / (67)
- Diablo IV / (61)
- Forza Horizon 6 / (60)
- Blox Fruits / (60)
- CoD: BLACK OPS 6 / (55)
- Adopt Me / (53)
- Path of Exile 2 / (48)
- Monster Hunter Wilds / (46)
- Windrose / (44)
- Path of Exile / (40)
- Grow a Garden 2 / (40)
- Bee Swarm Simulator / (36)


