


 0
0ARC Raiders High-Tier Loot and Blueprints Easy Farming Guides: Night Stella Montis Route
- KITE
- Share
- ARC Raiders
- 01/06/26
- 1907

ARC Raiders doesn't really punish you for being new—it punishes you for being unstructured. One week you're broke because you sold the wrong Blueprints, the next week your stash is jammed with valuable clutter, and then you finally run Night Stella Montis and realize: loot is everywhere, but profit only belongs to the player who arrives first, filters fast, and extracts on time.
- 1) The Three Loops That Make You Rich
- 1.1 The Money Loop: Loot → Recycle → Craft/Trade
- 1.2 The Stash Loop: Store → Compress → Rotate
- 1.3 The Survival Loop: Information → Movement → Extraction
- 2) Loot Priorities That Scale (What to Keep, and Why)
- 2.1 The universal bottleneck: Metal Parts (+ the usual suspects)
- 2.2 Green materials worth prioritizing (within reason)
- 2.3 Arc Alloy is sneakily important (because shields)
- 3) The Real Economy Trick: Sell Price ≠ Value (Recycle Smart)
- 3.1 A simple decision table I use every session
- 3.2 Repair vs recycle: durability rule-of-thumb
- 4) Stop Trusting Memory: Track Resources, Then Loot With Intent
- 4.1 My practical tracking loop
- 5) Workbenches and Traders: How I Remove RNG From the Equation
- 5.1 Why the Refiner changes your life
- 5.2 Assorted Seeds: shortage insurance
- 6) Stash Management That Actually Holds Up Long-Term
- 6.1 The store mods on weapons rule
- 6.2 Cap your low-impact items
- 7) Hidden Mechanics That Win Fights (and Protect Your Loot)
- 7.1 Faster drops: edge-roll into sprint
- 7.2 Quiet movement: tap-walk / tap-crouch
- 7.3 Sprint-roll vs slow-roll
- 7.4 Smoke + tagging grenade: turn chaos into information
- 7.5 Don't sleep on light impact grenades
- 7.6 Smart peeking: change one variable every time
- 7.7 Solo scanning: slide to gather info without losing speed
- 8) Night Stella Montis: High-Tier Loot + Blueprint Farming Route
- 8.1 The key idea: it's a time trial with two modes
- 8.2 The route in two phases (copy/paste this)
- 8.3 Stella Montis container priority (with risk and skip rules)
- 8.4 Key rooms without getting robbed (the shadow Raider problem)
- 8.5 Seed vault / robot zones: good, but don't worship them
- 9) Inventory and Extraction Discipline
- 9.1 The extraction trigger
- 9.2 A real example of why I'm strict about leaving
- FAQ
- Q1) Should I keep every blue item?
- Q2) I'm always out of Metal Parts. What's the fastest fix?
- Q3) My stash is full but I feel poor—why?
- Q4) When do I repair weapons instead of recycling?
- Q5) Where do blueprints come from most reliably in Night Stella Montis?
- Q6) If I spawn far from metro/lobby, should I still run there?
- Q7) Does smoke always help me?
- Q8) I die a lot with a full backpack—what do I fix first?
- Closing
↖ 1) The Three Loops That Make You Rich
If you only remember one thing, remember this: ARC Raiders rewards repeatable loops.
↖ 1.1 The Money Loop: Loot → Recycle → Craft/Trade
- Loot the right bottlenecks.
- Recycle fake value blueprints into real materials.
- Patch shortages through traders instead of praying to RNG.
↖ 1.2 The Stash Loop: Store → Compress → Rotate
- Attach mods onto weapons to compress slots.
- Cap low-tier consumables so they don't rent space forever.
- Rotate gear by durability: run, then recycle at the right time.
↖ 1.3 The Survival Loop: Information → Movement → Extraction
- Gather info while moving.
- Use small mechanics to break aim tracking and audio tells.
- Leave earlier once your bag becomes a beacon.
↖ 2) Loot Priorities That Scale (What to Keep, and Why)
Most players chase rarity. I chase bottlenecks—items that block crafting, repairs, and upgrades. That means my stash stays functional even when drops feel inconsistent.
↖ 2.1 The universal bottleneck: Metal Parts (+ the usual suspects)
Metal Parts touch almost everything. If you're low, your crafting tree slows down; if you're high, you convert found loot into usable kits faster.
If you're unsure what to drop, then drop nice-to-have items before Metal Parts.
That single rule prevents the I'm rich but can't craft anything problem.
↖ 2.2 Green materials worth prioritizing (within reason)
These greens keep showing up in the same chains—mods, repairs, shields, bench upgrades:
- Simple Gun Parts
- Steel Springs
- Magnets
- Batteries
- Arc Alloys
- Duct Tape
- Mechanical Components (later: Advanced Mechanical Components)
Why this matters: these aren't exciting, but they're connective tissue. When you're missing them, your session becomes a string of almost.
↖ 2.3 Arc Alloy is sneakily important (because shields)
Arc Alloy doesn't feel premium until shields start driving your costs. If you build a habit of grabbing it, you stop having weeks where you can't maintain shield economy.
↖ 3) The Real Economy Trick: Sell Price ≠ Value (Recycle Smart)
A lot of blue loot is only junk if you sell it blindly. If you recycle it, it becomes the green bottlenecks you actually need.
↖ 3.1 A simple decision table I use every session
Use this as your default filter:
| Thing you picked up | Common mistake | Better move | Why it works |
|---|---|---|---|
| Blue items that look like trash | Sell instantly | Recycle first | Often convert into Metal Parts/Gun Parts/Springs which unblock crafting |
| Loose attachments in stash | Hoard them as separate items | Store them on weapons | One weapon becomes a storage container and often sells higher fully built |
| Too many green shields | Keep 10+ just in case | Keep a small buffer | Cheap to replace; hoarding destroys stash flexibility |
| Near-broken weapons | Repair reflexively | Recycle when near-dead | Sale value drops; recycle returns parts + you often recover mods |
↖ 3.2 Repair vs recycle: durability rule-of-thumb
I don't baby every weapon. I treat durability like a timer.
| Weapon state | What I do | What this means |
|---|---|---|
| ~20–25 durability | Run it | Usually enough for a raid; saves repair resources |
| Single-digit / near dead | Recycle | Better long-term value: components/parts + mod recovery |
| High-value core build | Repair | Worth it when it preserves a loadout you actively use |
↖ 4) Stop Trusting Memory: Track Resources, Then Loot With Intent
I wasted an embarrassing amount of time forgetting what I needed. Tracking fixes that.
↖ 4.1 My practical tracking loop
1. Pick the next goal craft (weapon/mod/shield/bench upgrade).
2. Track the required resources.
3. In-raid, pick up tracked items even if they're not rare.
4. Craft, untrack, repeat.
Why it works: every raid has a purpose. You stop extracting with random clutter and start extracting with progress.
↖ 5) Workbenches and Traders: How I Remove RNG From the Equation
This is where your account starts feeling stable.
↖ 5.1 Why the Refiner changes your life
Once your refiner produces Mechanical Components (and later Advanced Mechanical Components), shortages become fixable.
- You still loot components.
- But now bad raids don't fully stall your upgrade path.
↖ 5.2 Assorted Seeds: shortage insurance
If you have Assorted Seeds, they're not future money. They're current stability.
If you discover you're repeatedly blocked by basics like Metal Parts, then convert seeds into fundamentals instead of hoarding them.
| Problem | Fix | Why it's efficient |
|---|---|---|
| Constant Metal Parts shortage | Trade seeds for Metal Parts | Restores crafting momentum immediately |
| Rotation-gated materials | Check daily trades, buy in batches | Prevents I can't craft today dead time |
↖ 6) Stash Management That Actually Holds Up Long-Term
Most stash chaos comes from two sources: too many replaceable consumables and too many single-slot attachments.
↖ 6.1 The store mods on weapons rule
If an attachment can live on a weapon, it lives on a weapon.
This compresses stash slots and increases resale value when you sell a built weapon.
If you discover you have rows of loose attachments, then you're basically wasting free storage space you already own.
↖ 6.2 Cap your low-impact items
Green shields and medical items multiply like rabbits. Keep a realistic buffer, not a bunker.
↖ 7) Hidden Mechanics That Win Fights (and Protect Your Loot)
When you're carrying a high-value bag, mechanics matter more than ego.
↖ 7.1 Faster drops: edge-roll into sprint
Drop → roll → recover is slow.
Roll at the edge to flow into sprint.
This means: better disengages, fewer I died while recovering moments.
↖ 7.2 Quiet movement: tap-walk / tap-crouch
Some surfaces are loud even crouched. Micro-tapping movement reduces sustained noise.
- If you're stalking in PvP on loud flooring, then tap-walk.
- If you're downed and bleeding out, then tap-crawl to reduce health drain while repositioning.
↖ 7.3 Sprint-roll vs slow-roll
Holding sprint produces a longer, harder-to-track roll even without momentum.
- If you keep slow-rolling in the same rhythm, good players pre-aim you.
- If you mix sprint-roll angles, you force aim corrections and buy space.
↖ 7.4 Smoke + tagging grenade: turn chaos into information
Smoke breaks sightlines, but it can help the enemy as much as it helps you—unless you add tagging.
Combo:
1) Smoke to cut vision
2) Tagging grenade into/near smoke
3) Track movement and shoot while they're blind
If you discover someone is using smoke to push you, then tag the smoke and reverse the advantage.
↖ 7.5 Don't sleep on light impact grenades
Cheap grenades still create value:
- pressure a corner-holder,
- strip shields,
- finish certain PvE threats without burning your best ammo.
↖ 7.6 Smart peeking: change one variable every time
Same angle + same height + same timing = you get farmed.
Mix:
- sides,
- crouch peeks,
- timing delays,
- roll reposition before re-peek.
↖ 7.7 Solo scanning: slide to gather info without losing speed
Sliding while scanning lanes keeps you moving and informed. Information functions like armor—especially solo.
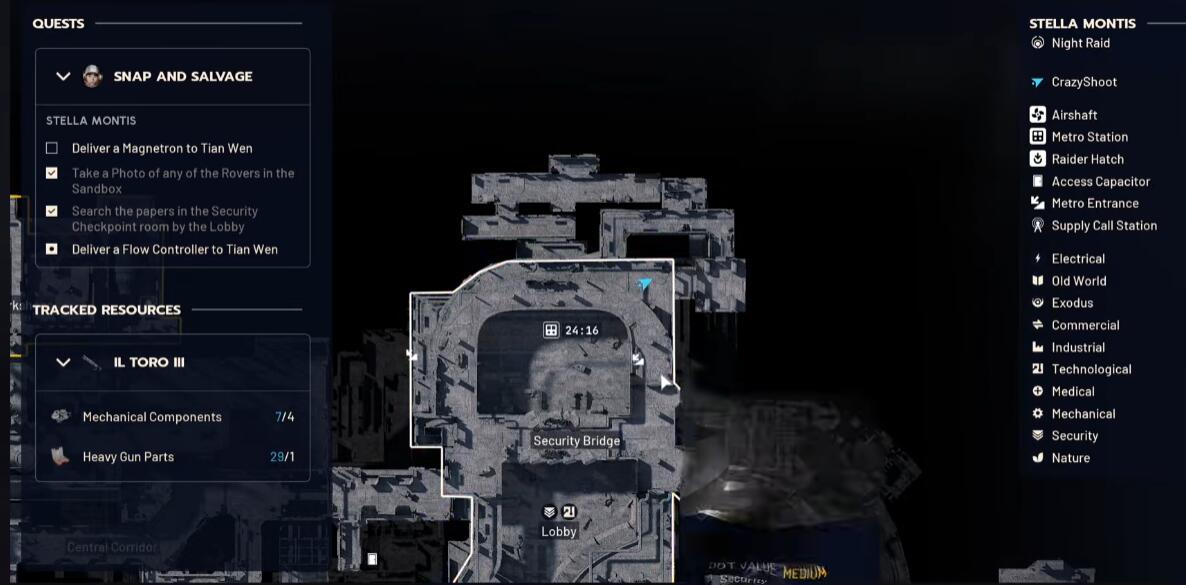
↖ 8) Night Stella Montis: High-Tier Loot + Blueprint Farming Route
Stella Montis is a loot printer only if you treat it like a race. People vacuum the best rooms fast, and the map punishes hesitation.
↖ 8.1 The key idea: it's a time trial with two modes
- First-to-arrive mode: you rush density rooms and weapon cases.
- Late-arrival mode: you farm what people ignore and still profit.
↖ 8.2 The route in two phases (copy/paste this)
Phase A — The 90-second Rush (spawn dependent)
If you spawn close to the metro/lobby area with high drawer density:
1. Sprint straight to the drawer-heavy room.
2. Open drawers first (fastest roll volume).
3. Grab keys/weapon cases/high-tier items first.
4. Leave before you start inventory debating.
Why: blueprint hunting is partly probability. More container rolls per minute = more chances.
Phase B — The 5-minute Sweep (when you're late or the area is looted)
If the obvious rooms are gooped/empty:
- Check trash cans and small containers (people skip them).
- Hunt blue box clusters.
- Check wall electrical boxes.
- Breach overlooked containers/lockers.
If you discover a popular room is already looted, then stop spending time confirming it and switch to the leftovers circuit.
↖ 8.3 Stella Montis container priority (with risk and skip rules)
| Priority | Target | Why it pays | Risk | Skip when… |
|---|---|---|---|---|
| S | Drawer-dense rooms | Maximum rolls/min; blueprint potential | High | You arrive late and it's clearly cleaned out |
| S | Weapon cases | High-tier compact value | High | You hear active PvP and you're solo with a good bag |
| A | Strong key rooms | Concentrated loot; sometimes multiple cases | Very high | A shadow Raider is hovering behind you |
| A | Blue box clusters | Fast checks, often ignored | Medium | You're overweight and already have premium slots filled |
| B | Wall electrical boxes | Overlooked; can pay in components/keys | Medium | You're under strict time to extract |
| B | Trash cans/small boxes | Late-arrival income | Low | Almost never—these are your recovery loot |
| C | Low-yield white boxes | Inconsistent (for me) | Low | You're racing and need efficiency |
↖ 8.4 Key rooms without getting robbed (the shadow Raider problem)
Key doors create predictable behavior: you open, someone follows.
If you notice a Raider orbiting your key door, then pick one:
| Option | Best when | Trade-off |
|---|---|---|
| Open fast, loot faster | You can clear quickly and leave | Highest theft risk |
| Stall + reposition | You're solo and don't want a coin flip | Might lose the room to time |
| Abandon and farm elsewhere | Your bag is already valuable | You skip concentrated loot, keep your run alive |
My personal rule: speed beats fairness. I don't rely on politeness to protect my key room.
↖ 8.5 Seed vault / robot zones: good, but don't worship them
These are hit-or-miss areas. I treat them like bonuses.
- If I'm early, I check them.
- If I'm late, I only hit the best containers and move.
↖ 9) Inventory and Extraction Discipline
Stella runs go wrong when you keep looting after you've already won.
↖ 9.1 The extraction trigger
- If the raid timer is nearing the last ~10 minutes, then transition from loot mode to exit mode.
- If you're carrying a six-figure bag, then survival becomes your highest ROI action.
↖ 9.2 A real example of why I'm strict about leaving
One Night Stella run, I was carrying roughly 126k–135k worth of loot after about ~19 minutes—multiple purples, valuable components, and a strong key. I got trapped after my shield broke and ended up crawling roughly 180m while bleeding to reach extraction. I survived, but the lesson was blunt:
Your bag attracts problems. The longer you stay, the more the map arranges a bad meeting for you.
↖ FAQ
↖ Q1) Should I keep every blue item?
No. I keep blues when their recycle outputs match my bottlenecks (Metal Parts, Gun Parts, Springs, Components). If it recycles into stuff I'm drowning in, I sell it.
↖ Q2) I'm always out of Metal Parts. What's the fastest fix?
Recycle blues that convert into Metal Parts, then use Assorted Seeds to top up fundamentals when you're blocked.
↖ Q3) My stash is full but I feel poor—why?
You're holding the wrong form of value: too many single-slot fillers (loose attachments, excessive low-tier shields, redundant meds). Store mods on weapons, cap consumables, and prioritize bottlenecks.
↖ Q4) When do I repair weapons instead of recycling?
If it's a core build you actively run and it isn't near-dead, repair can be worth it. If it's near-dead, recycling tends to return better long-term value (parts/components + recovered mods).
↖ Q5) Where do blueprints come from most reliably in Night Stella Montis?
From volume: drawer-dense rooms, blue box clusters, breached/locked containers. More rolls per minute beats one sacred chest myths.
↖ Q6) If I spawn far from metro/lobby, should I still run there?
If you're late, it can be a trap. If you discover it's already gooped, switch to leftovers: trash cans, blue boxes, wall electrical boxes, side containers.
↖ Q7) Does smoke always help me?
Smoke helps, but smoke without information can also help your enemy. If you pair smoke with a tagging grenade, you get vision while they get uncertainty.
↖ Q8) I die a lot with a full backpack—what do I fix first?
Leave earlier. High-value bags turn you into content. Set an extraction trigger (timer + bag value) and obey it.
↖ Closing
This guide is one system with two gears: economy discipline and route discipline. Economy discipline keeps your account progressing (bottlenecks, recycling, tracking, trader backstops). Route discipline turns Night Stella Montis into repeatable profit (rush if you're first, leftovers circuit if you're late, and extract before greed schedules your funeral).
If you play it this way, you won't just find more loot—you'll keep more of it, craft more consistently, and spend less time fighting your stash instead of fighting Raiders.

Most Popular Posts
- ARC Raiders Riven Tides Key Room Guide: Best Hotel Keys, Loot Routes, Secure & Crane Storage
- ARC Raiders Damage Fireflies Trial Guide: Best Farm Method on Buried City Night Raid
- ARC Raiders Riven Tides Update: New Map & Items, ARC Turbine, Rewards, and Best Early Strategy
- ARC Raiders Bettina Guide: Best Build, Buffs, and How to Use It Against ARC
- ARC Raiders Solo Search Supply Drops Guide: Best Buried City Route, Beacon Locations
- Arc Raiders Season 4 Riven Tides Update, Rewards, Safe Skins, and Release Timeline
Popular Category Lists
- Grow a Garden / (286)
- ARC Raiders / (266)
- CoD: Black Ops 7 / (166)
- Monopoly Go / (146)
- MLB 26 / (145)
- Star Citizen / (116)
- Steal a Brainrot / (89)
- ARK Survival Ascended / (74)
- Sailor Piece / (68)
- Forza Horizon 6 / (63)
- Diablo IV / (61)
- Blox Fruits / (60)
- CoD: BLACK OPS 6 / (55)
- Adopt Me / (53)
- Path of Exile 2 / (48)
- Monster Hunter Wilds / (46)
- Windrose / (44)
- Grow a Garden 2 / (42)
- Path of Exile / (40)
- Bee Swarm Simulator / (36)


