


 0
0ARC Raiders Riven Tides Best Trial Strategy, Panorama Azzurro Map Tips, and New Cosmetics
- KITE
- Share
- ARC Raiders
- 04/19/26
- 649
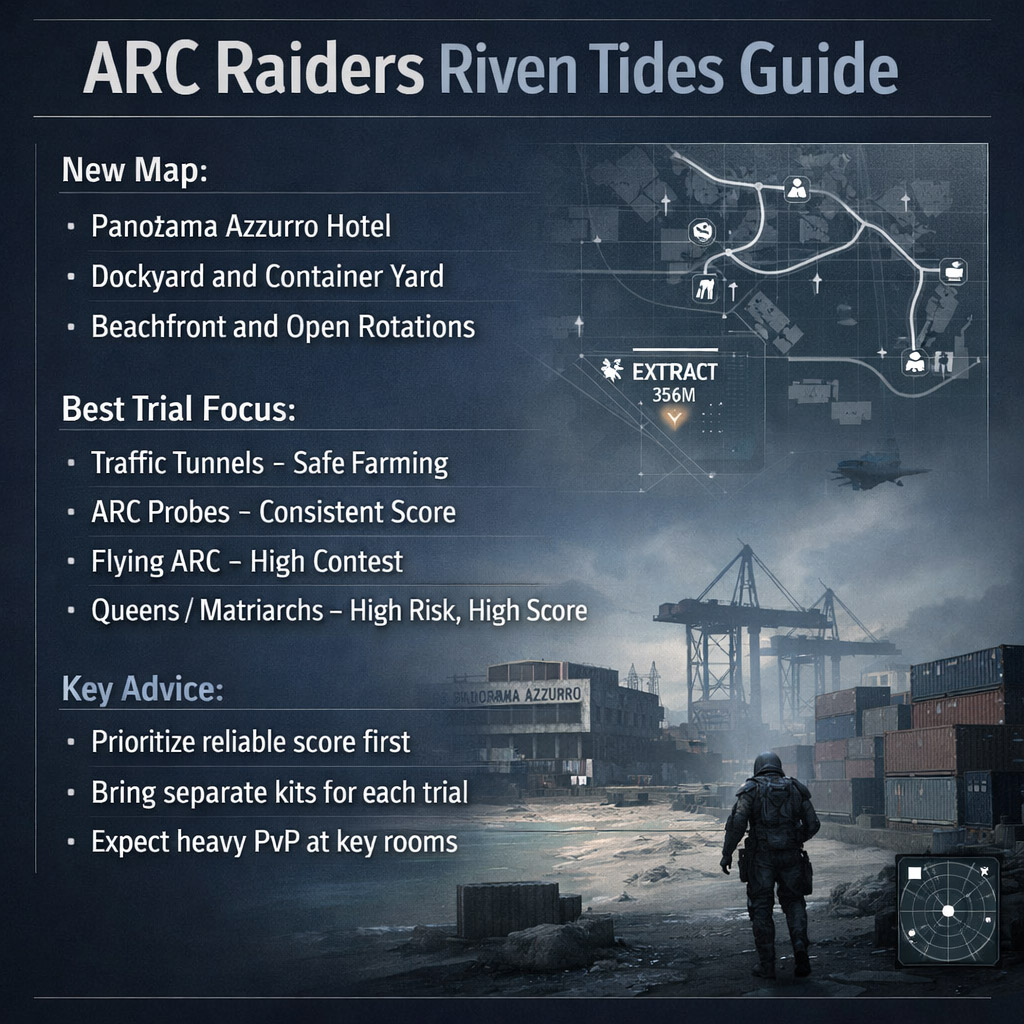
Riven Tides looks like one of the biggest ARC Raiders updates so far, not just because of the new map, but because it lands right alongside a very important Trial week. From what we've seen, Panorama Azzurro will be the headline location, backed by beach routes, a harbor zone, and container-heavy industrial space. That mix usually creates two things fast: early PvP at key rooms and very punishing rotations if we get careless.
After playing a lot of objective-heavy extraction runs, this kind of map tends to reward planning more than aggression. If you rush every hot zone, you might win one clean fight and still lose the raid. If you route with intent, bring the right kit for the Trial you're targeting, and avoid low-value fights, your score climbs much more consistently. That's the lens for this guide.
- Riven Tides Map Breakdown
- Key areas we should expect
- Panorama Azzurro and Early Hot Spots
- How we'd play it early
- New Cosmetics: Quick Take
- Best Final Week Trial Strategy
- What we'd prioritize first
- Best Loadouts for Trials
- Recommended prep
- Practical Tips That Should Save You Runs
- FAQ
- What is the main POI in Riven Tides?
- Which locations will be the most contested?
- What is the easiest Trial to farm?
- What is the highest-scoring Trial?
- What should we stock before final week?
- Closing Thoughts
↖ Riven Tides Map Breakdown
What stands out immediately is the contrast in map design. The hotel looks tight and vertical. The beach and resort exterior look open and exposed. The dockyard seems built for cover-heavy mid-range fights.
↖ Key areas we should expect
- Panorama Azzurro hotel
- Hotel lobby and upper floors
- Pool and beachfront sections
- Harbor / dockyard
- Container yard
- Customs-style industrial buildings
In practice, this means we're probably not dealing with a one-speed map. Inside the hotel, expect faster close-range fights and angle checks on every floor. Outside, especially near the beach or harbor, bad movement will get punished.
| Area | Likely Fight Type | Main Risk |
|---|---|---|
| Hotel | Close to mid-range | Ambushes, vertical pressure |
| Beachfront | Mid to long range | Exposure crossing open ground |
| Dockyard | Mixed range | Flanks around containers |
| Customs / elevated zones | Mid-range control fights | Teams holding height |
The main takeaway: build for flexibility. A loadout that feels great inside the hotel may feel awkward once you step into open coastal lanes.
↖ Panorama Azzurro and Early Hot Spots
From a pure player perspective, the hotel will almost certainly be one of the busiest places on day one. It has the right shape for it: central, vertical, and likely tied to valuable loot.
Two points stand out even more:
- Room 204
- Crane operator room
If those are active key rooms, they'll draw players immediately. We've seen this pattern on every extraction map with obvious locked loot spots: first teams rush in, second teams hold exits, third teams arrive late and clean up whoever is still healing.
↖ How we'd play it early
- Don't full-commit every raid
- Clear one section at a time
- Assume another squad is already nearby
- Leave fast after hitting your objective
That last part matters. On new maps, players stay too long because they're curious. Curiosity gets expensive.
| Hot Spot | Why It Matters | Best Approach |
|---|---|---|
| Room 204 | Likely premium loot room | Push early or avoid entirely |
| Crane operator room | Strong angle control, possible loot | Expect overwatch pressure |
| Main hotel lobby | Central traffic point | Clear fast, don't linger |
| Container lanes | Natural ambush paths | Check corners and rotate wide |
↖ New Cosmetics: Quick Take
The newly shown cosmetics have much stronger silhouettes than some of the earlier sets. One has a heavy gauntlet look, one feels closer to a sealed suit, and one has a rough gas-mask style profile. The designs fit the map well. They look built for a harsher coastal zone rather than a cleaner sci-fi setting.
For most players, though, the more important part is not the cosmetics themselves. It's what they do to the player base. Once top variants are on the line, people stop playing casually. Lobbies get sharper. Routes get greedier. More players queue specifically to optimize Trials.
That changes raid difficulty in a very real way.
↖ Best Final Week Trial Strategy
This is the part that matters most if you're trying to finish strong. The reported Trial set includes:
- Open ARC probes
- Damage flying ARC enemies inside the spaceport walls
- Open containers inside the traffic tunnels
- Damage Fireflies
- Damage Queens or Matriarchs
From experience, these break into two categories:
- Reliable score farming
- High-risk, high-upside scoring
| Trial | Reliability | Score Potential | Best Use |
|---|---|---|---|
| Open containers in traffic tunnels | High | Medium | Safe repeat farming |
| Open ARC probes | High | Medium | Great during the right conditions |
| Damage flying ARC in spaceport | Medium | High | Good if you control the area |
| Damage Fireflies | Medium | Medium to high | Depends on spawn quality |
| Damage Queens / Matriarchs | Low to medium | Very high | Best for spike runs |
↖ What we'd prioritize first
If we were pushing rank seriously, we'd start with the stable objectives:
1. Traffic tunnel containers
2. ARC probes
3. Flying ARC inside spaceport
4. Fireflies
5. Queen / Matriarch damage runs
Why this order? Because leaderboard pushes usually fail when players chase jackpot runs too early. The better method is to lock in dependable score first, then use your best kits for high-ceiling attempts later.
↖ Best Loadouts for Trials
You do not want one generic setup for all five objectives. That's the easiest way to waste runs.
↖ Recommended prep
| Trial Type | Recommended Gear Focus | Why |
|---|---|---|
| ARC probes | Mobility, sustain, light combat | Faster route efficiency |
| Flying ARC | Energy weapon, burst tools | Better anti-air uptime |
| Traffic tunnels | Compact PvE/PvP hybrid kit | Safer underground clears |
| Fireflies | Seeker grenades, accurate primary | Faster aerial damage |
| Queen / Matriarch | Wolfpacks, high burst damage | Best for score spikes |
A practical note from actual play: if you're trying to damage queens or matriarchs for top scoring, save those runs for your cleanest team sessions. Bad spawns, third parties, or wasted explosives can kill the attempt immediately. That objective has big upside, but it's not the one to build your whole week around.
↖ Practical Tips That Should Save You Runs
These are the habits that usually separate a good Trial week from a frustrating one:
- Bank easy score early in the week
- Run different kits for different objectives
- Avoid extended PvP if it doesn't help the Trial
- Treat key rooms like traps unless you're first there
- Don't force anti-air objectives with the wrong weapon
- If a route is overcrowded, reset and reroute instead of stubbornly contesting
One thing we've learned from these event-style pushes: the best score often comes from efficiency, not hero plays.
↖ FAQ
↖ What is the main POI in Riven Tides?
The main featured POI appears to be Panorama Azzurro, a large abandoned hotel that looks central to the map and likely to attract heavy early traffic.
↖ Which locations will be the most contested?
The biggest early hot spots should be Room 204, the crane operator room, the hotel lobby, and the dockyard container routes.
↖ What is the easiest Trial to farm?
Opening containers inside the traffic tunnels looks like the safest and most repeatable Trial for steady score gains.
↖ What is the highest-scoring Trial?
Damage Queens or Matriarchs appears to have the highest upside, but it's also one of the least consistent because it depends on timing, team coordination, and clean execution.
↖ What should we stock before final week?
Prioritize:
- burst damage tools like Wolfpacks
- anti-air capable weapons
- seeker grenades
- backup kits for probes, bosses, and tunnel routes
↖ Closing Thoughts
Riven Tides already looks like a map where positioning will decide more fights than raw aim. The hotel should create fast, vertical pressure. The coast should punish slow rotations. The dockyard should reward players who know how to work cover and angles. Add in a high-stakes Trial week, and this update becomes less about sightseeing and more about disciplined execution.
If you're aiming for the best skin variant, the smart play is simple: farm the reliable objectives first, save your expensive burst kits for strong runs, and don't confuse a popular route with a good route. On fresh maps, those are rarely the same thing.

Most Popular Posts
- ARC Raiders Riven Tides Key Room Guide: Best Hotel Keys, Loot Routes, Secure & Crane Storage
- ARC Raiders Damage Fireflies Trial Guide: Best Farm Method on Buried City Night Raid
- ARC Raiders Riven Tides Update: New Map & Items, ARC Turbine, Rewards, and Best Early Strategy
- ARC Raiders Bettina Guide: Best Build, Buffs, and How to Use It Against ARC
- ARC Raiders Solo Search Supply Drops Guide: Best Buried City Route, Beacon Locations
- Arc Raiders Season 4 Riven Tides Update, Rewards, Safe Skins, and Release Timeline
Popular Category Lists
- Grow a Garden / (286)
- ARC Raiders / (263)
- CoD: Black Ops 7 / (166)
- Monopoly Go / (146)
- MLB 26 / (145)
- Star Citizen / (113)
- Steal a Brainrot / (89)
- ARK Survival Ascended / (70)
- Sailor Piece / (68)
- Forza Horizon 6 / (61)
- Diablo IV / (61)
- Blox Fruits / (60)
- CoD: BLACK OPS 6 / (55)
- Adopt Me / (53)
- Path of Exile 2 / (48)
- Monster Hunter Wilds / (46)
- Windrose / (44)
- Path of Exile / (40)
- Grow a Garden 2 / (40)
- Bee Swarm Simulator / (36)


