


 0
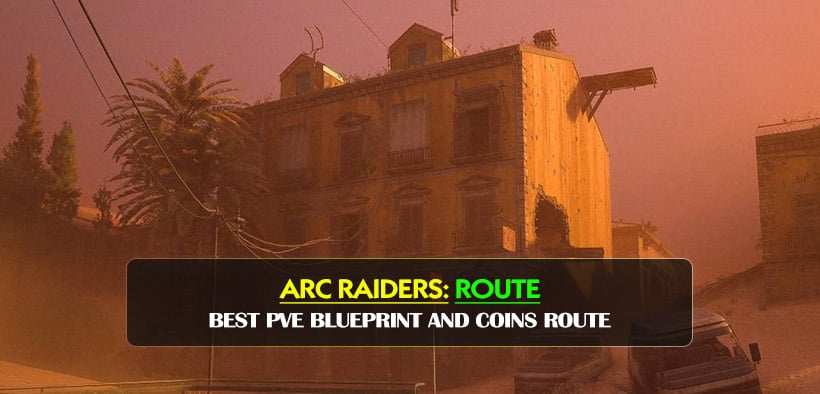
0ARC Raiders Solo-Friendly BEST PvE Blueprint and Coins Route
- KITE
- Share
- ARC Raiders
- 03/18/26
- 487
If your goal is to farm blueprints on Buried City without turning every run into a PvP Coins flip, this is the route we keep coming back to. After hundreds of hours on the map, the pattern is clear: the best solo runs do not come from looting everything. They come from hitting the right buildings early, skipping dead space, and ending near a safe extract.
- Route Overview
- Recommended Route Order
- Why This Route Works
- What we've learned from repeated runs
- Building Priorities
- High-priority buildings
- Medium-priority buildings
- Step-by-Step Route
- Loot Results and Expectations
- Solo Tips That Actually Matter
- Keep these rules in mind
- Recommended gear
- FAQ
- Is this route still good for solo players?
- Which building matters most?
- Is hospital required?
- What should we do if a stop is looted?
- What is a good profit target?
- Summary
This path is built around that idea. In one strong run, it returned 160k+ Coins, 4 blueprints, and multiple pink items. More importantly, it stayed efficient even when several buildings were already partially looted.
↖ Route Overview
This is the clean version of the route for day raids on Buried City.
↖ Recommended Route Order
| Step | Location | Priority | Why We Go Here |
|---|---|---|---|
| 1 | Plaza Rosa Pharmacy | Very High | Best early blueprint density |
| 2 | Street-side Breach Room | High | Fast breach, strong upside |
| 3 | Santa Maria Houses | Medium-High | Good if fresh, easy to skip if hit |
| 4 | Red Tower | High | Strong weapon case and blueprint value |
| 5 | Second Pharmacy | High | Lower density, still worth checking |
| 6 | Space Travel | Very High | One of the best blueprint buildings |
| 7 | Research Building | Medium-High | Good follow-up to Space Travel |
| 8 | Hospital | Medium | Better with roof access |
| 9 | Library | High | Strong trinket and drawer value |
| 10 | Hidden Second-Floor Loot Room | Medium | Quick bonus stop |
| 11 | Morirano Station Rooftop + Breach Room | Very High | Great late loot near extract |
| 12 | Hatch Extract | Very High | Safe, reliable finish |
The route works because it moves from high blueprint efficiency into a low-risk exit, which is exactly what solo players need.

↖ Why This Route Works
The current Buried City meta is much less forgiving than it was early on. More players know the best buildings now, so trying to full-clear the map usually lowers your returns.
↖ What we've learned from repeated runs
- Pharmacies and breach rooms give the best early blueprint value.
- Drawer-heavy buildings like Space Travel and Research are still among the most reliable follow-ups.
- Hospital is conditional, not mandatory.
- Morirano Station is one of the best endings because it gives late loot and a safe extract line.
That last point matters. A route is only good if you can regularly bring the loot home.
↖ Building Priorities
Let's keep this practical: not every stop deserves the same time.
↖ High-priority buildings
| Location | What to Prioritize | Why It Matters |
|---|---|---|
| Plaza Rosa Pharmacy | Special containers, drawers, attachments | Highest blueprint upside early |
| Red Tower | Weapon case, attachments, blueprint rolls | Great mid-route value spike |
| Space Travel | 5th/6th/3rd floors | Excellent blueprint building |
| Library | Lockers, trinkets, rooftop case | Strong late value |
| Morirano Station | Rooftop case, breach room | Final high-value check before extract |
↖ Medium-priority buildings
| Location | When to Loot | When to Skip |
|---|---|---|
| Santa Maria Houses | If fresh and quiet | If clearly looted |
| Research Building | If paired with Space Travel | If timing is tight |
| Hospital | If roof is accessible or interior is fresh | If heavily looted or no zipline |
| Hidden Loot Room | If on-path | If you are already full or late |
This is the practical loop: hit the stable money, test the flexible stops, avoid forced greed.
↖ Step-by-Step Route
Here's the route in simple terms.
1. Start at Plaza Rosa Pharmacy if spawn allows.
2. Rotate to the street-side breach room.
3. Check Santa Maria Houses only if they look fresh.
4. Move to Red Tower.
5. Hit the second pharmacy.
6. Clear Space Travel, especially the upper and mid floors.
7. Move into Research Building.
8. Check Hospital only if timing and access still make sense.
9. Loot Library.
10. Check the hidden second-floor room.
11. Finish at Morirano Station rooftop and breach room.
12. Use the hatch extract.
If you notice a building is already half-looted, don't force a full clear. Sweep the untouched side and keep moving. That one habit alone will save a lot of failed runs.
↖ Loot Results and Expectations
This route has a high ceiling, but the main strength is consistency.
| Outcome Tier | Typical Result | What It Means |
|---|---|---|
| Weak run | 60k–90k, 0–1 blueprint | Too many early buildings already hit |
| Solid run | 100k–140k, 1–3 blueprints | Normal successful route |
| Excellent run | 140k–165k+, 3–4 blueprints | Strong building access and clean execution |
| Peak run | 165k+ with multiple pinks and premium mods | Best-case roll with efficient pathing |
A representative strong run on this route produced:
- 160k+ Coins
- 4 blueprints
- 5 pink items
- Premium mods including Anvil Splitter
That won't happen every raid, but it shows the route's real upside when key stops are available.
↖ Solo Tips That Actually Matter
For solo players, the route is not just about loot. It is about tempo.
↖ Keep these rules in mind
- If Santa Maria is already looted, rotate immediately.
- If Space Travel is partially opened, loot only fresh floors.
- If Hospital roof is unavailable, lower your expectations there.
- If your bag is already above 140k, start thinking like you're extracting, not farming.
- If you find high-value attachments, fit them immediately to save slots.
↖ Recommended gear
| Category | Recommendation | Why |
|---|---|---|
| Weapon | Reliable PvE gun | Stable clear speed without overinvestment |
| Meds | Lean but sufficient | Enough sustain, more space for loot |
| Hatch key | Essential | Makes the route finish safer |
| Zipline | Strongly recommended | Unlocks hospital roof value |
This is where experience matters most: a profitable run is rarely lost because of one missed drawer; it is usually lost because we stayed too long after the run was already won.
↖ FAQ
↖ Is this route still good for solo players?
Yes. That is exactly where it performs best, because the path favors efficient buildings and a safe finish instead of forced fights.
↖ Which building matters most?
Plaza Rosa Pharmacy. If you can reach it early, you should.
↖ Is hospital required?
No. Hospital is useful, especially with roof access, but it is not the backbone of the route.
↖ What should we do if a stop is looted?
Skip or partially sweep. Do not spend too long trying to recover value from dead buildings.
↖ What is a good profit target?
- 100k+ means the run worked
- 140k+ means it was strong
- 160k+ means the route really paid off
↖ Summary
This Buried City PvE blueprint route is strong because it respects how the game is actually played now. We start with the best early blueprint stops, rotate through the most efficient mid-map buildings, and finish with late loot near a safe extract. That balance is what makes it reliable.
The real edge is not just knowing the path. It is knowing when to skip, when to cut the route short, and when to protect the run you already built. On Buried City, that discipline is often worth more than one extra room.

Most Popular Posts
- ARC Raiders Riven Tides Key Room Guide: Best Hotel Keys, Loot Routes, Secure & Crane Storage
- ARC Raiders Damage Fireflies Trial Guide: Best Farm Method on Buried City Night Raid
- ARC Raiders Riven Tides Update: New Map & Items, ARC Turbine, Rewards, and Best Early Strategy
- ARC Raiders Bettina Guide: Best Build, Buffs, and How to Use It Against ARC
- Arc Raiders Season 4 Riven Tides Update, Rewards, Safe Skins, and Release Timeline
- ARC Raiders Solo Search Supply Drops Guide: Best Buried City Route, Beacon Locations
Popular Category Lists
- Grow a Garden / (286)
- ARC Raiders / (262)
- CoD: Black Ops 7 / (166)
- Monopoly Go / (146)
- MLB 26 / (145)
- Star Citizen / (112)
- Steal a Brainrot / (89)
- Sailor Piece / (68)
- ARK Survival Ascended / (67)
- Diablo IV / (61)
- Forza Horizon 6 / (60)
- Blox Fruits / (60)
- CoD: BLACK OPS 6 / (55)
- Adopt Me / (53)
- Path of Exile 2 / (48)
- Monster Hunter Wilds / (46)
- Windrose / (44)
- Path of Exile / (40)
- Grow a Garden 2 / (40)
- Bee Swarm Simulator / (36)


