0
0 Created: Aug 16,2026 | EverQuest Legends
EverQuest Legends Shadow Knight/Shaman/Necromancer Build: DoT-Tank Progression Guide

Forget the pure melee bruiser fantasy. This hybrid wins by stacking systems: AC for survival, DoTs for damage, life taps and regen for sustain, slows for control. You tank like an SK, sustain like a Shaman, and grind bosses down like a Necro. It's not flashy on a parse — it's flashy on a why is this guy still alive basis.
Here's everything you need, no fluff.
- Stat Priority (Memorize This Order)
- AA Priorities: What to Take, In Order
- Leveling Gear: Don't Skip the Necklace
- Endgame Gear: Shield Up, Always
- Exaltations: Slot Planning Is the Real Skill
- Spell Upgrades: What Actually Stays Relevant
- Raid Loadout: Adjust Per Boss, Not Once and Done
- Common Mistakes That Tank Your Progress
- FAQ
- Should I use a shield or a two-hander?
- Is Cannibalization mandatory?
- Which DoT should I upgrade first?
- Is the pet worth investing in?
- What's the best race for this build?
- Bottom Line
Stat Priority (Memorize This Order)
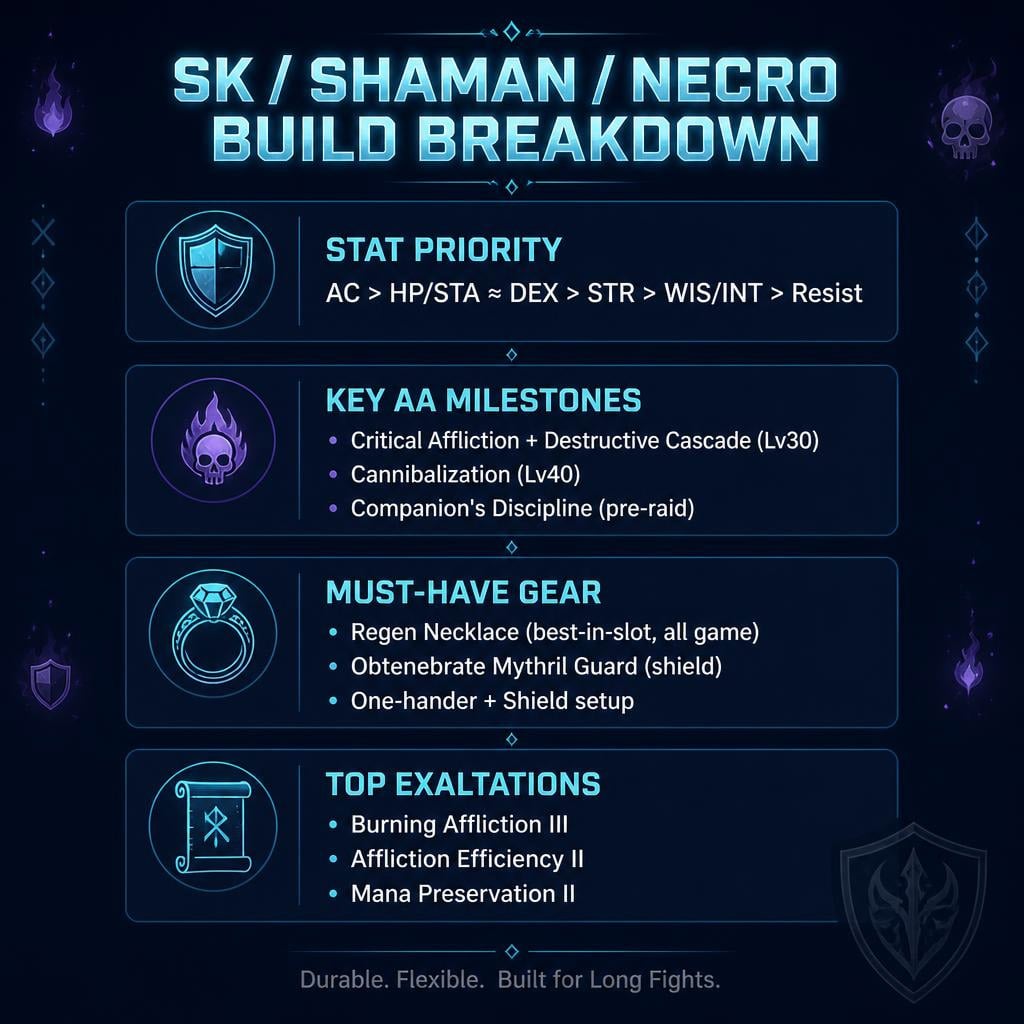
AC > HP/Stamina ≈ Dexterity > Strength > WIS/INT/Mana > Resists > Agility > Charisma
Dead characters don't DPS. Take the AC piece unless the alternative has a game-changing focus effect or clicky.
| Priority | Stat | Why |
|---|---|---|
| 1 | AC | Non-negotiable defensive stat |
| 2 | Stamina/HP | Survival margin |
| 2 | Dexterity | Proc frequency (weapon/Puma) |
| 3 | Strength | Early melee + carry weight |
| 3 | WIS/INT/Mana | Sustains long fights |
| 4 | Resists | Matters in high-tier content |
AA Priorities: What to Take, In Order
Levels 1-20: Extra Spell Slots, Leech Touch, Steadfast Will (skip if Ogre — frontal stun immunity already covers you), Mount at 20.
Levels 20-40: Critical Affliction + Destructive Cascade by 30 (your DoT crit foundation). Mental Clarity III unlocks Cannibalization at 40 — this is your mana lifeline for long fights. Not optional if you want to function past level 40.
Pre-Raid: Physical Enhancement, Companion's Discipline (stops your pet from blowing up a Feign Death pull), Combat Stability.
Mid-Progression: Spell Casting Mastery > Master of All (better value per point). Add Fury of Magic + Destructive Fury for life tap crits. Healing Boon lets Slug's Healing crit.
Skip early, add later: Endurance Regen. Once the regen necklace and Chloroplast are running, endurance stops being a problem. Melee crit AAs stay low priority forever — your damage isn't coming from melee.
Leveling Gear: Don't Skip the Necklace
The Regen Necklace/Talisman is the single most important item in this build. Get it early, upgrade it constantly. It scales into serious HP/mana/endurance regen and it's still relevant at endgame.
Faction blocking the quest? Grind it out, bank multiple turn-ins, do it in one batch. Worth every minute.
Zone progression:
| Level | Zone | Target |
|---|---|---|
| 1-15 | Crushbone/Blackburrow | Starter armor, Crushbone chest/helm |
| 18-25 | Najena | Durable mid-tier gear |
| 20-30 | Befallen | Pristine Studded pieces + D4 motes |
| 30-38 | Splitpaw/Cazic-Thule | Rubicite Breastplate |
| 35-45 | Lower Guk | Dark Reaver upgrades |
| 40+ | Master Yael | Serpent's Tooth, Earthshaker |
| 46+ | Plane of Hate | Umbral Plate, Rune Etched set |
| 47+ | Innoruuk | Multiple BiS drops |
| 48-50 | Fear/Sky | Endgame gear + exaltations |
Befallen D4 groups matter more than they look. Join whenever you can, even undergeared. Pristine pieces upgrade fast and the T5 motes feed your entire gear/spell pipeline later.
Endgame Gear: Shield Up, Always
One-hander + shield beats a two-hander here. The secondary-slot AC is too strong to pass up, especially with Plane of Sky scaling.
| Slot | Item | Why |
|---|---|---|
| Primary | Bloodmoon / Garduk | Best ratio / proc flexibility |
| Secondary | Obtenebrate Mythril Guard | Massive AC, defines your survivability |
| Any Slot | Blade Stopper + Ice Belt | Focus flexibility + resist coverage |
| Neck | Regen Talisman | Still BiS |
| Wrist | Plane of Sky Bracelet | Alacrity clicky |
| Waist | Rune Bolster Belt | Best haste option |
Haste value matters less once Shaman haste stacks on — you'll hit the cap regardless.
Exaltations: Slot Planning Is the Real Skill
Bad slot choices cascade into weaker choices everywhere else. Plan before you commit anything.
Priority order:
1. Burning Affliction III — biggest single DoT damage boost in the build
2. Affliction Efficiency II — makes long fights sustainable
3. Affliction Haste — faster DoT setup = better real DPS
4. Mana Preservation II — general casting economy
5. Improved Healing III — progression sustain
Clickies worth grabbing: Shield of the Immaculate (instant repeatable disease cure — solves fights without eating a spell slot), Golem Metal Wand (buff strip opener).
Procs: Torrid Corrupter (life tap, hits multiple targets), Earthshaker (easy AoE proc). Running Empower Invocation? Procs get extra value since they're not costing mana — weight them higher than usual.
Spell Upgrades: What Actually Stays Relevant
Venom Bolt first if you can only push one DoT — best combo of damage-per-mana and raw DPS. Bond of Death right behind it — heals while it damages, and the built-in resist modifier keeps it useful even against tough resist profiles.
| Spell | Priority | Why |
|---|---|---|
| Slug's Healing | Very High | Efficient sustain, works in every raid |
| Venom Bolt | Very High | Best DoT efficiency + DPS |
| Bond of Death | Very High | Damage + heal + resist mod |
| Final Pet | Very High | Scales hard with focus/gear |
| Spirit of the Puma | Very High | Mandatory proc buff |
| Superior Heal | Medium-High | Bridge before taps scale |
| Drain Soul | High (late) | Replaces Superior Heal once tap AAs land |
| Togor's Insects | High | Cuts incoming melee damage hard |
Don't max one spell and starve the rest. Costs scale steeply per rank — keep your core kit within 1-2 upgrade levels of each other instead.
Raid Loadout: Adjust Per Boss, Not Once and Done
Always bring: Malosi, Togor's Insects, Slug's Healing, Bond of Death, Spirit of the Puma, plus 3-7 DoTs based on resist profile.
Boss resists poison? Pull the poison DoTs. Resists disease? Swap to magic/fire options. Boss hits like a truck? Add Incapacitate and Shroud effects, double check your AC and shield are actually equipped (yes, it happens).
Pulls falling apart? Screaming Terror + Feign Death. Boss stacking buffs? Golem Metal Wand opener, then Nullify Magic on repeat.
Common Mistakes That Tank Your Progress
| Mistake | Fix |
|---|---|
| Ignoring AC for damage stats | AC first, always |
| Skipping the regen necklace | Get it early, it scales forever |
| Chasing melee DPS | Your damage is DoTs/procs/taps — invest there |
| No pet control | Take Companion's Discipline before raiding |
| One fixed raid bar | Adjust DoTs per boss resist profile |
| Forgetting clickies | Cure/dispel/Alacrity clicks are free value |
FAQ
Should I use a shield or a two-hander?
Shield. The secondary-slot AC from Obtenebrate Mythril Guard is too strong to skip, especially once Plane of Sky items are in play. Two-handers only make sense for specific bash/proc builds.
Is Cannibalization mandatory?
Functionally, no — you'll survive without it. Practically, yes — it's the strongest mana sustain tool you get at level 40 and long fights get noticeably harder without it.
Which DoT should I upgrade first?
Venom Bolt. Best balance of damage-per-mana and raw output. Bond of Death is a close second because it heals while it hits.
Is the pet worth investing in?
Yes. Final pet scales hard with focus, gear, haste, and Puma uptime. If you're not charming undead, the pet is part of your core damage plan, not an afterthought.
What's the best race for this build?
Ogre, for the free frontal stun immunity. Any other race works fine — just front-load Steadfast Will earlier if you're getting interrupted constantly.
Bottom Line
Get the regen necklace early. Build everything around AC. Unlock Cannibalization at 40. Push Burning Affliction III as your first big exaltation. Run one-hander + shield, not a two-hander. Keep your DoTs within 1-2 upgrade levels of each other instead of maxing one and neglecting the rest.
If a fight feels unwinnable, check the boring stuff first: AC, slow uptime, Slug's Healing, and whether your exaltations are actually fighting each other. Nine times out of ten, that's the real problem — not a missing BiS item.

Most Popular Posts
- EverQuest Legends Trio Guide: Stop Overthinking, Start Playing
- EverQuest Legends Plane of Sky Solo Guide: Key Farming, Class Unlocks & Boss Priority
- EverQuest Legends Motes Guide: Stop Wasting Motes on Upgrades
- EverQuest Legends Soldiers Brooch Guide: Get and Max DPS
- EverQuest Legends Shadow Knight/Shaman/Necromancer Build: DoT-Tank Progression Guide
- EverQuest Legends Kerran Unlock: The Fast Route (No Zone-Hopping)
Popular Category Lists
- ARC Raiders / (350)
- Grow a Garden / (294)
- CoD: Black Ops 7 / (167)
- Star Citizen / (162)
- MLB 26 / (159)
- Monopoly Go / (152)
- ARK Survival Ascended / (127)
- Steal a Brainrot / (99)
- Blox Fruits / (74)
- Adopt Me / (74)
- Forza Horizon 6 / (72)
- Sailor Piece / (68)
- Grow a Garden 2 / (68)
- Diablo IV / (62)
- CoD: BLACK OPS 6 / (55)
- Aion 2 / (50)
- Path of Exile 2 / (48)
- Monster Hunter Wilds / (46)
- Windrose / (44)
- Donut SMP / (41)