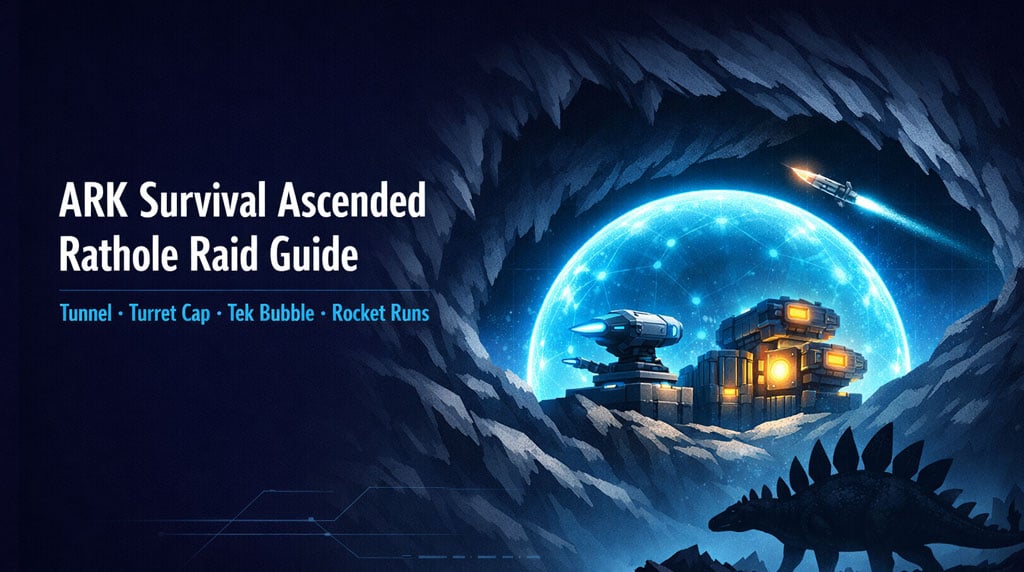
0
0How to Raid Ratholes in ARK Survival Ascended: PvP Tactics That Break Stacked Bases
- LUKE
- Share
- ARK Survival Ascended
- 05/20/26
- 281
Ratholes are not unraidable. They only feel that way when you attack them with one lazy plan: throw Stegos, soak forever, die on repeat.
The real way to raid ratholes in ARK Survival Ascended is to stack pressure. Control the outside. Stop turret replacement. Push structures. Force bad decisions. Then hit the generator, beds, or teleporters.
- ARK Survival Ascended Rathole Raiding: Core Priorities
- Tunnel Raiding Ratholes
- When to Tunnel Raid
- Tunnel Raid Execution
- Turret Capping: Stop Defenders Replacing Turrets
- Why Turret Capping Wins Rathole Raids
- Turret Cap Push Order
- Tek Bubble Pushes for Rathole Raids
- When a Tek Bubble Works
- Tek Bubble Execution
- Behemoth Gates for Structure Denial
- Why Behemoth Gates Matter
- Tame Pressure: Do More Than Soak
- Stegos
- Carbonemys
- Tame Blocking
- Rocket Running Ratholes
- Rocket Run When
- Best Rocket Run Targets
- Run in Groups
- Chain Pressure: The Real Rathole Raid Formula
- Practical Raid Flow
- Patience and Niche Tames
- When to Test Niche Tames
- Target Beds When Generator Is Buried
- Why Beds and Tek Pods Matter
- FAQ
- What is the best way to raid a rathole in ARK Survival Ascended?
- Is tunnel raiding worth it?
- How do you stop defenders from replacing turrets?
- Are Stegos enough to raid ratholes?
- What should we target if the generator is unreachable?
- Summary
↖ ARK Survival Ascended Rathole Raiding: Core Priorities
Do not start by asking, How do we soak all this?
Ask this instead:
What can we remove that makes the base stop functioning?
| Priority | Target | Why It Matters |
|---|---|---|
| 1 | Generator | Turns off powered turrets. Best profit if bullets stay inside. |
| 2 | Beds / Tek Pods | Stops defenders from respawning inside. |
| 3 | Teleporters | Cuts reinforcements, escapes, and re-entry. |
| 4 | Turret Wall | Opens rocket runs and tame pressure. |
| 5 | Outside Spam | Lets you place gates, turrets, tunnels, or bubbles. |
If the generator is reachable, go for it.
If it is buried too deep, kill beds.
If they still have teleporters outside, remove them first.

↖ Tunnel Raiding Ratholes
Tunnel raiding is the cleanest method when the base has weak outside spam.
You place foundations, walls, and support structures forward until you can safely reach the turret wall, generator box, or key defense angle.
↖ When to Tunnel Raid
Use tunnel raiding if:
- The base is offline
- Outside spam is weak
- You can place close to the entrance
- Turret angles do not fully deny building
- The rathole has enough room for structure creep
This is where many tribes overthink it. Structures cost less than hours of soaking.
If you can tunnel to the generator, the raid gets much cheaper. You avoid draining every turret and keep more loot intact.
↖ Tunnel Raid Execution
1. Clear enough spam to claim placement.
2. Drop foundations or support.
3. Build walls forward for cover.
4. Push toward generator, beds, or exposed turret clusters.
5. Blow the key target, not random walls.
| Defender Mistake | Raid Result |
|---|---|
| No outside spam | Easy tunnel path |
| Bad foundation coverage | Attackers claim gaps |
| Exposed generator angle | Fast power shutdown |
| Weak entrance denial | Gates and walls creep forward |
On land, if attackers can place nearby, you are vulnerable to tunneling.
Underwater, vacuum compartments can sometimes block wall placement through enemy structure range. That makes underwater ratholes harder to tunnel, but not safe by default.
↖ Turret Capping: Stop Defenders Replacing Turrets
Most online rathole raids fail because attackers destroy turrets and defenders instantly replace them.
That is wasted time.
Turret capping fixes this.
You place enough of your own turrets near the enemy base to push the area toward turret cap. Once capped, every enemy turret you destroy is much harder to replace.
↖ Why Turret Capping Wins Rathole Raids
A stocked rathole usually has:
- Backup Heavy Turrets
- Backup Tek Turrets
- Dedicated ARB
- Extra Element
- Players ready to replace defenses
If you destroy five turrets and they replace five, you made zero progress.
If the area is capped, those five turrets stay gone.
That is how a full wall turns into a weak wall.
↖ Turret Cap Push Order
1. Clear outside spam.
2. Place your own protected turrets.
3. Push turret count near cap.
4. Start stripping enemy turrets.
5. Prevent replacement.
6. Rocket run once coverage drops.
| Without Turret Cap | With Turret Cap |
|---|---|
| Turrets get replaced | Turrets stay destroyed |
| Raid becomes a resource war | Raid becomes permanent progress |
| Defenders stall forever | Defenders lose ground |
| Soaking feels endless | Rocket runs get easier |
If you are fighting a decent tribe, turret capping is mandatory.
↖ Tek Bubble Pushes for Rathole Raids
A Tek Forcefield can break a rathole if you can push it close enough.
The hard part of rocket running is distance. If you start too far away, you die before reaching the wall.
A forward Tek bubble changes that.
↖ When a Tek Bubble Works
Use it when:
- You cleared enough spam
- You control outside ground
- Your own turrets protect the bubble
- Defenders cannot easily destroy the setup
- The entrance has buildable space nearby
Even a few foundations closer can decide the raid.
↖ Tek Bubble Execution
1. Clear spam.
2. Place foundations or gates.
3. Add your own turrets.
4. Cap turret range if possible.
5. Push the Tek bubble forward.
6. Rocket run from the new safe point.
This does not work on every rathole. But when it works, defenders feel it instantly.
They lose outside control.
You gain a closer launch point.
Rocket runs stop being suicide.
↖ Behemoth Gates for Structure Denial
Behemoth Gates are not just walls. They are land denial tools.
They claim more practical space than small structures and help stop defenders from rebuilding outside.
↖ Why Behemoth Gates Matter
Use them to block defenders from:
- Replacing spam
- Pushing structures outward
- Dropping new turret towers
- Reclaiming ground
- Building counter-cover
Once you own the outside, the rathole becomes a trap.
| Use Behemoth Gates With | Result |
|---|---|
| Turret capping | Blocks turret replacement and outside rebuilds |
| Tek bubble | Creates safer forward pressure |
| Rocket running | Gives closer staging |
| Tame pressure | Forces defenders to react while losing space |
Place gates with intent. Do not spam them randomly.
The goal is simple: make every defender loss permanent.
↖ Tame Pressure: Do More Than Soak
Tames are not only for draining bullets.
In rathole raids, tames create pressure, block turret lines, bait settings, and give rocket runners better windows.
↖ Stegos
Stegos are still useful.
Use them to:
- Force defender attention
- Soak selected angles
- Buy time for structure placement
- Cover turret or gate pushes
Do not rely on pure Stego soaking against a stocked rathole. That is how raids turn into six-hour ARB donations.
↖ Carbonemys
Carbos are strong against player-only turrets.
Stand behind the Carbo.
Let player-only turrets target you.
Let the Carbo body absorb shots.
This works best in tight entrances where turret settings are poorly balanced.
↖ Tame Blocking
Sometimes a tame only needs to block 10 turrets.
That matters.
Running into 90 turrets is better than running into 100. After turret capping and a few successful runs, that number may drop to 70, then 50.
That is when rocket running starts landing.
| Tame | Best Use |
|---|---|
| Stego | Main soak and pressure |
| Carbonemys | Player-only turret soaking |
| Snow Owl | Niche vertical soak angles |
| Desmodus | Mobility and awkward entrances |
| Baryonyx | Water ratholes |
| Frog | Jump angles and tight gaps |
| Thylacoleo | Follow-up pressure if it fits |
| Small runners / chickens | Slip through spam and tight spaces |
Test tames before the real push. Some ratholes die to one weird creature angle.
↖ Rocket Running Ratholes
Rocket running works best after you weaken the setup.
Do not feed kits into a full turret wall for ego.
↖ Rocket Run When
- Turrets are capped
- Some turret lines are blocked
- The Tek bubble is closer
- Tames are distracting defenders
- You already stripped part of the wall
- The target is worth the run
↖ Best Rocket Run Targets
| Target | Value |
|---|---|
| Generator Box | Can end turret power instantly |
| Beds / Tek Pods | Removes defender respawns |
| Teleporters | Cuts re-entry and reinforcements |
| Tek Turrets | Reduces burst damage |
| Heavy Turret Clusters | Opens tame pressure |
| Spam Supports | Creates placement space |
Every rocket run needs a purpose.
Bad goal: Maybe I break something.
Good goal: I remove two Tek Turrets so the next runner reaches the generator box.
↖ Run in Groups
One runner might kill 2 turrets.
Three runners might kill 6.
If the area is capped, those six turrets stay gone.
That is real progress.
↖ Chain Pressure: The Real Rathole Raid Formula
Ratholes do not usually break from one tactic.
They break when you stack problems until defenders cannot solve all of them.
↖ Practical Raid Flow
1. Scout entrance and spam.
2. Try tunnel placement.
3. If tunneling fails, clear spam.
4. Place your own turrets.
5. Push turret cap.
6. Drop Behemoth Gates for structure denial.
7. Add Stegos, Carbos, or niche tames.
8. Push a Tek bubble if possible.
9. Rocket run weakened angles.
10. Hit generator, beds, pods, or teleporters.
11. Keep only actions that create permanent progress.
If a move does not change the raid state, stop repeating it.
| Bad Raid Habit | Better Play |
|---|---|
| Throw Stegos forever | Use Stegos while capping and building |
| Rocket run from max range | Move closer with bubbles, gates, and tame blocks |
| Destroy random turrets | Hit turrets that open key targets |
| Attack instantly | Test niche tames first |
| Repeat failed pushes | Change the condition before pushing again |
This is the difference between raiding and feeding.
↖ Patience and Niche Tames
Some ratholes need a specific answer.
That answer may not be a Stego.
It might be a Snow Owl dive, Frog jump, Baryonyx swim, Desmodus angle, or a small tame that fits through spam.
↖ When to Test Niche Tames
Test weird options if:
- Standard soaking fails
- Rocket runs cannot reach the wall
- The entrance is vertical
- The entrance is underwater
- Spam has small gaps
- Turrets have blind spots
Good raiders do homework.
Recreate the entrance in single-player if needed. Check what fits. Check what clips. Check what gets turreted. One good test can save hundreds of rockets and tames.
↖ Target Beds When Generator Is Buried
The generator is the dream target.
But sometimes it is too deep.
If you cannot reach it, kill the spawn system.
↖ Why Beds and Tek Pods Matter
Once defenders lose beds:
- They cannot instantly respawn inside
- Repairs slow down
- Turret replacement slows down
- Panic starts
- Outside deaths matter more
If they also lose teleporters, the base can turn from online defense into basically offline.
| If You See | Target This |
|---|---|
| Exposed generator route | Generator |
| Protected generator, exposed beds | Beds / Tek Pods |
| Outside teleporter | Teleporter |
| Weak outside spam | Tunnel / structure push |
| Constant turret replacement | Turret cap |
| Strange entrance geometry | Niche tame test |
Do not force the generator if another target breaks the defense faster.
↖ FAQ
↖ What is the best way to raid a rathole in ARK Survival Ascended?
The best method is layered pressure: tunnel if possible, then use turret capping, Behemoth Gates, Tek bubble pushes, tame pressure, and targeted rocket runs. The goal is permanent progress, not random soaking.
↖ Is tunnel raiding worth it?
Yes. If placement is possible, tunnel raiding is often cheaper than soaking. Reaching the generator through a tunnel can save huge amounts of ARB, Element, tames, and time.
↖ How do you stop defenders from replacing turrets?
Use turret capping. Place your own turrets close enough to hit the area cap. Once capped, destroyed enemy turrets become hard or impossible to replace.
↖ Are Stegos enough to raid ratholes?
Not against good defenders. Stegos help create pressure, but pure soaking is slow and expensive. Use them while pushing structures, capping turrets, blocking lines, or setting up rocket runs.
↖ What should we target if the generator is unreachable?
Target beds, Tek Pods, and teleporters. Removing respawns can collapse an online defense even if the main generator stays alive.
↖ Summary
Ratholes in ARK Survival Ascended are beatable when you stop treating them like normal bases.
Do not just soak.
Do not just rocket run.
Do not destroy turrets that get replaced instantly.
Control the outside first.
Then stack pressure:
| Situation | Correct Play |
|---|---|
| Weak spam | Tunnel raid |
| Defenders replacing turrets | Turret cap |
| Need closer rocket runs | Tek bubble push |
| Defenders rebuilding outside | Behemoth Gates |
| Player-only turrets | Carbonemys soak |
| Full turret wall | Tame block + coordinated rocket runs |
| Generator too deep | Kill beds and teleporters |
| Standard push fails | Test niche tames |
The rule is simple: every push must create permanent progress.
Once defenders cannot replace turrets, rebuild spam, respawn inside, or hold outside ground, the rathole starts cracking.

Most Popular Posts
- ARK Survival Ascended 2026 Update Guide: Lost Colony Fixes, Trait Upgrades, Creature Changes
- ASA Best Boss Fighting Creatures: Ranked for Boss Arenas, Titans, and Mini Bosses
- ASA Evo Brontosaurus Guide: Taming, Abilities, Saddles, Spawn Locations & Best Uses
- ARK Survival Ascended Loot & Blueprint Guide: Best Drop Locations for PvP Gear and Saddles
- ARK Survival Ascended Tame Burrowbuck: Location, Food, Saddle, and Abilities
- Best Base Locations on The Island in Ark Survival Ascended
Popular Category Lists
- Grow a Garden / (283)
- ARC Raiders / (256)
- CoD: Black Ops 7 / (166)
- Monopoly Go / (146)
- MLB 26 / (139)
- Star Citizen / (106)
- Steal a Brainrot / (88)
- Sailor Piece / (67)
- Forza Horizon 6 / (58)
- Blox Fruits / (56)
- CoD: BLACK OPS 6 / (55)
- ARK Survival Ascended / (54)
- Diablo IV / (53)
- Path of Exile 2 / (48)
- Adopt Me / (48)
- Monster Hunter Wilds / (46)
- Windrose / (43)
- Path of Exile / (40)
- Battlefield 6 / (34)
- Bee Swarm Simulator / (34)