


 0
0MH Wilds Decoration Guide: Farm, Craft and Strategies
- Samuel
- Share
- Monster Hunter Wilds
- 03/23/25
- 4166
Choosing the right setup for your hunter in MH Wilds relies on the decorations you pick. Each item comes in different tiers, with each offering a different combination of skills. Your edge in battle will mostly come from Level 3 decorations which are packed with skills. The game also offers a new set of both weapon and armor skills which requires farming and effectively utilizing decorations.
- How the New Decoration System Works?
- How to Obtain Decorations?
- Best Decorations to Farm
- How to Craft Decorations?
- How to Efficiently Farm Decorations?
Note: There are minor spoilers pertaining to the game;s end content within this guide. If you are in Low Rank or have yet to finish the story, tread carefully.
↖ How the New Decoration System Works?
There are 2 categories of decorations in Monster Hunter Wilds: Armor Skills and Weapon Skills.
| Type | Icon | Details |
|---|---|---|
| Armor Skills | Skills equippable on armor pieces with corresponding slots for decorations | |
| Weapon Skills | Skills that can be performed only on weapons with appropriate slots that are garnished with decorations |
Key Features:
- Levels Of Decorations: Decorations come in 3 levels: Level 1, Level 2, and Level 3; Higher levels of decorations provide more potent effects or multiple skills.
- Compatibility Of Slots:Decorations cannot be placed in any slot that does not match their level (e.g., a Level 3 decoration requires a Level 3 slot); Weapon exclusive decorations cannot be put on armor, and vice versa.
- Mixed Skill Decorations: Rare decorations exist that combine two different skills, such as Attack Boost + Horn Maestro or Fire Attack + Offensive Guard; Mixed skill decorations are highly sought after due to their versatility and efficiency.
Example Breakdown:
- A Level 1 Attack Boost provides one level of the skill.
- Level 3 Attack Boost provides three levels of the skill.
Sometimes you might be lucky enough to find a mixed decoration that has both "Fire Attack Level 3" and "Offensive Guard Level 1", providing you with an extra skill without paying extra.
↖ How to Obtain Decorations?
Unlocking Achievements
You'll start unlocking achievements during the low-rank story. Specifically when you reach Suja. However, the actual toil begins in high rank where investigations are important in attaining better rewards.
Key Points:
- Achievements are linked to specific quests and monsters.
- Rewards comprise of both armor as well as weapon decor and are shown by icons:
 : Weapon decoration.
 : Armor decoration.
- The rarity of the decorations is shown on the preview of the quest (for instance: Rarity 4, Rarity 5).
Targeting Monsters
To efficiently farm decorations aim for non-tempered monsters. These quests tend to give better rewards in terms of decorations than tempered monster quests which focus on materials for crafting Aran weapons instead.
Tier Breakdown:
- Tier 1 & Tier 2 Monsters: Offer lower rarity (Rarity 4-5) decorations.
- Tier 3 Monsters: Provide the highest rarity (Rarity 6) decorations.
Best Tier 3 Monsters:
You will need to achieve Hunter Rank 41+ to unlock quests containing Tier 3 Monsters. These include:
| Monster Name | Notes |
|---|---|
| Raa | Apex monster |
| Uuna | Apex monster |
| New Udra | Apex monster |
| Jind Thead | Apex monster |
| Arcel | Requires high rank access |
| Gorm Magala | Requires high rank access |
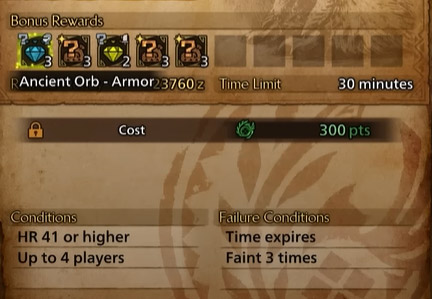
Quest Conditions
Decorations related to Tier 3 monsters are gated behind Hunter Rank 41+. Complete the story quest at Hunter Rank 40 to unlock higher ranks and access these investigations.
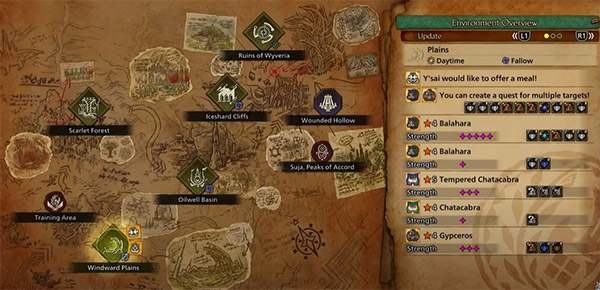
Decoration Preview for Quests:
- Before starting a quest, have a look at the reward preview.
- Look for decoration rarity (Rarity 4-6).
- Check if the decoration is for armor or weapons based on the icon and item name e.g. Mystery Orb – Sword or Mystery Orb – Armor.
Example Comparison:
| Quest Type | Rewards Focus | Rarity Example | Notes |
|---|---|---|---|
| Non-Tempered Monster | Decorations | Rarity 4-6 | Best source for farming |
| Tempered Monster | Aran weapon parts | N/A | Secondary focus are Decoration |
↖ Best Decorations to Farm
Farming decorations requires a clear strategy along with knowledge of the game itself.
1. Target Multi-Monster Investigations
- What to Look For: Investigations that have a Tier 3 monster (like Rathalos, Zinogre) along with a secondary monster.
- Why It Works: Multi-monster quests benefits from having lower individual monster health and quickens hunts while providing significantly higher rewards.
Example: A quest featuring a Radal and Chatak Cabra can yield:
- 5 Rarity 6 weapon decorations.
- 6 Rarity 6 armor decorations.
2. Efficiency is Key
Depending on your gear and skill level, multi-monster quests can be tackled in six minutes or less. These quests have additional reward structures with Arcel Gems, which are considered valuable material currency.
| Quest Type | Estimated Time | Rewards Potential | Additional Notes |
|---|---|---|---|
| Single-Monster Quest | ~5-10 minutes | Less overall variety, limited decorations | Ideal for specific spawn monster materials |
| Multi-Monster Quest | ~6-8 minutes | Increased decoration quantity | Lesser monster health for quicker hunts |
↖ How to Craft Decorations?
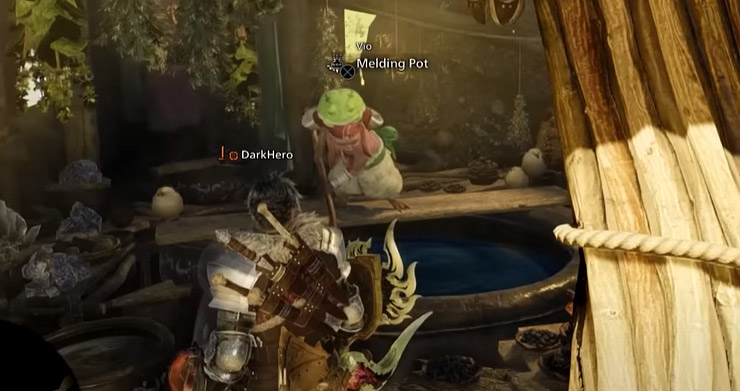
Crafting decorations can be done once the Suja Peaks of Accord region is reached and the Elder Melder is unlocked,
Step 1. Gain access to the Elder Melder
Visit the NPC Elder Melder situated in Suja Peaks of Accord, Use the Melding Pods to create decorations by spending materials and excess decorations with every mold.
Step 2. Materials Required
- Trade Items: This is usually traded by NPCs, making it harder to obtain.
- Unneeded Decorations: Risk decorations you are not required to keep in the hope of winning better replacements.
Step 3. Options in Melding
Grants the ability to forge any Level 1 or Level 2 decoration.
- Level 1 Decorations: Highly versatile and are available early in the game. Example: Divine Blessing (a top tier defensive skill).
- Level 2 decorations: Unlocked at Hunter Rank 100, giving them access to more powerful options.
| Requirement to Unlock | Decoration Level | Example Skill | Suggested Use Case |
|---|---|---|---|
| Level 1 | Default/Early game | Divine Blessing | Generall utility and versatile builds |
| Level 2 | Level 2 | Hunter Rank 100+ | Critical Boost, Weakness Exploit | Defensive builds for high-damage output |
↖ How to Efficiently Farm Decorations?
1. Investigation generation via map resets
If you are not finding suitable investigations on the map:
- Step 1: Go to the tent in any camp.
- Step 2: Select "Rest" in the barbecue menu and skip to a different time of day. (This costs 300 resource points. Rest point are abundant; for example, with 25,000 points, you can repeat this process many times. )
- Step 3: Open the map again and look for new two monster decoration rewarding investigations.
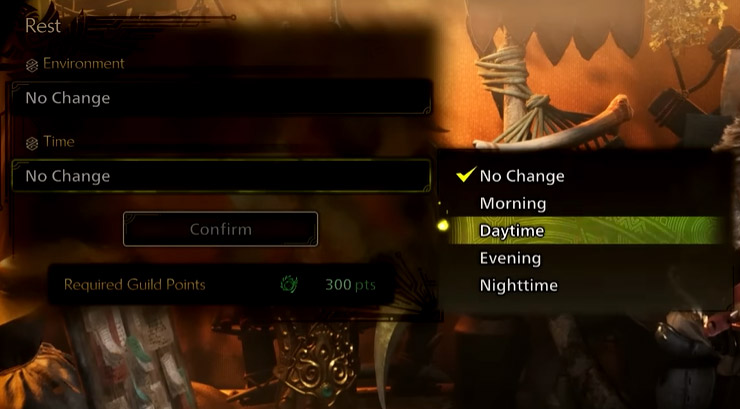
Note: While resetting the map can generate new investigations, it also resets the environment.
This implies certain monsters (like Radar or Arcv), for instance, might not spawn when they are supposed to.
2. Save Investigations for Trip Repeat Use
After you find a worthwhile investigation, don't forget to:
- Save it right before you start the quest.
- Upon completing the quest, you can repeat the quest up to thrice consecutively.
- Value multiple investigations with high rewards as they streamline the farming process through fewer map resets.
3. For Quicker Results, Play Multiplayer
Multiplayer gameplay allows expedient completion of tasks:
- Team Coordination: The chance of finding valuable investigations augments with four players.
- Shared Investigations: After the completion of one investigation, each player can check their maps for other investigations and share them with the group.
- Hunts Done Faster: In coordinated teams, hunts can be completed quicker for more farming in reduced time.
4. Pick the Right Weapons and Elements
The use of weapons that are more effective against the monster speed up the hunts:
| Monster | Weaknesses | Recommended Element(s) |
|---|---|---|
| Row | Water, Ice | Water or Ice |
| Usuna | Thunder | Thunder |
| New Udra | Water | Water |
| Jind Dad | Fire | Fire |
| Gorm Magala | Fire, Thunder, Dragon | Fire or Dragon |
Tip: Use a Dragon element weapon if you want a single build for all monsters since:
- Arcv and Gorm Magala are weak to Dragon.
- It is neutral to the four Apex monsters, making it good for repeated farming.
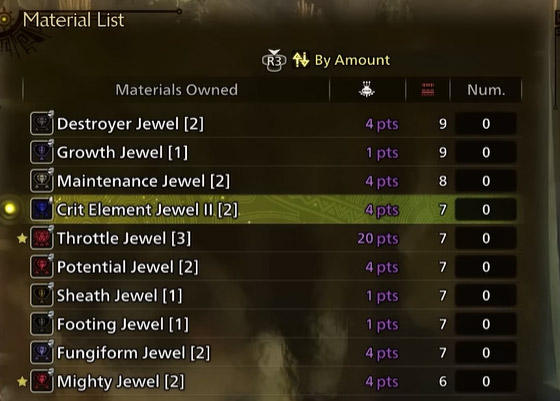
5. Prioritize Dual-Skill Decorations
Optimize your build by prioritizing decorations that contain 2 useful skills:
For example, A Level 3 decoration with Fire Attack + Offensive Guard lets you boost fire damage and also lets you use another skill like Razor Sharp or Handicraft.
Efficient farming ensures you get decorations that give the most value without wasting slots on single skill decorations.
6. Casual vs. Dedicated Farming Approaches
- Casual Players: Encounter investigations and save them as you come across them, allowing for steady progress without excessive grinding.
- Dedicated Min-Maxers: Implement efficient farming methods detailed above to perfect your character builds and perform well in endgame content.
Prioritize high-reward investigations, design key skills as necessary, and conserve as much time as possible with time-saving strategies. With good strategy and determination, you’ll have a powerful set of decorations that will enhance your hunting experience.
Most Popular Posts
- MH Wilds Artian Weapons Guide: Materials, Craft and Upgrades
- Monster Hunter Wilds Bow Builds: Mastering the Dragon Piercer Build Guides
- MH Wilds: All Weapons Tier List & Ranking | Speedrun Clear Time
- MH Wilds New Endgame Builds: Zoh Shia Armor Set
- How to Obtain Rare Monster Hunter Wilds Commission Tickets?
- Monster Hunter Wilds Best Endgame Angelbein Bow Build Guides
Popular Category Lists
- Grow a Garden / (286)
- ARC Raiders / (262)
- CoD: Black Ops 7 / (166)
- Monopoly Go / (146)
- MLB 26 / (145)
- Star Citizen / (112)
- Steal a Brainrot / (89)
- Sailor Piece / (68)
- ARK Survival Ascended / (67)
- Diablo IV / (61)
- Forza Horizon 6 / (60)
- Blox Fruits / (60)
- CoD: BLACK OPS 6 / (55)
- Adopt Me / (53)
- Path of Exile 2 / (48)
- Monster Hunter Wilds / (46)
- Windrose / (44)
- Path of Exile / (40)
- Grow a Garden 2 / (40)
- Bee Swarm Simulator / (36)


