0
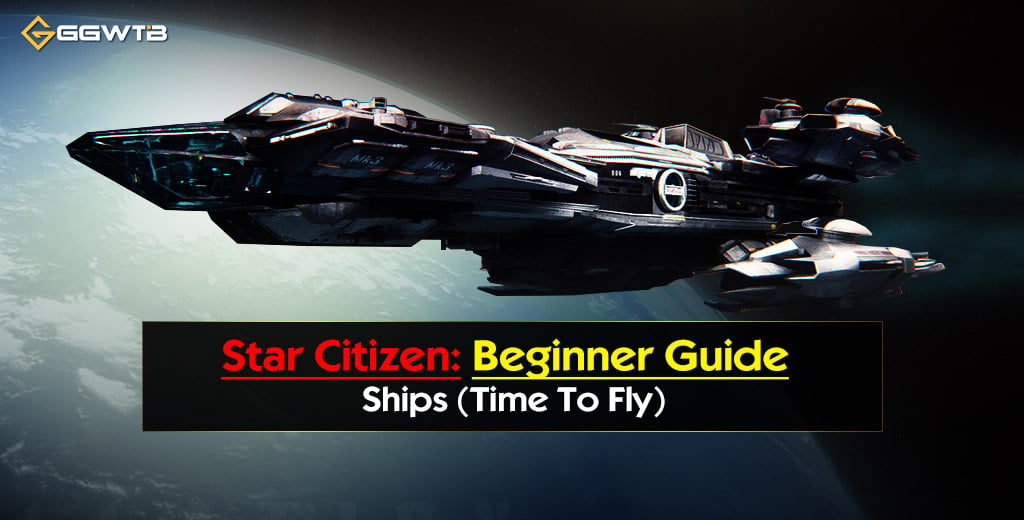
0Star Citizen Beginner Guide: Flight & Ships | Section 4
- RCHM
- Share
- Star Citizen
- 06/05/26
- 345
This guide is Star Citizen beginner section 4 flight guide covering ship retrieval, basic controls, quantum travel, station landing, cargo hauling, freight elevators, and Avenger Titan entry/exit tips.
thumb_img}
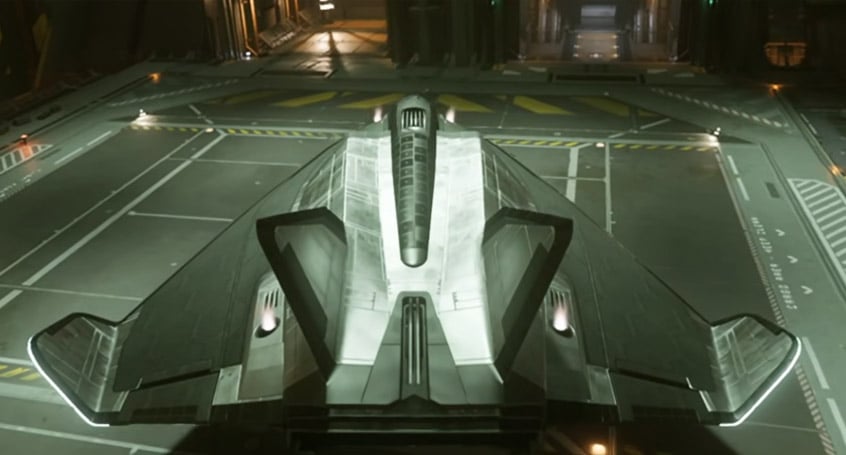
If you're new to Star Citizen, your first real milestone is simple: retrieve your ship, take off without exploding, complete a small cargo contract, and land safely. This guide focuses on that exact loop. No fluff. Just the controls, mistakes, and field-tested habits that keep new pilots alive.
- Before You Fly: Keybinds You Actually Need
- 1. The Ship: Introduction
- What to Check Before Takeoff
- 2. Beginning the Intro Cargo Hauling Contract
- Read the Box Size, Not Just Total SCU
- 3. Basic Flight Lessons
- Movement Basics
- Use Landing Gear as a Speed Limiter
- SCM vs NAV Mode
- Control Your Speed Limiter
- 4. How to Use Quantum Travel
- Basic Quantum Steps
- Leaving Atmosphere
- Common Quantum Problems
- 5. Landing at a Space Station
- Safe Station Landing Flow
- Use Ping in Darkness
- Landing Control Table
- 6. Retrieving and Loading Cargo
- Freight Elevator Process
- Tractor Beam Controls
- Practical Loading Tips
- 7. Getting Into a Loaded Avenger Titan
- Titan Cockpit Entry
- 8. Delivering Cargo to Its Destination
- Departure Checklist
- Atmospheric Arrival
- Final Delivery
- 9. Getting Out of a Loaded Avenger Titan
- Titan Cockpit Exit
- Beginner Cargo Flight Loop
- Common Beginner Mistakes
- FAQS
- Q1 - What Is The Best Starter Ship For Learning Cargo?
- Q2 - Why Does Cargo Box Size Matter?
- Q3 - How do I open hangar doors?
- Q4 - Why Can't I Quantum Travel?
- When should I use SCM mode?
- When should I use NAV mode?
- How do I load cargo?
- Where do I deliver cargo at a landing zone?
- How do I enter a loaded Avenger Titan?
- How do I exit a loaded Avenger Titan?
- Summary
↖ Before You Fly: Keybinds You Actually Need
Memorize these first. They cover most beginner flight and cargo situations.
| Keybind | Action | Why It Matters |
|---|---|---|
| F | Interact | Doors, seats, terminals, panels |
| F2 | Open mobiGlas | Contracts, map, route planning |
| U | Power ship on/off | Starts ship systems |
| I | Engines on/off | Turn engines off after landing |
| Left Alt + N | Request ATC | Opens hangar doors |
| N | Landing gear | Slows ship near pads/hangars |
| B | NAV / SCM mode | NAV for quantum, SCM for control |
| Spacebar | Strafe up | Takeoff |
| Ctrl | Strafe down | Landing |
| W/S | Forward / backward | Basic movement |
| A/D | Strafe left / right | Fine positioning |
| Q/E | Roll left / right | Level the ship |
| Shift | Boost | Use carefully |
| Tab | Ping | Helps see stations in darkness |
| 5 | Equip multi-tool | Cargo loading |
| Hold Y | Exit seat | Standard cockpit exit |
| Hold Z | Freelook | Look around cockpit |
↖ 1. The Ship: Introduction
Start at the ASOP terminal, select your ship, then click Retrieve. Wait until the hangar platform fully rises before walking out. Do not walk across the lowered hangar floor. You can fall and die.
↖ What to Check Before Takeoff
Look around the ship with F. Most starter ships have interaction points for:
| Ship Feature | Use | Beginner Advice |
|---|---|---|
| Main hatch / ladder | Entry | Learn all entry points |
| Cargo bay / cargo module | Freight storage | Needed for hauling |
| Component panels | Shields, power, coolers | Useful later for repairs |
| Pilot seat | Flight control | Main cockpit access |
| Internal storage | Store gear | Avoid storing rare items |
| Weapon rack | Holds guns/tools | Risky if ship is destroyed |
| Bed | Logout point | Works on supported ships |
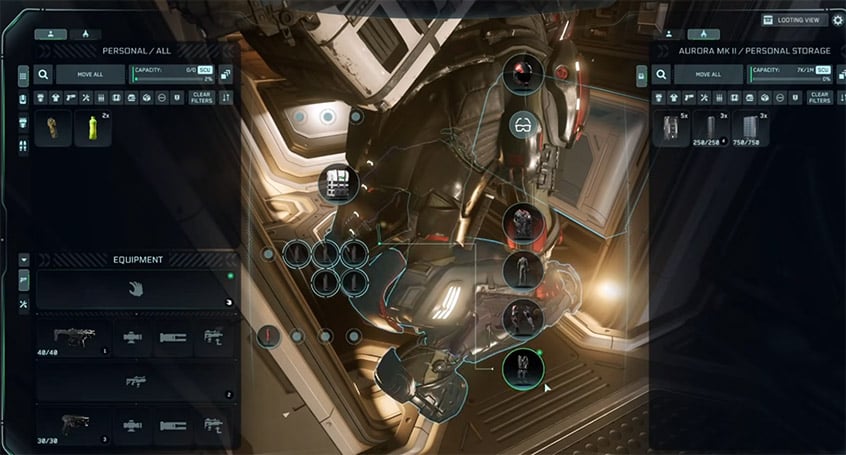
The Aurora MR is a solid starter because it teaches core systems in a small package: cockpit, bed, storage, component access, and limited cargo space. With a cargo module, it can handle small hauling jobs using 1 SCU boxes.
↖ 2. Beginning the Intro Cargo Hauling Contract
Open mobiGlas:
``text
F2 → Contracts → Hauling
`
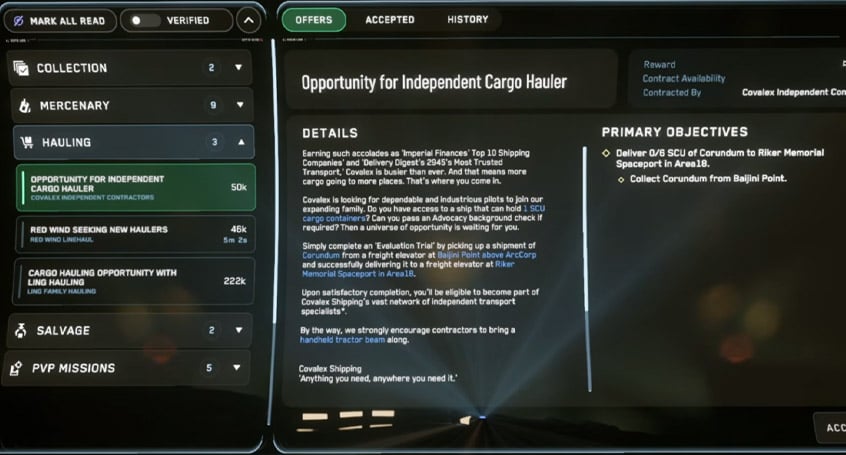
Look for a beginner hauling contract. A common starter run pays around 50,000 aUEC and asks you to move a small load, such as 6 SCU of cargo.
↖ Read the Box Size, Not Just Total SCU
This is where new players get trapped.
| Contract Cargo | Starter Ship Risk |
|---|---|
| 6 × 1 SCU boxes | Usually manageable |
| 3 × 2 SCU boxes | Depends on cargo bay |
| 2 × 4 SCU boxes | Often too large |
| 80 SCU total | Not for starter ships |
Star Citizen cargo is physical. A ship may have enough total SCU on paper but still fail if the boxes do not physically fit. After accepting the contract, click Track so the pickup and delivery markers appear on your HUD.
↖ 3. Basic Flight Lessons
Once seated:
- Press U to power the ship.
- Press I if engines are not on.
- Use Left Alt + N to request hangar doors.
- Use Spacebar to lift off.
- Exit slowly.

↖ Movement Basics
| Input | Movement |
|---|---|
| W | Forward |
| S | Backward |
| A | Left strafe |
| D | Right strafe |
| Spacebar | Up |
| Ctrl | Down |
| Mouse | Pitch / yaw |
| Q/E | Roll |
New pilots usually crash because they fly too fast near structures. Keep landing gear down when leaving or entering hangars.
↖ Use Landing Gear as a Speed Limiter
Press N to toggle landing gear.
Landing gear down:
- Reduces max speed.
- Makes hangar movement safer.
- Helps with final landing control.
Gear up only when clear of the station or city.
↖ SCM vs NAV Mode
| Mode | Use | Risk |
|---|---|---|
| SCM | Landing, combat, close control | Slower but safer |
| NAV | Quantum travel, high-speed movement | Easy to overshoot |
If you are close to a station, city, or hangar, use SCM mode. NAV mode is for travel, not precision.
↖ Control Your Speed Limiter
Use:
`text
Left Alt + Mouse Wheel
`
If you keep overshooting hangars, lower the limiter. This one habit prevents a lot of beginner deaths.
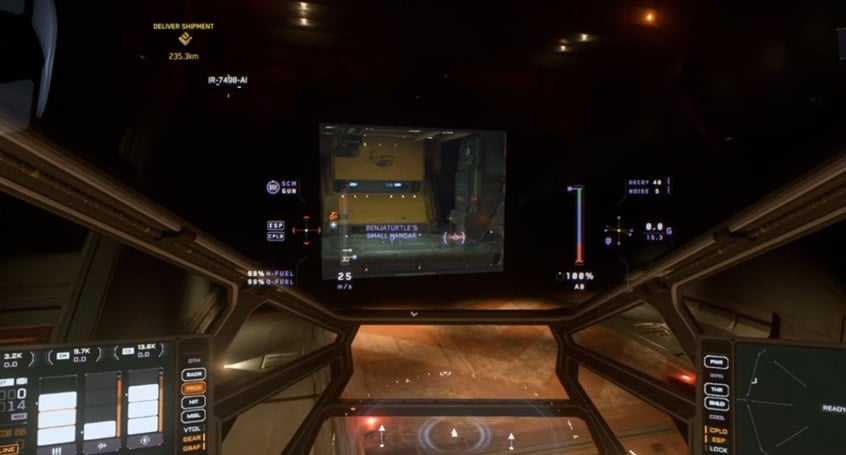
↖ 4. How to Use Quantum Travel
Quantum travel requires NAV mode and a valid target.
↖ Basic Quantum Steps
- Enter NAV mode with B.
- Point at the destination marker.
- Wait for calibration.
- Left-click to jump.
- Drop near the destination.
- Switch back to SCM before approach.
↖ Leaving Atmosphere
At Area18, quantum usually becomes available around 7 km altitude. If quantum is disabled, climb higher. Do not fly sideways across the city trying to quantum. Pitch up, climb, then jump.
↖ Common Quantum Problems
| Problem | Cause | Fix |
|---|---|---|
| Quantum disabled | Too low in atmosphere | Climb higher |
| No calibration | Not aimed at marker | Center target |
| Wrong destination | Marker confusion | Right-click zoom to confirm |
| Overshooting station | Stayed in NAV too long | Switch to SCM early |
For short jumps, such as Area18 to Baijini Point, quantum may drop you within roughly 20–30 km of the station.
↖ 5. Landing at a Space Station
Approach stations slowly. Most beginner crashes happen during arrival, not in deep space.
↖ Safe Station Landing Flow
- Exit quantum near the station.
- Fly closer in NAV only while far away.
- Switch to SCM before final approach.
- Press Left Alt + N to request landing.
- Follow the hangar marker.
- Lower speed limiter if needed.
- Press N to deploy landing gear.
- Enter hangar slowly.
- Use Ctrl to descend.
- Press I after touchdown.
↖ Use Ping in Darkness
Press Tab to ping. This outlines nearby structures and helps when a station is on the dark side of a planet.
↖ Landing Control Table
| Action | Input |
|---|---|
| Raise ship | Spacebar |
| Lower ship | Ctrl |
| Move sideways | A/D |
| Move forward/back | W/S |
| Deploy gear | N |
| Turn engines off | I |
Always turn engines off after landing. A ship with engines on can drift, slide, or jump when you touch the wrong key.
↖ 6. Retrieving and Loading Cargo
Once landed at the pickup station, park near the freight elevator if possible. This saves time and makes loading cleaner.
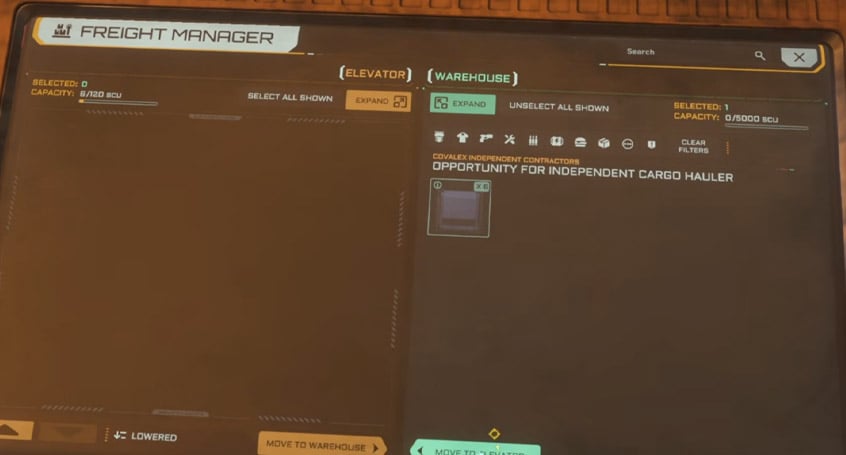
↖ Freight Elevator Process
- Open your ship cargo bay.
- Go to the freight elevator kiosk.
- Lower the elevator.
- Move contract cargo onto the elevator in the kiosk UI.
- Raise the elevator.
- Load boxes into your ship with a tractor beam.
↖ Tractor Beam Controls
| Input | Function |
|---|---|
| 5 | Equip multi-tool |
| Left-click | Grab box |
| Mouse wheel | Pull / push box |
| Hold R + mouse | Rotate box |
| Hold R | Reholster depending on state |
Aim boxes at the cargo grid. When aligned, they snap into place.
↖ Practical Loading Tips
- Load awkward boxes first.
- Use small mouse movements.
- Do not stand between the box and the ship.
- Watch for the cargo grid hologram.
- Confirm every mission box is loaded before departure.
For starter hauling, 1 SCU boxes are ideal. They are small, easy to rotate, and forgiving in tight cargo bays.
↖ 7. Getting Into a Loaded Avenger Titan
The Avenger Titan is beginner-friendly, but a full cargo bay can block the rear entrance.
Use the cockpit ladder instead.
↖ Titan Cockpit Entry
- Walk to the left side of the cockpit.
- Look near the canopy/ladder area.
- Use F on the interaction prompt.
- Climb directly into the cockpit.
| Ship | Cargo Issue | Fix |
|---|---|---|
| Aurora MR | Limited cargo space | Use small contracts |
| Avenger Titan | Rear entry can be blocked | Use cockpit ladder |
| Cutter | Roomier interior | Slower handling |
| Pisces C8X | Easy to fly | Limited cargo |
If you fly a Titan, learn the cockpit ladder before your first loaded delivery.
↖ 8. Delivering Cargo to Its Destination
After loading, close the cargo bay and return to the cockpit.
↖ Departure Checklist
- Engines on: I
- Request hangar: Left Alt + N
- Lift off: Spacebar
- Exit slowly.
- Retract gear with N once clear.
- Enter NAV mode.
- Quantum to the destination.
If the target is on a planet, you may need two jumps:
`text
Station → Planet orbit → Surface landing zone
`
For Area18 deliveries, jump toward ArcCorp first if needed, then target Area18 or Riker Memorial Spaceport.
↖ Atmospheric Arrival
Stay in NAV while far out, but switch to SCM before you get close to the landing zone.
| Situation | Action |
|---|---|
| 25 km out | Manage speed |
| 10–15 km out | Start slowing |
| Near spaceport | Request hangar |
| Hangar marker appears | Switch to SCM |
| Final approach | Gear down |
| Touchdown | Engines off |
At Area18, Riker Memorial Spaceport is marked by strong lighting and landing infrastructure. Do not aim for the city center unless your marker clearly tells you to.
↖ Final Delivery
Once landed:
- Turn engines off with I.
- Exit the ship.
- Open cargo bay.
- Equip tractor beam.
- Move boxes onto the freight elevator.
- Open kiosk.
- Confirm all boxes are listed.
- Lower elevator.
- Complete delivery.
For a six-box contract, verify the kiosk shows 6/6 before confirming. A successful beginner hauling contract can pay around 50,000 aUEC and unlock more hauling offers through reputation.
↖ 9. Getting Out of a Loaded Avenger Titan
If your Avenger Titan rear bay is packed, do not fight the cargo.
Exit through the cockpit side.
↖ Titan Cockpit Exit
- Land.
- Press I to turn engines off.
- Hold Z to freelook left.
- Find the cockpit exit prompt.
- Use F or left-click to exit.
This avoids getting stuck behind cargo or causing physics problems by pushing boxes around inside the ship.
↖ Beginner Cargo Flight Loop
Use this as your quick checklist.
| Phase | Action | Key Tools |
|---|---|---|
| Retrieve ship | Call ship from ASOP | Terminal |
| Inspect ship | Check entry and cargo access | F |
| Accept contract | Pick small hauling job | F2 |
| Take off | Request hangar and lift | Left Alt + N, Spacebar |
| Travel | Use quantum | B, left-click |
| Land at pickup | Request station hangar | SCM, N, Ctrl |
| Load cargo | Use freight elevator | Kiosk, tractor beam |
| Deliver cargo | Fly to destination | NAV + SCM |
| Submit cargo | Lower delivery elevator | Freight kiosk |
↖ Common Beginner Mistakes
| Mistake | Why It Happens | Fix |
|---|---|---|
| Accepting cargo that does not fit | Only checking total SCU | Check box size |
| Crashing into hangars | Too fast | Gear down, lower limiter |
| Quantum not working | Too low or wrong mode | Climb and enter NAV |
| Missing delivery point | Marker confusion | Use hangar freight elevator |
| Drifting after landing | Engines still on | Press I |
| Titan blocked by cargo | Rear bay full | Use cockpit ladder |
| Hangar closes | Too slow after ATC | Request again |
| Cargo will not appear | Elevator not lowered | Lower elevator first |
↖ FAQS
↖ Q1 - What Is The Best Starter Ship For Learning Cargo?
The Aurora MR works for basic hauling if the cargo is small. The Avenger Titan is better for cargo flexibility, but you must use the cockpit ladder when the rear bay is full.
↖ Q2 - Why Does Cargo Box Size Matter?
Because cargo is physical. A ship may support enough total SCU but still fail to fit large containers. For starter ships, prioritize 1 SCU boxes.
↖ Q3 - How do I open hangar doors?
Press Left Alt + N to contact ATC. Wait for the hangar marker, then fly toward it.
↖ Q4 - Why Can't I Quantum Travel?
You may be too low in atmosphere or not in NAV mode. Climb higher, enter NAV mode, and aim directly at a quantum marker.
↖ When should I use SCM mode?
Use SCM for landing, station approach, combat, and close maneuvering. It gives better control and safer speeds.
↖ When should I use NAV mode?
Use NAV for long-distance travel and quantum jumps. Avoid using NAV near hangars or tight structures.
↖ How do I load cargo?
Use the freight elevator kiosk to raise the cargo, then use a multi-tool tractor beam to move boxes into your ship's cargo grid.
↖ Where do I deliver cargo at a landing zone?
Usually through the freight elevator inside your assigned hangar. Check that the kiosk shows the required number of boxes before lowering the elevator.
↖ How do I enter a loaded Avenger Titan?
Use the side cockpit ladder. The rear ramp may be blocked by cargo.
↖ How do I exit a loaded Avenger Titan?
After landing, turn engines off, look left from the cockpit with freelook, and use the cockpit exit prompt.
↖ Summary
Your first reliable Star Citizen flight loop is:
`text
Retrieve ship → Accept small cargo contract → Take off → Quantum travel → Land → Load cargo → Return → Deliver cargo
``
The habits that matter most:
- Check cargo box size, not just total SCU.
- Use SCM near stations and hangars.
- Use NAV for quantum and long-distance travel.
- Keep landing gear down during close maneuvers.
- Lower the speed limiter when approaching.
- Turn engines off after every landing.
- Use the freight elevator correctly.
- Learn alternate entry and exit points, especially on the Avenger Titan.
Master this loop and you have the foundation for hauling, delivery contracts, station navigation, planetary landings, and early-game money making in Star Citizen.

Most Popular Posts
- Star Citizen Covalex Cargo Hauling 4.8: Fast Reputation Route, Best Ships, and Master Unlocks
- Star Citizen 4.8 Solo Ship Guide: Best Purchasable PvP & PvE Ships, Loadouts, Components
- Star Citizen 4.8 Salvage Guide: Best RMC Farming, Adagio Rep, and Ships to Use
- Star Citizen 4.8 Best Component Blueprints: Fast Farming Roadmap for Crafting
- Star Citizen 4.8.3 XenoThreat Event Guide: Fast Points, Best Missions, Rewards, and Ship Strategy
- Star Citizen 4.8 aUEC Farming Guide: Best Money Methods, First Ships, and Fast Progression
Popular Category Lists
- Grow a Garden / (286)
- ARC Raiders / (263)
- CoD: Black Ops 7 / (166)
- Monopoly Go / (146)
- MLB 26 / (145)
- Star Citizen / (113)
- Steal a Brainrot / (89)
- ARK Survival Ascended / (70)
- Sailor Piece / (68)
- Forza Horizon 6 / (61)
- Diablo IV / (61)
- Blox Fruits / (60)
- CoD: BLACK OPS 6 / (55)
- Adopt Me / (53)
- Path of Exile 2 / (48)
- Monster Hunter Wilds / (46)
- Windrose / (44)
- Path of Exile / (40)
- Grow a Garden 2 / (40)
- Bee Swarm Simulator / (36)