0
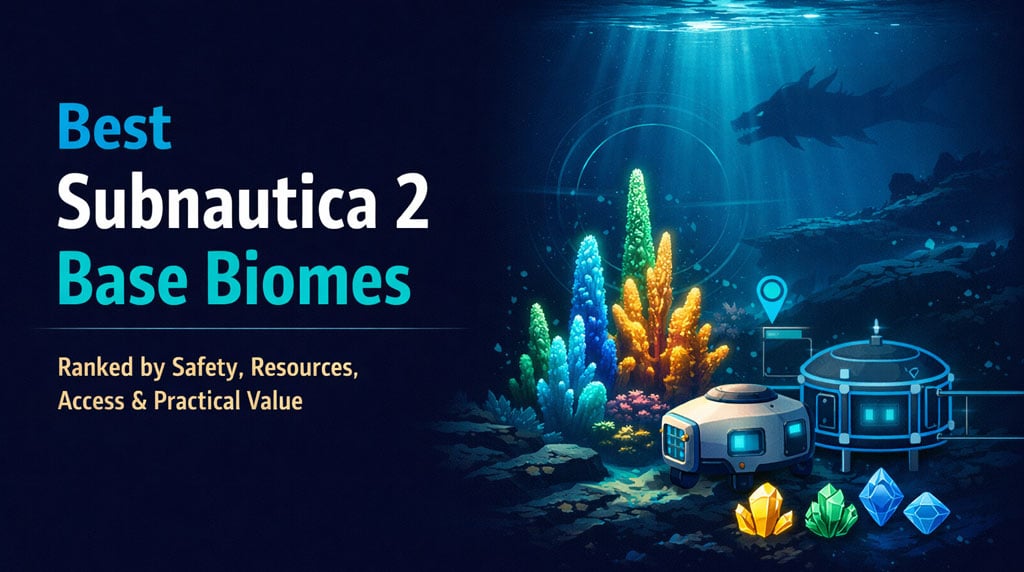
0Subnautica 2 Best Biomes for Base Building: Ranked by Safety, Resources, and Practical Value
- FROST
- Share
- Subnautica 2
- 05/22/26
- 676
If you want the short answer: build your first base in the Shallows, move serious operations toward Chuer Towers or Plateaus, then add compact outposts in the Lead Zone, Graveyard, and Observatory.
Do not judge a biome by looks. Judge it by how many trips it saves, how often it tries to kill you, and whether it gives you the resources you actually need.
- Subnautica 2 Biome Ranking Criteria
- Best Subnautica 2 Biomes Ranked
- Best Starter Base: Shallows
- Why It Works
- Build Strategy
- Best All-Round Base: Chuer Towers
- Why It Works
- Build Strategy
- Best Early-Mid Upgrade: Plateaus
- Why It Works
- Build Strategy
- Best Resource Outpost: Lead Zone
- Why It Works
- Build Strategy
- Best High-Risk Outpost: Graveyard
- Why It Works
- Build Strategy
- Best Late-Game Base: Observatory
- Why It Works
- Build Strategy
- Decent but Flawed Biomes
- North Raceway
- Anemone Hills
- Power Plant
- Root Canyon
- Worst Subnautica 2 Biomes for Base Building
- South Raceway
- Blighted Coral
- Collector Leviathan Arena
- Best Base Plan by Game Stage
- Recommended Route
- Key Creature Threats for Base Planning
- FAQ
- What is the best biome for a starter base in Subnautica 2?
- What is the best overall base location in Subnautica 2?
- Should we build a base in the Graveyard?
- Is the Observatory worth building in?
- Which Subnautica 2 biomes should we avoid building in?
- Summary
↖ Subnautica 2 Biome Ranking Criteria
A good base location needs four things:
| Factor | What It Means in Practice |
|---|---|
| Safety | Fewer predators, fewer hazards, easier escape routes |
| Resources | Useful materials nearby, not just basic titanium |
| Accessibility | Easy travel to other key biomes |
| Base Practicality | Good terrain, food access, long-term value |
Each biome is scored out of 40 points.
| Tier | Score | Build Verdict |
|---|---|---|
| Excellent | 32–40 | Main base material |
| Great | 29–31 | Strong base or major outpost |
| Decent | 20–28 | Works, but has clear flaws |
| Impractical | 10–19 | Usually not worth it |
| Avoid | 0–9 | Do not build here |

↖ Best Subnautica 2 Biomes Ranked
| Rank | Biome | Safety | Resources | Access | Practicality | Total | Verdict |
|---|---|---|---|---|---|---|---|
| 1 | Shallows | 9 | 6 | 10 | 8 | 33 | Best starter base |
| 2 | Chuer Towers | 9 | 8 | 8 | 8 | 33 | Best all-round base |
| 3 | Plateaus | 5 | 7 | 9 | 9 | 30 | Best early-mid upgrade |
| 4 | Graveyard | 2 | 10 | 9 | 9 | 30 | Best dangerous outpost |
| 5 | Observatory | 8 | 9 | 4 | 9 | 30 | Best late-game hub |
| 6 | Lead Zone | 6 | 8 | 7 | 8 | 29 | Best lead farm base |
| 7 | North Raceway | 6 | 6 | 9 | 8 | 29 | Good travel outpost |
| 8 | Anemone Hills | 8 | 6 | 5 | 4 | 23 | Safe but remote |
| 9 | Power Plant | 2 | 8 | 3 | 7 | 20 | Utility outpost only |
| 10 | Root Canyon | 2 | 10 | 1 | 6 | 19 | Too deep, too awkward |
| 11 | South Raceway | 5 | 4 | 6 | 4 | 19 | Skip it |
| 12 | Blighted Coral | 1 | 2 | 4 | 0 | 7 | Do not build |
| 13 | Collector Leviathan Arena | 0 | 1 | 3 | 0 | 4 | Absolutely avoid |
↖ Best Starter Base: Shallows
The Shallows are still the safest first base location in Subnautica 2. You get food, basic materials, clean routes, and very few real threats.
| Score | Rating |
|---|---|
| Safety | 9/10 |
| Resources | 6/10 |
| Accessibility | 10/10 |
| Practicality | 8/10 |
| Total | 33/40 |
↖ Why It Works
The Shallows give us exactly what early game needs:
- Titanium
- Copper
- Quartz
- Easy food fish
- Safe build space
- Fast access to nearby early biomes
The only real problem is silver. You will outgrow this place once upgrades and base modules start asking for better materials.
↖ Build Strategy
Use the Shallows as your starter hub.
Build:
- Fabricator
- Storage wall
- Power source
- Food/water setup
- Scanner support if available
If you keep running out of silver, do not abandon the Shallows immediately. Add a small resource run toward the Plateaus.
Best use: First main base
Avoid building here if: You want mid-game resources without travel
↖ Best All-Round Base: Chuer Towers
The Chuer Towers are the strongest overall base location. Safe enough to live in. Rich enough to matter. Central enough to save time.
| Score | Rating |
|---|---|
| Safety | 9/10 |
| Resources | 8/10 |
| Accessibility | 8/10 |
| Practicality | 8/10 |
| Total | 33/40 |
↖ Why It Works
This biome has:
- Good resource spread
- Access to lithium
- Manageable threats
- Strong route value
- Distinct landmarks for navigation
The Great Jaw is the main thing to respect. It is huge, but it is not the same problem as a roaming Leviathan. Stay away from its trigger zones and the biome is very manageable.
↖ Build Strategy
Build here when your Shallows base starts feeling too basic.
Best setup:
- Scanner Room
- Large storage
- Battery charging
- Vehicle access
- Resource sorting lockers
If you want one serious mid-game base, choose Chuer Towers over Anemone Hills or South Raceway. It simply wastes less time.
Best use: Main mid-game base
Main weakness: Terrain and visuals may not suit every player
↖ Best Early-Mid Upgrade: Plateaus
The Plateaus are not as safe as the Shallows, but they are much better for progression. This is where we start solving real crafting bottlenecks.
| Score | Rating |
|---|---|
| Safety | 5/10 |
| Resources | 7/10 |
| Accessibility | 9/10 |
| Practicality | 9/10 |
| Total | 30/40 |
↖ Why It Works
The Plateaus give access to:
- Silver
- Lead
- Copper
- Quartz
- Titanium
That means fewer painful early-game resource loops.
The downside is creature pressure. Nibbler Mangoes, Sand Spee juveniles, and border threats make this biome less relaxing.
↖ Build Strategy
Build on the safer side near the Shallows. Do not place your main hatch near hostile borders.
Good layout:
- Compact main room
- Scanner coverage
- Resource lockers
- Fast exit route toward Shallows
If you are dying often here, your base is too exposed. Move it closer to the safe edge.
Best use: Second base or early-mid main hub
Main weakness: More predators than beginners expect
↖ Best Resource Outpost: Lead Zone
The Lead Zone is simple: come here when you need lead. It is one of the most useful farming biomes in Subnautica 2.
| Score | Rating |
|---|---|
| Safety | 6/10 |
| Resources | 8/10 |
| Accessibility | 7/10 |
| Practicality | 8/10 |
| Total | 29/40 |
↖ Why It Works
You get:
- Heavy lead supply
- Other mid-tier resources
- Good access toward harder zones
- Practical outpost value
The problem is local harassment. Mango Nibblers are annoying, and the Marrow Breach near the wreck can punish lazy routes.
↖ Build Strategy
Do not build next to the wreck. Build on a safer edge and farm inward.
Recommended outpost:
- Scanner Room
- Fabricator
- Storage
- Medkit backup
- Power cell/battery chargers
Result: faster lead farming, fewer long trips, less inventory waste.
Best use: Mining outpost
Main weakness: Wreck-side danger
↖ Best High-Risk Outpost: Graveyard
The Graveyard is dangerous, but it earns its score. This biome has serious resources, wrecks, and story value.
| Score | Rating |
|---|---|
| Safety | 2/10 |
| Resources | 10/10 |
| Accessibility | 9/10 |
| Practicality | 9/10 |
| Total | 30/40 |
↖ Why It Works
The Graveyard can provide:
- Titanium
- Gold
- Sulfur
- Celestine
- Advanced materials
- Wreck access
- Story progression routes
The catch is obvious: heat, predators, and Marrow Breaches.
This is not a cozy base biome. It is a pit stop biome.
↖ Build Strategy
Keep it small.
Build:
- One compact room
- Power
- Fabricator
- Storage
- Medkits
- Emergency food/water
Do not overbuild until you know the patrol routes.
If you are adapted for the heat and know how to move through the biome, a Graveyard outpost saves a massive amount of time.
Best use: Dangerous resource and story outpost
Main weakness: Low safety, constant pressure
↖ Best Late-Game Base: Observatory
The Observatory is the best late-game living space. It is safer than most endgame biomes and packed with useful resources.
| Score | Rating |
|---|---|
| Safety | 8/10 |
| Resources | 9/10 |
| Accessibility | 4/10 |
| Practicality | 9/10 |
| Total | 30/40 |
↖ Why It Works
The Observatory offers:
- Strong late-game resources
- Low threat level
- Alien tech access
- Good staging position for final biomes
Its weakness is the route. You need to pass near the Collector Leviathan Arena, which makes early travel miserable.
↖ Build Strategy
Once you can reach it safely, make it your late-game hub.
Build:
- Full crafting setup
- Deep storage
- Power infrastructure
- Vehicle support
- Emergency return supplies
If you are still constantly returning to early biomes, delay this base. If most of your work is now deep-zone exploration, build it.
Best use: Late-game main base
Main weakness: Bad access from early biomes
↖ Decent but Flawed Biomes
These biomes can work, but they are not top picks.
↖ North Raceway
The North Raceway scores well because of its access value.
| Total | 29/40 |
|---|---|
| Best use | Travel outpost |
Build here if you often move toward the Graveyard. Keep it small: storage, power, medkits, batteries.
Do not make it your main base unless you like constant route traffic and moderate predator pressure.
↖ Anemone Hills
The Anemone Hills are safe but poorly placed.
| Total | 23/40 |
|---|---|
| Best use | Scenic side base |
It has resources and food, but the map position hurts it. You spend too much time traveling.
Build here only if you like the biome's look.
↖ Power Plant
The Power Plant has good resources but bad living conditions.
| Total | 20/40 |
|---|---|
| Best use | Endgame utility outpost |
Threats include Needler Mangoes and deeper-zone pressure. Useful as a small station. Bad as a home base.
↖ Root Canyon
The Root Canyon has top-tier resources and terrible access.
| Total | 19/40 |
|---|---|
| Best use | Advanced deep outpost |
The Collector Leviathan threat and depth make it inefficient for most players.
Build here only when you are geared, confident, and farming specific late-game materials.
↖ Worst Subnautica 2 Biomes for Base Building
Some biomes are not challenging. They are just bad investments.
↖ South Raceway
| Total | 19/40 |
|---|---|
| Verdict | Usually skip |
The South Raceway has fewer resources and less route value than the North Raceway. Use it as a pass-through zone, not a base site.
↖ Blighted Coral
| Total | 7/40 |
|---|---|
| Verdict | Do not build |
Problems:
- Infected biome
- Parasites
- Infected Marrow Breach
- Poor resources
- Bad location
- Zero practical value
Enter, finish your objective, leave.
↖ Collector Leviathan Arena
| Total | 4/40 |
|---|---|
| Verdict | Never build here |
This zone has almost no resources and one massive problem: the Collector Leviathan.
The only build worth considering is a protected transit route. As a base location, it is dead on arrival.
↖ Best Base Plan by Game Stage
Use multiple bases. One giant base creates long trips and wasted inventory space.
| Stage | Best Biome | What to Build |
|---|---|---|
| Early Game | Shallows | Main starter base |
| Early-Mid Game | Plateaus | Upgrade hub or resource base |
| Mid Game | Chuer Towers | Main operating base |
| Resource Farming | Lead Zone | Mining outpost |
| High-Risk Progression | Graveyard | Compact pit stop |
| Late Game | Observatory | Advanced main hub |
| Deep Farming | Root Canyon | Tiny emergency outpost |
↖ Recommended Route
1. Start in the Shallows.
2. Expand toward the Plateaus for silver and lead.
3. Move your serious base to Chuer Towers.
4. Add a Lead Zone mining outpost.
5. Build a small Graveyard pit stop.
6. Set up your late-game hub in the Observatory.
This route cuts travel time hard. It also keeps dangerous biomes from becoming full-time chores.
↖ Key Creature Threats for Base Planning
Creature behavior matters more than size. A huge passive creature is less annoying than a small predator camping your hatch.
| Creature | Approx. Size | Threat | Base Impact |
|---|---|---|---|
| Forey | Small/medium | Low | Manageable starter threat |
| Nibbler Mango | Small/medium | Medium | Annoying near Plateaus and Lead Zone |
| Needler Mango | ~11 m | High | Makes Power Plant stressful |
| Marrow Breach | ~20 m | Very high | Avoid patrol routes and wreck zones |
| Coral Crab | ~22 m | Low | Intimidating, usually manageable |
| Great Jaw | ~65 m | Conditional | Avoid tendons/trigger areas |
| Collector Leviathan | ~100 m | Extreme | Do not build in its arena |
| World Tree | ~3,000 m | Story-scale | Not a normal base threat |
Rule of thumb:
If a predator patrols your daily route, the base location is worse than the score suggests.
↖ FAQ
↖ What is the best biome for a starter base in Subnautica 2?
The Shallows. It is safe, central, easy to navigate, and stocked with basic materials. Its only major weakness is poor access to silver.
↖ What is the best overall base location in Subnautica 2?
Chuer Towers. It has the best mix of safety, resources, accessibility, and long-term value. It is the strongest mid-game main base choice.
↖ Should we build a base in the Graveyard?
Yes, but keep it compact. The Graveyard is dangerous, but its 10/10 resource value makes it worth using as a pit stop for wrecks, story routes, and advanced materials.
↖ Is the Observatory worth building in?
Yes. The Observatory is one of the best late-game hubs. The only issue is access, since reaching it means dealing with routes near the Collector Leviathan Arena.
↖ Which Subnautica 2 biomes should we avoid building in?
Avoid Blighted Coral and the Collector Leviathan Arena. Both have terrible safety, weak resources, and almost no practical base value.
↖ Summary
The best Subnautica 2 base strategy is not one perfect base. It is a chain of smart bases.
Build like this:
- Shallows for your first safe hub
- Plateaus for early silver and lead access
- Chuer Towers for your main mid-game base
- Lead Zone for mining
- Graveyard for dangerous resource runs
- Observatory for late-game operations
Skip Blighted Coral, South Raceway, and the Collector Leviathan Arena unless you enjoy making survival harder for no reward.
Best practical pick: Chuer Towers.
Best first base: Shallows.
Best late-game base: Observatory.

Most Popular Posts
- Best Base Locations in Subnautica 2: Top 5 Early and Late Game Spots
- Subnautica 2 Power Storage Guide: How to Unlock Backup Base Power and Survive the Night
- Subnautica 2 Resource Guide: Best Locations for Silver, Lithium, Deepwing Eggs, Metal Farms, and Late-Game Materials
- Subnautica 2 Best Base Locations: Safe Starts, Resource Hubs, Power Spots, and Late-Game Bases
- Subnautica 2 Best Biomes for Base Building: Ranked by Safety, Resources, and Practical Value
- Subnautica 2 Tadpole Upgrades Guide: Blueprint Locations, Depth Module, Armor, Charger & Tadpole Pens Code
Popular Category Lists
- Grow a Garden / (286)
- ARC Raiders / (285)
- CoD: Black Ops 7 / (166)
- MLB 26 / (149)
- Monopoly Go / (148)
- Star Citizen / (128)
- Steal a Brainrot / (90)
- ARK Survival Ascended / (85)
- Sailor Piece / (68)
- Forza Horizon 6 / (66)
- Diablo IV / (62)
- Blox Fruits / (62)
- Adopt Me / (57)
- Grow a Garden 2 / (56)
- CoD: BLACK OPS 6 / (55)
- Path of Exile 2 / (48)
- Monster Hunter Wilds / (46)
- Windrose / (44)
- Path of Exile / (40)
- Bee Swarm Simulator / (37)