


 0
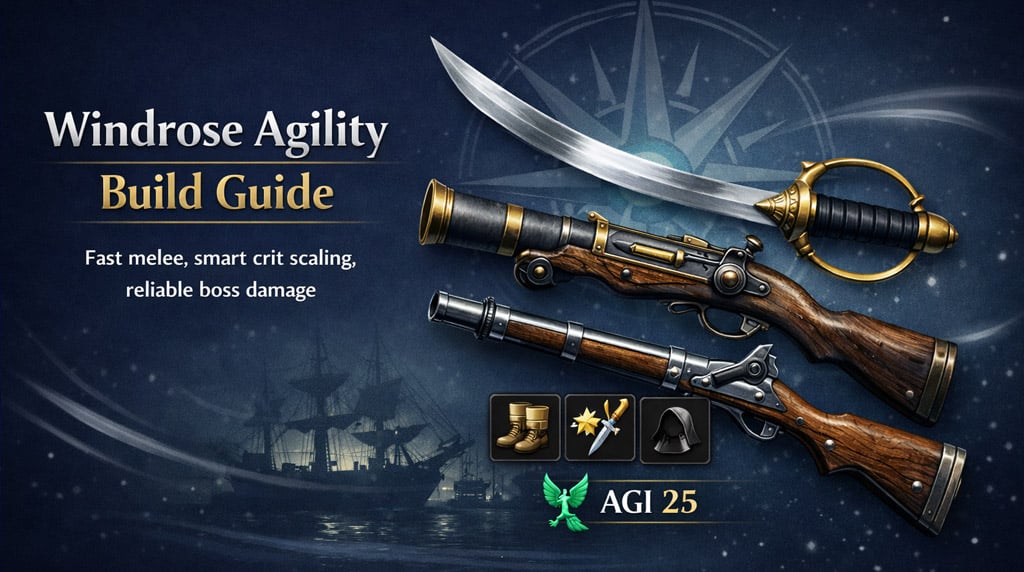
0Windrose Agility Build Guide: Best Stats, Weapons, Talents, Food and Boss Setup
This Windrose Agility build carried us comfortably through the main story without needing constant respecs or chasing every shiny weapon drop. It is fast, practical, and forgiving enough to handle normal fights, elites, bosses, and ship boarding.
The idea is simple: we use Agility as the damage foundation, then add enough Vitality, Endurance, crit chance, crit damage, and stamina efficiency to make the build feel smooth in real combat. Instead of stacking one stat forever, we build around what actually helps during fights.
- Build Overview
- Best Stats for the Agility Build
- Why Not Stack More Agility?
- Best Food Combo
- Accessories, Ammo and Armor
- Best Accessories and Ammo
- Ammo Warning
- Recommended Armor Bonuses
- Best Weapons for This Build
- Dueling Saber
- Blunderbuss
- Infantry Musket
- Soul Litter
- Combat Strategy
- Weapon Scaling and Upgrade Priority
- Upgrade Rule
- Recommended Talents
- Full Build Snapshot
- FAQ
- Is Agility the best stat for this Windrose build?
- Why do we only invest 5 points into Agility?
- Is Taco better than Gazpacho?
- What is the best boss weapon for this build?
- Should we use Bullet Arborum all the time?
- Is the Dueling Saber replaceable?
- Is this build good for ship boarding?
- Summary
↖ Build Overview
This setup works best if you like moving often, using melee and firearms together, and punishing openings instead of standing still trading hits.
| Category | Recommended Choice | Purpose |
|---|---|---|
| Main stat | Agility | Core damage scaling |
| Defensive stat | Vitality | Better survivability |
| Utility stat | Endurance | More stamina comfort |
| Main melee | Dueling Saber | Fast, reliable damage |
| Burst weapon | Blunderbuss | Close-range boss damage |
| Ranged weapon | Infantry Musket | Safe pressure from distance |
| Utility weapon | Soul Litter | Boarding and AoE healing |
| Food combo | Taco + Beans with Mushroom and Sweet Potato | Crit chance and extra health |
The build feels strong because every piece supports the same plan: stay mobile, attack safely, punish openings, and avoid wasting stamina.
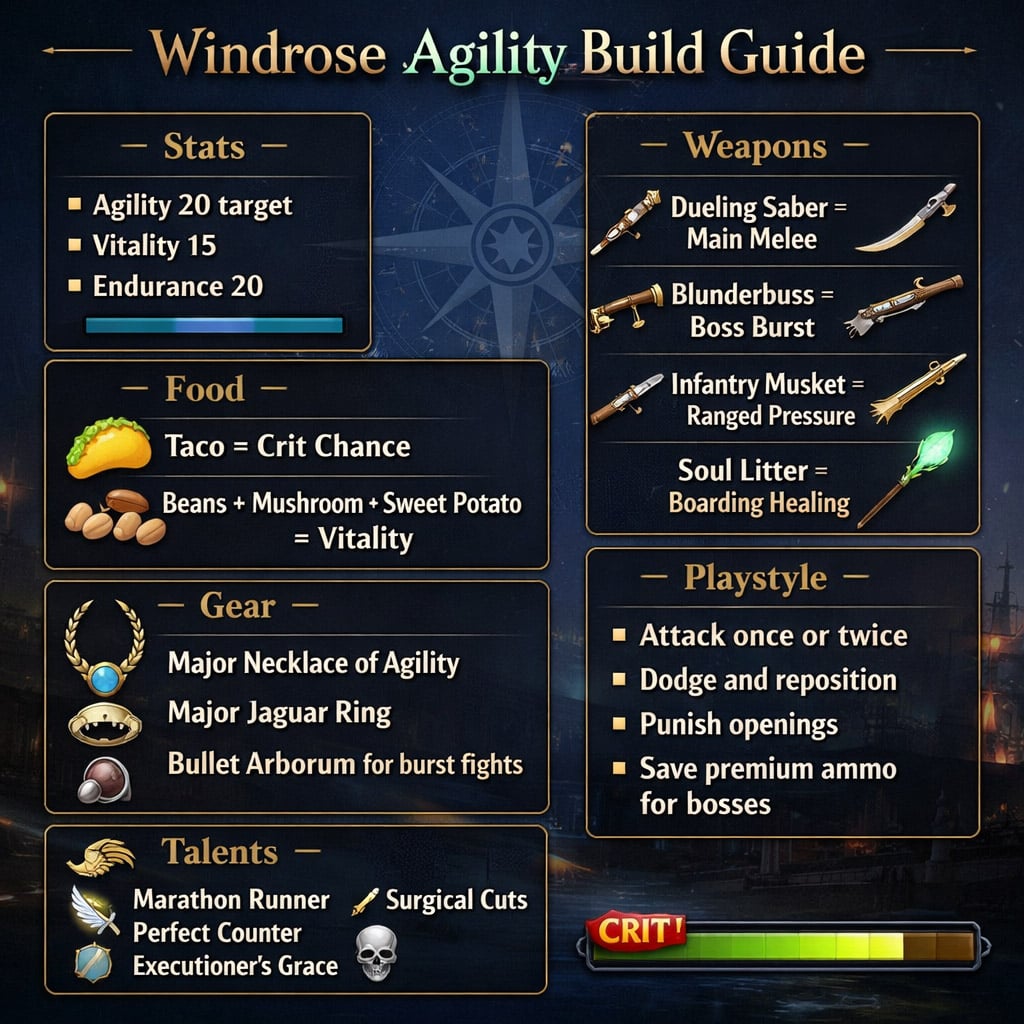
↖ Best Stats for the Agility Build
The final stat setup may look a little strange at first, because we only invest a small amount directly into Agility. The reason is simple: gear does part of the work for us.
| Stat | Target / Setup | Why It Matters |
|---|---|---|
| Agility | 5 invested, boosted to 20 | Main damage stat |
| Vitality | 15 baseline | Keeps the build from feeling fragile |
| Endurance | 20 baseline | Supports dodging, attacking, and boarding |
The key Windrose item here is the Major Necklace of Agility, which gives +15 Agility. That lets us reach around 20 Agility while still investing heavily into Vitality and Endurance.
↖ Why Not Stack More Agility?
Early Agility feels great. Mid-game Agility still feels good. But once we reached around 20 Agility, adding more did not feel as valuable as adding crit chance, stamina comfort, and survivability.
That means the build scales in two stages:
| Stage | Focus | Reason |
|---|---|---|
| Early game | Reach a strong Agility base | Improves weapon damage quickly |
| Mid to late game | Add crit and comfort stats | Better real combat value |
If your damage already feels solid but you keep dying or running out of stamina, do not force more Agility. Add survivability or stamina support instead.
↖ Best Food Combo
Food is one of the easiest ways to improve this build, but the best choice is not always more Agility.
| Food | Benefit | Why We Use It |
|---|---|---|
| Taco | Nearly 10% crit chance | Better value once Agility is already high |
| Beans with Mushroom and Sweet Potato | +10 Vitality | Makes the build safer and more forgiving |
At first, Gazpacho looks tempting because it adds Agility. But once we already have around 20 Agility, Taco gives better results in practice because it adds crit chance.
That crit chance works especially well with:
- Major Jaguar Ring for more crit chance
- Bullet Arborum for extra crit damage
- Fast melee pressure from the Dueling Saber
- Close-range burst from the Blunderbuss
| Food Option | Best Use | Verdict |
|---|---|---|
| Gazpacho | Early game or low Agility | Good before reaching 20 Agility |
| Taco | Mid to late game | Best damage food for this setup |
| High Vitality food | Hard fights or safer play | Good defensive option |
If you feel strong but a little too squishy, Taco plus Vitality food gives the build a very comfortable balance.
↖ Accessories, Ammo and Armor
This is where the build starts to feel properly connected. We are not picking random bonuses. We are stacking Agility, crit chance, crit damage, healing, and stamina efficiency.
↖ Best Accessories and Ammo
| Slot | Item | Reason |
|---|---|---|
| Necklace | Major Necklace of Agility | Adds +15 Agility and saves stat points |
| Ring | Major Jaguar Ring | Adds 10% crit chance |
| Ammo | Bullet Arborum | Adds 30% crit damage and better ballistics |
The necklace is the most important piece because it lets us keep Agility high without sacrificing Vitality or Endurance.
Bullet Arborum is strong, but do not waste it in every fight. In our run, Iron Bullets were still the default choice most of the time, especially with the Blunderbuss.
↖ Ammo Warning
| Weapon / Ammo Use | Practical Note |
|---|---|
| Iron Bullets | Best for regular fights |
| Bullet Arborum | Save for bosses or elites |
| Blunderbuss | Uses 2 bullets per shot |
The Blunderbuss burns through ammo fast. A stack of 40 bullets only gives you 20 shots, so premium ammo can disappear very quickly.
↖ Recommended Armor Bonuses
For armor, the exact gloves matter less than the set bonuses. The best combination we used was:
| Armor Piece | Purpose |
|---|---|
| Fleastier's Hat | Healing bonus |
| Fleastier's Boots | Healing bonus |
| Tracker's Jacket | Stamina cost reduction |
| Tracker's Pants | Stamina cost reduction |
| Marksman's Gloves | Flexible slot |
The two bonuses that matter most are:
| Bonus | Why It Helps |
|---|---|
| More healing from all sources | Makes mistakes less punishing |
| Reduced stamina spent per attack | Keeps the attack-dodge rhythm smooth |
This build attacks, dodges, repositions, and attacks again. Anything that improves stamina efficiency makes the whole setup feel better.
↖ Best Weapons for This Build
The weapon loadout works because each weapon has a clear job. We are not carrying four weapons for style points, although looking good never hurts.
| Weapon | Role | Best Use |
|---|---|---|
| Dueling Saber | Main melee weapon | Normal fights and elites |
| Blunderbuss | Burst weapon | Bosses and close-range openings |
| Infantry Musket | Ranged pressure | Safe damage and pulling enemies |
| Soul Litter | Utility weapon | Boarding and AoE healing |
↖ Dueling Saber
The Dueling Saber is the main weapon of the build. It is quick, reliable, and fits Windrose combat very well.
Use it like this:
1. Move in.
2. Land one or two hits.
3. Dodge or reposition.
4. Punish the next opening.
If you keep getting hit after attacking, you are probably staying in too long. This weapon rewards short, clean exchanges.
↖ Blunderbuss
The Blunderbuss was the biggest surprise of the run. Even an early green Blunderbuss stayed useful because it gave reliable burst damage during boss openings.
The rule is simple: use it point blank.
Do not try to snipe with it. If you fire from too far away, the damage feels bad. If you wait for a real opening and fire up close, it can hit extremely hard.
| Blunderbuss Tip | Why It Matters |
|---|---|
| Fire at point blank range | Best damage output |
| Save shots for real openings | Avoids wasting ammo |
| Use Bullet Arborum selectively | Strong but expensive |
| Upgrade to Dragon's Breath later | Better version if available |
↖ Infantry Musket
The Infantry Musket gives the build a safer ranged option. It is useful when you want to start fights carefully or damage enemies before they reach you.
Use the musket when:
- An enemy is dangerous up close
- You want to pull one target from a group
- A boss creates distance
- You need safe pressure before switching to melee
↖ Soul Litter
The Soul Litter is mostly a boarding weapon. It is not the default weapon for every fight, but it becomes useful when enemies crowd together and the fight gets messy.
Its main value is AoE healing and utility, especially during ship boarding.
↖ Combat Strategy
Windrose combat feels best when you treat it like a rhythm game with swords and gunpowder. The goal is not to trade hits. The goal is to create openings, take damage safely, then reset before the enemy punishes you.
| Situation | Best Response |
|---|---|
| Normal enemy | Saber pressure, then dodge |
| Dangerous elite | Musket first, then melee |
| Boss opening | Point-blank Blunderbuss |
| Enemy group | Reposition and avoid getting surrounded |
| Boarding fight | Use Soul Litter for healing and control |
| Low stamina | Back off and reset |
The basic combat loop is:
1. Open with musket or movement.
2. Use saber for fast melee pressure.
3. Dodge before stamina gets too low.
4. Punish big openings with Blunderbuss.
5. Heal or reset when the fight gets messy.
If you find yourself dying often, the issue usually is not the build. It is overcommitting. Two safe hits are better than three greedy hits followed by a dramatic trip to the floor.
↖ Weapon Scaling and Upgrade Priority
Weapon scaling matters more than rarity. A rare weapon can still feel bad if it does not scale with your main stat.
| Scaling Grade | Meaning | Value for This Build |
|---|---|---|
| A | Excellent scaling | Best choice |
| B | Good scaling | Usually worth using |
| C | Average scaling | Usable, but not ideal |
| D | Poor scaling | Usually avoid |
For this build, prioritize weapons that scale well with Agility.
↖ Upgrade Rule
| Priority | Question |
|---|---|
| 1 | Does it scale with Agility? |
| 2 | Does it feel good in real combat? |
| 3 | Does it solve a problem in the build? |
| 4 | Is it worth upgrading or ascending? |
| 5 | Is the rarity better? |
The order matters. Fit comes before rarity.
If a weapon fits your stats and performs well against same-level enemies, it is worth considering. If it only looks good because the color is prettier, save your materials.
↖ Recommended Talents
The talent path supports the same playstyle: mobility first, melee damage second, defensive control third.
| Order | Talent | Points | Reason |
|---|---|---|---|
| 1 | Marathon Runner | 3 | Better stamina comfort |
| 2 | Surgical Cuts | 3 | Stronger melee pressure |
| 3 | Perfect Counter | 1+ | Adds a defensive punish option |
| 4 | Executioner's Grace | 2 | Useful finishing efficiency |
Marathon Runner is the best early pick because stamina affects everything: attacking, dodging, repositioning, and boarding.
Surgical Cuts comes next because the Dueling Saber is our main damage tool.
Perfect Counter is not mandatory, but it gives the build a higher skill ceiling once you understand enemy patterns.
Executioner's Grace is more of a comfort choice. You can move those points elsewhere if you want stricter optimization, but for a main story clear, it feels fine.
↖ Full Build Snapshot
| Category | Recommended Setup |
|---|---|
| Main stat | Agility |
| Stat spread | 5 Agility invested, 15 Vitality, 20 Endurance |
| Agility source | Major Necklace of Agility |
| Food | Taco + Beans with Mushroom and Sweet Potato |
| Ring | Major Jaguar Ring |
| Ammo | Iron Bullets normally, Bullet Arborum for burst |
| Armor bonuses | Healing bonus and stamina cost reduction |
| Main weapon | Dueling Saber |
| Burst weapon | Blunderbuss, then Dragon's Breath if available |
| Ranged weapon | Infantry Musket |
| Utility weapon | Soul Litter |
| Main talents | Marathon Runner, Surgical Cuts, Perfect Counter |
This is the setup we used because it stayed consistent across the whole main story. It did not rely on perfect play, and it did not collapse the moment a boss punished one mistake.
↖ FAQ
↖ Is Agility the best stat for this Windrose build?
Yes, Agility is the core stat because the build uses fast weapons and firearms that benefit from it. The important part is knowing when to stop stacking it and start adding crit, stamina, and survivability.
↖ Why do we only invest 5 points into Agility?
Because the Major Necklace of Agility gives +15 Agility. That lets us reach around 20 Agility while saving points for Vitality and Endurance.
↖ Is Taco better than Gazpacho?
For this setup, Taco is better once Agility is already high. Gazpacho is useful earlier, but Taco adds crit chance, which scales better with the rest of the build.
↖ What is the best boss weapon for this build?
The Blunderbuss is excellent for bosses because it delivers strong close-range burst during short openings. If you get Dragon's Breath later, use that as an upgrade.
↖ Should we use Bullet Arborum all the time?
No. Bullet Arborum is powerful but expensive. Use Iron Bullets for regular fights and save Bullet Arborum for bosses, elites, or important burst windows.
↖ Is the Dueling Saber replaceable?
Yes, but only if the replacement has good Agility scaling and still feels fast in combat. Do not swap just because another weapon has higher rarity.
↖ Is this build good for ship boarding?
Yes. The stamina investment, healing bonuses, and Soul Litter utility make it very comfortable for boarding fights.
↖ Summary
This Windrose Agility build works because it has a clear plan. We use Agility for damage, but we do not tunnel vision on it forever. Once Agility reaches a strong baseline, crit chance, crit damage, stamina efficiency, and survivability give better real combat value.
The Dueling Saber handles normal melee fights, the Blunderbuss deletes boss openings, the Infantry Musket adds safe ranged pressure, and the Soul Litter helps during boarding. With Taco, Major Jaguar Ring, Bullet Arborum, and the right armor bonuses, the whole build feels fast, stable, and practical.
If you want a build that can clear the main story without constant rebuilding, this Agility setup is one of the smoothest ways to play Windrose.

Most Popular Posts
- Windrose Best Weapons Tier List, Traits, and Build Picks
- Windrose Completion Guide: Max Comfort, Weapons, Armor, Quests and Missable Items
- Windrose Best Rings, OP Necklaces, Blackbeard Maps & Upgrade Tips
- Windrose Agility Build Guide: Best Stats, Weapons, Talents, Food and Boss Setup
- Windrose OP Guide: Combat, Skills, Gear, Food, Jewelry, and Armor Sets
- Windrose Best Currency Making Guide: Fastest Silver Farm With Piracy
Popular Category Lists
- Grow a Garden / (286)
- ARC Raiders / (267)
- CoD: Black Ops 7 / (166)
- Monopoly Go / (147)
- MLB 26 / (146)
- Star Citizen / (122)
- Steal a Brainrot / (89)
- ARK Survival Ascended / (77)
- Sailor Piece / (68)
- Forza Horizon 6 / (65)
- Diablo IV / (61)
- Blox Fruits / (61)
- CoD: BLACK OPS 6 / (55)
- Adopt Me / (55)
- Path of Exile 2 / (48)
- Grow a Garden 2 / (48)
- Monster Hunter Wilds / (46)
- Windrose / (44)
- Path of Exile / (40)
- Bee Swarm Simulator / (36)


