


 0
0Windrose Dock Warehouse Build Guide: Practical Harbor Storage + Defensive Sea Wall Tips
Good harbor base in Windrose should feel useful first and pretty second. We want a place where you can unload loot, store materials, repair ships, and still look like you are running a proper seaside operation instead of stacking random boxes on a pier.
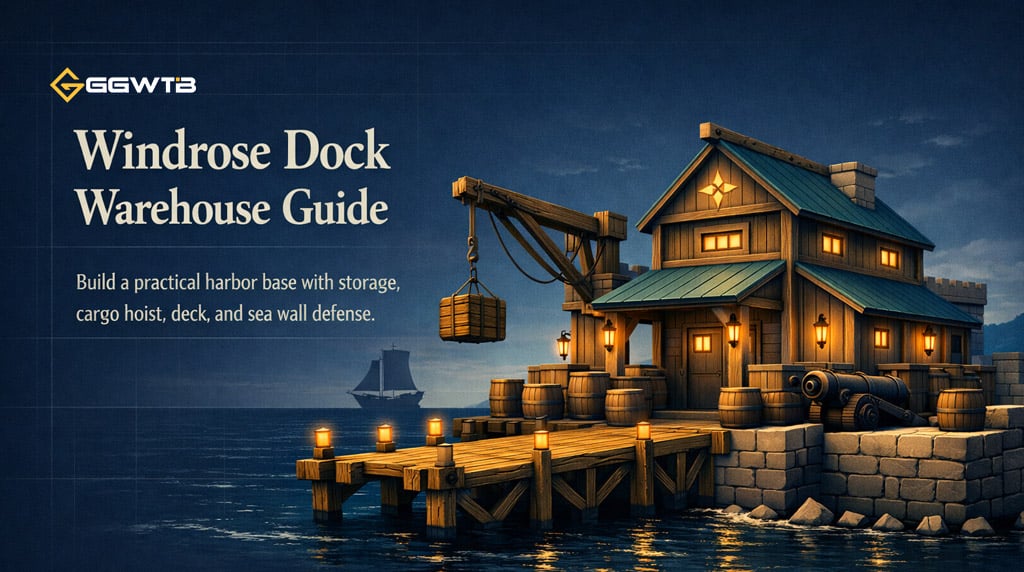
For this build, we are combining two ideas: a dock warehouse for storage and base utility, plus a simple defensive sea wall module you can repeat around your bay. I have found that this setup works especially well once your base starts growing beyond a starter hut and you need your dock area to feel organized.
- Quick Build Overview
- Recommended Materials
- Dock Warehouse Layout
- Lower Floor
- Upper Floor
- Front Dock Deck
- Cargo Hoist Detail
- Interior Storage Tips
- Roof Design
- Defensive Sea Wall Module
- Cannon Placement
- Best Build Order
- Common Problems and Fixes
- FAQ
- What is the best warehouse size in Windrose?
- Can I build this without clay walls?
- Why use arches at the front?
- How do I make the warehouse look more realistic?
- How tall should the sea wall be?
- Should every sea wall section have cannons?
- Summary
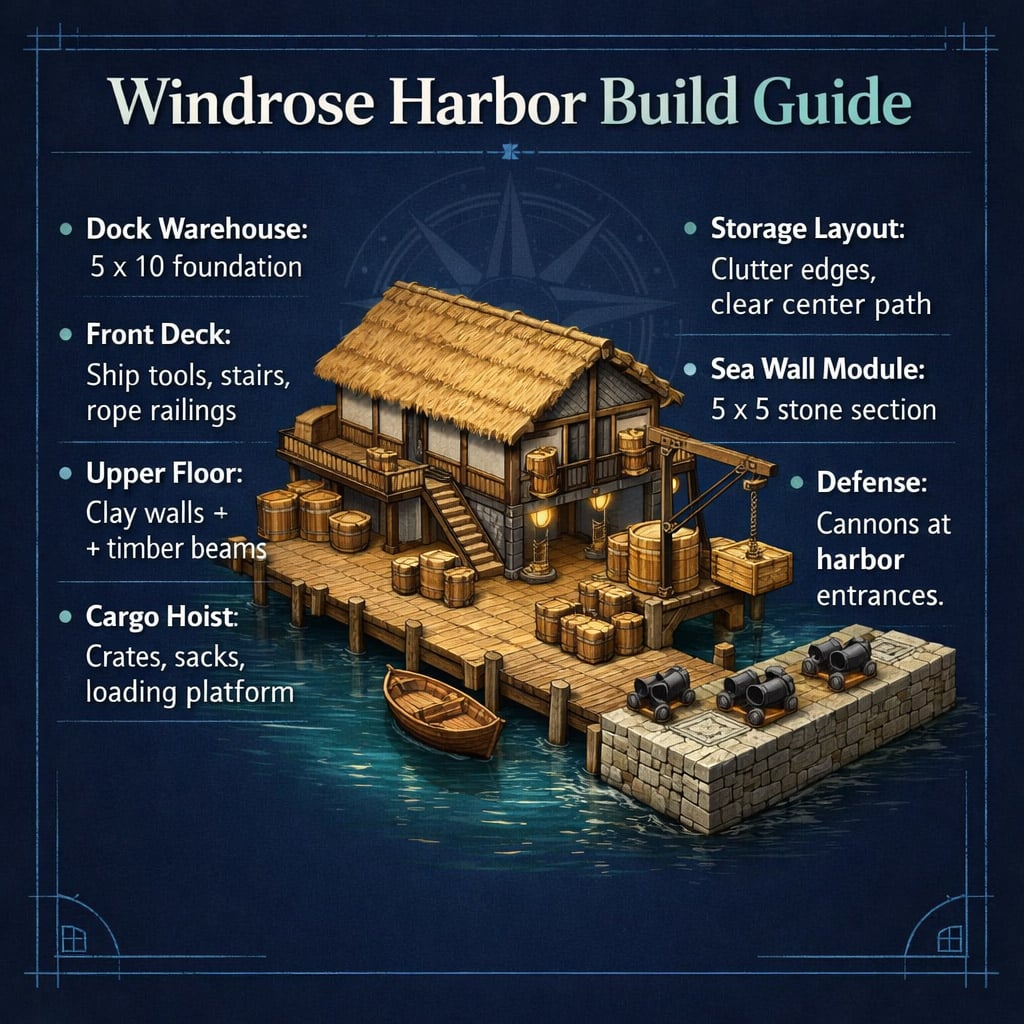
↖ Quick Build Overview
This build works best as a medium-sized harbor project. It is not too expensive compared with a full town build, but it gives your dock area a much stronger identity.
| Build Part | Suggested Size | Main Use |
|---|---|---|
| Dock Warehouse | 5 x 10 foundations | Storage and harbor utility |
| Front Deck | Across warehouse front | Ship tools, access, decoration |
| Upper Floor | Slight overhang | Extra storage and visual depth |
| Cargo Hoist | Side wall detail | Makes the warehouse feel functional |
| Sea Wall Module | 5 x 5 foundations | Repeatable harbor defense |
The key is to build in clean sections. If you start with a solid footprint, you can decorate, expand, and swap materials later without rebuilding the entire dock.
↖ Recommended Materials
You can adjust materials based on what you have unlocked, but these pieces give the best dockside look.
| Material / Piece | Best Use | Why It Works |
|---|---|---|
| Stone foundations | Warehouse base | Strong, grounded look |
| Clay walls | Upper warehouse walls | Warm coastal texture |
| Thick timber beams | Framing and supports | Adds structure and depth |
| Spanish arches | Warehouse entrances | Wide, practical access |
| Reed roof | Main roof | Fits a rustic harbor style |
| Rope fences | Deck and dock railings | Nautical detail |
| Rough stone | Sea wall | Better defensive feel |
| Cannons | Wall defense | Good for harbor protection |
If you do not have clay walls yet, use wood or stone as a placeholder. The layout matters more than the final texture early on.
↖ Dock Warehouse Layout
Start with a 5 x 10 stone foundation. In practice, this size is large enough for storage without making the building feel oversized. I have tried larger warehouse footprints in survival builds before, and they often become awkward empty spaces unless you have a lot of props unlocked.
↖ Lower Floor
Use the lower floor as your main storage zone.
Recommended layout:
| Area | What to Place |
|---|---|
| Front | Wide arches for entry |
| Sides | Windows or solid walls |
| Back | Windows and storage walls |
| Corners | Pillars or full wall pieces |
| Interior | Chests, crates, sacks, barrels |
The front arches are worth using because a warehouse should be easy to enter and exit. If you are constantly dropping off loot after sailing, narrow doors get annoying fast.
↖ Upper Floor
For the second floor, let the building overhang slightly. This gives the warehouse a better silhouette and stops it from looking like a plain box.
Use clay walls with timber beams:
- Place vertical beams at corners.
- Add horizontal beams under windows.
- Frame each window with wood.
- Keep the wall pattern consistent.
This is one of the easiest ways to make the building look custom without using complicated shapes.
↖ Front Dock Deck
The deck is where the warehouse connects to the rest of your harbor. It should be wide enough for movement, ship tools, and a few decorative props.
| Deck Feature | Recommendation |
|---|---|
| Support pillars | Place them at corners and regular gaps |
| Railings | Use beams, posts, or rope fences |
| Stairs | Add at least one water-access stair |
| Utility area | Keep ship tools near the front |
| Decoration | Add crates, barrels, lights, and seating |
If the deck looks like it is floating, add more pillars underneath. This small fix makes a huge difference, especially from a distance.
Leave a few open gaps in the railing so small boats can still dock naturally.
↖ Cargo Hoist Detail
The cargo hoist is the best visual detail on this build. It instantly tells players, This is a working warehouse.
Place it on the side facing the dock or water.
| Hoist Piece | Purpose |
|---|---|
| Side opening | Loading entrance |
| Vertical pillar | Main support |
| Horizontal beam | Hoist arm |
| Small platform | Cargo lift |
| Crates and sacks | Goods being raised |
If you find the warehouse still looks too much like a house, add the cargo hoist. It changes the whole story of the building.
↖ Interior Storage Tips
Since Windrose supports convenient crafting access, we do not need perfectly sorted rows of chests. That gives us room to make storage look natural.
A good storage cluster can include:
| Storage Prop | Use It For |
|---|---|
| Chests | Main storage |
| Crates | Bulk goods |
| Barrels | Dock supplies |
| Sacks | Food, cloth, or trade goods |
| Treasure chests | Rare items or visual interest |
Try grouping Windrose items in corners instead of lining everything against one wall. It feels more like a real warehouse and still keeps the center clear for walking.
A simple rule I use: keep paths clean, clutter the edges.
↖ Roof Design
Use a reed roof for the main warehouse. It fits the coastal style and looks good with clay walls and timber beams.
For a better roof:
- Add a small overhang on each side.
- Use temporary roof pieces if snapping gets difficult.
- Add small roof windows or dormer details.
- Support roof edges with beams where possible.
If the roof refuses to place, the structure probably needs more support. Add walls, pillars, or temporary pieces first, then remove anything you do not need.
↖ Defensive Sea Wall Module
Once the warehouse is done, a sea wall helps your harbor feel protected. Start with one 5 x 5 module, then repeat it as needed.
| Sea Wall Part | Suggested Setup |
|---|---|
| Foundation | 5 x 5 rough stone |
| Height | 3 wall layers |
| Top path | Walkable rampart |
| Cannon gap | 2 blocks wide |
| Decoration | Beams, ropes, lights, cannonballs |
Three layers high is a good balance. Two can look too short, while four or more gets expensive quickly.
↖ Cannon Placement
Do not place cannons everywhere. It looks better and feels more believable when cannons are used sparingly.
Good cannon spots:
- Harbor entrance.
- Open water approach.
- Near watchtowers.
- Corners with wide visibility.
A simple pattern works well:
| Section | Type |
|---|---|
| 1 | Blank wall |
| 2 | Guard platform |
| 3 | Blank wall |
| 4 | Cannon section |
| 5 | Blank wall |
This saves materials and keeps the wall from looking repetitive.
↖ Best Build Order
Here is the build order I recommend if you are making the full harbor setup.
| Step | What to Build | Why |
|---|---|---|
| 1 | Warehouse foundation | Sets the scale |
| 2 | Lower walls and arches | Makes storage usable early |
| 3 | Front deck | Connects the dock area |
| 4 | Upper floor frame | Adds shape and height |
| 5 | Roof | Finishes the main structure |
| 6 | Cargo hoist | Gives the warehouse identity |
| 7 | Interior storage | Makes it practical |
| 8 | Sea wall module | Starts harbor defense |
| 9 | Cannons and details | Adds final character |
This order keeps the build useful throughout the process. You are not stuck with a half-finished decorative shell that does nothing.
↖ Common Problems and Fixes
| Problem | Fix |
|---|---|
| Building looks boxy | Add overhangs, beams, and a side extension |
| Deck feels unsupported | Add more pillars underneath |
| Roof will not snap | Use temporary roof pieces for snap points |
| Storage looks messy | Group clutter into small clusters |
| Sea wall looks plain | Add timber trim and varied sections |
| Cannon area feels cramped | Use a wider 5 x 5 module |
Most build problems come from flat surfaces. When something looks wrong, add depth before adding decoration.
↖ FAQ
↖ What is the best warehouse size in Windrose?
A 5 x 10 foundation is a strong size for a dock warehouse. It gives enough room for storage and stairs without becoming too large or difficult to decorate.
↖ Can I build this without clay walls?
Yes. Use wood or stone first, then replace the upper walls with clay later. The frame and layout are more important than the exact material at the start.
↖ Why use arches at the front?
Arches make the warehouse easier to use. You can move in and out quickly, which matters when the building is your main storage hub.
↖ How do I make the warehouse look more realistic?
Add working details: crates near entrances, a cargo hoist on the side, support beams, rope railings, and cluttered storage corners.
↖ How tall should the sea wall be?
Three layers high usually looks best. It feels defensive without wasting too many materials.
↖ Should every sea wall section have cannons?
No. Use cannons only where they make sense, such as harbor entrances or open water approaches. Blank wall sections make the defense look more realistic.
↖ Summary
This Windrose dock warehouse works because it is practical first. The 5 x 10 layout gives us reliable storage space, the raised deck connects naturally to the harbor, and the cargo hoist makes the building feel like it belongs beside the water.
The sea wall adds the next layer: protection and structure for the whole dock area. Start with one 5 x 5 defensive module, then repeat it around your bay with a mix of blank walls, guard platforms, and cannon sections.
Build the shape first, decorate second, and upgrade materials as you unlock them. That approach keeps your harbor useful at every stage while still giving you a base that feels alive.

Most Popular Posts
- Windrose Best Weapons Tier List, Traits, and Build Picks
- Windrose Completion Guide: Max Comfort, Weapons, Armor, Quests and Missable Items
- Windrose Best Rings, OP Necklaces, Blackbeard Maps & Upgrade Tips
- Windrose Best Starter Build Guide: OP Rapier + Pistol Setup for Early to Mid Game
- Windrose OP Guide: Combat, Skills, Gear, Food, Jewelry, and Armor Sets
- Windrose Agility Build Guide: Best Stats, Weapons, Talents, Food and Boss Setup
Popular Category Lists
- Grow a Garden / (286)
- ARC Raiders / (262)
- CoD: Black Ops 7 / (166)
- Monopoly Go / (146)
- MLB 26 / (145)
- Star Citizen / (112)
- Steal a Brainrot / (89)
- Sailor Piece / (68)
- ARK Survival Ascended / (67)
- Diablo IV / (61)
- Forza Horizon 6 / (60)
- Blox Fruits / (60)
- CoD: BLACK OPS 6 / (55)
- Adopt Me / (53)
- Path of Exile 2 / (48)
- Monster Hunter Wilds / (46)
- Windrose / (44)
- Path of Exile / (40)
- Grow a Garden 2 / (40)
- Bee Swarm Simulator / (36)


